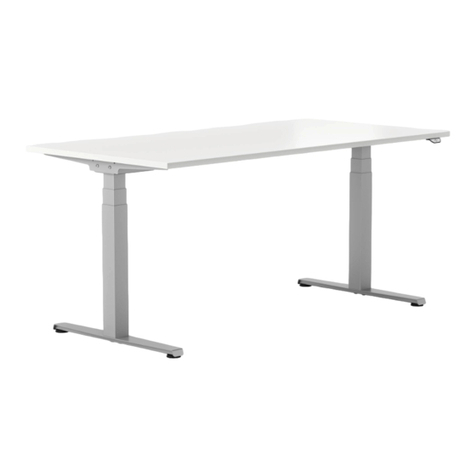
Kinnarps Works GE Owner's manual

Height-adjustable with electro-motor
Information for the user WORKS GE

2
EC Declaration of Conformity 3
Safety notice 4
Ergonomics 5
Technical Information Works GE Basic 6
Technical Information Works GE Comfort 7
Initial operation / Operational controls 8
Operational controls 9
Troubleshooting 10
Accessories, cleaning, after-sales service 11
PLEASE NOTE:
Before using for the first time, return the table to its reset position.
To do this, plug in the power cable and hold the ‚downwards‘
button for 5 seconds while the table is in its lowest position.
A slight tremble accompanied by an acoustic signal show that the
reset process has been completed. Now the table may be raised.
Contents

3
Company: Kinnarps GmbH
Mainzer Straße 183
67547 Worms
Product: Electro-motor operated, height-adjustable work place
Type: WORKS GE
Year of construction: 2011
Relevant EC regulations/
machine directives EC Directive Machines 06/42/EG
other EC guidelines EC Directive EMC 04/108/EC
where applicable: EC Low-Voltage Direcitve 06/95/EC
Harmonised standards applied: EN ISO 12100 Part 1 and 2
EN 349: 2008
EN 527 Parts 1-3
EN ISO 27779
EN 60335-1:2002 + A1:2004 + A11:2004 + A12:2006
+ A2:2006 + A13:2008
EN 50366:2003 + A1:2006
EN 61000-6-1:2007
EN 61000-6-2:2005
EN 61000-6-3:2007
National standards applied: DIN EN 14073 Parts 2-3
DIN Technical Report 147
DIN 16550-1
It is confirmed herewith that the product as named above conforms with the given EC
directives. This declaration ceases to be valid should the product be reconstructed or altered
without approval.
Worms, 1st August 2011
Jörg Pannekoike
Manager
EG-Declaration of Conformity

4
CAUTION! PLEASE KEEP THIS INFORMATION FOR THE USER IN A PLACE WHERE IT IS
ACCESSIBLE TO ALL USERS AT ALL TIMES!
Ensure the safety instructions are complied with.
Improper operation may result in danger to persons and to objects and will invalidate the
guarantee.
The table is intended exclusively for its application as office furniture. Any other or further•
application is not in accordance with the conditions.
The table may only be used when in technical perfect condition and subject to the•
information for the user.
The table must be erected on level flooring when put into operation for the first time.•
The height-adjusting screws on the foot extensions may be raised or lowered by +/- 1 cm
to correct unevenness.
When erecting the table, sufficient room for the entire scope of the lift must be ensured.•
Ensure the length of cables from all devices on the table is adequate.•
When transporting or moving the table, only the underframe may be held.The table may•
not be raised by the tabletop, as the fixing screws may be torn out.
The power plug to the table must be accessible at all times.•
All cables and wires are to be protected from excessive heat.•
The table is not to be used in a wet or moist environment.•
The housing of the control unit must not be opened.•
Plug connections may be made or de-coupled only when the power supply is off.•
CAUTION! DANGER OF CRUSHING! Sufficient room between the sides of the table and•
any near object, walls etc. must be ensured for the entire range of lift (2.5 cm minimum).
Further, the user must ensure that no person and no object (e.g. open doors and windows
or chair armrests) may lie within or protrude into the range of lift. Danger of crushing is
particularly prevalent in the upper section of the column when lowering the table.
The maximum permissible load on the table (see technical information) must not be excee-•
ded!
Electrical wirings and connections are to be carried out exclusively by authorised specialists.•
All electrical installations must be in compliance with DIN VDE 0100, in particular with DIN
VDE 0100 Part 724.
Safety notice

5
Adjustment range
Basic
72 - 120 cm
Comfort
65 - 125 cm
Ergonomics
Application and its consequences
A regular alternation between sitting and standing strengthens the muscles and the
locomotor system, helping to prevent physical discomfort.
The cardiovascular system is thus activated, leading to an increase in concentration and
efficiency. Of particular importance is the correct ratio: 60% dynamic sitting, 30% working
in a standing position and 10% purposeful walking around (to meetings, copier, running
errands).The periods standing should be no longer than 20 mins., preferably with frequent
changes in posture.
Sitting posture
A correct sitting posture can be achieved when work tools and furniture are set up arranged
so that upper arms form a vertical line and lower arms a horizontal line at working height.
Upper arms and lower arms should be at a 90° angle to each other. The upper legs should
be more or less horizontal and feet flat on the floor to produce an angle between upper and
lower legs of 90° or more.
Standing posture
A correct standing posture can be achieved when work tools and furniture at a standing
workplace are set up and arranged so that the measurements in the illustration below are
adhered to. The vertical range of vision is defined as an area between the horizontal optical
axis and 60° below. In order to achieve a relaxed position of the head, the visual axis should
be lowered 35° below horizontal and form more or less a right angle with the monitor
screen. Adjustments to the table height should be considered to allow for these
measurements.

6
1tabletop support
2lifting column
3T-feet
4height adjustment
screw
5control element
(switching panel)
6motor drive control
with identification
plate
7cable duct (optional)
2
4
1
3
7
6
5
Technical Information WORKS GE Basic
Single telescopic column
Temp. range 0° C to +35° C
at place of assembly: (suitable only for use in dry environments)
Voltage: 24 V (DC)
Power supply: 230 V / 50 Hz
Power consumption: max. 338 W (0.6 W on standby)
Protection: IP 20
Duty cycle: 10% or 2 mins. ON / 18 mins. OFF
Max. power: 60 kg (per column)
Max. load on top: 75 kg (motor drive switches off above 75 kg)
Max. dynamic bending 150 Nm per column - 22 kg for 80 cm table depth,
moment: 18 kg for 90/100 cm table depth (on front edge of top)
Lifting speed: 38 mm/sec. (without load)
Max. adjustment range: 480 mm - 720 mm to 1200 mm
Noise level: < 50dB
The identification plate is to be found on the front side of the control unit.
Noise emitted during operation of the table complies with DIN EN ISO 7779.

7
1tabeltop support
2lifting column
3T-feet
4height adjustment
screw
5control element
(switching panel)
6motor drive control
with identification
plate
7cable duct (optional)
2
4
1
3
76
5
Technical Information WORKS GE Comfort
Twin telescopic column
Temp. range at +5° C to +40° C
place of assembly: (suitable only for use in dry environments)
Voltage: 24 V (DC)
Power supply: 230 V / 50 Hz
Power consumption: max. 240 W (0.6 W on standby)
Protection class: IP 20
Duty cycle: 10% in maximum continuous operation of 2mins
Max. power: 65 kg (per column)
Max. load on top: 75 kg – motor drive switches off above 75 kg
Max. dynamic bending 150 Nm per column – 22 kg for 80 cm table depth,
moment: 18 kg for 90/100 cm table depth (on front edge of top)
Lifting speed: 38 mm/sec. (without load)
Max. adjustment range: 600 mm - 650 to 1250 cm
Noise level: < 50 dB
The identification plate is to be found on the front side
of the control unit. Noise emitted during operation of
the table complies with DIN EN ISO 7779.

8
Initial operation / Starting up
Before using for the first time, return the table to its reset position. To do this, plug in the
power cable and hold the ‚Down(wards)‘ button for several seconds while the table is in its
lowest position. A slight tremble accompanied by an acoustic signal show that the reset
process has been completed. Each time the power supply has been cut off (e.g. due to a
power cut), repeat the reset process: first return the table to its lowest position, then
depress Reset (‚down(wards)‘ button) for several seconds.
Safety zone
When being lowered, the table automatically comes to rest 4cm before reaching the final
table height. Only after an additional press of the ‚Down(wards)‘ button does the table
continue to its final position of 72cm (for Basic) and 65cm (for Comfort). On the ‚Komfort‘
switching panel, the display shows the current table height.
Controls
The switching panel actuates the motor drive control. It is available as the ‚standard‘ or ‚kom-
fort‘ version.
‚Standard‘ switching panel without memory function.
Depress or hold down the buttons until the table reaches its desired height.
‚Komfort‘ switching panel with memory function and display.
This manual switching panel is equipped with a display to show the current table height in
centimetres or inches. Four positions (table heights) can additionally be put into memory.
Initial operation / Operational controls
1
2
3
4
5
6
7
Reset LED
Info LED
Up (2)
Down (2)
Up
Down
Positions 1 + 2
Positions 3 + 4 8
S-button 9

9
1The Reset LED shows that the system must be initialised (see section ‚Initial operation‘).
It lights until the initialising procedure has been finalised.
2The Info LED shows that the control system has registered an error. The display shows the
error code ‚Exx‘ instead of the current table height. To rectify malfunctions see Pg. 10
‚Troubleshooting‘.
The LEDs:‚Pedestal, Flex, Ergotrainer, Pin‘ are reserved for optional functions and not active
with standard systems.
3 + 4 The ‚Up‘ (2) button and ‚Down‘ (2) button, and the ‚Up‘ button and ‚Down‘ button
(5 + 6) are identical in their function in the case of the standard version.
To store a position
Raise or lower the table to the desired height using ‚Up‘ or ‚Down‘ and press the button ‚S‘
(the character ‚S –‘ is shown in the display), and then one of the position buttons 7 + 8 (the
character e.g.‚S1‘ appears in the display). To show the position has been saved, the switching
panel emits a ‚double click‘ sound and after 2 seconds the display shows the current table
height. Using this procedure, up to four different positions can be stored.
To recall a position
Hold down the button for the desired storage position 1, 2, 3, or 4 and the table will move to
this position regardless of its present height. The button must be depressed until the table
fully reaches the desired position, otherwise the table will stop.
Correcting displayed height
Should there be a mismatch between the height appearing on the display and the actual
height, the display may be corrected as follows:
1. Press the ‚S–‘ button and release it 9
2. Press the ‚Down‘ button until the height indicator begins to flash (appr. 5 secs.) 6
3. Measure the height of the table and enter the measured value using the ‚Up‘ button 5
or the ‚Down‘ button 6. Confirm the new entry by pressing the ‚S-‘ button quickly.
To leave the menus without confirming, wait appr. 10 seconds for the height indication
to reappear.
Operational controls

10
Fault Possible cause Correction
drive doesn‘t function power supply interrupted plug in power supply
plug on switching panel disconnected connect plug
drive or control failure request after-sales service
switching panel doesn‘t function properly request after-sales service
maximum load exceeded reduce / remove load
Error messages on ‚Komfort‘ switching panel display
Display Possible cause Correction
HOT drive control monitors duty cycle (time-
dependent) and temperature. A value
has been exceeded.
wait until the ‚HOT‘ indica-
tion has disappeared.The
table will then continue to
function
E00, E01, E02
E81
internal error disconnect power supply
and request after-sales
service
E12, E13, E14 malfunction disconnect power supply.
Correct the external short-
circuit and/or check the
cable to the motors.
Continue to use the
control as usual
E24, E25, E26, E48, E49
E62, E65
current overload reduce / remove load
E55, E56
(table rises / descends
on one side only)
control failure stop movement, request
after-sales servcie
cable to motor disconnected connect plug
E60 a collision has been registered remove cause
E61 motor exchanged / connection broken reinstall table (see pg. 8)
E63 external sensor / cable disconnected check plugs
E64 authentication error reinstall table (see pg. 8)
E70 alteration to motor drive configuration
Troubleshooting

11
Accessories
For the horizontal cable management, the table can be equipped with a hinged cable trough
(optional extra) on the cross brace. For vertical cable management a flexible cable duct is
available. As an option, a PC bracket and printer shelf can be retrofitted. For further information
please contact your specialist dealer.
Cleaning
To clean the surfaces of the table any commercial cleaning agent may be used. Ensure that
only care products and cleaning agents are applied which are appropriate for the material in
question (wood, plastic, metal).
No liquids may enter plugs and sockets, the control panel, controls and motor drive. Please
therefore only use dry cloths for cleaning.
After-sales service
Deliveries, installation, instruction
As a rule, the table is delivered, assembled and set up by the manufacturer or the dealership.
Users are given instruction into its usage by the manufacturer or by the specialist dealer.
Repair and Accessories
Original spare parts and accessories can be obtained from the manufacturer or from the
specialist dealer. Should faults or malfunctions occur which cannot be resolved, please refer
to the after-sales service department.
Accessories, cleaning, after-sales service

Information for the user WORKS GE
Kinnarps’ business philosophy is simple. We create
efficient, long-term, global solutions to improve the
way you work and the prosperity of your business.
Height-adjustable with electro-motor
Kinnarps GmbH
Cammer Straße 17
32423 Minden
T +49 (0) 571 3850 - 0
F +49 (0) 571 3850 - 3010
info@minden.kinnarps.de
www.kinnarps.de
Kinnarps GmbH
Mainzer Straße 183
67547 Worms
T +49 (0) 6241 4003 - 0
F +49 (0) 6241 4003 - 1366
info@kinnarps.de
www.kinnarps.de
Changes made subject to
technical conditions, models, minimal
deviations in dimensions and printing
errors and mistakes are excepted.
M-20-2011
W-U-GE0010EN09.11
Table of contents
Other Kinnarps Indoor Furnishing manuals
Popular Indoor Furnishing manuals by other brands

Takara Belmont
Takara Belmont W SWING YUME operating instructions

Royale
Royale S13279 user manual

Drive DeVilbiss Healthcare
Drive DeVilbiss Healthcare 1275/BAR/EX Instructions for use

jali
jali Single Section Cupboard Assembly instructions

Steelcase
Steelcase Avenir Movable Walls PFF-16 quick start guide

Rauch
Rauch M2803 Assembly instructions