manuals.online logo
Brands
  1. Home
  2. •
  3. Brands
  4. •
  5. KitchenAid
  6. •
  7. Oven
  8. •
  9. KitchenAid KESO-140S User manual

KitchenAid KESO-140S User manual

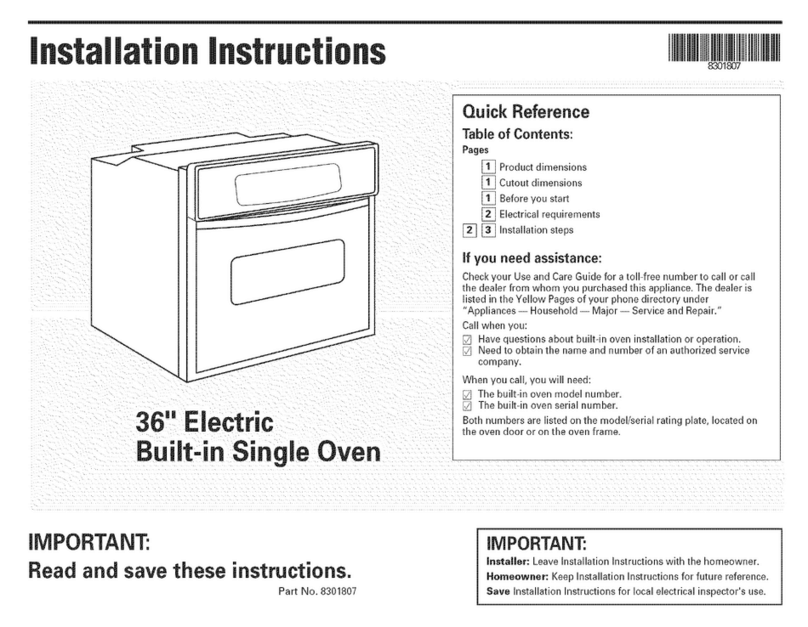
ELECTRIC BUILT-IN
SINGLE & DOUBLE OVENS
MODELS (singles).
KESO- 74OW 4%/l 7OS/175S
SCO- 1243/2433/l 27312733
MODELS (doubles):
KED0-24OSE/245SS/270SE/275SS
SCO-2243124431227312743
INSTALLATION
INSTRUCTIONS
INSTALLER: FINAL CHECK LIST
IMPORTANT:
LEAVE THESE INSTRUCTIONS FOR USE BY LOCAL ELECTRICAL INSPECTOR
PLACEMENT OF UNIT
0 1. Properly positioned-level, aligned and square with cabinet opening.
0 2. Anchored securely to cabinet.
0 3. Installation debris removed.
ELECTRICAL
0 1. Oven properly grounded.
0 2. Separate 120/240 volt (or 120/208 volt for special ordered units), 60 hertz, single
phase branch of proper ampacity and protected by a fuse or circuit breaker with
approved rating.
0 3. All connections made in accordance with local and/or National Electrical Code.
OPERATIONAL
0 1. Oven racks installed and slide freely in all positions.
0 2. Knobs securely in place and rotate freely without rubbing edges of control panel glass
holes.
0 3. All lights function properly.
0 4. Clock timer buzzer operates.
0 5. Doors properly adjusted, open and close smoothly.
q
6. Selector switch functions in all modes.
0 7. Unless instructed to leave for owner, remove all tags, labels and internal packing
materials.
0 8. Oven has been wiped clean to remove fingermarks and other smudges.
THANK YOU INSTALLER:
1. Complete Installation Check List.
2. Leave all literature for customer.
3. Notify dealer that installation is completed.
FORDETAILEDINSTRUCTIONS,FOLLOWMETHODSDESCRIBEDIN THISFOLDER.
IMPORTANT: Read Before Installing to Save Time, Work,
assure proper performance, and owner’s warranty protection.
INSTALLATION INSTRUCTIONS
CABINET CONTRUCTION
The first item for the installation of the oven will be to secure an appropriate cabinet or provide a properly
framed opening in the wall. Refer to Illustration and Tables below for the correct location and dimensions
to use. A solid bottom or runners, spaced on 19% centers are required in the opening to support the oven.
The front of the cabinet must be at right angles to the supports as well as level. If the oven is not
installed level, it will not cook properly.
-23%"-
to inside of
cabinet back
-mm -a-
l
31%"
to top of
oven support
I
-
23%"-
to inside of
cabinet back
1
----em_
11”
to top of
oven sumort
1
2'/1" MIN
to upper
cab. doors
z
I
‘,I I
I
28%"
I
I I
I I
36" 31%"
I
-A MIN,-A MIN,
l-8 MIN-
%” to lower
%” to lower
cab. doorscab. doors
I
,yr
. c
-A MIN -I
61” MIN
ction Box
T.i.b.“A I-..,
61" MIN
SINGLE OVENS
..::_I
DOUBLE OVENS
Model No. A B
Min. Cabinet Min. Cut Out
Width Width
KEDO-240
KEDO-245 24" 22%"
SCO-2243
SCO-2443
KEDO-270
KEDO-275
SCO-2273 27" 24%"
SCO-2743
t
@HOBART CORPORATION, 1984
-2-
ELECTRICAL
It is necessary to provide an appropriate junction box as shown on the previous page. The installation of
this junction box and the wiring connecting it to the house wiring should be done by a qualified electrician.
All wiring must be done in accordance with the National Electrical Code and/or any other applicable local
codes or ordinances.
The power supply to the junction box must be 120/240 volt (or 120/208 for special ordered unit), 60 hertz
A.C. single phase, 3 wire. Do not connect the oven to a D.C. power supply as serious damage to the
components will result. Refer the TABLE 1 for fuse or circuit breaker size for the model being installed.
Remember that the oven must have a separate circuit. Do not operate other electrical equipment on the
same circuit.
TABLE 1
Model No. Maximum Wattage
I
KESO-140/170 I
KESO-145/175
SCO- 1243/l 273 3.8 KW @ 240 V
SCO-243312733
I
KE DO-240/270 I 6.0 KW@ 240 V
KE DO-245/275
SCO-224312273 7.5 KW @ 240 V
SCO-244312743
Fuse or Breaker
Size Required
30 AMPS
40 AMPS
UNPACKING THE UNIT
The oven should be left on the carton base until it is ready to
put into the cabinet. It is also recommended that the pads over
the door(s) be left in place. These precautions will reduce the
possibility of damage to the front of the unit and the bottom of
the front frame.
Prior to installation,, ,test the electrical service to assure that it
agrees with the specrfrcations on the oven data plate.
Remove all cords, tape and wire used to hold various parts in
position during shipment. Remove oven racks from the inside of
the oven and put to one side while oven is being installed in
cabinet. Take broiler pan and grid from packing on top of the
oven and keep with literature packet in a location where they
will be retained by the owner.
ELECTRICAL CONNECTION
4 ;I:/
-\ i _--&,w
-\I : _ 1 ,. _ 7
&\ -‘& 2.
, !:w
To Remove Oven Racks
Slide rack forward until bar on back of rack
touches first stop.
Lift front of rack until
rear
portion of rack
slides out between front two stops.
WARNING: ELECTRICAL AND GROUNDING CONNECTIONS MUST COMPLY WITH THE APPLI-
CABLE PORTIONS OF THE NATIONAL ELECTRICAL CODE AND/OR OTHER LOCAL ELECTRICAL
CODES.
WARNING: DISCONNECT ELECTRICAL POWER SUPPLY AND PLACE A TAG AT THE DISCON-
NECT SWITCH INDICATING THAT YOU ARE WORKING ON THE CIRCUIT.
Connect the conduit from the oven to the junction box and properly connect to the power supply leads.
GROUNDING -THE OVEN MUST BE GROUNDED,
Do not work on the oven wiring until the oven has been positively grounded.
The oven frame is grounded through the base grounding wire. Connect it to ground in accordance with local
codes. Connect the white neutral to the service neutral wire at the junction box.
-3-
.
INSTALLING THE UNIT IN CABINET
The doors should be removed to decrease the weiaht of the oven and provide a better hand hold on the
oven while lifting it into the cabinet.
A. To Remove Doors (See Fig. 1)
Use caution! Oven door is heavy.
1. Open door completely.
2. Depress finger tab in oven door hinge area. Push tab toward
oven. Lift tab away from door liner and slide toward top of
oven door.
3. Repeat step 2 for other side of door.
4. Close door until approximately 5 inches from fully closed
position.
5. Slide door off the hinge arm assemblies.
6. Repeat steps 1 through 5 for other door on double ovens.
Be sure that mica spacers at either side of oven are in place to pro-
vide proper air flow between cabinet and oven.
When oven has been placed into cabinet, the bottom trim strip is
placed on lower edge of front frame. This is done by loosening the
three screws at the bottom of the front frame. Slide the trim strip
under the screw heads until the strip meets the lower corners of the
front frame (See Fig. 2). Tighten screws to hold to front frame.
Secure oven to cabinet with #8 flat head screws supplied with oven.
Disregard any excess screws.
B. Replace Oven Racks in Oven Cavity.
C. Reinstall The Door(s) (See Fig. 1)
1. Slide door hinge arms until firmly seated.
2. Lower door to full open position.
3. Push finger tabs to back. Depress the tabs and slide forward.
4. Close and reopen door slowly to make sure it has been
replaced properly.
5. Repeat steps 1 through 4 for other door on double oven.
DOOR ADJUSTMENT CHECK
/r
NEWSPAPER STRIPS
TOP OF DOOR
NE WSPAPER STRIPS>
8tDTTOM OF DOOR
DOOR IN FULL
OPEN POSITION
Place 2” x 18” strips of newspaper in lo-
cations indicated by illustration. Allow one
end of the paper to extend into the oven
cavity. Pull gently at each piece of paper. If
door is properly adjusted, each piece of
paper will offer firm resistance when pulled.
When door is out of adjustment, slide unit
out far enough to expose hinges on each
side. Loosen screws and move bottom of
door to a proper fit. After completing ad-
rustment tiqhten all screws in hinges.
ADJUST UP OR DOWN>
TO ALIGN DOOR
Specifications Subject to Change Without Notice
FORM 15457 (6-84) \HOBARTI
TROY, OHIO 45374
PRINTED IN U.S.A.

This manual suits for next models

15

Other KitchenAid Oven manuals

KitchenAid KEBC177KBT0 User manual

KitchenAid

KitchenAid KEBC177KBT0 User manual

KitchenAid KEBS246D User manual

KitchenAid

KitchenAid KEBS246D User manual

KitchenAid KEBK171SSS01 User manual

KitchenAid

KitchenAid KEBK171SSS01 User manual

KitchenAid 400010794234 User manual

KitchenAid

KitchenAid 400010794234 User manual

KitchenAid KCO253CU User manual

KitchenAid

KitchenAid KCO253CU User manual

KitchenAid KEBS278DBL10 User manual

KitchenAid

KitchenAid KEBS278DBL10 User manual

KitchenAid KEBK101S User manual

KitchenAid

KitchenAid KEBK101S User manual

KitchenAid SUPERBA KEBS277YBL1 User manual

KitchenAid

KitchenAid SUPERBA KEBS277YBL1 User manual

KitchenAid KEMS378X User manual

KitchenAid

KitchenAid KEMS378X User manual

KitchenAid KEHU309SSS03 User manual

KitchenAid

KitchenAid KEHU309SSS03 User manual

KitchenAid KEBS276YBL3 User manual

KitchenAid

KitchenAid KEBS276YBL3 User manual

KitchenAid Architect Series II KEBU208SSS User manual

KitchenAid

KitchenAid Architect Series II KEBU208SSS User manual

KitchenAid KCO253Q User manual

KitchenAid

KitchenAid KCO253Q User manual

KitchenAid KEBS207YAL3 User manual

KitchenAid

KitchenAid KEBS207YAL3 User manual

KitchenAid KMPC 3610 Operating and maintenance manual

KitchenAid

KitchenAid KMPC 3610 Operating and maintenance manual

KitchenAid KEBC167MSS01 User manual

KitchenAid

KitchenAid KEBC167MSS01 User manual

KitchenAid KEBS277DBL4 User manual

KitchenAid

KitchenAid KEBS277DBL4 User manual

KitchenAid KOHCP-60600 User manual

KitchenAid

KitchenAid KOHCP-60600 User manual

KitchenAid KCO275 User manual

KitchenAid

KitchenAid KCO275 User manual

KitchenAid KEBS277W User manual

KitchenAid

KitchenAid KEBS277W User manual

KitchenAid KEBS207SBL00 User manual

KitchenAid

KitchenAid KEBS207SBL00 User manual

KitchenAid KEBS246Y User manual

KitchenAid

KitchenAid KEBS246Y User manual

KitchenAid KEBS277YBL0 User manual

KitchenAid

KitchenAid KEBS277YBL0 User manual

KitchenAid KEBK206SWH02 User manual

KitchenAid

KitchenAid KEBK206SWH02 User manual

Popular Oven manuals by other brands

Frigidaire FEB27S2ASB Circuit diagrams

Frigidaire

Frigidaire FEB27S2ASB Circuit diagrams

Kleenmaid TO901X Instructions for use

Kleenmaid

Kleenmaid TO901X Instructions for use

Electrolux EH L2-3 user manual

Electrolux

Electrolux EH L2-3 user manual

NEFF B69CS3A 0 Series User manual and installation instructions

NEFF

NEFF B69CS3A 0 Series User manual and installation instructions

NEFF U14M42.3GB instruction manual

NEFF

NEFF U14M42.3GB instruction manual

Pkm BIC3 I-GK-IX-2 instruction manual

Pkm

Pkm BIC3 I-GK-IX-2 instruction manual

Fagor 5H-760 Series User manual for your oven

Fagor

Fagor 5H-760 Series User manual for your oven

Eureka Woodstock Series 2 Operation & installation instructions

Eureka

Eureka Woodstock Series 2 Operation & installation instructions

Samsung NV51K6650SG/AA user manual

Samsung

Samsung NV51K6650SG/AA user manual

Electrolux EOC5741AO user manual

Electrolux

Electrolux EOC5741AO user manual

Klarstein 10021587 manual

Klarstein

Klarstein 10021587 manual

AEG BPE742320B user manual

AEG

AEG BPE742320B user manual

AEG BE2000201 user manual

AEG

AEG BE2000201 user manual

Electrolux EOB5450AAX user manual

Electrolux

Electrolux EOB5450AAX user manual

Laurus LEH5 user manual

Laurus

Laurus LEH5 user manual

Bosch HBF133BR0N user manual

Bosch

Bosch HBF133BR0N user manual

Whirlpool W10351242B installation instructions

Whirlpool

Whirlpool W10351242B installation instructions

Vitek Vt-1274 Manual instruction

Vitek

Vitek Vt-1274 Manual instruction

manuals.online logo
manuals.online logoBrands
  • About & Mission
  • Contact us
  • Privacy Policy
  • Terms and Conditions

Copyright 2025 Manuals.Online. All Rights Reserved.