KKOLAR TANKY OV 60 User manual

INSTRUCTION MANUAL
TANKY OV 60
Built-in Electric Oven

1
DEAR CUSTOMER,
The oven is exceptionally easy to use and extremely efficient After reading the instruction.
manual operating the oven will be easy,.
Before being packaged and leaving the manufacturer the oven was thoroughly checked with,
regard to safety and functionality.
Before using the appliance please read the instruction manual carefully,.
By following these instructions carefully you will be able to avoid any problems in using the
appliance.
It is important to keep the instruction manual and store it in a safe place so that it can be
consulted at any time.
It is necessary to follow the instructions in the manual carefully in order to avoid possible
accidents.
Caution!
Do not use the oven until you have read this instruction manual.
The oven is intended for housedhold use only.
The manufacturer reserves the right to introduce changes which do not affect
the operation of the appliance.

2
TABLE OF CONTENTS
Safety instructions 3............................................................................................................
Description of the appliance 8........................................................................ ...................
Installation 10........................................................................................................................
Operation 12...........................................................................................................................
Cleaning and maintenance 16.............................................................................................
Technical data 19...................................................................................................................

3
SAFETY INSTRUCTIONS
NOTE;
Ensure there is a grounded socket nearby behind the unit()
A dedicated power circuit is recommended for the unit but not required Additional electrical.
appliances on the same circuit may exceed the current amperage rating for that circuit If after() .
the installation of your unit the circuit breaker trips or the fuse fails on a repeated basis then.,
a dedicated circuit will likely be required.
!The appliance must be installed only by a qualified person in compliance with the
instructions provided Incorrect installation may cause harm to persons animals or may
.,
damage property.
The manufacturer declines all responsibility for improper
installation which may harm persons and animals and damage property.
Important:The power supply to the appliance must be cut off before any adjustments or
maintenance work is done on it.
WARNING:
When using this product basic precautions should always be taken including the following,,:
Your buliding in oven is a classified electrical appliance As with any electrical appliance and-.
particularly with electric heaters basic precautions must be followed in order to reduce the risk,
of fire burns electrical shocks and or other serious injuries or death,, / .
! The appliance becomes hot during operation Take care not to touch the hot parts inside.
the oven.
! Always keep children away from the cooker.
While in operation direct contact with the cooker may cause burns!
! Ensure that small items of household equipment including connection leads do not touch,,
the hot oven or the hob as the insulation material of this equipment is usually not resistant
to high temperatures.
! Do not leave the cooker unattended when frying Oils and fats may catch fire due to.
overheating or boiling over.
Do not put pans weighing over 15 Kg on the opened door of the oven and pans over 25
kg on the hob.
! Do not use harsh cleaning agents or sharp metal objects to clean the door as they can
scratch the surface which could then result in the glass cracking,.
! Do not use the cooker in the event of a technical fault Any faults must be fixed by an.
appropriately qualified and authorised person.
! In the event of any incident caused by a technical fault disconnect the power and report,
the fault to the service centre to be repaired.
! The rules and provisions contained in this instruction manual should be strictly observed.
Do not allow anybody who is not familiar with the contents of this instruction manual to
operate the cooker.
! The cooker should not be cleaned using steam cleaning equipment.

4
SAFETY INSTRUCTIONS
! The panels adjacent to the oven must be made of heat resistant material-.
! Cabinets with a veneer exterior must be assembled with glues which can withstand temp-
erature of up to 100℃.
! Keep combustible materials such as curtans drapes furniture pillows clothing linens bedding,:,,,,,,,
paper etc at least 3 feet 0 9 meters from the front sides and rear of the heater Do not use,., (. ) .
this unit in areas where gasoline paint or other flammable liquids or their associated vapors,
may be present.
! To reduce the risk of fire do not place or install this unit in areas where the ventilation or,
circulation ducts may become blocked.
! The unit s power cord must be connected to a properly grounded and protected 220 240V',-
electrical outlet Always use ground fault protection where required by the electrical code To. .
redece the risk of fire avoid running the power cord under rugs carpets etc Keep the power,,,.
cord away from high traffic areas where it may pose a tripping hazard.
! Avoid the use of an extension cord which may overheat and cause a fire,.
! When transporting or storing the unit keep it in a dry location free from dust excessive,,,
vibration or other factors which may damage the unit,.
! Do not operate any oven with a damaged cord or plug or after the heater malfunctions has,
been dropped or danaged in any manner Return oven to authorized service facility for.
examination,electrical or mechanical adjustment,or repaired.
!
! Use this oven only as described in this manual Any other use not recommended by the
.
manufacturer may cause fire electric shock or injury to persons,, .
!This appliance is not intended for use by persons (including children) with reduced physical,
sensory or mental capabilities, or lack of experience and knowledge, unless they have been given
supervision or instruction concerning use of the appliance by a person responsible for their safety.
Children should be supervised to ensure that they do not play with the appliance.
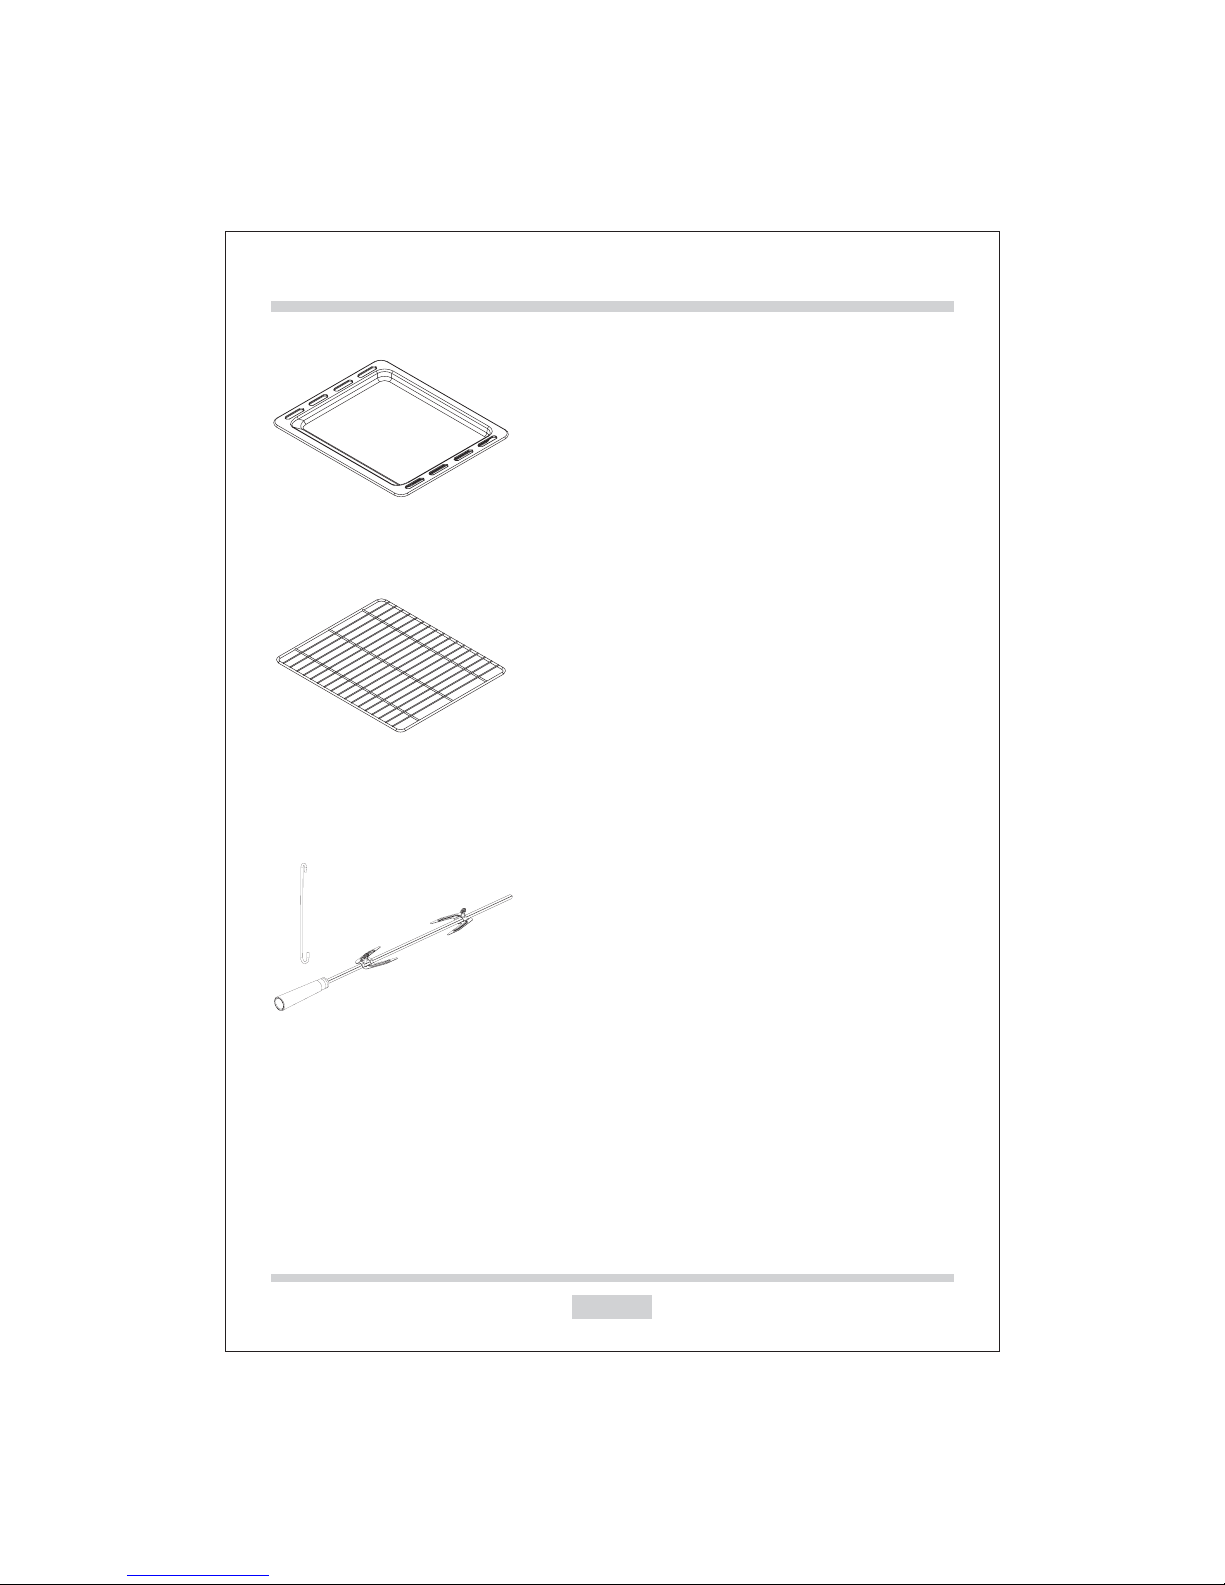
! Never add cold water to food on a hot universal tray or baking tray or directly onto food in a hot
oven The steam created could cause serious burns or scalding and the sudden change in.
temperature can damage the enamel.
!D.
If the supply cord is damaged, it must be replaced by a special cord or assembly available from
the manufacturer or its service agent.
o not lift the oven by the handle

SAFETY INSTRUCTIONS
This appliance can be used by children aged from 8 years and above if they have been given supervision
or instruction concerning use of the appliance in a safe way and if they understand the hazards involved.
Cleaning and user maintenance shall not be made by children unless they are aged from 8 years and
above and supervised. Keep the appliance and its cord out of reach of children aged less than 8 years.
Appliances can be used by persons with reduced physical, sensory or mental capabilities or lack of
experience and knowledge if they have been given supervision or instruction concerning use of the
appliance in a safe way and if they understand the hazards involved.
Children shall not play with the appliance.
If the supply cord is damaged, it must be replaced by the manufacturer, its service agent or similarly
qualified persons in order to avoid a hazard
WARNING: The appliance and its accessible parts become hot during use. Care should be taken to
avoid touching heating elements.
Children less than 8 years of age shall be kept away unless continuously supervised
This appliance can be used by children aged from 8 years and above and persons with reduced
physical, sensory or mental capabilities or lack of experience and knowledge if they have been
given supervision or instruction concerning use of the appliance in a safe way and understand the
hazards involved. Children shall not play with the appliance. Cleaning and user maintenance shall
not be made by children without supervision.
During use the appliance becomes hot. Care should be taken to avoid touching heating elements inside the oven.
WARNING: Accessible parts may become hot during use.
Young children should be kept away.
Do not use harsh abrasive cleaners or sharp metal scrapers to clean the oven door glass since they
can scratch the surface, which may result in shattering of the glass.
WARNING: Ensure that the appliance is switched off before replacing the lamp to avoid the possibility
of electric shock.
,
This appliance is not intended for use by persons (including children) with reduced physical, sensory
or mental capabilities, or lack of experience and knowledge, unless they have been given supervision
or instruction concerning use of the appliance by a person responsible for their safety.
Children should be supervised to ensure that they do not play with the appliance.
If the supply cord is damaged, it must be replaced by the manufacturer, its service agent or similarly
qualified persons in order to avoid a hazard
5

6
HOW TO SAVE ENERGY
Using energy in a respon-
sible way not only saves
money but also helps the
environment So let s save.'
energy And this is how you!
can do it:
!Do not uncover the pan too often
(!)a watched pot never boils
Do not open the oven door unnecessarily
often.
!Switch off the oven in good time and
make use of residual heat.
For long cooking times switch off heating,
zones 5 to 10 minutes before finishing
cooking This saves up to 20 on energy,%.
Only use the oven when cooking larger
dishes.
Meat of up to 1 kg can be prepared more
economically in a pan on the cooker hob.
!Make use of residual heat from the
oven.
If the cooking time is greater than 40
minutes switch off the oven 10 minutes
before the end time.
Important!,When using the timer set
appropriately shorter cooking times
according to the dish being
prepared.
!Make sure the oven door is properly
closed.
Heat can leak through spillages on the door
seals Clean up any spillages immediately..
!Do not install the cooker in the direct
vicinity of refrigerators freezers/.
Otherwise energy consumption increases
unnecessarily.

7
UNPACKING
During transportation protec,-
tive packaging was used to
protect the appliance against
any damage After.unpack-
ing please,dispose of all
elements of packaging in a
way that will not cause dam-
age to .the environment
All materials used for packaging the appli-
ance are environmentally friendly they are;
100 recyclable and are maeked with the%
appropriate symbol.
Caution During unpacking the packag!,-
ing materials polythene bags polystyrene(,
pieces etc,.)
should be kept out of reach of
children.
▲
DISPOSAL OF THE APPLIANCE
After the implementation of the
European Directive 2002/96/EU in
the national legal system, the
following applies:
▲
Electrical and electronic devices
may not be disposed of with
domestic waste. Consumers are obliged by law
to return electrical and electronic devices at the
end of their service lives to the public collecting
points set up for this purpose or point of sale.
Details to this are defined by the national law of
the respective country. This symbol on the
product, the instruction manual or the package
indicates that a product is subject to these
regulations. By recycling, reusing the materials
or other forms of tilizing old devices, you are
making an important contribution to protecting
our environment.

8
DESCRIPTION OF THE APPLIANCE
1
3
2
1Selection knob
3Oven door handle
4Clock
5Timer
6Power
7Affirm
2Increase or lessen knob
CONTROL PANEL
key press-
4
5
6
7

9
Baking tray*
Grill grate
()drying rack
SPECIFICATIONS OF THE APPLIANCE
*optional
Rotisserie

10
INSTALLATION
!The kitchen area should be dry and aired
and equipped with efficient ventillation.
When installing the oven easy access to,
all control elements should be ensured.
!This is a built in oven and its back wall-,
and one side wall can be placed next to a
high piece of furniture or a wall Coating.
or veneer used on fited furniture must be
applied with a heat resistant adhesive-
( ℃). -100 This prevents surface deforma
tion or detachment of the coating.
!Make an opening with the dimensions
given in the diagram for the oven to be
fitted.
!Make sure the mains plug is disconected
and then connect the oven to the mains
supply.
!Insert the oven completely into the open-
ing without allowing the four screws in the
places shown in the diageram to fall out.
Min38
600
570
580
Min600
590
600
570
580
40

11
INSTALLATION
Elecrical connection
Warning!
All electrical work should be carried out by a
suitably qualified and authorised electrician.
No alterations or wilful changes in the electric-
ity supply should be carried out.
Fitting guidelines
The oven is manufactured to work with
three phase alternating current-(-220V
240V 50Hz The/).
connection diagram is also
found on the cover of the connection holder.
Remem-ber that the connection wire should
match the connection type and the power
rating of the oven.
The connection cable must be secured in a
strain relief clamp-.
Warning!
Remember to connect the safety circuit to the
connection terminal marked with .Theholder
electrictity supply for the must have a
oven
safety switch which enables the power to be
cut off in case of emergency The distance.
between the working contacts of the safety
switch must be at least 3 mm.
Before connecting the oven to the power
supply it is important to read the informa-
tion on the data plate and the connection
diagram.
CONNECTION DIAGRAM
Caution Voltage of heating elements 220V 240V!~
Caution In the event of any connection the safety!
wire must be connected to the terminal
For V connection ways as below
Yellow and Green Wire connects
Blue Wire connects to N neutral
Brown Wire connects to L live
,:
()
()
220 ~240V
to

12
OPERATION
Before first use
!Remove packaging clean the interior of the,
oven and the hob.
!Take out and wash the oven fittings with
warm water and a little washing up liquid-.
on the in the room or
open a window.
!Heat the oven to a temperature of 250(℃,
for approx 30 min remove any stains and, .),
wash carefully the heating zones of the hob;
should be heated for around 4 min without.
a pan.
Important!
The inside of the oven should only be washed
with warm water and a small amount of wash-
ing up liquid-.
Switch ventilation

13
OPERATION
LED display
1. Turn On and off
Turn on: on off condition push button once it is in standby status
Turn off: In working status, push button once it is off status.
The LED displays below when in standby
,,.
,
:
2. Set up clock (24 hours Turn one scale stands for one hour or one minute.):
Note: when it is set up electricity, if the clock is not set up, it will not show time
and only shows ( 0:00)
(1) In standby status, push button once, the "Hour" number flicker, reminding
to start set up.
(2) Turn knob K2,set up hour (0-23), turn clockwise the hour increase, otherwise,
turn anticlockwise, the hour decrease, defaulted "00".
(3) Push button once, hour is set up, the minute flicker, reminding to set up.
(4) Turn Knob K2, set up minute (0-59).Turn clockwise, the time is increasing,
turn anticlockwise, the time is decreasing, Defaulted "00".
Knob K2Knob K1

OPERATION
(5) Push button once, finish hour set up start to work will flicker once each
second (for example: 12:30)
, ":"
3. Function select: For example: Function other functions are same way to set up()
(1) In standby condition, turn Knob K1, the LED will show as below picture ( XX
indicates flicker, others are bright all the time)
Note: Above is default for all functions.
(2) After selecting the function, can set up temperature and working time as below:
a. Turn K K2 , turn one scale, the temperature will increase or decrease 5 .
Temperature set up from 50 C C
℃
-250 .
nob
゜゜
b. Push button once, the Hour flicker then turn K2 to set up hour time (0-9).“” , Knob
c. Push button again(or push this button twice continuously), minute flicker,
and turn K2 , set up the minutes push button to confirm The
system start to work as set up other icons don t show.
For example: Working time set up as 3:30 hours, and working temperature
as 230 C
(0-59), .
,'
゜.
Knob
d. In status of item 1 ,or item , push button, and start to work as
defaulted or current set up condition.
2-( ) 2-(2)
14

15
OPERATION
Icon
Working
mode
Table 1
Upper heat+
lower heat +
air exhaust fan
Rear heat+
convection +
air exhaust fan
Grill +
air exhaust fan
Grill+
Convection +
air exhaust fan
Lower heat +
air exhaust fan
Upper heat +
grill +
air exhaust fan
Upper heat +
grill +
convection +
air exhaust fan
Grill +
rotisserie +
air exhaust fan
Convection
Light
Default
temperature
Temperature
can be set
Time can
be set
220 180 210 190 60 210 210 210
50-250 50-240 180-240 50-200 50-180 180-240 180-240 180-240
0:01-9:00
4. Checking function
(1) In working condition push button can check current time after flicker times
it will show original working condition
,, ,5,
.
(2) In working condition, push button, can check set up time, after flicker 5 times,
it will show original working condition.
5. Set up child lock
(1) Lock Push and button at same time and keep more than 3 seconds,
LED show then lock successfully, except for key other keys cannot
function For example
:
“”, "",
.:
(2) Unlock: Push and button at same time and keep more than 3 seconds,
the LED icon doesn t show and it is unlocked.“” '

16
CLEANING AND MAINTENANCE
By ensuring proper cleaning and mainte-
nance of your cooker you can have a sig-
nificant influence on the continuing fault-free
operation of your appliance.
Before you start cleaning ,the cooker must
be switched off and you should ensure
that all knobs are set to the “OFF” position.
Do not start cleaning until the cooker has
completely cooled.
Caution ! The sharp blade should always
be protected by adjusting the cover (just
push it with your thumb).Injuries are pos-
sible so be careful when using this instru-
ment-keep out of reach of reach of children
!Appropriate light cleaning or washing
products are recommended, such as e.g.
any kind of liquids or emulsions for fat
removal. In particular, special cleaning
products such as COLLO Luneta, Sidol
Stahlglanz ,Stahl-Fix for washing and
cleaning and Cera Fix for maintenanc
are recommended If the recommended.
products are not available, it is advisable
to use a solution of warm water with a little
washing-up liquid or cleaning products for
stainless steel sinks.
*optional

17
CLEANING AND MAINTENANCE
*optional
Replacement of the oven light bulb
In order to avoid the possibility of an
electric shock ensure that the appliance is
switched off before replacing the bulb.
!
Set all control knobs to the position“OFF”/ “STOP”
and disconnect the mains plug,
!unscrew and wash the lamp cover and
then wipe it dry.
!unscrew the light bulb from the socket,
replace the bulb with a new one-a high
temperature bulb (300 )with the follow-℃
ing parameters:
-voltage 220~240 V
-power 15 W
-thread E14.
!Screw the bulb in , making sure it is prop-
erly inserted into the ceramic socket.
!Screw in the lamp cover.
Oven light bulb
Oven
!The oven should be cleaned after every
use. When cleaning the oven the lighting
should be switched on to enable you to
see the surfaces better.
!The oven chamber should only be washed
With warm water and small amount of
washing-up liquid.
!After cleaning the oven chamber wipe it
dry.
Caution!
Do not use cleaning products contain-
ing abrasive materials for the cleaning
and maintenance of the glass front
panel.
!steam cleaning :﹡
-pour 250ml of water(1 glass)into a bowl
placed in the oven on the first level from
the bottom,
-close the oven door,
-set the temperature knob to 50℃,and
the function knob to the bottom heater
position,
-heat the oven chamber for approximately
30 minutes,
-open the oven door, wipe the chamber
inside with a cloth or sponge and wash us-
ing warm water with washing-up liquid.
Caution! Possible moisture or water
residues under the cooker can result from
steam cleaning.
!After cleaning the oven chamber wipe it
dry.

18
CLEANING AND MAINTENANCE
▲
▲
Door removal
In order to obtain easier access to the oven
chamber for cleaning , it is possible to remove
the door, To do this ,tilt the safety catch part of
the hinge upwards. Close the door lightly, lift
and pull it out towards you. In order to fit the
door back on to the cooker, do the inverse.
When fitting ,ensure that the notch of the
hinge is correctly placed on the protrusion
of the hinge holder. After the door is fitted to
the oven ,the safety catch should be carefully
lowered down again. If the safety catch is not
set it may cause damage to the hinge when
closing the door.
Door removal
Removal of the internal glass
panel
Unscrew and unfasten the plastic latch that
is in the corner at the top of the door .Next
take out the glass from the second blocking
mechanism and remove. After cleaning, insert
and block the glass panel, and screw in the
blocking mechanism.
Removal of the intemal glass panel

19
OPERATION IN CASE OF EMERGENCY
In the event of an emergency, you should:
!switch off all working units of the cooker
!disconnect the mains plug
!call the service centre
!Some minor faults can be fixed by referring to the instructions given in the table
below. Before calling the customer support centre or the service centre check the
following points that are presented in the table.
PROBLEM REASON ACTION
The appliance does not
work. break in power supply check the household fuse
box if there is a blown fuse,
replace it with a new one
The oven lighting does not
work the bulb is loose or dama-
ged
tighten up or replace the
blown bulb (see chapter
Cleaning and Maintenance)
TECHINCAL DATA
Voltage rating
Power rating
Usable capacity of the oven
Net weight
220V 240V 50/60Hz-
max 2 8kw..
Cooker dimensions H/W/D (cm) 59 5 59 5 57 5./ ./ .
58 litres
Approx 32kg.
Table of contents
Other KKOLAR Oven manuals