Klom WL314 Supplement


© Wilton 2013
No part of this report may be reproduced or transmitted
in any form whatsoever, electronic, or mechanical, including photocopying,
recording, or by any informational storage or retrieval system without express
written, dated and signed permission from the author.

This book is a short guide to the popular Klom Electronic Pick Gun.
Like any electronic picking tool the Klom helps to speed up the picking process.
The tool is not a sonic screwdriver though and cannot simply be waved at a
lock to make it open. It requires proper use and correct technique to get the
most from it and the most efficient results. Therefore, this guide has been
produced to help you to get the best results from the Klom electronic pick gun
and to ensure that you are opening locks with it in the shortest time possible.
This guide is relatively short. It is aimed at providing an introduction to the world
of locks and lock picking on this particular topic. Although it is an introduction
there is valuable information to be learned from this guide.
The aim of this book is to give you a no-nonsense guide to this topic and to arm
you with only the information you need. Written in plain English and free of
jargon it pulls together the best tips and info to get you up to speed on the
subject as quickly as possible.
Also, check out the full series of reports from www.withoutakey.co.uk to further
your knowledge and expertise in lockpicking.

Note: - The Klom Electric Pick Gun can be purchased from
www.withoutakey.co.uk
1
2
3
4


Parts of a KLOM EPG
Buy the
KLOM EPG from
Withoutakey.co.uk

Before you do anything with the Klom it is recommended that you carry out the
following steps.
The first thing that you will need to do after receiving your Klom EPG
is to get it fully charged.
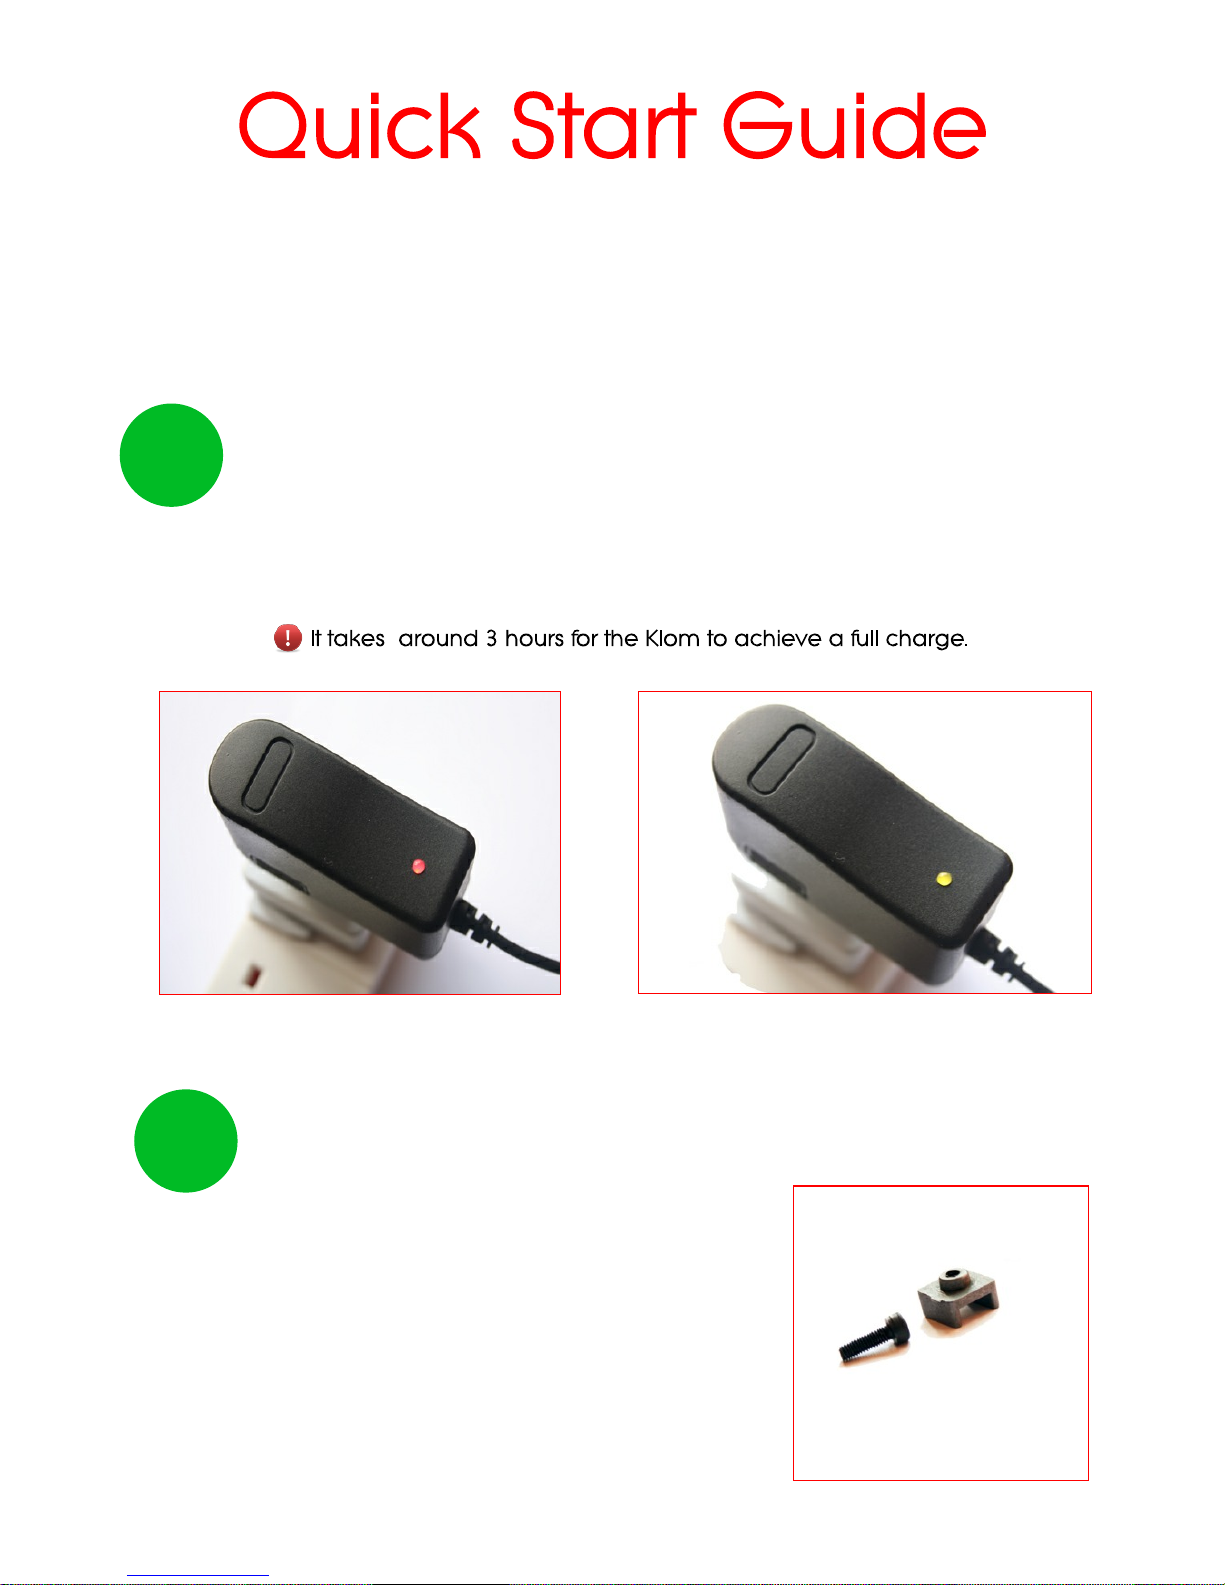
Once you plug the charger in to an adapter and set it charging
you will notice a red light on the charger unit. This red light will
change to a green light once the Klom is fully charged.
Whilst the unit is charging you can attach the ‘U’ shaped clip to
the head piece. It is the U shaped clip that will actually hold the
picks/probes in place.
Locate the U clip and the bolt from
the box of attachments and fit into
place. You don’t need to tighten it
fully until you have inserted a pick as
well. So move onto the next step.
1
2

From the box of attachments choose a pick that you want to use.
You will probably want to experiment with the different shapes to
see what size you prefer and what you have the most success with.
It’s a bit like choosing normal picks – everyone will have their
favourite shaped pick and find they work better with one in partic-
ular.
Insert the pick under the U clamp you fitted in the above step and
tighten into place.
Once the Klom has fully charged you can now attach the head
piece to the body. By looking at the head and the end of the Klom
you should be able to see how the two parts align. You will need
to twist the head into place and you simply reverse this motion
when you want to remove the head section.
When attaching the head you might find that it doesn't want to go on. If this is
the case then the reason is simply because of the orientation of the black cam
mechanism on the actual body
of the lock. It will simply be butting
up against the back of the probe
mechanism rather than sitting un-
der it. You just need to depress
the trigger, or rotate the cam
mechanism with your fingers a
little, so that it doesn't butt up
against it and the head can then
go on easily.
3
4

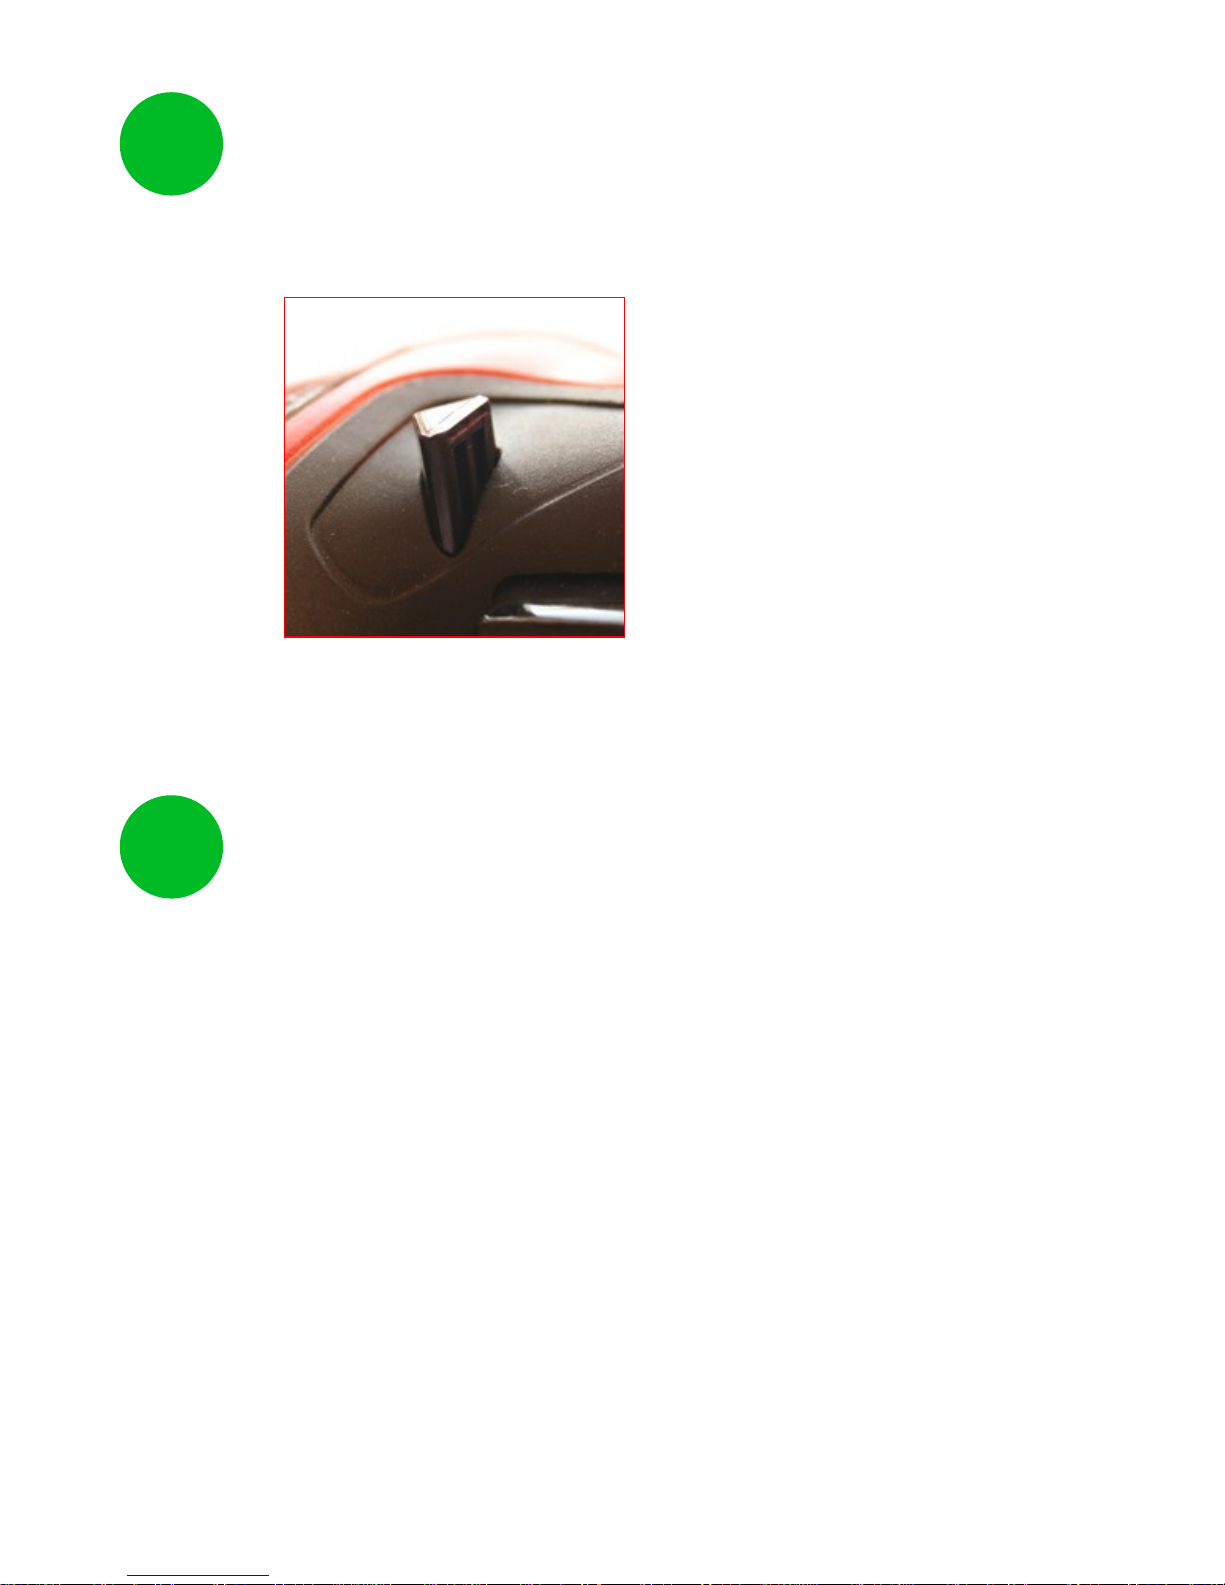
Push the sliding direction bar fully to the left or right. The side that
you push this to doesn't matter when the normal head is attached.
The direction is only relevant if the drill head is attached. For the
normal head that creates the up and down motion the direction
that the drive mechanism moves
in is not relevant because either
way the mechanism will still go up
and down. It is important to ensure
that the direction switch is fully
pushed either to the left or right
because if you have it in the mid-
dle the gun will not operate.
On the top of the head you will see an adjustment screw. The
more that this is turned clockwise the more the screw enters the
head. This has the effect of pushing down on the levering probe
more and so the more it pushes it down the less movement there
will be. It is suggested that you start off with less movement and
then gradually unscrew that adjustment screw to create more movement of
the pick/probe as is desired.
You should now be ready to start picking!
5
6

Technique

Remember that practice makes perfect and this is also true in
respect to the Klom Electronic Pick Gun. You must practice using
the tool to get used to handling it and to learn the correct feel
and touch to ensure rapid results when using it.
However, it is also important that the correct technique is practiced so that you
do not pick up bad technique that will hamper your success. Bad technique
can also lead to the tool being damaged and certainly can cause the probes
to become bent or snapped.
The first thing that you want to do is to look at the gun and make
sure that the amount of lift of the probe will not be too excessive
or too minimal.
I like to start with less lift and increase it gradually. However, over time you will
probably ignore this adjustment setting instead preferring to leave the amount
of lift at a setting that you were happy with previously.
Turn the top adjusting screw so that it is as far into the casing of the lock head
as it can go. This will reduce the lift and motion of the pick gun. You now want
to adjust it back, i.e. so that the screw moves back out of the lock head, so that
more movement of the probe is permitted.
Try and adjust it so that you have a very slight level of movement. This can
always be adjusted to a greater level of movement later but for now just start
off with a minimal
1
2
Buy the
KLOM EPG from
Withoutakey.co.uk

The next thing I always like to do is to insert the turning tool that
I’ll be using into the lock first. This helps you to see that it will not
interrupt the use of probe of the lock gun.
It is important to have a correct sized turning tool. This is important for two main
reasons.
The first reason was mentioned in the previous paragraph and that is that you
want a turning tool that will not get in the way of the lock gun. However, you
don’t want it to get in the way of the first pin of the lock either because if it is
touching that first pin it can prevent it being moved and picked successfully.
The second reason for choosing a turning tool of the correct size is because you
want to properly apply turning pressure on the cylinder (sometimes called plug)
of the lock. You do not want a turning tool that isn’t applying the correct turning
force of the lock. You want to make sure that the turning tool is helping to retain
the pins in their ‘set’ state once they have been picked to the correct height by
the pick gun.
Also consider using the turning tool at the top of the keyway. This is a good
position that allows it to be kept out of the way but is also very effective when
applying turning force to some high security locks. The top of the keyway
position for turning tools is something that does not get mentioned much in lock
picking books or guides as most people, and traditional picking instruction,
instructs you to place the turning tool at the bottom of the lock. This might be a
technique that you are unfamiliar with therefore but do give it a go. It is a great
way of imparting an effective turning force on the plug of the lock.
3

The next step is to insert the actual probe of the lock gun. It is
important here to ensure that the probe does actually reach all
the way to the pin stack at the back of the lock. It is no good
picking 4 out of the 5 pins and not picking that last pin stack.
There are two main angles that the probe can be inserted. The probe can be
perfectly upright underneath the pins or it can positioned so that it is at a slight
angle. By this I mean that you can actually angle the gun and therefore the
probe over to the right a little. Imagine the face of a clock and the top edge of
the probe would be angled at 1 o’clock. It would then sit under the pins at this
slight angle. This helps to adjust the force that is being applied to the pins by
the tool.
When the probe is inserted into the lock it is now a good time to check that the
turning tool will not hamper the operation of the gun in any way. What you
don’t want is for the probe to keep bumping into the turning tool as not only will
this seriously affect the success of picking but it can also cause the turning tool
to get dislodged and eventually fall out. Even being dislodged can affect the
turning force of the tool and prevent the pins properly setting. If you haven’t
tried the top of the lock method for the turning tool then perhaps give that a try
too, especially if you are having problems fitting both the turning tool and the
probe into the lock.
You can now turn on the lock gun by depressing the trigger and at the same
time begin to apply a little turning pressure of the turning tool.
4

Hints & Tips

The supplied charger should take approximately 3 hours to fully charge the
KLOM EPG.
Whilst charging the adapter will have a red light. When it is fully charged the
light on the adapter will go green.
The small triangles light to show the direction of rotation of the KLOM only. (As it
would when being used as a drill) They are therefore redundant. These lights
do not reflect the charge status of the KLOM.
Pushing the bar from one extreme position to the other changes the direction
of rotation of the KLOM. If this bar is in a interim position the KLOM may not
function. Make sure it it pushed fully to one side or the other.
Buy the
KLOM EPG from
Withoutakey.co.uk

Troubleshooting

I’d now like to take a quick look at some problems and issues you may have
and try to provide some help and advice to overcome them.
What do you mean by doesn't work? Take a look at the following options...
1) If there is no power from the gun: The first thing to do is to get a full charge of
the gun. Have you followed the quick start section of this guide which explained
that you will need to charge the gun before you use it for the first time.
Remember, that when you plug the gun in the charger will show a red light and
only when it is fully charged will that light turn to green. This takes around 3
hours to charge.
Make sure that you have pressed the direction lever fully to the left or the right
and that it is not simply in the middle of the gun.
2) The gun sounds like the motor is working but the head is not going up and
down.
This is caused by the cam part of the lock having become loose. You can easily
solve this by tightening the small grub screw that is located on the cam.
To do this you will need to use the small hex key that is in the attachments box.
Please also note that the shaft of the motor has a flat section to it. It is this part
that the small grub screw needs to be touching when it is tightened with the hex
key. Once you have used the hex key and tightened the screw the cam will be
firmly attached to the drive shaft again. This will then allow it to properly interact
with the probe restoring the up and down motion.
3) If the gun is not picking the lock. Remember that the Klom EPG is a tool and
just like any other tool you need to practice to use it effectively. Do not expect
the Klom to take all the skill out of lock picking. Yes, using an electric pick gun
can make picking locks look devastatingly easy but to do so you should still put
in the practice. It is still easy to use the gun though and the amount of practice
required is probably less than normal manual picking techniques but please
do put in practice of some amount before giving up on the tool. Once

mastered you will be amazed at the speed of picking that can be accom-
plished.
This is a symptom of a poor charge of the gun. See the above and plug the
Klom in for a full charge.
Also, ensure that the direction lever is moved fully over to the left or the right of
the gun. If it is in the middle this can cause problems and can stop the gun
working.
Please bear in mind that the function of any pick, whether picking a lock
manually or with an electric gun, is simply to raise the pins of the lock. The pick
is not used to rotate the cylinder of the lock.
Any twisting of the pick in the lock can result in the pick snapping. Remember,
it is the turning tool's job to turn the cylinder of the lock and not the pick!

If you do have any further questions please get in touch at the email below.
I also hope very much that you have enjoyed this guide and if so please do
email to let me have your comments. Also, please check out the further guides
available in this series (available at WithoutaKey.co.uk).
Best Wishes Pete
Buy the
KLOM EPG from
Withoutakey.co.uk
Table of contents