manuals.online logo
Brands
  1. Home
  2. •
  3. Brands
  4. •
  5. KMART
  6. •
  7. Artificial Pine Tree
  8. •
  9. KMART 0-09458709-4 User manual

KMART 0-09458709-4 User manual

Please refer to part numbers when reordering
For questions or comments about product:
Email: [email protected] or Call toll-free: (866)210 5958.
Made in / Hecho en CHINA. Distributed by Kmart Corporation, Hoffman Estates, IL 60179
OWNER’S MANUAL
7' EMERALD PEAK LED TREE
PRODUCT CODE: 0-09458709-4
UPC CODE: 030539 034122
Date of purchase: ____/ ____/ ____
1 2
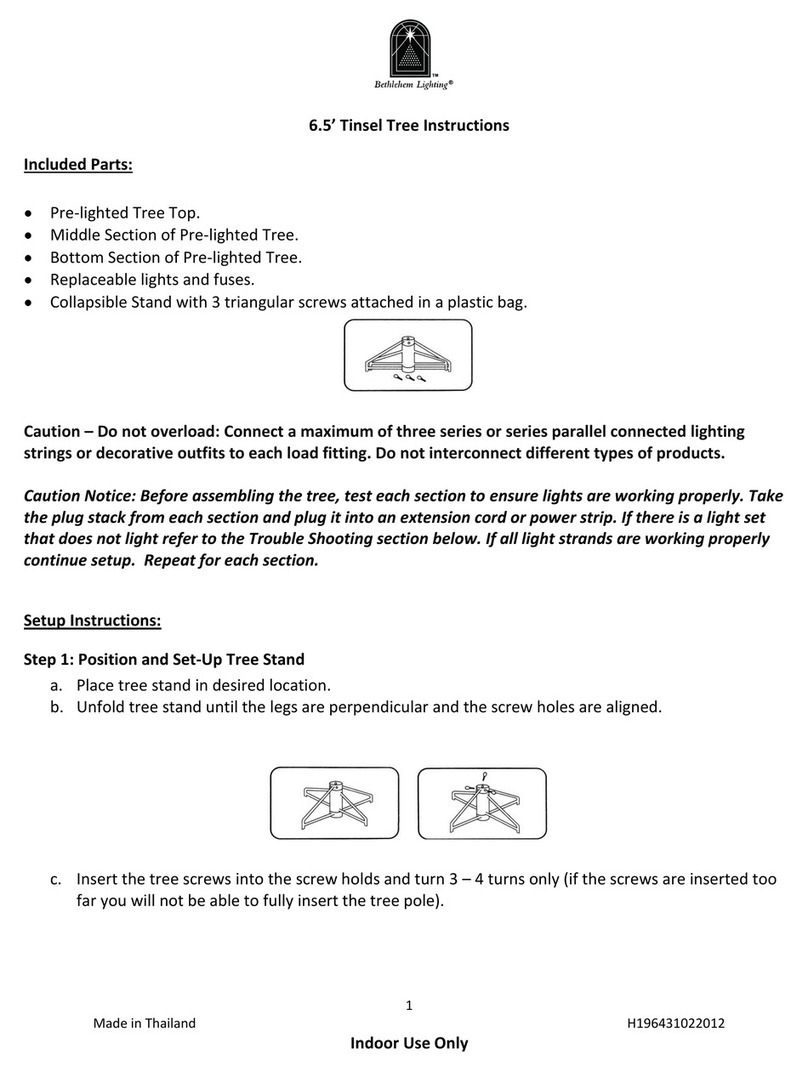
ASSEMBLY INSTRUCTIONS FOR TREE STAND
Fig.1
1. Tree stand consists of a
metal stand and a single
eye bolt. (See Fig.1)
Fig. 2
2. Open the stand to a 90 degree
angle until the hole lines up with
the hole on the tube. (See Fig.2)
Fig. 3
3. Insert an eye bolt and
screw into the hole. (See
Fig.3)
Fig. 4
4. Insert the tree into the stand and
adjust accordingly. The tree
should be straight and balanced
correctly. (See Fig.4)
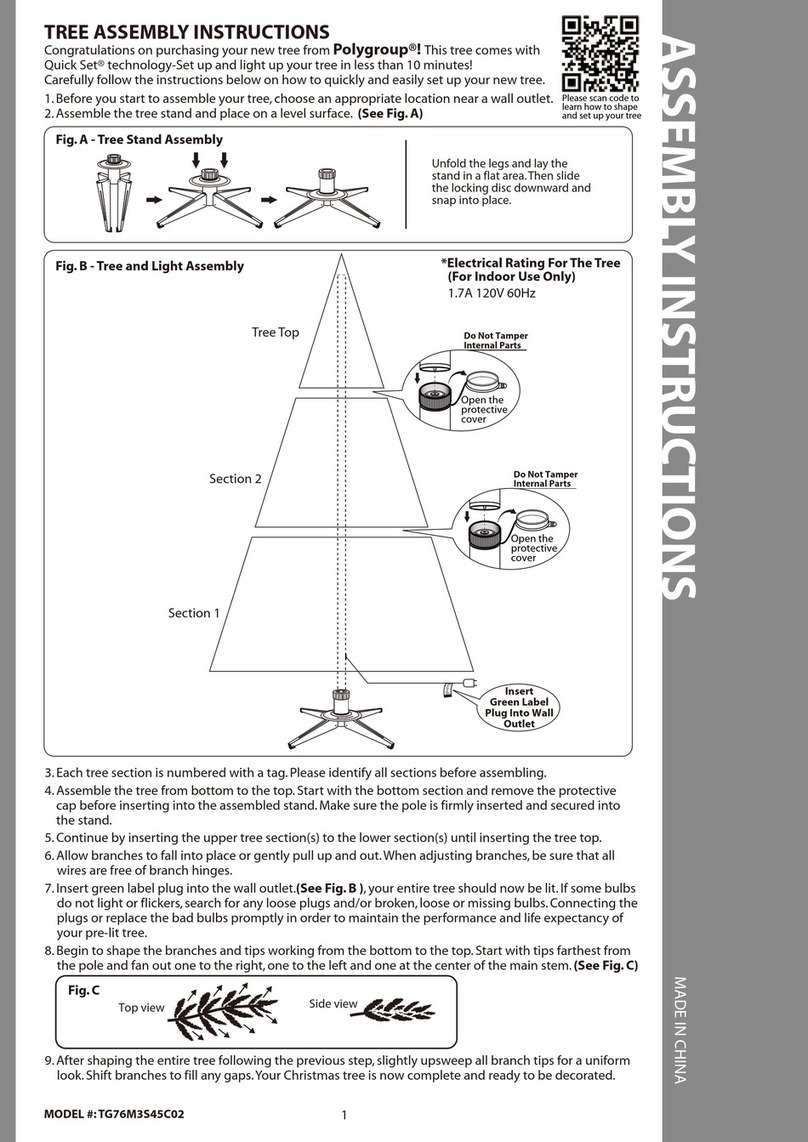
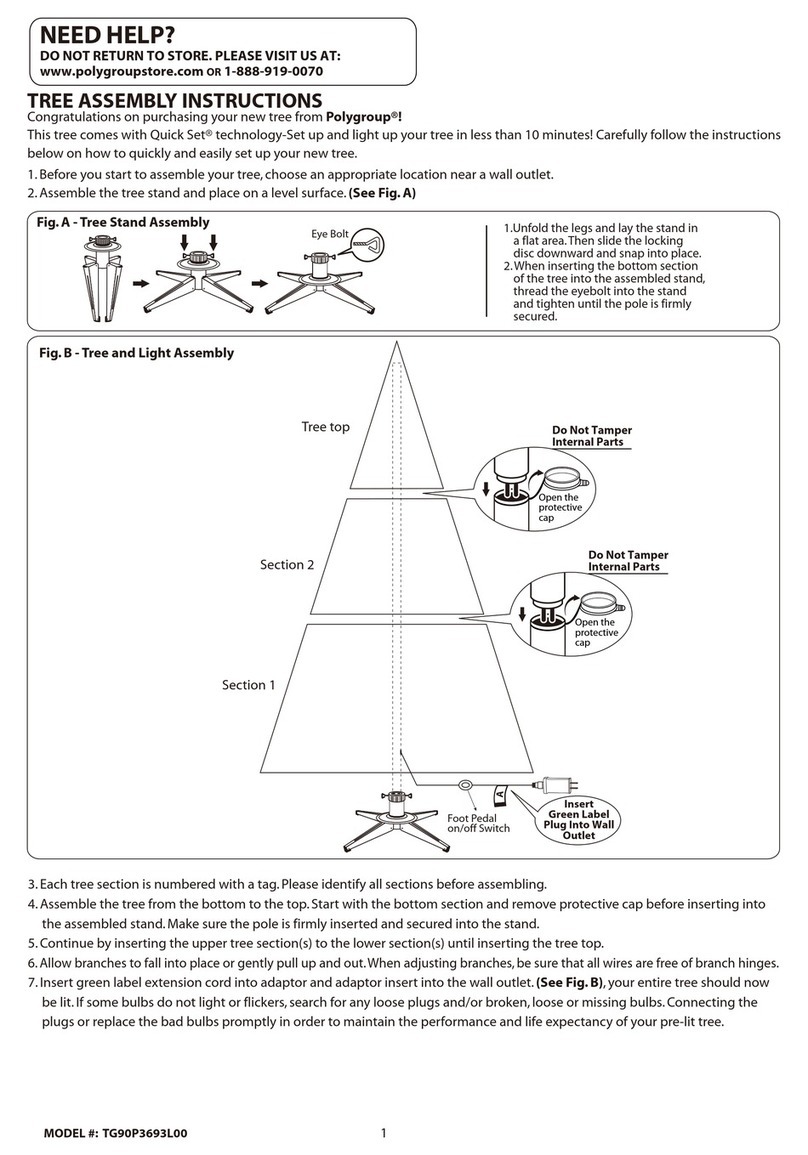
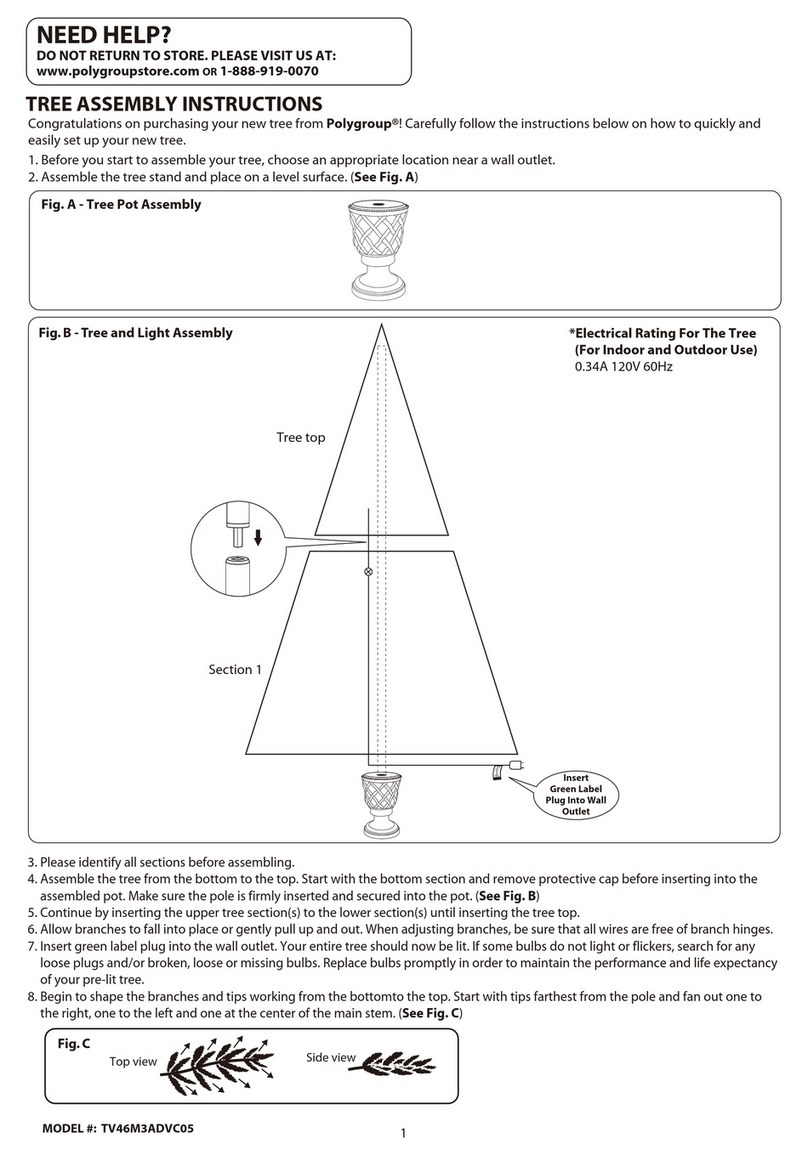
ASSEMBLY INSTRUCTIONS FOR TREE
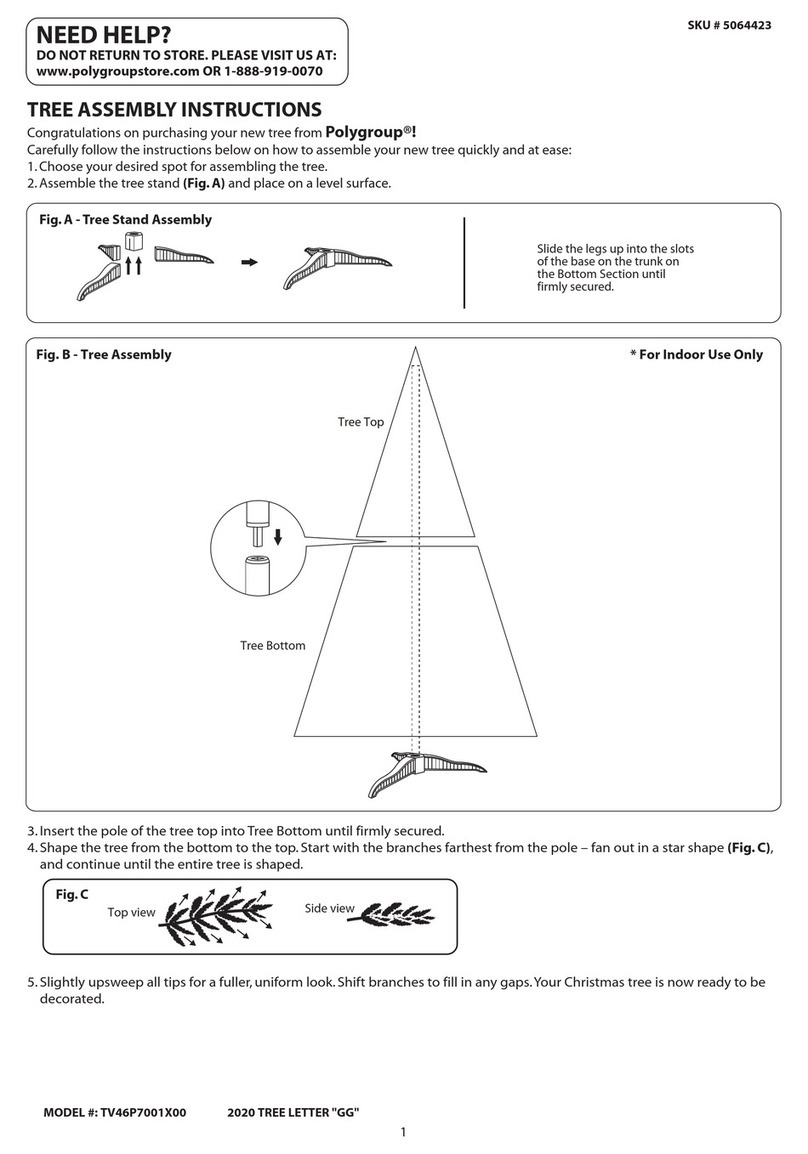
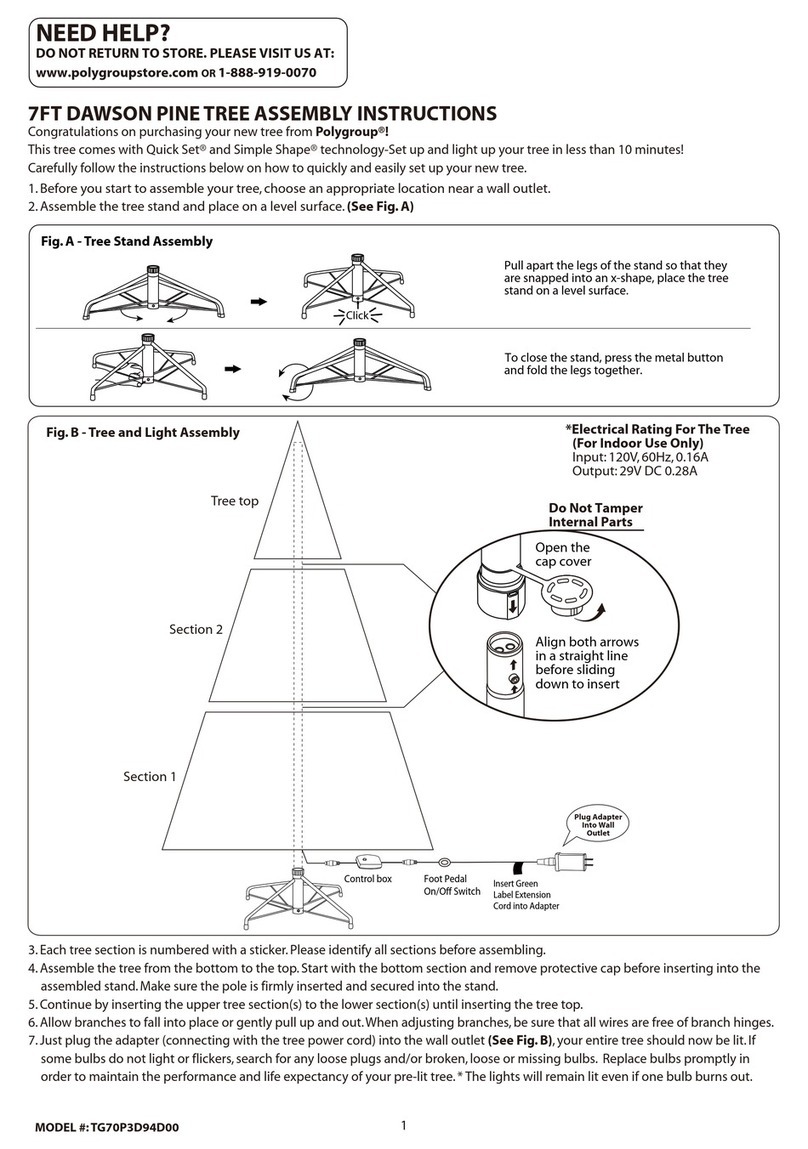
1. Before you start to assemble the tree, choose an appropriate location near an outlet.
2. Assemble the tree from the bottom to the top. Assemble tree stand according to the assembly
instruction for the tree stand.
3. Carefully insert bottom section (C) of tree into the assembled tree stand and tighten the screw. (See Fig.1)
4. Insert the middle section (B) of the tree into the bottom section (C). If the lights don’t light up, rotate the
middle section (B) on right or left direction until it falls into place, then insert vertically and tightly into the bottom
section (C) to ensure proper circuit connection. (See Fig. 2)
5. Insert top section (A) into the middle section (B). If the lights don’t light up, rotate the top section (A) on right or
left direction until it falls into place, then insert vertically and tightly into the middle section (B) to ensure proper
circuit connection. (See Fig. 3)
Note:There is an end connector on the top section (A), which is connected for tree top only.
6. Connect the end connector of green power cord with foot pedal switch (E) with the green connector
fixed on the bottom section (C)in correct direction (always match the protuberance on the end
connector of power cord to the protuberance on the green connector fixed on the bottom section (C)
according to the magnified drawing. (See Fig. 4).
7. Connect the end connector of white connector power cord (F) with the white connector fixed on the
bottom section (C)in correct direction (always match the protuberance on the end connector of
power cord to the protuberance on the white connector fixed on the bottom section (C) according to
the magnified drawing. (See Fig. 4).
8. Open all the branches (see Fig. 5).
9. Shape the branches. Start with tips farthest from the trunk, one to the right; one to the left and one
at the center of the main stem (see Fig. 6).
10.Plug the green power cord with foot pedal switch (F) into a proper outlet. (see Fig. 8). This tree
comes with a foot pedal switch with timer function for easy illumination and changing functions.
Please see below instructions of how to use the foot pedal switch.
11.Plug the white power cord (F) into a proper outlet. (see Fig. 7). The white connector power cord
plug is for tree top only.
HOW TO USE THE FOOT PEDAL SWITCH:
1. Press the foot pedal less than two seconds and release to select below 8 light functions:
1) Steady on Warm white
2) Flashing Warm White
3) Slow Fade Warm White
4) Steady Multicolor
5) Flashing Multicolor
6) Slow Fade Multicolor
7) Sequential Multicolor & Warm White
8) Slow Fade Multicolor & Warm White
2. Press the foot pedal more than two seconds to select below timer hours:
1) Indicator lights on foot pedal switch turn on red: the lights on tree will automatically be ON for 6
hours and be OFF for 18 hours. This cycle will occur every day unless the red indicator lights turn
out.
2) Indicator lights on foot pedal switch turn on green: the lights on tree will automatically be ON for 8
hours and be OFF for 16 hours. This cycle will occur every day unless the green indicator lights turn
out.
3) Indicator lights on foot pedal switch turn on blue: the lights on will automatically be ON for 2 hours
and be OFF for 22 hours. This cycle will occur every day unless the green indicator lights turn out.
4) Indicator lights on foot pedal switch turn on yellow: the lights will automatically be ON for 4 hours
and be OFF for 20 hours. This cycle will occur every day unless the yellow indicator lights turn out.
TROUBLE SHOOTING (If Lights Do Not Work):
1. If entire tree does not light, make sure connectors of power cord plugs (E, F) are securely
connected to the connectors fixed on the bottom section (C) and the power cord plugs are
securely inserted into a working electrical outlet.
2. Check whether all bulbs are tightly fixed inside the lamp holder.
3. If a bulb is blown or broken, replace the faulty bulb according to bulb replacement instructions
below.
4. If the fuse in the power cord plugs are blown, replace the blown fuse according to fuse
replacement instructions below.
5. If you are still experiencing problems with your tree, please contact our customer service
representative at 866-210-5958.
3 4
CAUTION! – ALWAYS UNPLUG YOUR TREE FROM ITS
POWER SOURCE BEFORE ATTEMPTING EITHER FUSE
OR BULB REPLACEMENT.
USE AND CARE INSTRUCTIONS
FUSE REPLACEMENT
This product comes with an overload protection (fuse). A blown fuse indicates an overload or short
circuit.
If a fuse blows, unplug tree from wall outlet. Replace the fuse as per the fuse replacement
instructions below (follow product marking for proper fuse rating). If the replacement fuse blows, a
short circuit may be present and the product should be reviewed to determine the cause.
A) Fuse replacement of power cord with foot pedal switch (E) (replaceable 3-amp 125V fuses are
located in plastic bag)
1. Grasp plug and remove from its power source (Illustration.1).
2. Locate blown fuse(s) by sliding access cover on top of plug towards prongs.
3. Remove blown fuse by turning the plug over. A fuse should fall into your hand
(Gentle tapping may be required).
4. Replace blown fuse with spare replacement fuse. Close fuse cover by sliding
fuse access cover towards the cord. Illustration.1
B) Fuse replacement of power cord (F) (replaceable 3-amp 125V fuses are located in spare parts bag)
1. Grasp plug and remove from its power source.
2. Locate blown fuse(s) by sliding access cover on top of plug towards
prongs.
3. Remove blown fuse by turning the plug over. Fuse should fall into your
hand (Gentle tapping may be required).
4. Locate spare replacement fuses in spare parts bag. (Exhibit A)
5. Replace blown fuse with spare replacement fuse(s). Close fuse cover by sliding fuse access cover
towards the cord.
BULB REPLACEMENT:
1. Grasp plug and remove from its power source
2. Pull bulbs and plastic base straight out of socket. Do not twist bulbs.
3. Replace burned bulb with 3.0/2.0 volt 0.06/0.04 watt LED bulb ONLY.
(Additional bulbs are included for your convenience).
IMPORTANT SAFETY INSTRUCTIONS
READ AND FOLLOW ALL SAFETY INSTRUCTIONS
a) Do not use seasonal products outdoors unless marked suitable for indoor and outdoor use. When
products are used in outdoor applications, connect the product to a Ground Fault Circuit Interrupting
(GFCI) outlet. If one is not provided, contact a qualified electrician for proper installation.
b) This seasonal use product is not intended for permanent installation or use.
c) Do not mount or place near gas or electric heaters, fireplace, candles or other similar sources of
heat.
d) Do not secure the wiring of the product with staples or nails, or place on sharp hooks or nails.
e) Do not let lamps rest on the supply cord or on any wire.
f) Unplug the product when leaving the house, when retiring for the night, or if left unattended.
g) This is an electric product – not a toy! To avoid risk of fire, burns, personal injury and electric shock
it should not be played with or placed where small children can reach it.
h) Do not use this product for other than its intended use.
i) Do not hang ornaments or other objects from cord, wire, or light string.
j) Do not cover the product with cloth, paper or any material not part of the product when in use.
k) This product is equipped with push-in type lamps. Do not twist lamps.
l) This product has a polarized plug (one blade is wider than the other) as a feature to reduce the risk
of electric shock. This plug will fit in a polarized outlet only one way. If the plug does not fit fully in
the outlet, reverse the plug. If it still does not fit, contact a qualified electrician. Do not use with an
extension cord unless plug can be fully inserted. Do not alter or replace the plug.
m) This product employs overload protection (fuse). A blown fuse indicates an overload or short circuit
situation. If the fuse blows, unplug the product from the outlet. Also unplug any additional strings or
products that may be attached to the product. Replace the fuse as per the user servicing
instructions (follow product marking for proper fuse rating) and check the product. If the
replacement fuse blows, a short-circuit may be present and the product should be discarded.
n) Read and follow all instructions that are on the product or provided with the product.
SAVE THESE INSTRUCTIONS
BASIC PRECAUTIONS SHOULD BE FOLLOWED WHEN
USING THIS PRODUCT: (Inspect product carefully before using or re-using):
1. This is an electrical product – not a toy! To avoid risk of fire, burns, personal injury and electrical
shock it should not be played with.
2. Do not hang ornaments or other objects from cord, wire, or light string. Hang ornaments only on
the tree itself.
3. For your safety, unplug the product when leaving the house, retiring for the night, or if left
unattended.
4. Do not let bulbs rest on the supply cord or on any wire.
5. Do not close doors or windows on the product or extension cords as this may damage the wire
insulation.
6. Should you discover any of the following: a) cut, damaged, or frayed wire insulation; b) cracks in
the sockets; c) loose connections or exposed wires, please call us.
Warning: Changes or modifications to this unit not expressly approved by the party
responsible for compliance could void the user’s authority to operate the equipment.
NOTE: This equipment has been tested and found to comply with the limits for a Class B digital
device, pursuant to Part 15 of the FCC Rules. These limits are designed to provide reasonable
protection against harmful interference in a residential installation. This equipment generates, uses
and can radiate radio frequency energy and, if not installed and used in accordance with the
instructions, may cause harmful interference to radio communications.
However, there is no guarantee that interference will not occur in a particular installation. If this
equipment does cause harmful interference to radio or television reception, which can be determined
by turning the equipment off and on, the user is encouraged to try to correct the interference by one or
more of the following measures:
  Reorient or relocate the receiving antenna.
  Increase the separation between the equipment and receiver.
  Connect the equipment into an outlet on a circuit different from that to which the receiver
is connected.
      Consult the dealer or an experienced radio/TV technician for help.
STORAGE: When storing the product, carefully remove the product from wherever it is placed,
including trees, branches, or bushes, to avoid any undue strain or stress on the product conductors,
connections, and wires. Disassembled tree can be stored in its original box. Store tree in a cool dry
place where the temperature does not exceed 100 degrees Fahrenheit.
UL MODEL # TMP7-6(0.4)
This manual suits for next models

1

Other KMART Artificial Pine Tree manuals

KMART JACLYN SMITH Nashville 140076541705 User manual

KMART

KMART JACLYN SMITH Nashville 140076541705 User manual

KMART Trim a Home 9 ft. Kingston Slim Spruce Tree User manual

KMART

KMART Trim a Home 9 ft. Kingston Slim Spruce Tree User manual

KMART TRIM A HOME User manual

KMART

KMART TRIM A HOME User manual

Popular Artificial Pine Tree manuals by other brands

Polygroup TG90P3499C01 Assembly instructions

Polygroup

Polygroup TG90P3499C01 Assembly instructions

Home Accents Holiday TG90M3BB7D00 manual

Home Accents Holiday

Home Accents Holiday TG90M3BB7D00 manual

Home Accents Holiday TG90M5311L03 manual

Home Accents Holiday

Home Accents Holiday TG90M5311L03 manual

Polygroup TG76P3A08D00 Assembly instructions

Polygroup

Polygroup TG76P3A08D00 Assembly instructions

Polygroup TG76M3Y85C02 Assembly instructions

Polygroup

Polygroup TG76M3Y85C02 Assembly instructions

CASARIA CAMT35 instructions

CASARIA

CASARIA CAMT35 instructions

NSH NORDIC 780-017 manual

NSH NORDIC

NSH NORDIC 780-017 manual

Costway CM23547USA user manual

Costway

Costway CM23547USA user manual

Sunnydaze Decor LSR-664 quick start guide

Sunnydaze Decor

Sunnydaze Decor LSR-664 quick start guide

Home Accents Holiday TG66M2Z29D09 quick start guide

Home Accents Holiday

Home Accents Holiday TG66M2Z29D09 quick start guide

ICStation RGB LED Bluetooth Amplifier Christmas Tree DIY... manual

ICStation

ICStation RGB LED Bluetooth Amplifier Christmas Tree DIY... manual

Polygroup TV70M5417C01 Assembly instructions

Polygroup

Polygroup TV70M5417C01 Assembly instructions

GE Just Cut Hampton's Spruce 18227 Assembly instructions

GE

GE Just Cut Hampton's Spruce 18227 Assembly instructions

Members Mark TZ70BN053X02 Assemnly Instructions

Members Mark

Members Mark TZ70BN053X02 Assemnly Instructions

HOMEDEPOT TG76M2Y65C00 Assembly instructions

HOMEDEPOT

HOMEDEPOT TG76M2Y65C00 Assembly instructions

North Light WX-LED20-1MC-1 manual

North Light

North Light WX-LED20-1MC-1 manual

GE 19216 Assembly instructions

GE

GE 19216 Assembly instructions

Polygroup TG90M6010C13 Assembly instructions

Polygroup

Polygroup TG90M6010C13 Assembly instructions

manuals.online logo
manuals.online logoBrands
  • About & Mission
  • Contact us
  • Privacy Policy
  • Terms and Conditions

Copyright 2025 Manuals.Online. All Rights Reserved.