manuals.online logo
Brands
  1. Home
  2. •
  3. Brands
  4. •
  5. Knightsbridge
  6. •
  7. Fan
  8. •
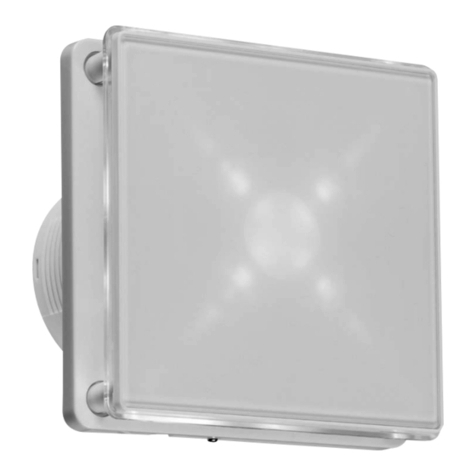
  9. Knightsbridge EX004H Instruction Manual

Knightsbridge EX004H Instruction Manual

1
INSTALLATION & MAINTENANCE MANUAL
EX004H
ACCESSORIES LTD
106
x4
2
These instructions should be read carefully and retained after installation by the end user for future reference
and maintenance.
These instructions should be used to aid installation of the following product:
EX004H
GENERAL INSTRUCTIONS
SAFETY
INSTALLATION
• This product must be installed in accordance with the latest edition of the IEE Wiring Regulations (BS7671) and current
Building Regulations. If in any doubt, consult a qualified electrician
• Please isolate mains prior to installation or maintenance
• Check the total load on the circuit (including when this product is fitted) does not exceed the rating of the circuit cable, fuse
or circuit breaker
• Please note the IP (Ingress Protection) rating of this product when deciding the location for installation
• This product is Class II double insulated
• This product is IPX4 rated
• Provide power to the required point of installation
• Cut a suitable 100mm diameter hole in the mounting surface ensuring not to infringe with any joists, gas / water
pipes or electrical cables. Install suitable ducting and a suitable external grille or shutter. The maximum length of
ducting to be used is 2m
• Remove the front fascia (see Fig. 1)
• Remove the faceplate by removing the screw at the
bottom of the product and lifting off
• Mark the location of the fixing holes and drill
ensuring not to infringe with any gas / water pipes
or electrical cables
• Remove the cable knock-out on the baseplate and
guide the mains cable through
• Fix the base to the mounting surface using the
fixings provided
• Remove the terminal cover by removing the two
screws (see Fig. 2)
•
•
•
•
•
•
•
•
•
•
•
•
•
•
IPX4
Fig. 1
Fig. 2
•
•
•
•
• Carefully bring the wires into the
terminal enclosure, and ensuring
correct polarity is observed, wire as
shown in Fig. 3. The switched live
supply is not needed if only using the
humidistat or interval functions
•
•
•
•
Fig. 3
• Adjust the DIP switch to the required settings - see DIP
Switch Settings below
• Reassemble the terminal cover, faceplate and front fascia
• Switch on and check for correct operation
DIP SWITCH SETTINGS
With the interval function on, the fan operates irrespective of humidity. This is useful to prevent the
fan running constantly where humidity levels are consistently high, for example near the sea. It also
allows the fan to operate when humidity levels are consistently low, for example when installed near a
heating appliance.
The fan switches on automatically for one hour, irrespective of the humidity level, switches off for the
interval set, then switches on again for one hour, etc.
The interval time can be set
as follows:
The humidity level
can be set as follows
The overrun time
can be set as follows
The humidistat causes the fan to operate when the humidity level reaches the set level (+10/-5%). It
switches off when the humidity drops below the set level and after the selected period on the overrun
timer.
Interval function
Interval time
Humidity function
3
•
•
•
•
•
•
•
•
•
•
•
•
4
ML Accessories Limited
LU5 4LT
www.mlaccessories.co.uk DCFEB20_V1
ACCESSORIES LTD
WARNING
This product must be disconnected from the circuit if subjected to any high voltage or insulation resistance testing.
Irreparable damage will occur if this instruction is not followed.
Wire as per Fig. 3 with a switched live supply. The fan operates via the humidistat function described above, but additionally
switches on and remains on while the switched live supply is on. After the switched live turns off, the fan continues to operate
for the selected period on the overrun timer. If the humidity is above the selected level, it will continue to operate via the
humidistat function.
With the start-up timer function on, this causes a delay of 50 seconds before the fan switches on via
the external switch. If the switched live is on for less than 50 seconds the fan will not switch on.
GENERAL
The LED lamps fitted in this product are non-replaceable. The product should be recycled in the correct manner when it
reaches the end of its life. Check local authorities for where facilities exist.
Clean with a soft dry cloth only, do not use aggressive cleaning products or solvents which may damage the product.
This product is non-dimmable.
WARRANTY
This product has a warranty of 3 years from date of purchase. Failure to install this product in accordance with the current
edition of the IEE Wiring Regulations (BS7671), improper use, or removal of the batch code will invalidate the warranty.
If this product should fail within its warranty period, it should be returned to the place of purchase for a free of charge
replacement. ML Accessories does not accept responsibility for any installation costs associated with the replacement
product. Your statutory rights are not affected.
ML Accessories reserve the right to alter product specification without prior notice.
Operation with external switch
Start-up timer function
Factory settings
Interval function Off
Interval time 4 hours
Humidistat 60% RH
Timer 1 min.
Start-up timer function Off

Other Knightsbridge Fan manuals

Knightsbridge EX003T Instruction Manual

Knightsbridge

Knightsbridge EX003T Instruction Manual

Knightsbridge EX003T Instruction Manual

Knightsbridge

Knightsbridge EX003T Instruction Manual

Popular Fan manuals by other brands

Schuller VENTO 168311D installation guide

Schuller

Schuller VENTO 168311D installation guide

VMI CUBE manual

VMI

VMI CUBE manual

Brink Sonair installation manual

Brink

Brink Sonair installation manual

Geovent GEOFILTER GFX2 instruction manual

Geovent

Geovent GEOFILTER GFX2 instruction manual

Fantech Fit 120H installation manual

Fantech

Fantech Fit 120H installation manual

Antec Cooling Fan brochure

Antec

Antec Cooling Fan brochure

Carrier 48P 030 User's information manual

Carrier

Carrier 48P 030 User's information manual

Honeywell HSF600BE operating instructions

Honeywell

Honeywell HSF600BE operating instructions

Goldair GHL255W operating instructions

Goldair

Goldair GHL255W operating instructions

Sulion Ness WiFi manual

Sulion

Sulion Ness WiFi manual

Pepeo Tibu instruction manual

Pepeo

Pepeo Tibu instruction manual

Maico RLS 2 F Installation and operation

Maico

Maico RLS 2 F Installation and operation

Field Controls 46334800 manual

Field Controls

Field Controls 46334800 manual

Colasit CDVA 400 Operation manual

Colasit

Colasit CDVA 400 Operation manual

Stadler Form Oto operating instructions

Stadler Form

Stadler Form Oto operating instructions

Carrier 62MB Installation, Start-Up and Service Instructions

Carrier

Carrier 62MB Installation, Start-Up and Service Instructions

Marta MT-FN2534 user manual

Marta

Marta MT-FN2534 user manual

Munters WF50 Series instruction manual

Munters

Munters WF50 Series instruction manual

manuals.online logo
manuals.online logoBrands
  • About & Mission
  • Contact us
  • Privacy Policy
  • Terms and Conditions

Copyright 2025 Manuals.Online. All Rights Reserved.