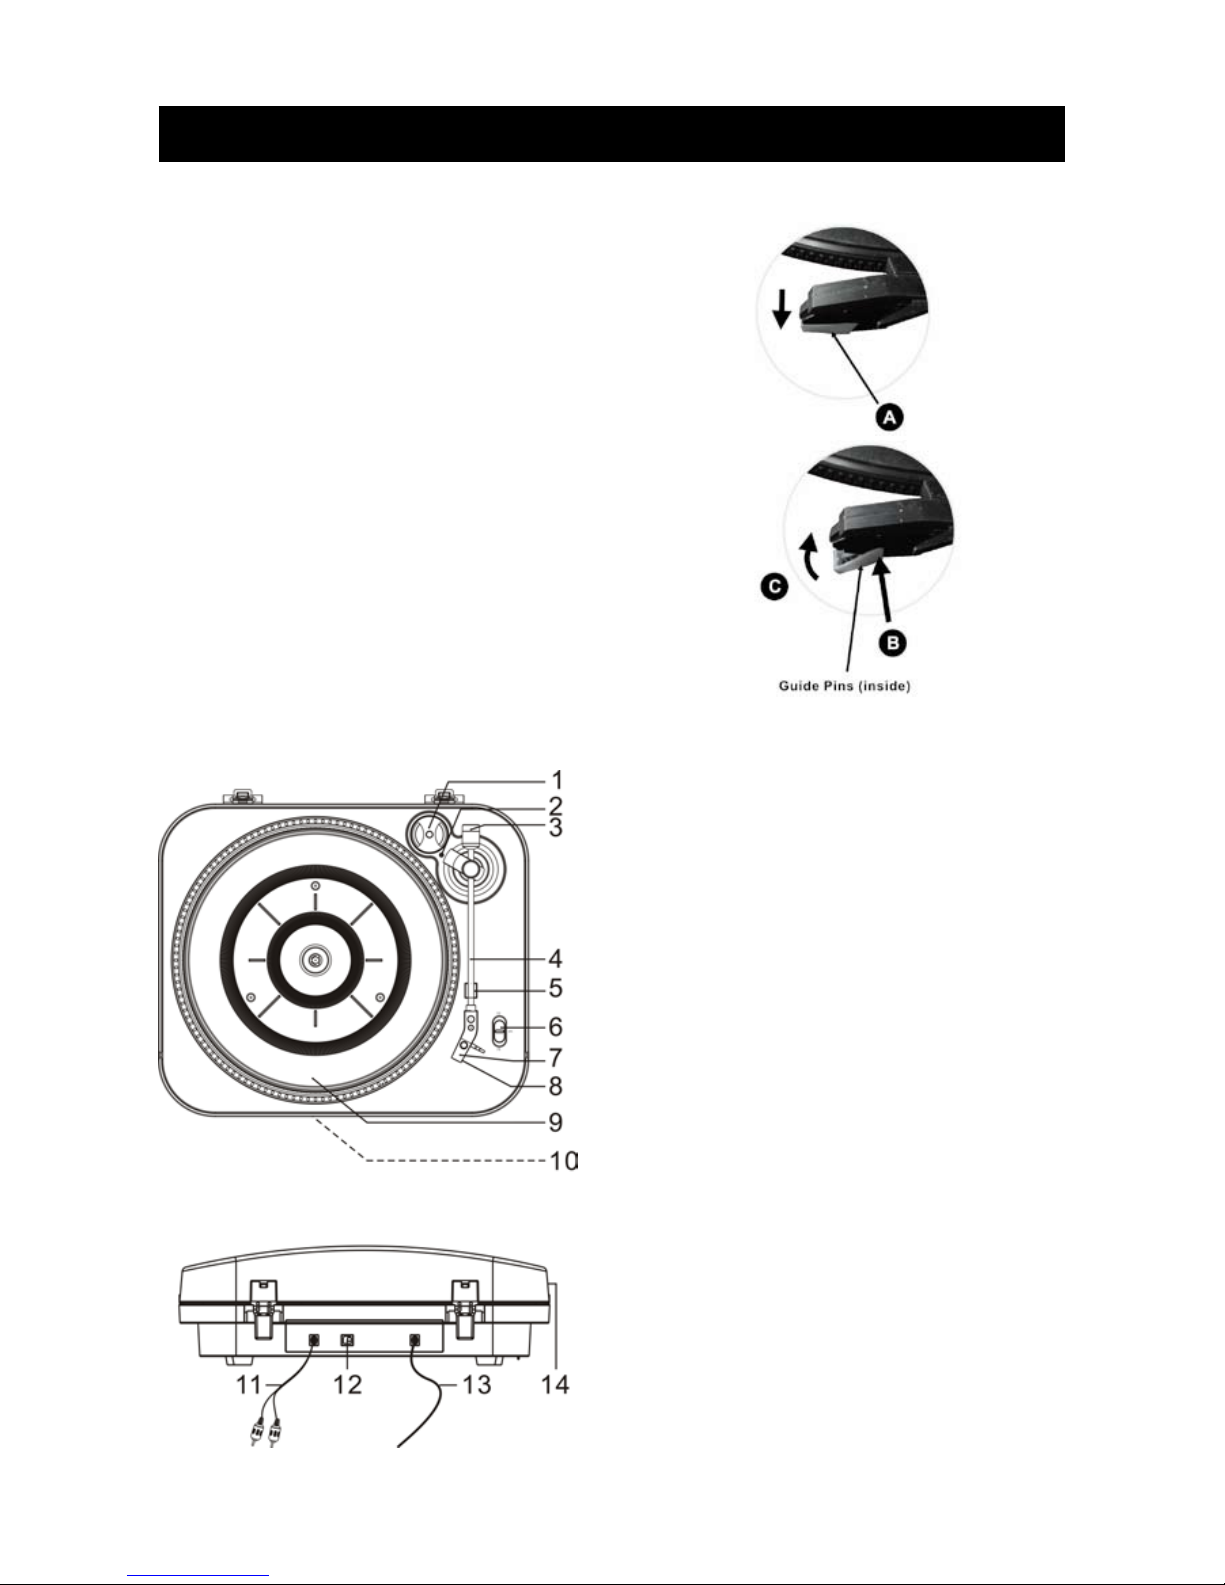
Konig HAV-TT20USB User manual

HAV-TT20USB
MANUAL (p. 2)
USB Turntable

2
ENGLISH
How to Replace the Turntable Stylus (Needle)
Removing the old stylus
1. Place a screwdriver at the tip of the stylus and push
down in direction “A”.
2. Remove the stylus by pulling it forward and down.
Installing a new stylus
1. Hold the tip of the stylus and insert the other end by
pressing in direction “B”.
2. Push up in direction “C” until it locks at the tip.
Layout
1. 45 RPM ADAPTER
2. TONE ARM TRACKING INDICATOR
3. DECORATION
(NOT FOR ADJUSTING THE TONEARM)
4. TONEARM
5. TONEARM REST
6. SPEED SELECTOR
7. STYLUS
8. NEEDLE COVER
9. TURNTABLE
10. ATMOSPHERE LIGHT
11. RCA LINE OUT CABLE
12. USB SOCKET
13. AC POWER CORD
14. DUST COVER

3
PART I: Phonograph
1. Connect the RCA line out jacks to the auxiliary input sockets of your amplifier. Make sure to match the
socket colours with the jack colours.
2. Connect the AC plug to a household socket. The atmosphere light will be lit blue the whole time.
3. Place a record on the turntable. Remember to use the 45 RPM adapter located in the top right corner
when playing a 45 RPM record.
4. Select the speed according to the record you are playing.
5. Lift and move the tonearm to the turntable, the TONEARM TRACKING INDICATOR will light up. Place
the tonearm on the edge of the record and the record starts playing.
NOTE: It is strongly recommended to close the transparent cover while playing a record to prevent dust
from getting inside. Also, please do not place anything on top of the dust cover, especially while
playing a record.
6. To pause or stop playing, you need to lift and move the tonearm back to the tonearm rest manually.
7. When the record reaches the end, the tonearm stops rotating. Lift the tonearm and place it on the
tonearm rest manually.
PLEASE NOTE:
• TheTONEARMTRACKINGINDICATORremainsonuntilthetonearmisreturnedtothetonearmrest.
• Whenarecordplaystotheend,youhavetoreturnthetonearmtothetonearmrestbeforeplayback.
Otherwise, neither the turntable nor playback will work.
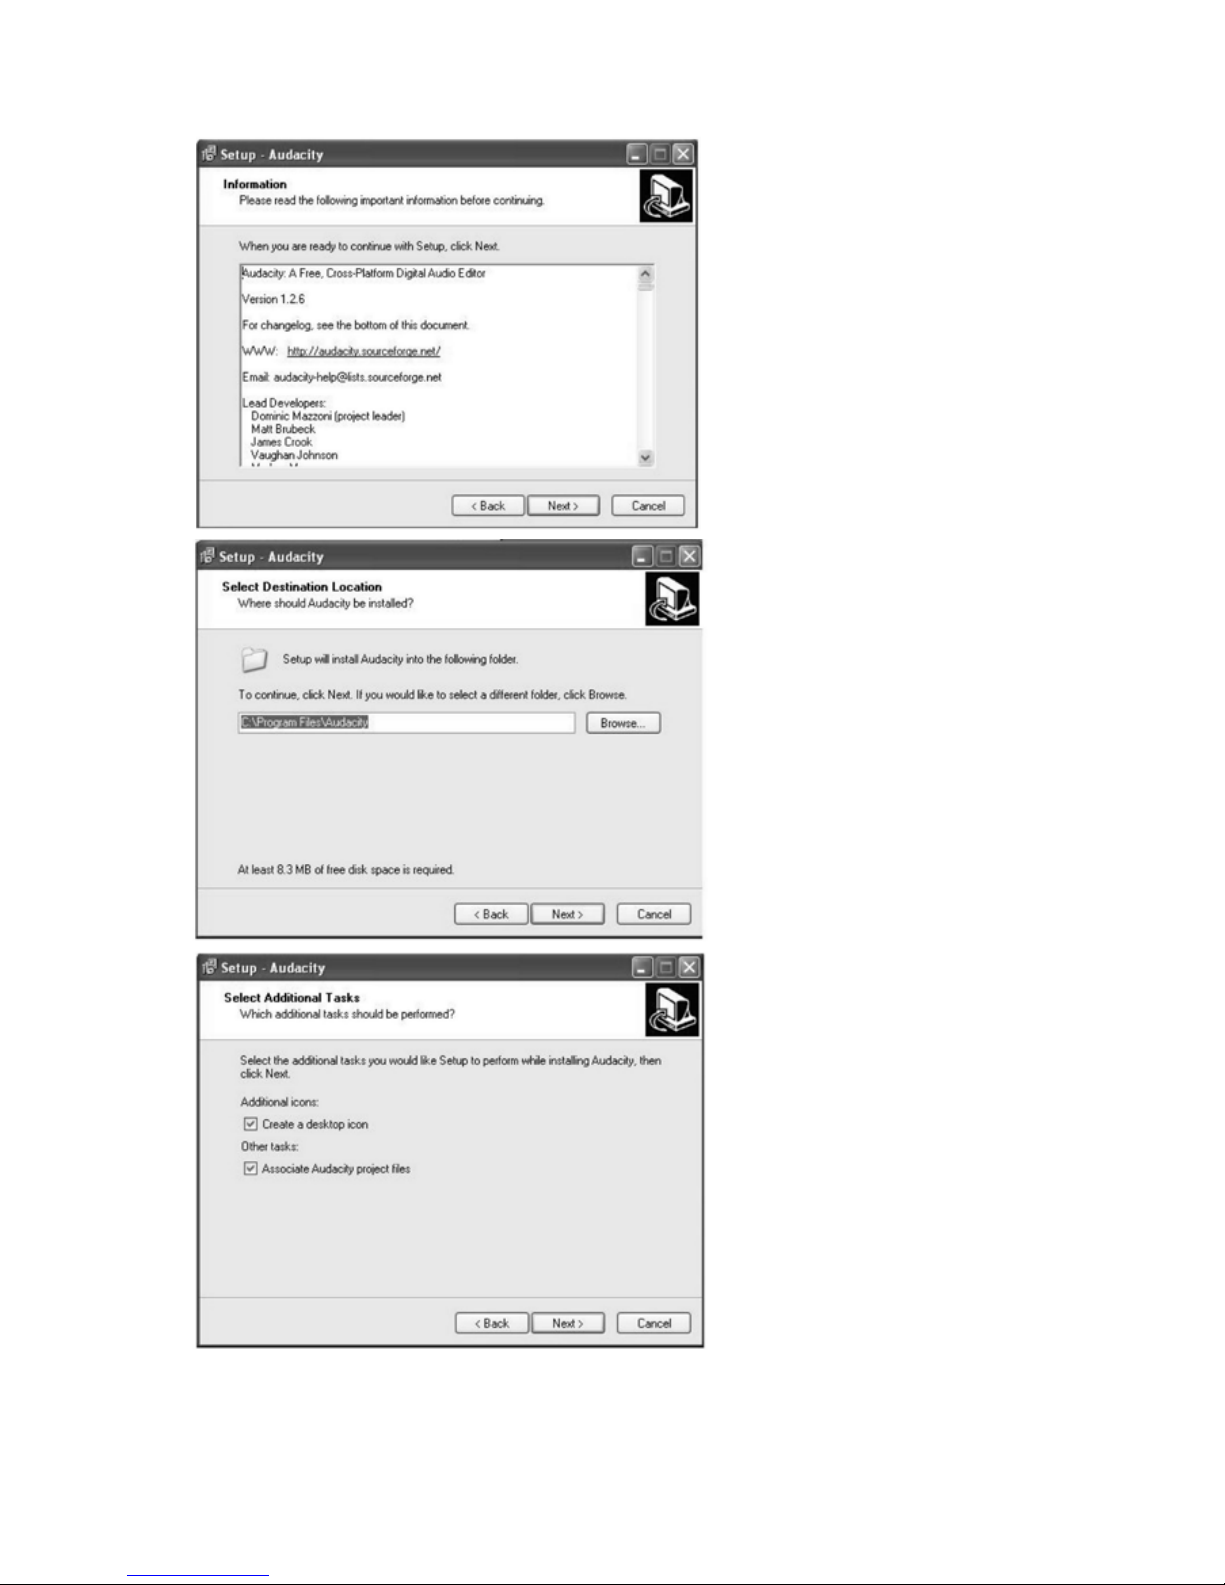
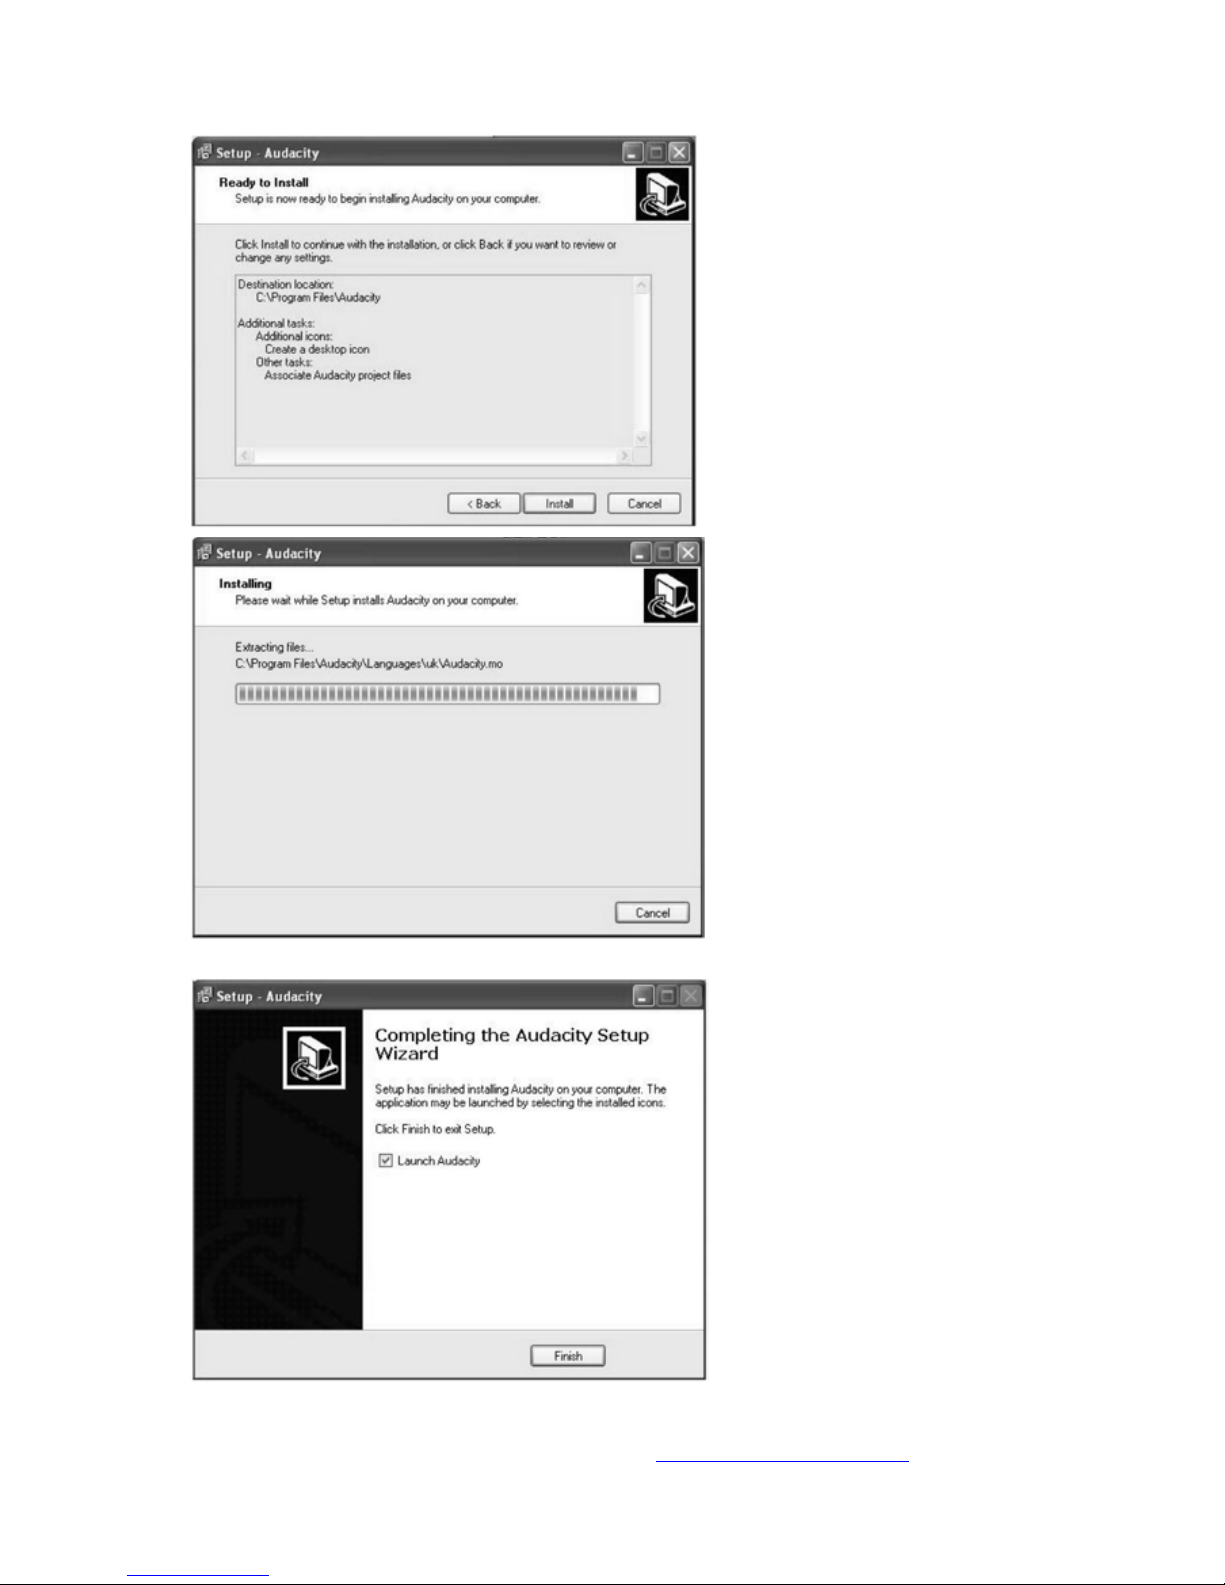
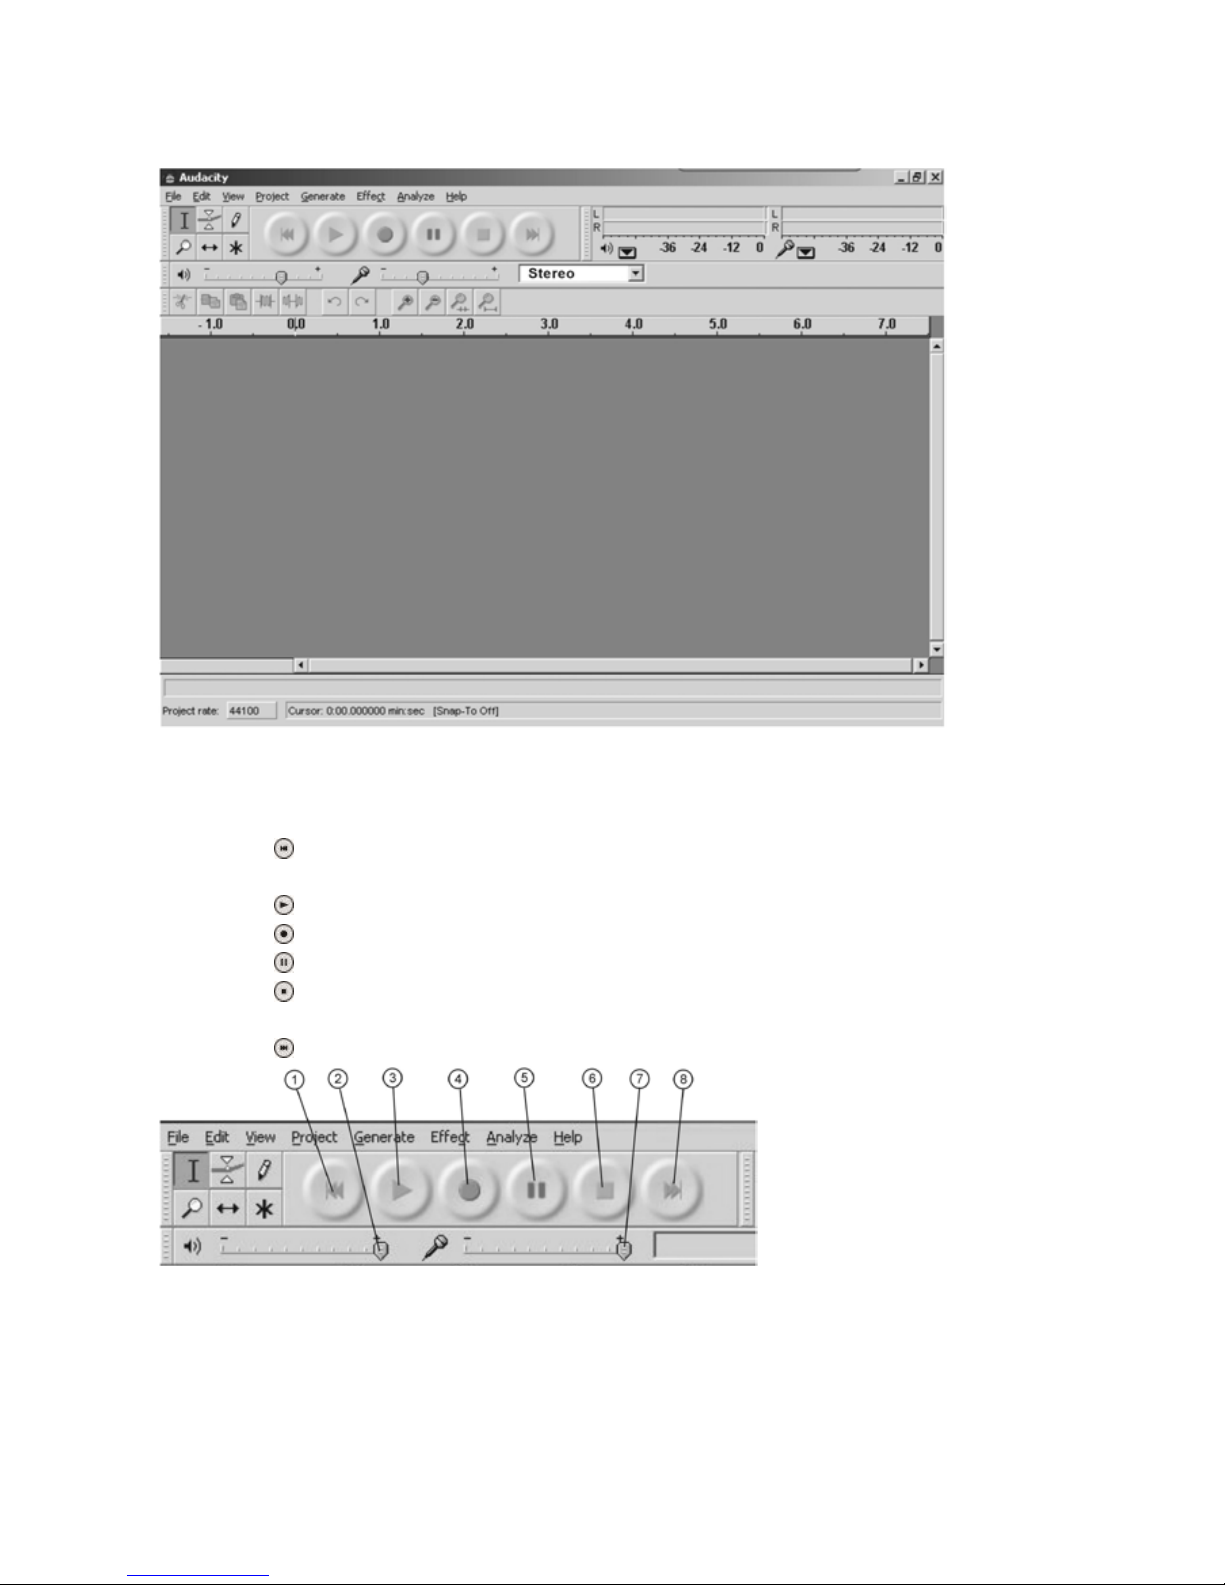
PART II: Audacity Software
The provided CD contains the following software:
(1) audacity-src-1.2.6----------For source codes
(2) Audacity_for_MAC---------For Macintosh
(3) Audacity_for_WIN----------For Windows
(4) AUTORUN.INF
(5) The GNU General Public License.html
The software is compatible with Windows®98, 2000, ME, XP, Vista, 7 and Macintosh®.

4
Audacity Installation and USB Connection
Connect one end of USB cable to the turntable and the other end to your computer. Then plug in the
turntable AC power cord.
Audacity for Windows®
1. Please insert the Audacity software disk that comes with your unit. Go to My Computer and double click
on the CD ROM Drive.
2. There are five folders on the Audacity disk. Select Audacity_for_WIN for Windows®system and then
select Audacity_for_MAC for Macintosh®system.
3. Double click on the Audacity_for_WIN for Windows®system and then double click on the audacity-win-
1.2.6 to install the Audacity software.

5
Installing the Audacity Software
1. The Audacity Setup Wizard will appear. Click on Next to install the software.
2. Click on “I accept the agreement” and then click on Next.

6
3. Continue clicking on the Next buttons.

7
4. Click on the Install button to start installation.
5. Click on Finish to complete installation.
6. You can now open the Audacity software and start recording your files. NOTE: Once you set up Audacity,
you do not need to reset it with each use.
(For additional information, visit the Audacity website at http://audacity.sourceforge.net)

8
Conguring Audacity for Microsoft Windows®
Audacity Interface
Audacity Control Buttons
Use the audio control buttons at the top of the screen:Skip to Start, Play, Record, Pause, Stop and Skip to
End. Use the File, Edit, View, Project, Generate, Effect and Analyze menus to Save, Export, and edit the
music.
1. Click the ( ) button to skip to start;
2. Adjust the output volume;
3. Click the ( ) button to play;
4. Click the ( ) button to record;
5. Click the ( ) button to pause the recording;
6. Click the ( ) button to stop the recording;
7. Adjust the input volume;
8. Click the ( ) button to skip to end;

9
Audacity Preferences
1. Click “Edit” on the Audacity interface, select “Preferences”.
• ThescreenwillopenupAudacityPreferences.YoucanseetheAudioI/O,Quality,FileFormats,
Spectrograms, Directories, Interface, Keyboard and Mouse in the Audacity Preferences interface.
2. Select the recording device: microphone (USB Audio CODEC)
• Click“AudioI/O”ontheAudacityPreferencesinterface.
• Click“Device”andselect“microphone(USBAudioCODEC)”.
• Click“Channels”andselect2(Stereo).
• Tickthecheckboxesbelow“Channels”.
• Click“OK”.
Note: If you cannot find the “microphone (USB Audio CODEC)” on the Device list, close Audacity and
re-open to try again.

10
3. Adjust the output and input volume.
NOTE: Because of the variation between different operating systems, the input volume control may not
work with some versions of Windows®. Windows®Vista is recommended to ensure the input
volume control works properly.
For more information on setup, please see ‘Setting up Audacity’ on the website below:
http://wiki.audacityteam.org/index.php?title=Transferring_tapes_and_records_to_computer_or_CD
And for any query on the ‘Mixer Toolbar’ please see
http://wiki.audacityteam.org/index.php?title=Mixer_Toolbar_Issues

11
Recording Operation
To download music and save to your computer:
1. Place the record on the turntable.
2. Move the tonearm over to the record to start playing.
3. Click the Record ( ) button to start recording.
The waves (left and right tracks) will show on the interface.
4. At the end of a song, click “Stop” ( ) in Audacity, then lift and move the tonearm to the tonearm rest.
Move the cursor to the wave area and left click at the end of the song.
For the next song, replace the record or move tonearm to another desired song. Immediately press the
“Record” ( ) button in Audacity and recording will continue and another set of R/L tracks will appear on
the interface.
5. Repeat steps 3 and 4 until you have finished recording.

12
General Problem for all Versions of Windows®
1. When the turntable is connected, you cannot hear any sound when you want to listen to video or music.
This is because the default playback device has been changed to USB Audio CODEC after the turntable
is connected to the PC.
Solution 1:
Remove the USB cable from the PC.
Solution 2:
Vista and Windows 7:
Click “Start” and go to the Control Panel. Find and click the “Sound” icon. Click the “Playback” tab and
change the playback device. Click “OK”.
(Vista and Windows 7) (Other versions)
Other versions (e.g.: Windows XP):
• Youcanclick“Start”andfind“Programs”,“Accessories”,“Entertainment.Thenclick“Sound
Recorder”. When in the Sound Recorder, click the “Edit” tab and select “Audio Properties”.
• Or,findandclickon“ControlPanel”.Findandselect“Soundandaudiodevice”andchoosethe“Audio”
tab.
In Sound playback, change the default device by clicking on the drop-down arrow. Select your playback
device and click “OK”.
Sound is emitted.
! Please note that you need to change the settings manually every time you connect the USB cable to
the PC.
For more information on resetting the Windows®system sound, please go to
http://wiki.audacityteam.org/index.php?title=USB_turntables#Set_up_Audacity_to_record_from_the_
turntable

13
2. If you want to hear the music while recording, follow the steps below:
Go to the Audacity interface.
Click Edit and select “Preferences”. Then click “Audio I/O” tab
and select the following setting. Click “OK” to confirm.
Deselect the checkbox to disable its function.
For more information please see ‘Set up Audacity to record from the turntable’ at the website below:
http://wiki.audacityteam.org/index.php?title=USB_turntables#Set_up_Audacity_to_record_from_the_
turntable

14
Adjustment for Windows®7 and Vista only
IfyoudonothavetheuctuantwaveontheAudacityinterfaceorthesoundisdistortedwhenrecording,
adjust the recording level as described below:
• Click“Start”inthelowerleftcorner,gototheControlPanel.
• InClassicView,doubleclicktheSoundicon.

15
• OrintheControlPanelHomeview,click“HardwareandSound”.Thenclick“Sound”.

16
• IntheSoundinterface,selectthe“Recording”tab.
• Then,choosearecordingdevice.HerewerecommendyouselectMicrophoneUSBAudioCODEC
which is highlighted in the picture and click “Properties”.
• Select“Levels”andadjusttheVolumeSetting.Thesettingrangeisfrom0to100.Normallyitshould
be between 30 and 80. However, you may refer to the Input Level Indicator from the Audacity panel
that does not exceed 0. Then click “OK” on the Microphone Properties interface and sound interface.
Close the Control Panel. (Please note that there is no “Levels” tab in the “Sound” panel on certain
operating systems, such as Windows®98 and Windows®2000. For Windows®7 users and Vista
users, the “Levels” tab is available in the “Sound” panel).

17
For more information on Windows®Vista
http://wiki.audacityteam.org/wiki/Windows_Vista_OS
For more information on Windows®7
http://wiki.audacityteam.org/wiki/Windows_7_OS
• Youhaveamusicrecordingonyourcomputernowbutthemusicneedstobesavedandconverted
to WAV, Ogg or MP3 format before exporting.
• Youmayplaybackthesongthroughyourcomputer.
• Simplyclick( ) to play and turn on your computer speakers
NOTE: You can visit the Audacity website at http://audacity.source forge.net.
for more detailed information and operation instructions, etc.
Preparing to Export and Save to MP3 Format
Prepare for MP3 Export--- (Additional software “lame_enc.dll” needs to be installed).
1. Please make sure that the Audacity disk is still inserted in your computer.
2. Click the “Edit” tab on the Audacity interface and select “Preferences”.

18
3. Select the “File Formats” tab and click on the “Find Library” button.
4. A dialogue box will appear. Click “Yes”.
5. Another box appears to locate “lame_enc.dll”. Select “Yes” and find and select the lame_enc.dll file.

19
6. Click the “OK” Button.
Now the MP3 software set up is complete and you may proceed with exporting to MP3 format.
Dividing Tracks
1. Press the ( ) button to return to the beginning of the first song.
2. Move the cursor to the wave graphic area, left click and hold, then drag from left to right. Release the
mouse when the highlighted area reaches the end of the first song.
3. Click the "File" tab and select "Export Selection as MP3".
4. The window will pop up a dialogue box for you to enter the song title (File name), where you want to save
it (Save in), and the file format (Save as type).

20
5. Click “Save” and the first song will be saved on your computer.
See the interface example below, saved in MP3 format:
Complete box below:
Second song to be divided and saved:
1. Move the cursor to the wave graphic at the beginning of the second song. Left click, hold and drag from
left to right until you reach the end of the second song.
2. Click the “File” tab then select “Export Selection as MP3”.
3. Follow the steps above to the divide songs, one-by-one.
Export and Save as WAV and Ogg Formats (after recording is complete)
Whenthesongisnished,clickthe( ) buttonon Audacity. Then lift and move the tonearm to the tonearm
rest.
1. Highlight the song you want to save, and then click the File tab on the Audacity interface.
2. Select “Export Selection as WAV” or “Export Selection as Ogg”.
Other manuals for HAV-TT20USB
1
Table of contents
Other Konig Turntable manuals