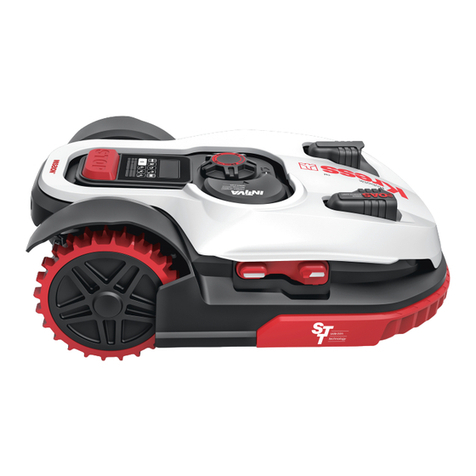
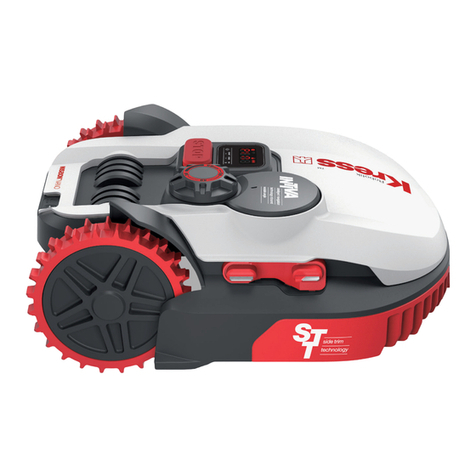
Kress Robotik Mission NANO User manual

Quick Start Guide

Quick Start Guide P03
Schnellstartanleitung P11
Guide de démarrage rapide P19
Guida introduttiva rapida P27
Guía de inicio rápido P35
Snelstartgids P43
Skrócona instrukcja obsługi P51
Příručka rychlého spuštění P59
Príručka rýchleho spustenia P67
Vodič za hitri začetek P75
Guia rápido P83
Gyorsindítási útmutató P91
Kratki vodič P99
Ghid de pornire rapidă P107
KR101E
En
De
Fr
I
Es
Nl
Pl
Cz
Sk
Sl
Pt
Hu
Hr
Ro
En
De
Fr
I
Es
Nl
Pl
Cz
Sk
Sl
Pt
Hu
Hr
Ro
Original instructions
Originalbetriebsanleitung
Notice originale
Istruzioni originali
Manual original
Oorspronkelijke gebruiksaanwijzing
Instrukcja oryginalna
Původní návod k používání
Pôvodný návod na použitie
Izvorna navodila
Manual original
Eredeti használati utasítás
Originalne upute za rad
Instrucţiuni originale

3
En
10 26 cm
inch
10.2
4
0
0
Quick Start Guide Owner's Manual 2+1 years limited warranty
2+1
From your shed
Scissors
Hammer
Mission
TM
NANO Charging base Distance gauge
Owner’s manual
For a video guide on how to connect and use the App, please visit
www.kress-robotik.com or scan the QR-Code.
WARNING: Read all safety warnings and all instructions. Failure to follow the warnings and
instructions may result in electric shock, fire and/or serious injury.
Carefully read the instructions for the safe operation of the machine.
Save all warnings and instructions for future reference.
Hex key
Spare blades
Tape
Base fixing
nails
Quick start guide Warranty
statement
Power adapter
In the box

4
En
Overview

5
En
0cm

6
En
Lay down the boundary wire around the working
area as the illustration shown.
Complete the entire boundary wire setup
4
Installation
2
3
1
Find a flat surface for the charging base, the place
should be dry and out of direct sun light and the
adapter can be mounted on the wall.
Place the charging base
Connect the adapter to the electrical outlet. The
LED on the charging base will turn on in green color.
Manually dock MissionTMNANO into the charging
base while MissionTMNANO is powered off. The
green light on the charging base will be flashing and
MissionTMNANO will begin to charge.
Pull out a length of boundary wire around 80cm
and fasten it to the ground near the charging base.
Later, this end of the boundary wire (IN-wire) will
be connected to the BLACK terminal after pegging
your boundry wire.
NOTE: The extended boundary wire should not exceed
350m or it may cause signal problem.
Charge MissionTMNANO before first operation
Peg the boundary wire
80cm

7
En
After pegging the boundry wire, please take your
MissionTMNANO away from the charging base. Lead
the boundary wire back to the charging base, leave
a length of the boundary wire (OUT-wire) around
80cm and cut it off. Insert both wire ends into the
grooves on the charging base.
Peel off the plastic skin at the end of both wires
(around 1cm), and connect the naked metal wire
end of the IN-wire to the BLACK terminal and the
end of OUT-wire to the RED terminal.
If your lawn has multiple areas connected to each other by a corridor, it should be at least 1 meter wide. If
the corridor is narrower than 1 meter, MissionTMNANO will have difficulty travelling between. In this case, it is
recommended to set up a main area and a secondary area in your lawn. The boundary wire should be placed
as illustrated in the picture. When the secondary area has to be cut, please pick up MissionTMNANO and
bring it to the secondary area. MissionTMNANO will mow without problem, but you have to bring it back to the
charging base when the battery runs out.
90o
90o
INOUT
IN WIREOUT WIRE
Secondary area
<1m
Main area

8
En
Press until MissionTMNANO turns on. For the first
use, input the default PIN code 0000 by pressing
for four times when the number 0 is blinking.
NOTE: When MissionTMNANO turns on, all lights
on the display will be illuminated and then turn
off. Check if there is any light damaged. It is
recommended to shield the display with your hand
when the outdoor light gets too strong.
NOTE: MissionTMNANO will turn off if it does not
receive any input within 30 seconds after it is
turned on. If you enter wrong PIN code three times,
MissionTMNANO will raise the alarm “di-di” and then
turn off.
3
Press then to send MissionTMNANO back to
the charging base. MissionTMNANO will follow the
boundary wire to the charging base.
4
Place your MissionTMNANO a few meters in front of
the charging base.
2
Set the cutting height to the maximum level (60mm).
1
Verification
Before it starts mowing for the first time, make sure MissionTMNANO's working area is clear of objects such as
toys and branches...Before starting your MissionTMNANO for the first time, make sure your grass is no longer
than 10cm. If longer, use a regular mower to cut it before operating MissionTMNANO. If you want to drastically
shorten the height of your grass, it is recommended that you do so progressively, by adjusting the cutting
height in steps.
Only for reference
Press and , MissionTM NANO can be forced
to end work of the day .
5

9
En
First please set the height to a desired grass level after cut and you can do the program setting manually or using
mobile App.
NOTE: When doing the program setting manually, MissionTMNANO will enter the standby page if it does not
receive any input from the user within 30 seconds.
Setting
Fine tune the outline shape of the boundary wire if necessary.
If the verification test is completed smoothly, you can start mowing by pressing then .
If there is any problem during verification test, please refer to “Owner’s manual-Troubleshooting”.
6
1
To change the PIN code, keep pressing both and
buttons at the same time for 5 seconds. The icon
will be blinking, and “ ” will be rolling flashing.
After that, the first number will be blinking, use or
to input the old PIN code and press to confirm. The
next number will be blinking. Use the same method to
complete other numbers. Then,” ” will be rolling
flashing , the first number will be blinking and use or
to select the number you want and press to
confirm. The next number will be blinking. Use the same
method to complete other numbers. For example, the
new PIN code is set to be 0326. After that, “ ” will
be rolling flashing and the first number will be blinking
again. Use the same method to input the new PIN
code you set just now (in this example, ). Then “
” will be rolling flashing on the display. Your
PIN code has been changed successfully.
Set year, date and time are compulsory setting
items. If you don’t set these items, it will influence the
schedule time in the following setting. These items
should be set in the order of year, date and time. For
the year setting, keep pressing for 3 seconds until
the icon and a number are blinking on the display,
for example, . Use or to select the year
you want. Then press to confirm to finish the year
setting.
Change PIN code
2
Set year, date and time
Meanwhile, the icon will be flashing again and
a number will be displayed to indicate the date, for
example, , meaning September 29. When is
flashing, use or to select the number and press
to confirm. Then will be flashing. Use the same
method to select the number and press to confirm to
finish the date setting.
Only for reference
Only for reference
Only for reference

10
En
To download the MissionTMNANO App, scan the QR
code below or download it from Playstore (Google-
Android), AppleStore (Apple-iOS) or our website
www.kress-robotik.com.
App
Only suitable for
iOS 11.0 or higher
Meanwhile, the icon will be flashing and the time will
be displayed, for example, . When is blinking,
use or to to select the number and press to
confirm. Then will be blinking, use the same method
to select the number and press to confirm. Now the
time setting is completed and MissionTMNANO will enter
the standby page.
3
4
Keep pressing for 3 seconds. When the icon
is blinking, press . A number will be blinking
on the display, for example, , which is the
lawn area. The working time will be automatically
set according to the size of your garden. Use
or to set the lawn area (the area will increase /
decrease each time the / is pressed), and
press to confirm. Then MissionTMNANO will enter
the standby page.
The default start time of 9:00 can be changed
to anytime by keep pressing both and
buttons at the same time until a ding sound is
heard.
For example, keep pressing both and
buttons at 14:05, and your MissionTMNANO will start
mowing from 14:05.
Set work area
Change default start time
STOP
Only for reference
Standby page
Only for reference
Only for reference

11
De
10 26 cm
inch
10.2
4
0
0
Quick Start Guide Owner's Manual 2+1 years limited warranty
2+1
Aus Ihrem Schuppen
Schere
Hammer
Mission
TM
NANO Ladebasis Begrenzungskabel-
Abstandlehre
Benutzerhandbuch
Eine Videoanleitung bezüglich der Verbindung und Nutzung der
App finden Sie unter www.kress-robotik.com oder scannen Sie
den QR-Code.
WARNUNG: Lesen Sie alle Sicherheitshinweise und Anweisungen. Versäumnisse bei der Einhaltung
der Sicherheitshinweise und Anweisungen können elektrischen Schlag, Brand und/oder schwere
Verletzungen verursachen.
Lesen Sie die Bedienungsanleitung zum sicheren Betrieb des Gerätes aufmerksam durch.
Bewahren Sie alle Sicherheitshinweise und Anweisungen für die Zukunft auf.
Innense-
chskantschlüssel
Ersatzmesser
Bandmaß
Basis-
Haltenägel
Schnellstartanleitung
Garantieerklärung
Netzteil
Im Lieferumfang

12
De
Überblick

13
De
0cm

14
De
Verlegen Sie das Begrenzungskabel wie in der
Abbildung dargestellt um den Arbeitsbereich.
Einrichtung des Begrenzungskabels abschließen
4
Installation
2
3
1
Suchen Sie einen flachen Untergrund für die
Ladestation, die Stelle sollte trocken sein und nicht
dem direkten Sonnenlicht ausgesetzt sein. Das
Netzteil kann an der Wand montiert werden.
Ladebasis finden
Verbinden Sie das Netzteil mit einer Steckdose.
Die LED an der Ladestation wird grün aufleuchten.
Docken Sie den MissionTMNANO manuell an die
Ladestation an, während der MissionTMNANO
ausgeschaltet ist. Die grüne LED auf der Ladestation
blinkt. Der MissionTMNANO beginnt mit dem
Ladevorgang.
Ziehen Sie ein etwa 80 cm langes Stück
Begrenzungskabel heraus und befestigen Sie es
am Boden, neben der Ladestation. Später wird
dieses Ende des Begrenzungskabels (IN-Kabel) an
die SCHWARZE Anschlussklemme angeschlossen,
nachdem das Begrenzungskabel fixiert wurde.
HINWEIS: Das erweiterte Begrenzungskabel sollte
350m nicht überschreiten, anderenfalls wird es
Signalprobleme verursachen.
MissionTMNANO vor Erstgebrauch aufladen
Begrenzungskabel anschließen
80cm

15
De
Nachdem Sie das Begrenzungskabel fixiert haben,
entfernen Sie den MissionTMNANO weg von der
Ladestation. Verlegen Sie das Begrenzungskabel
zurück zur Ladestation, lassen Sie eine Länge von
etwa 80 cm des Begrenzungskabels (OUT-Kabel)
überstehen, und schneiden Sie es ab. Legen Sie
beide Kabelenden in die Rillen der Ladestation ein.
Entfernen Sie die Kunststoffhülle an beiden
Kabelenden (etwa 1 cm), und schließen Sie das
freiliegende Ende des Metalldrahts vom IN-Kabel an
die SCHWARZE Anschlussklemme und das Ende
des OUT-Kabels an die ROTE Anschlussklemme an.
Wenn Ihr Rasen in mehrere Bereiche unterteilt ist, die über einen Korridor miteinander verbunden sind, sollte
dieser mindestens 1 Meter breit sein. Wenn der Korridor schmaler als 1 Meter ist, wird der MissionTMNANO
Schwierigkeiten haben, dort zu fahren. In diesem Fall sollten Sie einen Hauptbereich und einen Nebenbereich
Ihres Rasens festlegen. Das Begrenzungskabel muss wie in der Abbildung dargestellt positioniert werden.
Wenn der Nebenbereich gemäht werden muss, transportieren Sie den MissionTMNANO von Hand in
den Nebenbereich. MissionTMNANO wird ohne Schwierigkeiten mähen, aber Sie müssen ihn zurück zur
Ladestation bringen, wenn der Akku leer ist.
90o
90o
EINGANGAUSGANG
Eingehendes
kabel
Ausgehendes
kabel
Nebenbereich
<1m
Hauptbereich

16
De
3
4
Stellen Sie Ihren MissionTMNANO einige Meter vor
der Ladestation auf.
2
Vor dem ersten Einsatz, Achten Sie darauf, dass sich keine Fremdkörper wie Spielzeuge oder Äste im
Arbeitsbereich befinden. Bevor Sie Ihren MissionTMNANO zum ersten Mal starten, vergewissern Sie sich, dass
das Gras nicht länger als 10 cm ist. Falls es länger ist, mähen Sie mit einem normalen Mäher, bevor Sie den
MissionTMNANO in Betrieb nehmen. Wenn Sie die Höhe Ihres Grases drastisch verringern wollen, sollten Sie
das progressiv tun, indem Sie die Schnitthöhe stufenweise anpassen.
Stellen Sie die Schnitthöhe auf die maximale Stufe
ein (60 mm).
1
Verifizierung
Drücken Sie , bis der MissionTMNANO
eingeschaltet ist. Geben Sie bei der ersten
Verwendung den voreingestellten PIN-Code 0000
ein, indem Sie viermal drücken , wenn die Zahl 0
blinkt.
HINWEIS: Wenn MissionTMNANO eingeschaltet wird,
werden alle Lichter der Anzeige angemacht und
dann ausgemacht. Prüfen Sie, ob irgendein Licht
beschädigt ist. Es wird empfohlen,die Anzeige mit
Händen abzuschirmen, wenn die Umgebung zu hell
ist.
HINWEIS: MissionTMNANO wird automatisch
ausgeschaltet, wenn keine Eingabe innerhalb
30 Sekunden nach dem Einschalten empfangen
wird. Wenn Sie dreimal einen falschen PIN-
Code eingeben,wird der Alarm „di-di“ ausgelöst
und MissionTMNANO wird dann automatisch
ausgeschaltet.
Drücken Sie und , um den MissionTMNANO
zurück zur Ladestation zu schicken. Der
MissionTMNANO wird dem Begrenzungskabel bis
zur Ladestation folgen. Nur als Referenz
5
Drücken Sie und , um MissionTMNANO zu
zwingen, die Arbeit des Tages zu beenden.

17
De
Bei Bedarf können Sie die Kontur des Begrenzungskabels anpassen.
Nachdem die Verifizierung reibungslos abgeschlossen wurde, können Sie den Mähvorgang durch Drücken
von und starten.
Wenn es ein Problem bei der Verifizierung gibt, sehen Sie bitte in das "Benutzerhandbuch-Fehlersuche".
6
Einstellung
1
Halten Sie zum Ändern des PIN-Codes 5 Sekunden
lang beide Tasten & gleichzeitig gedrückt. Das
Icon blinkt und „ ” rollt blinkend. Danach
blinkt die erste Zahl. Verwenden Sie oder ,
um den alten PIN-Code einzugeben, und drücken
Sie zur Bestätigung. Die nächste Zahl blinkt und
verwenden Sie dieselbe Methode, um andere Zahlen
zu vervollständigen. Dann rollt „ ” blinkend, die
erste Zahl blinkt und wählen Sie mit oder
die gewünschte Zahl aus und drücken Sie zur
Bestätigung. Die nächste Stelle blinkt. Auf derselben
Weise wählen Sie die anderen Stellen. Der neue PIN-
Code lautet beispielsweise 0326. Danach blinkt „
“ rollend und die erste Stelle blinkt erneut. Auf derselben
Weise geben Sie den neuen PIN-Code ein (von diesem
Beispiel ). Auf der Anzeige blinkt dann „
“. Ihr PIN-Code wird erfolgreich geändert.
Die Einstellung von Jahr, Datum und Uhrzeit ist
obligatorisch. Wenn Sie diese Elemente nicht
einstellen, beeinflusst dies die Zeitplanung in der
folgenden Einstellung. Diese Elemente sollen in der
Reihenfolge von Jahr, Datum und Uhrzeit eingestellt
werden. Halten Sie für die Jahreseinstellung 3
Sekunden lang gedrückt, bis das Symbol und eine
Zahl auf der Anzeige blinken, z. B. . Verwenden
oder wählen Sie das gewünschtes Jahr.
Drücken Sie anschließend, um die Jahreseinstellung
zu bestätigen und beenden.
PIN-Code ändern
2
Stellen Sie Jahr, Datum und Uhrzeit ein
Gleichzeitig blinkt das Symbol erneut und das Datum
wird angezeigt, z. B. , d.h.29. September. Wenn
blinkt, verwenden oder wählen Sie die Ziffer und
drücken Sie zur Bestätigung. Dann blinkt die Ziffer .
Auf derselben Weise wählen Sie die Ziffer und drücken
zur Bestätigung der Einstellung vom Datum.
Stellen Sie zunächst die Höhe nach dem Schnitt auf eine gewünschte Grashöhe ein und Sie können die
Programmeinstellung manuell oder mit der mobilen App vornehmen.
HINWEIS: MissionTMNANO ruft die Standby-Seite auf, wenn das Programm manuell eingestellt und keine
Eingabe vom Benutzer innerhalb 30 Sekunden vorgenommen wird.
Nur als
Referenz
Nur als Referenz
Nur als Referenz

18
De
Um die MissionTMNANO App herunterzuladen,
verwenden Sie Ihr Mobiltelefon, um den
untenstehenden QR Code zu scannen, oder
downloaden Sie diese vom Playstore (Google-
Android), AppleStore (Apple- iOS) oder von unserer
Website www.kress-robotik.com.
App
Nur für iOS 11.0
oder höher geeignet
Gleichzeitig blinkt das Symbol und die Uhrzeit wird
angezeigt, zum Beispiel . Wenn blinkt, verwenden
oder wählen Sie die Ziffer und drücken Sie zur
Bestätigung. Wenn blinkt, verwenden oder wählen Sie
die Ziffer und drücken Sie zur Bestätigung. Damit ist
die Zeiteinstellung abgeschlossen und
MissionTMNANO
öffnet die Standby-Seite.
3
4
Drücken Sie 3 Sekunden lang. Wenn das
Symbol blinkt, drücken Sie . Auf der Anzeige
blinkt eine Ziffer, z. B. , also der Rasenbereich.
Die Arbeitszeit wird automatisch an die Größe Ihres
Gartens angepasst. Verwenden oder stellen
Sie den Rasenbereich ein (der Bereich wird sich
bei jedem Drücken vergrößert / verkleinert)
und drücken Sie zur Bestätigung. Dann wird
MissionTMNANO die Standby-Seite aufrufen.
Die voreingestellten Startzeit von 9:00 Uhr kann
jederzeit geändert werden, indem Sie beide Tasten
& gleichzeitig gedrückt halten, bis ein Ding-
Ton zu hören ist.
Drücken Sie beispielsweise beide Tasten &
um 14:05 Uhr, und Ihr MissionTMNANO beginnt um
14:05 Uhr zu mähen.
Stellen Sie den Arbeitsbereich ein
Änderung der voreingestellten Startzeit
STOP
Nur als Referenz
Standby
Nur als Referenz
Nur als Referenz

19
Fr
10 26 cm
inch
10.2
4
0
0
Quick Start Guide Owner's Manual 2+1 years limited warranty
2+1
De votre garage
Ciseaux
Marteau
Mission
TM
NANO Socle de recharge Jauge de distance
du fil-barrière
Mode d’emploi
Pour une vidéo guide sur la façon de se connecter et d'utiliser l'application,
veuillez vous rendre sur www.kress-robotik.com ou scannez le code QR.
ATTENTION : Lisez toutes les mises en garde et toutes les instructions. Le non-respect des mises en
garde et des instructions peut être à l'origine d'électrocutions, d'incendies et/ou de blessures graves.
Lisez attentivement le manuel d’utilisation afin d'utiliser l’appareil d’une manière sécurisée.
Gardez le mode d'emploi et les mises en garde pour pouvoir vous y référer ultérieurement.
Clé
hexagonale
Lames de
rechange
Mètreruban
Chevilles de
rétention de la
base
Guide de
démarrage rapide Conditions de
garantie
Adaptateur
d'alimentation
Contenu

20
Fr
Aperçu
Other manuals for Mission NANO
1
This manual suits for next models
1
Table of contents
Languages:
Other Kress Robotik Lawn Mower manuals
Popular Lawn Mower manuals by other brands

HUSTLER
HUSTLER The Hustler Sport 17.5/42 Brochure & specs

Poulan Pro
Poulan Pro 177545 owner's manual

Troy-Bilt
Troy-Bilt 12AE449 Series Fast start guide

Elem Garden Technic
Elem Garden Technic WTTAC46T-CC139-CMES Original instructions

Snapper
Snapper 331414KVE Safety instructions & operator's manual

Craftsman
Craftsman 944.360030 owner's manual