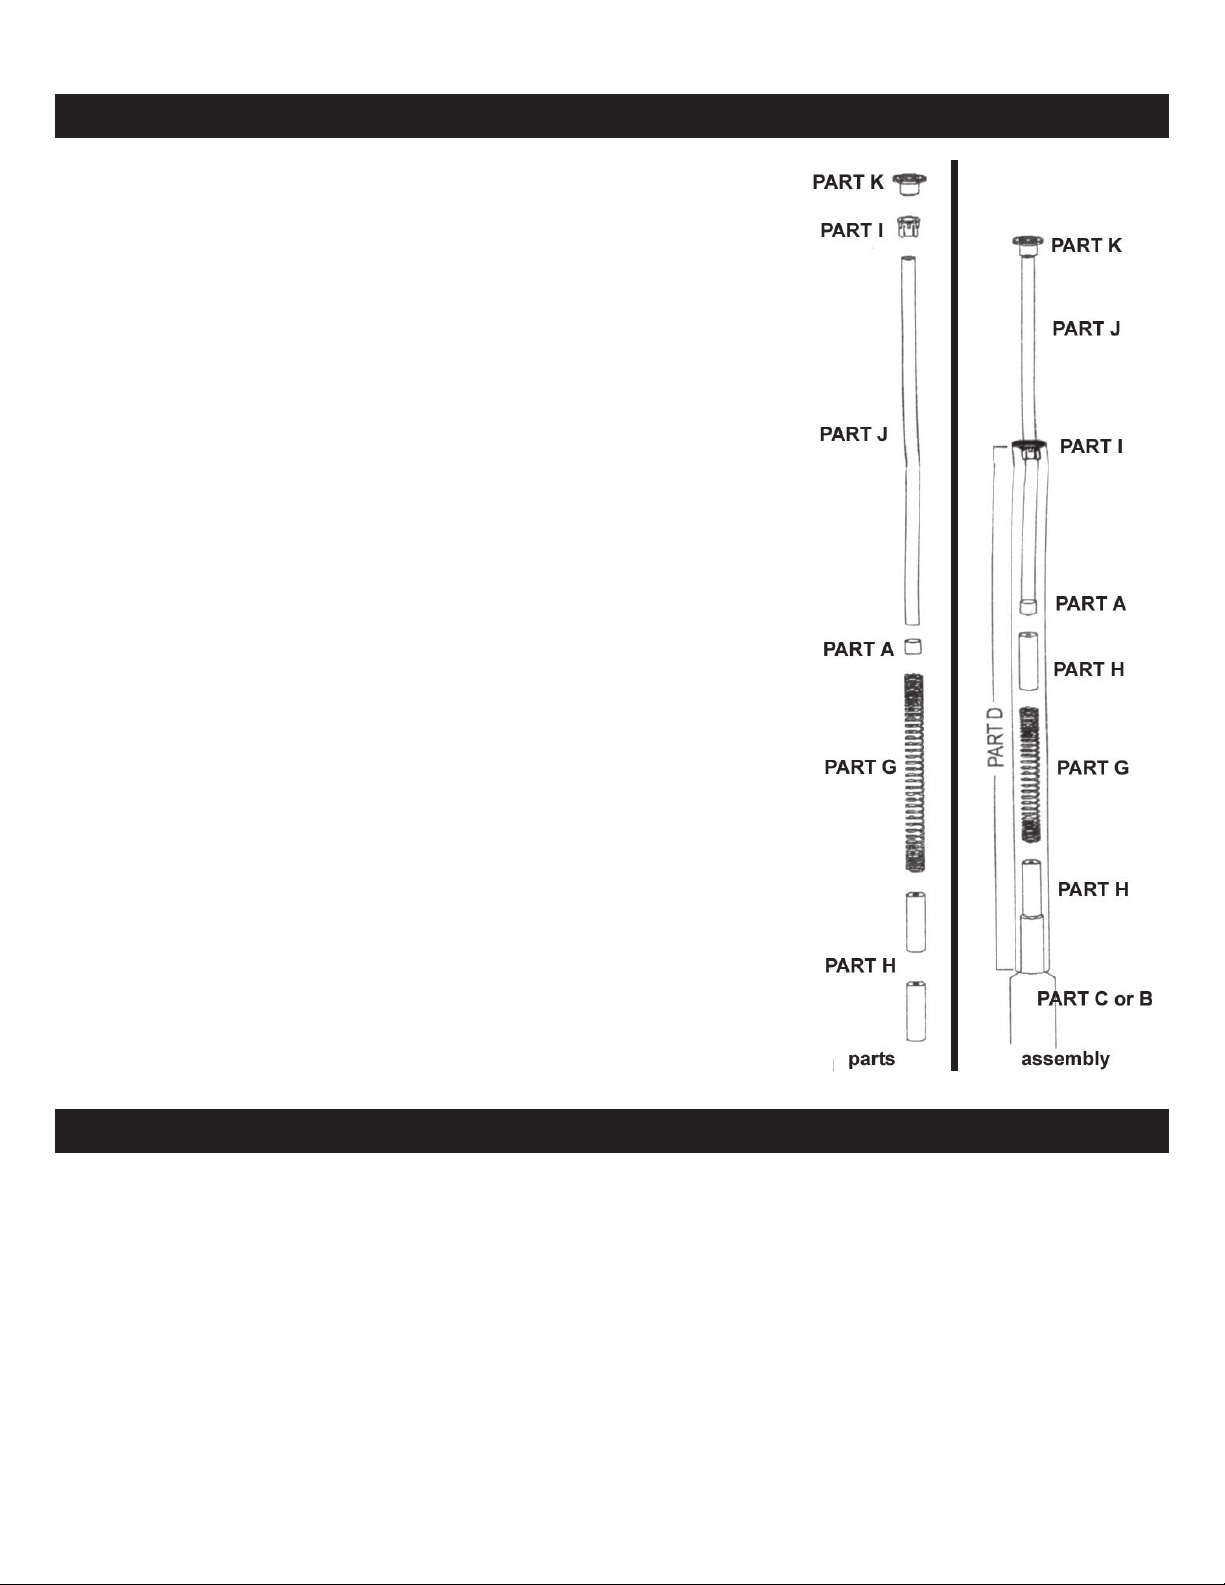
A. Slide part I (the black plastic collar) over part J (the
metal tension rod.)
Ax black plastic cap and foot parts K and A to the top
and bottom of part J (the tension rod.)
You should now have 3 plastic parts axed to part J (the
tension rod.) Part I (the black plastic collar) should be able
to move easily up and down the rod.
B. Part H consists of 2 black plastic tubes that are hollow at
1 end.
Insert one part H (the black plastic tube) with the hollow
end facing down inside of part D on the pole assembly.
Then insert part G the spring into part D on top of already
inserted part H.
Finish by inserting the second part H (the black plastic
tube) into part D. (On top of the already inserted part G the
spring).
Make certain it is inserted with the hollow end facing down
as well.
C. Now insert the assembled part J (the tension rod with 3
black plastic parts axed to it) into part D on the pole
assembly.
Slide part I the black plastic collar into the top of part D
pushing the collar securely into place.
The tension rod should now be projecting out of the top of
the assembly approximately 14” / 35.5 cm
STEP 5 - TENSION ROD ASSEMBLY
To install the assembled shower tower place the top of the tension rod against the ceiling.
While keeping tension on the spring by pushing upwards slide the bottom of the assembled
unit into place so the tower is vertical and secure.
Note: If the area you are installing the tower into is such a dimension that you cannot
achieve the correct height by discarding parts B and or C of the pole assembly the unit can
be custom fit. This can be achieved by cutting one of the poles at the bottom on one of
the grooved pole lines with a hacksaw.
Important: This should only be done once all pole combinations have been tested.
Once the item is cut the goods cannot be returned to the retailer.
STEP 6 - INSTALLATION