manuals.online logo
Brands
  1. Home
  2. •
  3. Brands
  4. •
  5. Kwiksemble
  6. •
  7. Indoor Furnishing
  8. •
  9. Kwiksemble Vanity 257431 User manual

Kwiksemble Vanity 257431 User manual

INSTALLATION GUIDE
Kwiksemble Vanity
INSTALLATION
https://www.youtube.com/watch?v=USMQKJRZQxw
2. Gently lay the cabinet down on its back.
Tip - Help protect the cabinet by placing a
towel down over hard surfaces.
3. Install the baseboard shelf and middle shelf.
Tip - slide each shelf into position evenly, align
the interlocking black brackets and press into
position.
12
4. Install the kickboard. Tip - Align the brackets
on both sides and press firmly into position.
Point your smartphone camera at the
QR code below to watch the
step-by-step assembly video!
Or search Kwiksemble on Youtube
1. Unfold the main cabinet untill all hinges click
into place. Tip - Open each side in small
increments at a time to evenly open the
cabinet.
PARTS
1x pre-assembled
foldable cabinet
1x pre-assembled
base board
1x pre-assembled
shelf
1xkickboard2x pre-assembled
doors
IMPORTANT!
• Thoroughly inspect all parts and components for damage or defects. Warranty claims for damage or defects will not be accepted after
installation.
• Read through these instructions carefully and retain for future reference.
• It is recommended that this vanity unit is installed by a licensed trades person.
• All plumbing must be installed by a licensed plumber.
• Under no circumstances should vanities and/or basins be tiled into the wall.
• This product must not be installed in an area where it may be exposed to splashing water from a bath or shower.
34
INS KWK FC V1
22/10/20
CAUTION!
• This vanity cabinet is NOT designed to carry the weight of child or an adult. To avoid injury and damage to the vanity cabinet, never sit on, stand
on, or hang off the installed wall hung cabinet.
CARE AND MAINTENANCE
• Wipe down the vanity using warm soapy water on a damp cloth.
• Do not use harsh detergents, corrosive chemicals, or abrasive cleaners.
• When cleaning the cabinet, make sure all moisture from the damp cloth has been removed with a dry cloth.
• The cabinet is water resistant not waterproof. Make sure that the bathroom is well ventilated to prevent moisture
build up. Do not allow water to sit on vanity for a long time, ensure that the water is removed as soon as possible to prevent swelling.
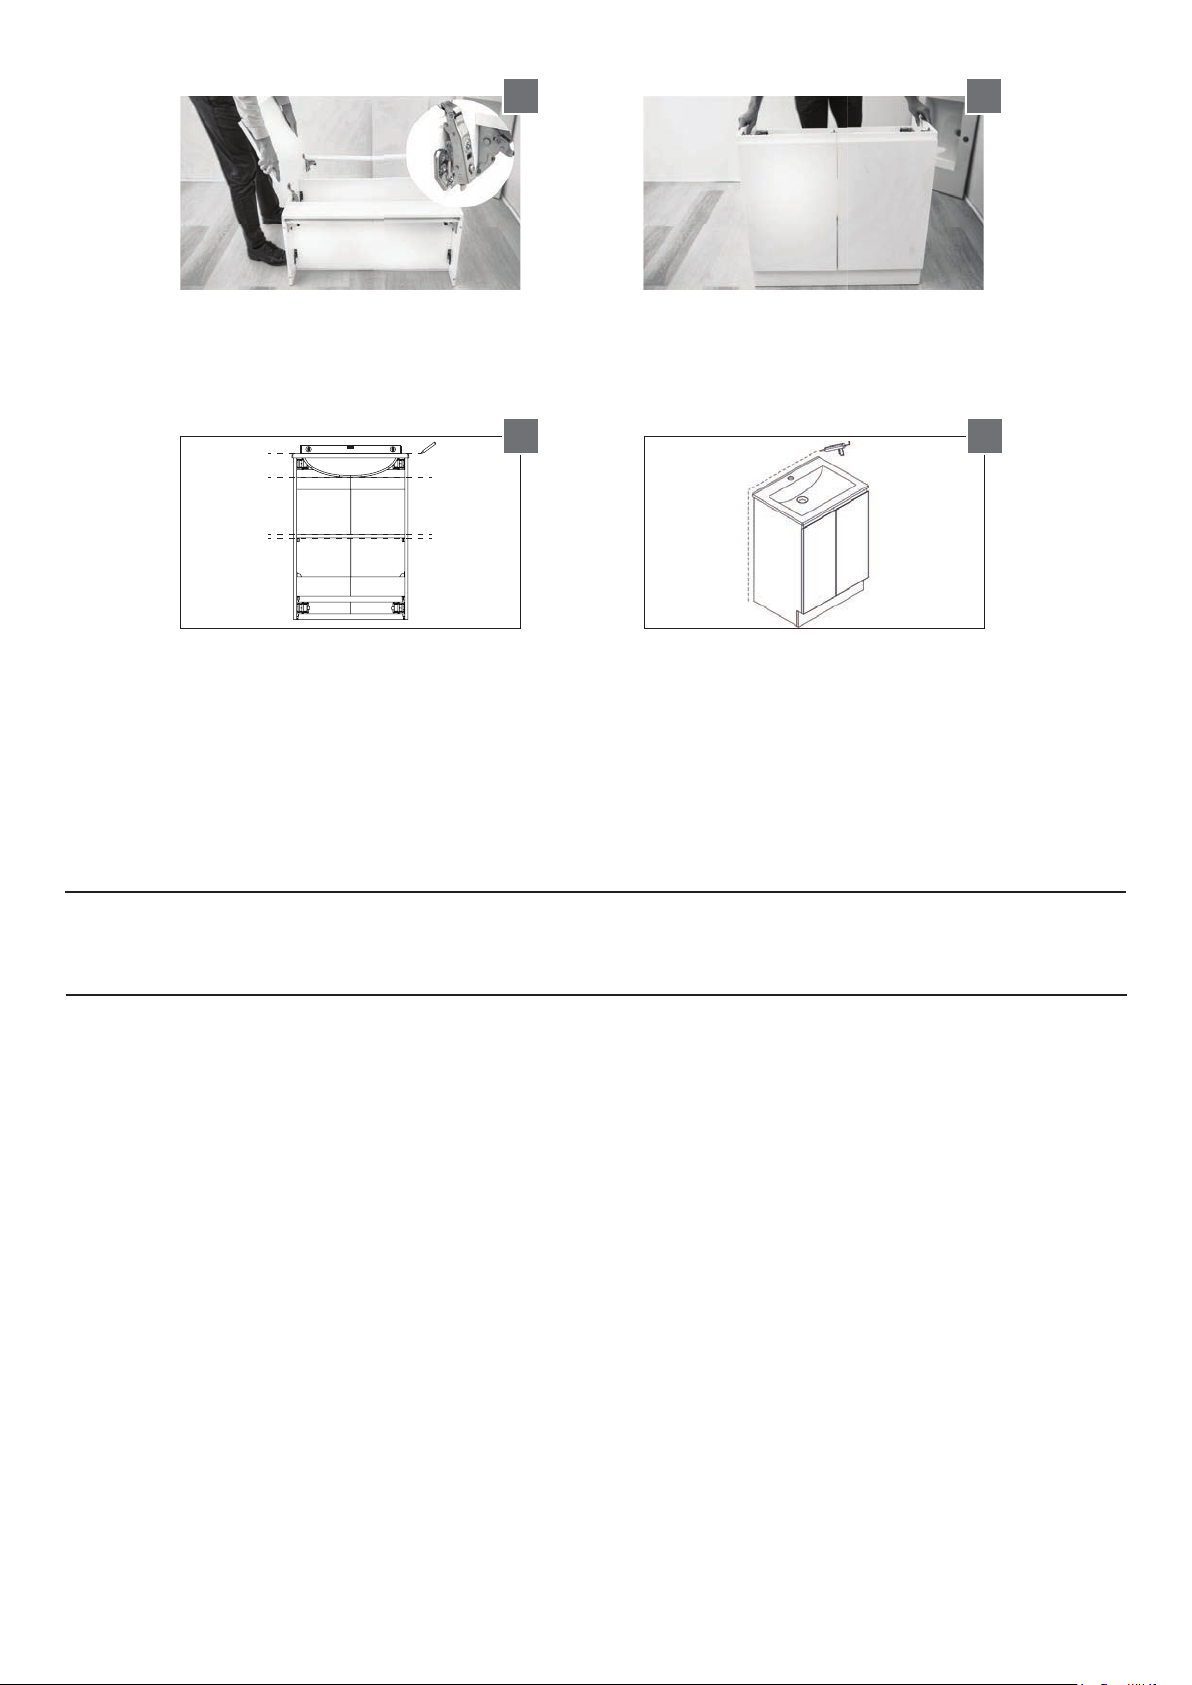
5. Install the doors. Tip - Align the small hooks
on the door hinge into position & then lift the
tab on the end of the door bracket and press
into position.
6. Stand the cabinet up and check the doors
for alignment. Tip - Small adjustments can be
made to align the doors by turning the 2
screws in the middle of each hinge.
5 6
7
7. Position cabinet in desired location ensuring
the cabinet does not fouI with existing
plumbing. If you have a floor waste pipe, you
will need to mark out the location on the base
board and shelf of the cabinet and using a
hole saw, drill a hole to suit the size of the
plumbing in the marked-out location.
8. Once the vanity top (available separatly) is
installed, we recommend applying anti-fungal
wet area silicone to seal the back and sides at
the wall junction to ensure water cannot get
behind the vanity and cause damage. Allow
recommended drying time (refer to sealant
instructions) before first use.
8

This manual suits for next models

2

Popular Indoor Furnishing manuals by other brands

System Build 7532396COM manual

System Build

System Build 7532396COM manual

Southern Enterprises Lozano HO0164A0TX Assembly instructions

Southern Enterprises

Southern Enterprises Lozano HO0164A0TX Assembly instructions

Whittier Wood 3816DUET Assembly instructions

Whittier Wood

Whittier Wood 3816DUET Assembly instructions

Alvin Comfort Economy CH277 Assembly instructions

Alvin

Alvin Comfort Economy CH277 Assembly instructions

HARTO Ambroise instructions

HARTO

HARTO Ambroise instructions

Rauch 29056.4520 Assembly instructions

Rauch

Rauch 29056.4520 Assembly instructions

Canvas 088-2296-6 Assembly instructions

Canvas

Canvas 088-2296-6 Assembly instructions

Addspace 01709 534123 Assembly instructions

Addspace

Addspace 01709 534123 Assembly instructions

Forgeon BATTLEGROUND manual

Forgeon

Forgeon BATTLEGROUND manual

Seville Classics UltraDurable SHE24601 manual

Seville Classics

Seville Classics UltraDurable SHE24601 manual

Monarch Specialties I 1344 Assembly instructions

Monarch Specialties

Monarch Specialties I 1344 Assembly instructions

Kohler Englefield 1141301 installation instructions

Kohler

Kohler Englefield 1141301 installation instructions

Next STANTON A49406 Assembly instructions

Next

Next STANTON A49406 Assembly instructions

Homelegance 1556W Series Assembly instruction

Homelegance

Homelegance 1556W Series Assembly instruction

Graco Kendall 03545-21 SL Series manual

Graco

Graco Kendall 03545-21 SL Series manual

Sealey GSC110385SP instructions

Sealey

Sealey GSC110385SP instructions

Forte HYTB011L Assembling Instruction

Forte

Forte HYTB011L Assembling Instruction

CB2 CENTRAL Assembly instructions

CB2

CB2 CENTRAL Assembly instructions

manuals.online logo
manuals.online logoBrands
  • About & Mission
  • Contact us
  • Privacy Policy
  • Terms and Conditions

Copyright 2025 Manuals.Online. All Rights Reserved.