Technical changes reserved. Store for later use!
Further information
NOTICE: Make sure you always work with
the latest documentation. Please visit:
www.luetze.com
Enter the article name or article
number in the search.
Here you will also find further technical
informations and documentations on these
products as well as further articles in the
Lütze online catalogue.
United Kingdom
LÜTZE Ltd.
Unit 3 Samdy Hill Park,
Sandy Way, Amington
Tamworth, Staffs, B77 4DU
Tel.: +44 1827 313330
Germany
Friedrich Lütze GmbH
Postfach 1224 (PLZ 71366)
Bruckwiesenstrasse 17-19
D-71384 Weinstadt
Tel.: +49 7151 6053-0
www.luetze.com
Spain
LUTZE, S.L.
Friedrich Lütze GmbH ■ Bruckwiesenstr. 17–19 ■ D-71384 Weinstadt ■ GERMANY ■ www.luetze.com
2/2
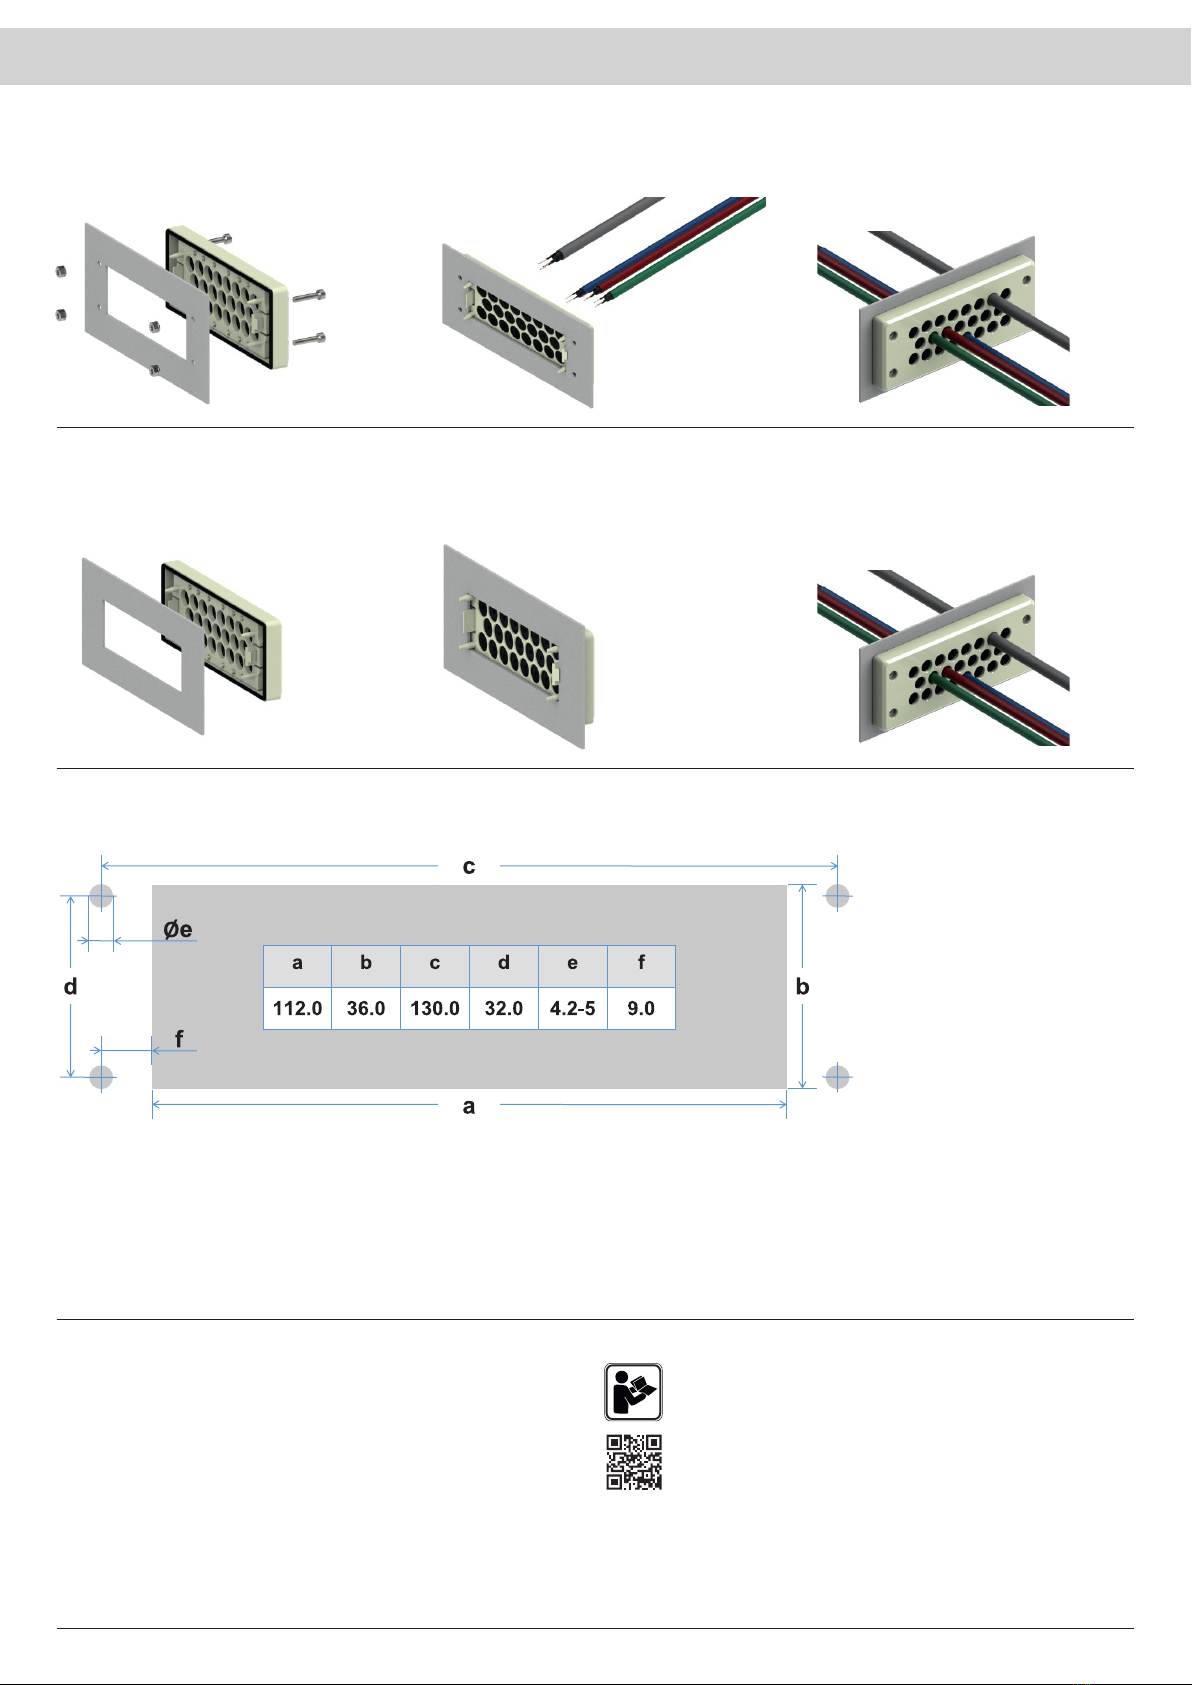
Mounting Instruction
1:1 Mounting Template (mm)
Contact
North America
LUTZE Inc.
Austria
LÜTZE Elektrotechnische
Erzeugnisse Ges.m.b.H.
Switzerland
LÜTZE AG
France
LUTZE SAS
2. Installation using Snap-In Version
1. Installation with Mounting Bolts
1.1 Secure frame to enclosure as shown using
provided mounting hardware. Tighten bolts
to 1.0 Nm.
1.2 Ensure that the cable outer diameters are
within the specified clamping range for your
®
Cablefix X model.
1.3 From the front, push cables through the
frame until the desired length is met. Pull
lightly back on the cable to engage the seal.
All unused entry points are sealed by default.
2.1 When using snap-in version, the frame can
be secured to 1.5 mm enclosure walls with
integrated clips.
2.2 Press frame firmly against the enclosure
surface until it snaps into place.
2.3 From the front, push cables through the
frame until the desired length is met. Pull
lightly back on the cable to engage the seal.
All unused entry points are sealed by default.


