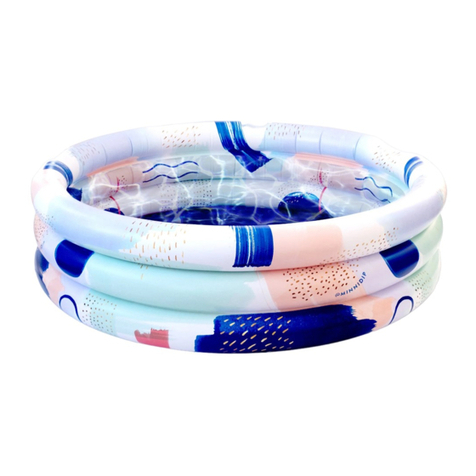
La Vaca Minnidip User manual

PREVENT YOUNG CHILDREN FROM DROWNING
• Drowning can occur in as little as 2 inches of water and it
occurs silently and very quickly. Always designate an adult
to be accountable for watching children who are in or near
the pool. This adult is the assigned Water Watcher and should
always be wearing the provided Water Watcher tag. Download
and print additional Water Watcher tags at <minnidip.com>.
• The Water Watcher must keep children in direct line of sight,
stay close, and constantly supervise when they are in or near
pool, even during filling and draining of the pool as it still
poses a risk of drowning. Do not remove any safety barriers
until the pool is completely empty and stowed away.
• If designated Water Watcher steps away from pool area,
a new adult must be designated to take over the duties.
• Always completely empty and store pool before discontinuing
constant supervision of children and before removing any
safety barriers.
• Always keep unsupervised children from accessing the pool.
Install fencing or other approved barriers around all sides of
pool. State or local laws and/or codes may require fencing or
other approved barriers around pool. Research local regulations
before setting up pool. Please refer to CPSC Pub. No. 362.
“Safety Barrier Guidelines for Residential Pools” for a list of
barrier recommendations and guidelines at <www.poolsafely.gov>.
• When searching for a missing child, always check the pool
first even if you believe the child or pet is in the house.
• When pool is not in use, remove all floats and any toys or
similar items from the pool that might attract a child to
want to enter the pool.
• Position furniture and any similar objects (such as tables,
chairs, floats, etc) away from pool to prevent children
from gaining access to the pool by climbing on them.
• After using pool, remove water to a level of 1⁄2 in. (1 cm) or less.
DIVING RISK
• Do not dive into this pool. Diving into shallow water
can result in a broken neck, paralysis, or death.
ELECTROCUTION RISK
• Keep ALL electrical lines, speakers, radios and similar
electrical appliances far away from the pool at all times.
• Do not place pool under or near electrical lines running
overhead or near electrical outlets.
FIRST AID AND EMERGENCY PREPAREDNESS
• Keep a list of emergency numbers and working phone
near the pool at all times.
• In the event of an emergency, immediate use of CPR can
save a life. In order to respond to an emergency, become
certified in cardiopulmonary resuscitation (CPR) and
keep CPR instructions near pool at all times.
SET-UP SAFETY
• Only set up the pool on ground that is absolutely flat, firm
and level, as well as clear of twigs, rocks or other objects that
may puncture the pool liner or cause injury.
• Never set up the pool on an inclined surface or slope or on
soft or loose soil conditions (such as sand or mud) because it
can cause pool collapse, resulting in property damage
and bodily injury.
• Never set up the pool on an elevated surface such as a deck,
platform or balcony, which may collapse under the weight of
the filled pool.
• Move the boxed product to the selected site before inflating.
Never inflate the product and drag it along the ground which
may result in damage. Prior to inflation, inspect for any rips,
tears or punctures. Do not use a possibly damaged product.
• Pool should only be set up in compliance with local safety
and building codes. Follow inflation instructions listed on
inside of the manual.
GENERAL SAFETY DURING USE
• Keep pool water fresh, clean and hygienic to prevent illness.
• Always use extreme caution when stepping in and out of pool.
• Keep the pool floor visible at all times and water clear of
objections to floor visibility.
• Do not straddle, lean, or apply pressure on the inflatable
wall as flooding or injury could occur.
• Remove all hard, sharp and loose objects before entering
the pool to prevent puncturing the inflatable wall.
• Properly maintain pool to prevent damage beyond normal
wear and deterioration. Deterioration can lead to pool failure
which might cause large quantities of water to release from
the pool, causing property damage or bodily injury.
• Do not modify this product or use accessories not supplied
by manufacturer.
MAINTENANCE & DRAINAGE
• Pool must be drained and disassemble by adults only.
• Water can be easily contaminated. Change the water of
the pool frequently (especially in hot weather) or when
contamination is noticeable.
• Check local regulations for specific directions regarding
disposal of swimming pool water.
1. Dispose of pool water by first using the drain plug
on the floor of the pool.
2. Carefully open both flaps of the air valves on each ring
and the pool will quickly deflate. Once water’s almost emptied,
slowly lift one side of the pool to drain the remaining water.
3. Re-insert all valve caps after drainage to prep for storage.
4. Be sure pool and all parts are completely dry before folding.
Air dry in the sun or wipe with a dry cloth.
5. To fold pool back up for storage, first lay pool flat in circular
form. Fold it, with the air valves located at the point of the
fold, into a half circle. Then fold the half circle lengthwise,
over top itself, into a long strip. Next, starting at the end
opposite of the air valves, fold the strip over in sections until
reaching the end, pushing any remaining air out as it folds
onto itself. Push down on folded pool to release all air.
6. Original package can be used for storage in dry place
at room temperature. Extreme temperatures can result
in temperature shock and can cause the pool to
become defected.
REPAIR PATCH
A repair patch has been included with the product
to repair small leaks and holes.
1. Locate the leak and completely deflate the product.
2. Thoroughly clean and dry the damaged surface and
allow to completely dry for at least 10 minutes.
3. Place patch over leak or hole and apply pressure.
Smooth out any air bubbles.
4. Wait for 20 minutes before re-inflating the pool.
GUIDE TO
GETTING YOUR
@MINNIDIP PARTY
STARTED!
OH HELLO MINNIDIPPER!
LET’S GO MINNIDIPPING!
S
T
E
P
-
B
Y
-
S
T
E
P
A
Designed by Emily Vaca with love in Chicago, IL USA
Made in Fuzhou, China
©2019-2021 La Vaca Co. All rights reserved.
MINNIDIP®is a trademark of La Vaca Co
LA VACA®is a trademark of Emily Vaca
La Vaca Co. P.O. Box 221016 Chicago, IL 60622
MODEL NOs: 7427, 7663
READ AND FOLLOW ALL SAFETY INFORMATION AND INSTRUCTIONS.
KEEP FOR FUTURE REFERENCE. FAILURE TO FOLLOW THESE WARNINGS
AND INSTRUCTIONS CAN RESULT IN SERIOUS INJURY OR DEATH
TO USERS, ESPECIALLY CHILDREN.
THE FIRST DESIGNER INFLATABLE POOL
IMPORTANT SAFETY RULES
MODEL NOs: 7427, 7663
THE MINNI-MAX™MANUAL
of TIPS & WARNINGS
MINNIDIP.COM

Set up time: 15 minutes excluding time to fill with water.
Pool must be set up and assembled by adults only. Refer
to back page for important safety instructions for set-up
preparation and use. Only set up on completely level ground.
MINNIDIP®QUICK SET-UP
WATCH STEP-BY-STEP
VIDEOS: MINNIDIP.COM
1
OPEN BOTH FLAPS OF EACH
OF THE 3 AIR VALVES
The air valves have two ports and a plug. The main port (A)
is completely open, allowing air in and out quickly. The first
flap (B) is a one-way valve that allows air in, but not out.
The second flap (C) is a plug to secure air after fully inflated.
MAX WATER LINE
MINNIDIP TIPS
C
B
A
*PUMP & BLOW DRYER
NOT INCLUDED
D
AIR VALVE
E
NO
GAP
GAP
SECURE ONEWAY VALVES B
Once the open port is plugged with the one-way valve, grip
it between your thumb and index finger and push it securely
until there is absolutely NO GAP between the valves. If you
feel air escaping, make sure the black piece is fully inserted.
Important tip: Valves must be fully plugged as shown with no
gap or can result in an air leak once pool is filled with water—
especially the top ring as the bottom two rings will expand
once water is added and can pull the top ring valve loose if
not properly closed prior to filling with water.
3
INFLATE: ONEWAY VALVE B
USING YOUR MOUTH (recommended)
Use your mouth to blow a few large breaths through this one-
way valve (about 5-6 breaths) to fill it as much as possible to get
the pool taut. This is an easy, and quicker, alternate to using an
air pump attachment as your breath has more force and fills it
quicker. Repeat on the middle ring, then the top.
USING AN AIR PUMP*
Use the same air pump attachment and insert into the black port,
angling the tip of the attachment towards the outer perimeter of
the valve so that the one-way valve flap lifts slightly to allow air
flow in. Repeat on the middle ring, then the top.
Once all rings are mostly filled, you may need to blow a little
more air through each one-way valve for pool to feel firm.
DO NOT OVER INFLATE and leave wrinkles in vinyl prior to
filling with water. Adding water will stretch vinyl and smooth it.
4
PLUG & SECURE VALVES C
Once each ring is inflated fully, plug with second flap (C). Then
firmly push each valve into pool so that it doesn’t get knocked
loose during use. Push firmly in center to fully secure valve.
5
FILL WITH FRESH WATER
First, make sure drain plug is securely plugged on the bottom floor.
Fill with clean water to the max water level, marked by wave icon.
Do not overfill, as too much water can put tension on seams and
may result in pool wall collapse and flooding, causing safety issues
and property damage. Please note: If filled to the max level,
the bottom two rings will expand wider than the top ring
due to water pressure.
6
INFLATE: OPEN PORT A
IMPORTANT: DO NOT OVER INFLATE. Do not attempt
to remove all wrinkles in vinyl. Pool vinyl will stretch and
air inside will expand in the heat. If over-inflated, it will
expand and compromise the seams when filled with water.
USING AN AIR PUMP*
Start inflating with the smallest air pump attachment
(D) by fitting snuggly into the open port. Fill as much as
possible, then quickly plug with the first flap without
letting too much air escape.
USING A BLOW DRYER*
Blow dryer MUST BE COOL TO THE TOUCH.
Start inflating by directing the air flow into the open port.
Do not touch metal of blow dryer to valve or vinyl of pool.
The blow dryer mouth (E) will not fit directly into the open
port, but you can direct air flow towards the opening. Wrap
your hand around the blow dryer and open port to help
direct air flow. Fill as much as possible, then quickly plug
with the first flap without letting too much air escape.
2
ENJOY & SHARE!
Now it’s time to dip in and enjoy!!
And don’t forget to share and tag
your pool party photos:
@MINNIDIP ##MINNIDIP
7
QUESTIONS? EMAIL US: [email protected]
When draining water, GENTLY open drain valve flap, holding vinyl around plug down to avoid tearing vinyl or plug.
When not in use, ALWAYS empty water and store your MINNIDIP®out of direct sunlight and in a shaded location
to prevent fading caused by UV rays. NEVER leave filled with water to prevent drowning hazards and unhealthy water
contamination. Leaving filled with water for extended period of use, especially in extreme heat, can cause vinyl to
over-stretch and strain seams. NEVER add chlorine or any chemicals to the water to avoid vinyl and ink deterioration.
Do not store in below-room-temps (such as non-heated garages in winter) as it will compromise seams and cause leakage.
CARING FOR YOUR MINNIDIP®
This manual suits for next models
2
Other La Vaca Swimming Pool manuals
