laguna Back-Saver Clay Mixer User manual

6/2001
Back-Saver Clay Mixer
5 HP MODEL
by
OWNER’S REFERENCE MANUAL
Manufactured by:
Laguna Clay Co., 14400 Lomitas Avenue, City of Industry, CA 91746, (626) 330-0631

WARRANTY FOR INFORMATION ONLY-
ORIGINAL WARRANTY SENT WITH SHIPMENT. 2
Back-Saver Clay Mixer
OWNER’S MANUAL ∙5 HP MODEL
** IMPORTANT: READ THIS MANUAL BEFORE OPERATING YOUR MIXER **
Laguna’s Back-Saver Clay Mixer has been designed to dramatically reduce the backbreaking work
so often experienced in mixing clay. To ensure the safe and productive use of your mixer, study
the following safety guidelines and operating instructions BEFORE mixing your first batch of clay.
“#’s” reference photo illustrations in this manual.
For additional information about this mixer and other quality, clay-processing equipment manu-
SAFETY FIRST!
NEVER mix clay without the grate-cover (#2) and the motor cover
(#14) in place. Except as described in Operating Instruction J below,
the mixing blades (#8) will only operate with the grate-cover in place.
For your own safety, do not bypass the safety, proximity sensor (#5).
NEVER operate your mixer with more than one person. The safety
features of this equipment are designed for a single operator. While
emptying clay from the mixer (Operating Instruction J), you don’t
want to have to worry about the location of a helper’s hands!
NEVER put your hands anywhere inside the mixing tub (#1) or scrape
down the sides of the tub unless the power key (#6) is in the OFF
position.
ALWAYS use the yellow safety handle (#9) when rotating or tilting
the tub. The tub is heavy, so brace yourself prior to tilting it forward.
The yellow safety handle may not be required when tilting the tub
full of moist, mixed clay; refer to Operating Instruction J.
OPERATING INSTRUCTIONS:
[“#’s” reference photo illustrations in this manual]
A. Polarity Check for 3 phase motors only. If you have special-
ordered a 3-phase motor for your Back-Saver mixer, refer to
the “Polarity Check” information attached to your power cord.
B. Drive Chain Tension. When you receive your new mixer, and
before plugging the power cord into the hot receptacle, remove
the motor cover (#14) and determine that the drive chain (#18)
is fairly taut, not loose. Three small bolts secure the motor
cover in place. The chain has been pre-set at the factory, but
it is good to check it prior to initial use in the event the motor
mount shifted in shipping causing the chain to loosen. If the
chain feels loose, refer to the Maintenance section of this
manual. [Warning: The chain will be greasy, so you may want
to use a paper towel or glove to protect your hand.]
#2 #4
#5
Cover in
place
#14
#9
#13
#8 !#1
#1

WARRANTY FOR INFORMATION ONLY-
ORIGINAL WARRANTY SENT WITH SHIPMENT. 3
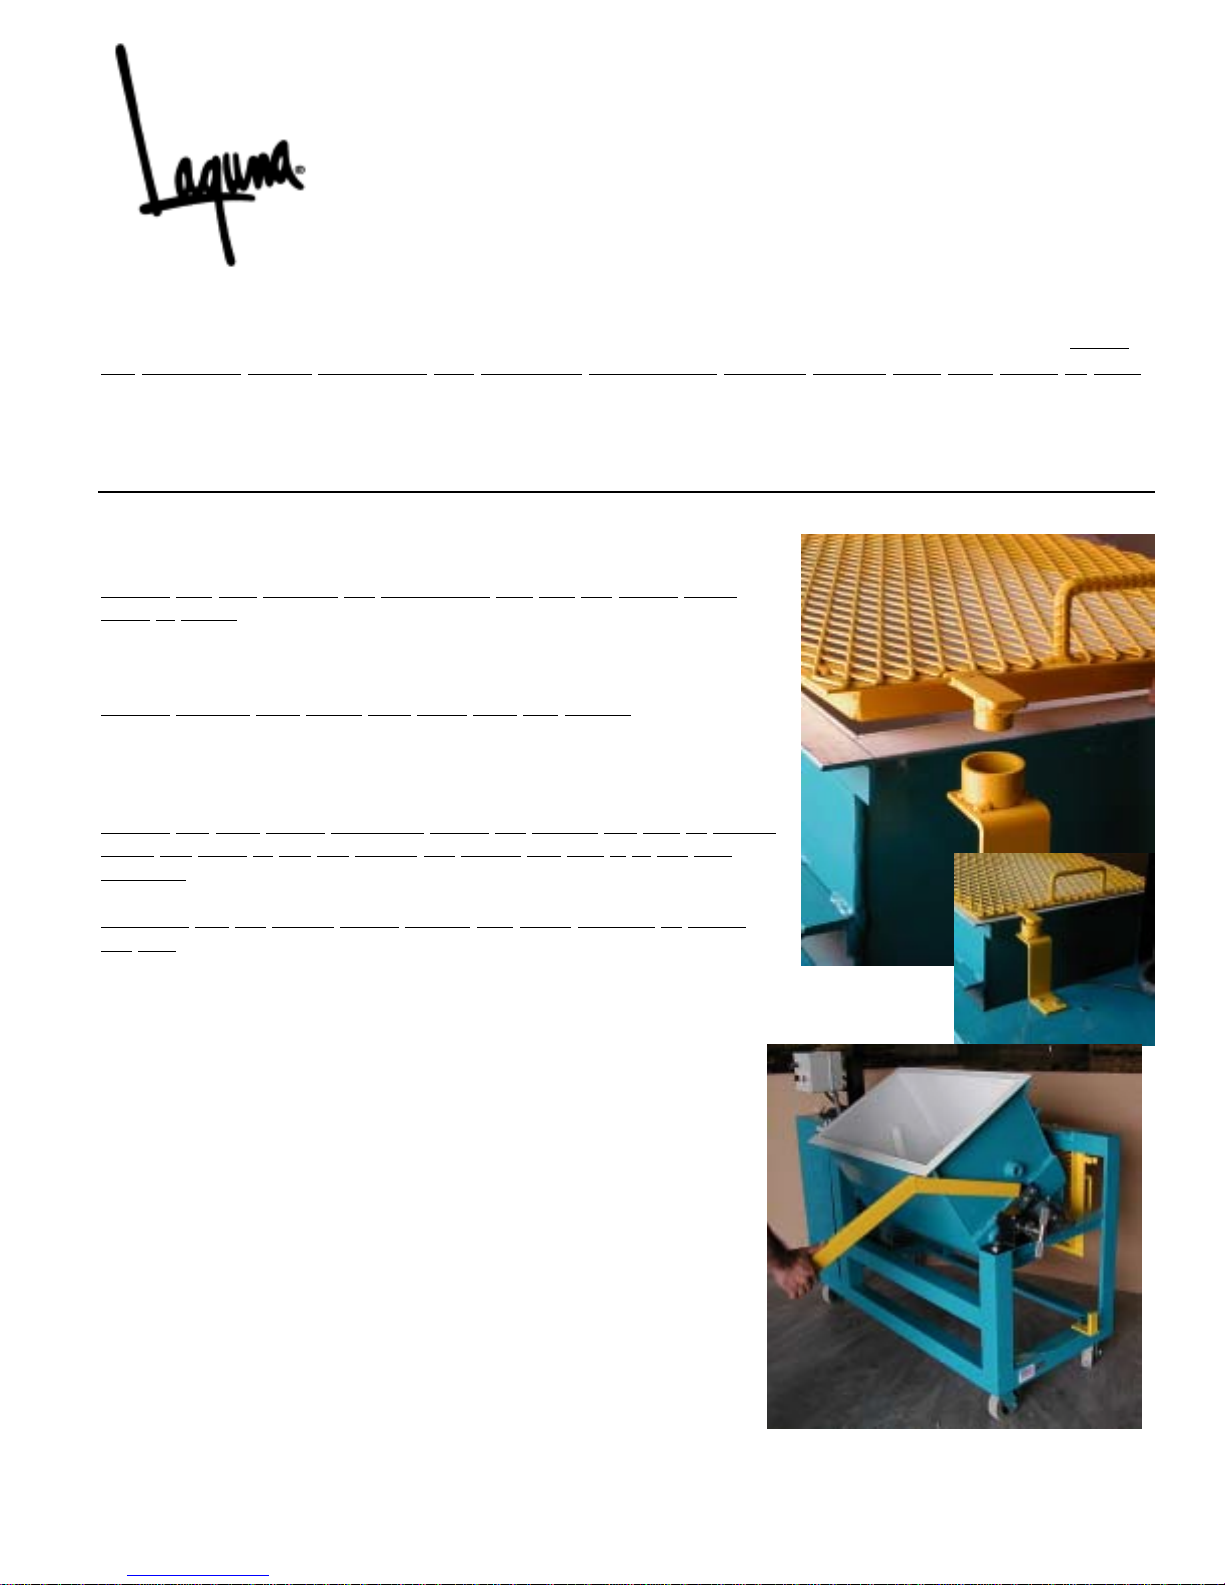
C. Dump the dry ingredients for your clay formula (or your scrap clay)
into the mixing tub (#1). The maximum capacity of your Back-Saver
mixer is 300 lbs. of moist clay. This typically equates to 80% dry
material and 20% water. This ratio varies depending on desired clay
firmness.
D. Place grate-cover (#2) on top of the mixing tub as follows. First rest
the right side of the grate-cover in place on the tub (#1). Then slowly
lower the left side until the proximity sensor “key” (#4) is inserted into
the proximity sensor unit (#5). When removed from the mixer, it is
recommended that the grate-cover be hung on the 2 hooks protruding
from the back of the mixer frame (#3). This will keep the cover and the
proximity sensor “key” from becoming damaged.
E. Power. Turn the power key to the ON position. (#6)
F. Dry Mix. Turn the FWD/REV switch (#7) to the FWD position and mix
your dry formula for approximately 2 minutes. Turn the mixer switch
to the REV position, and mix for another 2 minutes. (Allow mixing
blades to come to a stop between forward and reverse.)
G. Add Water. Turn the FWD/REV switch (#7) to the forward position,
and add water through the grate-cover until the desired consistency of
moist clay is achieved. To avoid stalling the mixer’s motor, add the
water rapidly. The water can be added with the mixer in either the off
mode or in the FWD or REV modes. If water is added too slowly, the
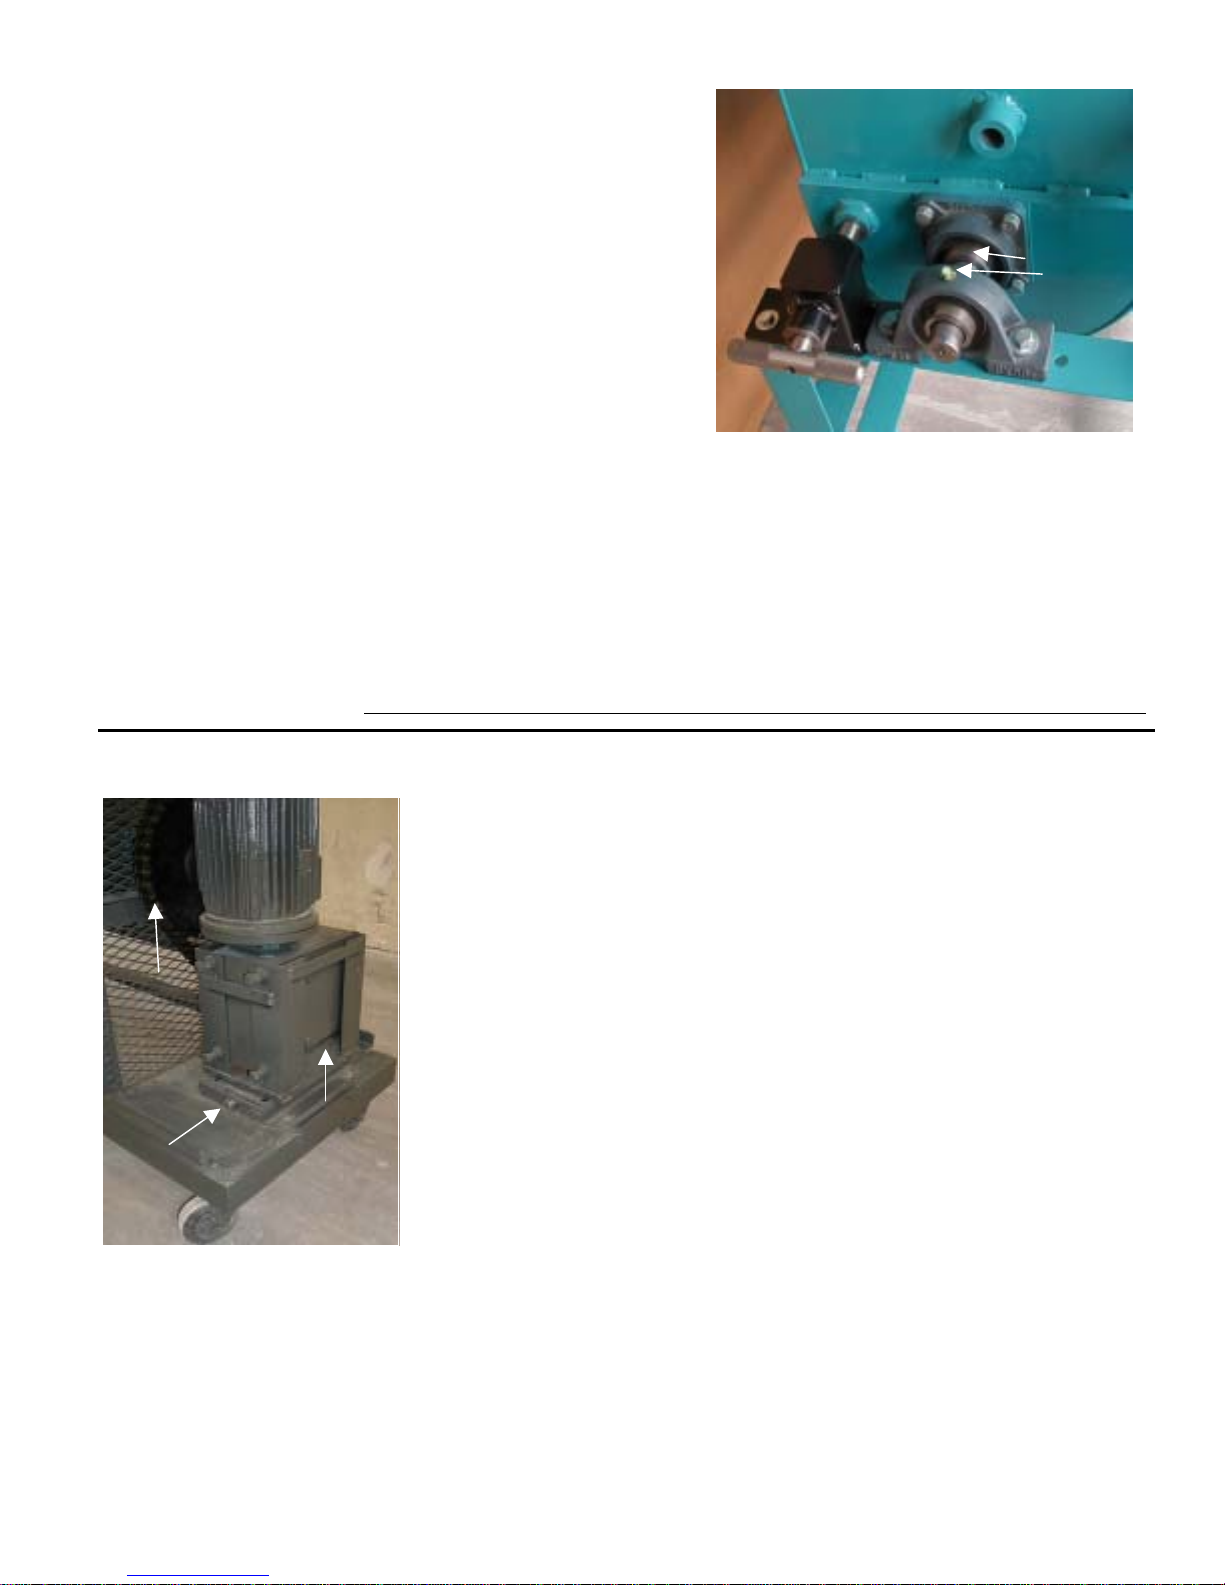
motor may stall under the compacted load. If the motor stalls and you
lose power: (1) Turn the FWD/REV switch and the power key to the OFF
positions and unplug the power cord. (2) Remove the cover on the
control box. (3) Press the reset button (#17). (4) Replace the cover. (5)
Plug in the power cord. (6) Turn the power key ON and (7) turn the
FWD/REV key to FWD to start the mixing blades. If the mixing blades
do not begin rotating immediately, switch the rotation to REV. If
necessary, repeat this FWD > REV > FWD cycle until the blades begin
rotation. As you learn the sounds of your mixer, you may be able to
stop the motor before a stall and utilize this FWD > REV > FWD cycle to
avoid the stall. Remember, you won’t experience motor stalls if you
follow the instructions at the beginning of this paragraph.
H. Wet Mix. With the 5 horsepower model, a typical formula is well mixed after (a) 6 minutes in forward,
(b) 6 minutes in reverse, and (c) a final 2 minutes in forward.
I. Scraping Sides of Mixer. It is advantageous to scrape clay from the
sides of the mixer once or twice during the wet mix cycle – particularly
if your mix is somewhat “sticky.” You will probably want to scrape
once during the forward cycle and once during the reverse cycle. A flat
bladed garden spade is the ideal tool for this process, but BEFORE
SCRAPING; ALWAYS TURN THE POWER KEY (#6) TO THE OFF POSI
TION. Also, NEVER scrape down the sides of the mixer or dislodge
clay from the mixing blades (#8) with your hands. The blades are
sharp and they will become even sharper with use. A long-handled,
restaurant-grade spatula works quite well. If you can’t find one locally,
they are available through 1-(800) 4-LAGUNA.
J. Unloading mixed Clay. The following steps will allow you to unload 300
pounds of moist clay safely and easily. THIS IS A ONE-PERSON OPEATION.
The safety features of this equipment are designed for a single operator. As stated above, when you are
emptying clay from the mixer, you don’t want to have to worry about the location of your helper’s hands!
#2
#6
#7 #11
#11
#12
#16
#17
"
!#3
!
#1
#14

WARRANTY FOR INFORMATION ONLY-
ORIGINAL WARRANTY SENT WITH SHIPMENT. 4
#15
#10
1. Remove the grate-cover (#2), and store as recommended
in Paragraph D above.
2. Install the safety handle (#9).
3. Disengage the Safety Position Lock (#10) on the right
side of the mixer frame by pulling the lock handle out
and rotating it ¼ turn. This handle is spring loaded,
and a firm pull is required to disengage it from the
mixing tub.
4. Rotate the tub forward to approximately 100º with the
safety handle, but do not force the rotation. If the
stiffness of the clay prevents the rotation of the tub,
remove the safety handle and go on to step 5. below.
5. Place one hand each on the two, discharge buttons (#11,
#12).
6. While depressing Discharge 1 (#11), press Discharge 2
(#12) intermittently. This will cause the mixing tub to
tilt forward into the unloading position.
7. Repeat this process several times until the tub has tilted is resting on the Stop Bar (#13).
8. Place a table, cart, or wheelbarrow into which the mixed clay is to be unloaded in front of the mixing tub.
9. Repeat step 5 above allowing the mixing blades to push your mixed clay out of the mixing tub and into
the waiting container.
10. Once the blades cease to eject clay, turn the power key (#6) to the OFF position and use a scraping tool to
remove any remaining clay.
K. Cleaning. Always clean with the power cord disconnected. The easiest way to clean your mixer is to roll it
to a suitable location and using the detachable tub handle (#9) tilt the mixing tub forward allowing it to rest
on the Stop Bar (#13). The tub is heavy, so brace yourself prior to tilting it forward. Using a garden hose,
rinse out the mixing tub. Never use your hands to clean the tub or the mixing blades; the blades are sharp.
Maintenance & Upkeep
A. Check Drive Chain Tension. The drive chain (#18) will stretch,
particularly during initial use. At a minimum, it is recommended that you
check the chain for proper tension upon receipt of your new mixer, after
the first 20 batches, and every 4-6 months hereafter. REMEMBER; ALWAYS
DISCONNECT POWER TO THE MIXER BEFORE CHECKING OR ADJUSTING
THE CHAIN TENSION. Access the chain by removing the motor housing
(#14). The chain will be greasy, so you may want to use a paper towel or
old glove to protect your hand. Push on the chain to make sure it is almost
taut with only a slight amount of slack or give. If there is more than ⅛- ¼”
slack when you apply pressure to the chain, continue to paragraph B
below.
B. Adjust Drive Chain Tension. Disconnect electrical power to the mixer.
Remove the motor housing (#14). Loosen (do not remove) the 4 mounting
bolts (#19) below the gear box; rotate the tension adjusting bolt (#20)
counterclockwise to tighten the chain tension or clockwise to loosen the
chain tension. Retighten the 4 mounting bolts (#19). Replace the motor
housing.
C. Lubrication – Chain. The chain was properly lubricated at the factory, and
it should be lubricated every six months using any standard chain lubricant
available at a local hardware store.
D. Lubrication – Bearings. The bearing assemblies (through which the shaft is mounted on either side of the
mixing tub) were properly greased at the factory, but the should also be greased every six months to preserve
the life of the bearings. There are four grease fittings. Usually 1 or 2 “shots” of grease is plenty. Too much
grease can be as damaging as none at all!
Motor
18
19
20
Gearbox

WARRANTY FOR INFORMATION ONLY-
ORIGINAL WARRANTY SENT WITH SHIPMENT. 5
Congratulations!
Your decision to purchase a Laguna Back-Saver Mixer will provide you with years of trouble-free
service if the safety, operating and maintenance instructions provided in your Owner’s Manual
are adhered to.
Direct questions about your new Mixer or other equipment available through Laguna Clay Co. to
626/330-0631 or info@lagunaclay.com.
You are encouraged to read the following warranty information carefully, and complete and re-
turn the warranty registration immediately to ensure the full warranty service to which you are
entitled.
Limited Warranty
This warranty does not cover:
• Damage resulting from moving or transporting the mixer
• Negligence or abuse to the mixer, whether intentional or unintentional, including, but not lim-
ited to, the introduction of foreign objects or material into the mixer for which the mixer was
not designed – objects or materials which could damage the mixing blades, tub, bearing as-
semblies, gear box, or motor
• Unauthorized changes or alterations to the original mixer which prove detrimental to the op-
eration of the mixer
Laguna Clay Co.
14400 Lomitas Ave #City of Industry, CA 91746
--------------------------------------------------------------------------------------------------------------------------------------------------------
BACK-SAVER Mixer Warranty Registration
Complete and return this card immediately to ensure full warranty coverage on your new mixer. In lieu of a properly
completed and returned warranty registration card or the providing of an original purchase receipt at the time war-
ranty work is required, the warranty period for this product will commence on the date the mixer was initially shipped
from the manufacturer. (Please print all information.)
NAME: _____________________________________________________________________________________________
ADDRESS: __________________________________________________________________________________________
NO.&STREET CITY,STATE,ANDZIP
DEALER ____________________________________________________________________________________________
NAME CITY&STATE
_____________________________________________________________________________________________
MODEL AND/OR SERIAL NO. DATE OF PURCHASE
Detach and return this section immediately to: LAGUNA CLAY CO.
14400 LOMITAS AVE.
CITY OF INDUSTRY, CA 91746
Table of contents