L&L Kiln Mfg, Inc. Fuego User manual

Kilns
Built
To
Last
L&L Kiln Mfg, Inc.
505 Sharptown Road, Swedesboro, NJ 08085
Ph: 856.294.0077 Fx: 856.294.0070 E: service@hotkilns.com
FUEGO
INSTRUCTION
MANUAL (USA)

CAUTION INSTRUCTIONS FOR L&L KILNS
cautions.pdf REV: 11/1/2016 Page 1
2016 L&L Kiln Mfg, Inc. 505 Sharptown Rd, Swedesboro NJ 08085 P:856.294.0077 F:856.294.0070 [email protected] hotkilns.com
CAUTION INSTRUCTIONS
KILNS THESE CAUTIONS APPLIES TO
CURRENT PRODUCTION KILNS
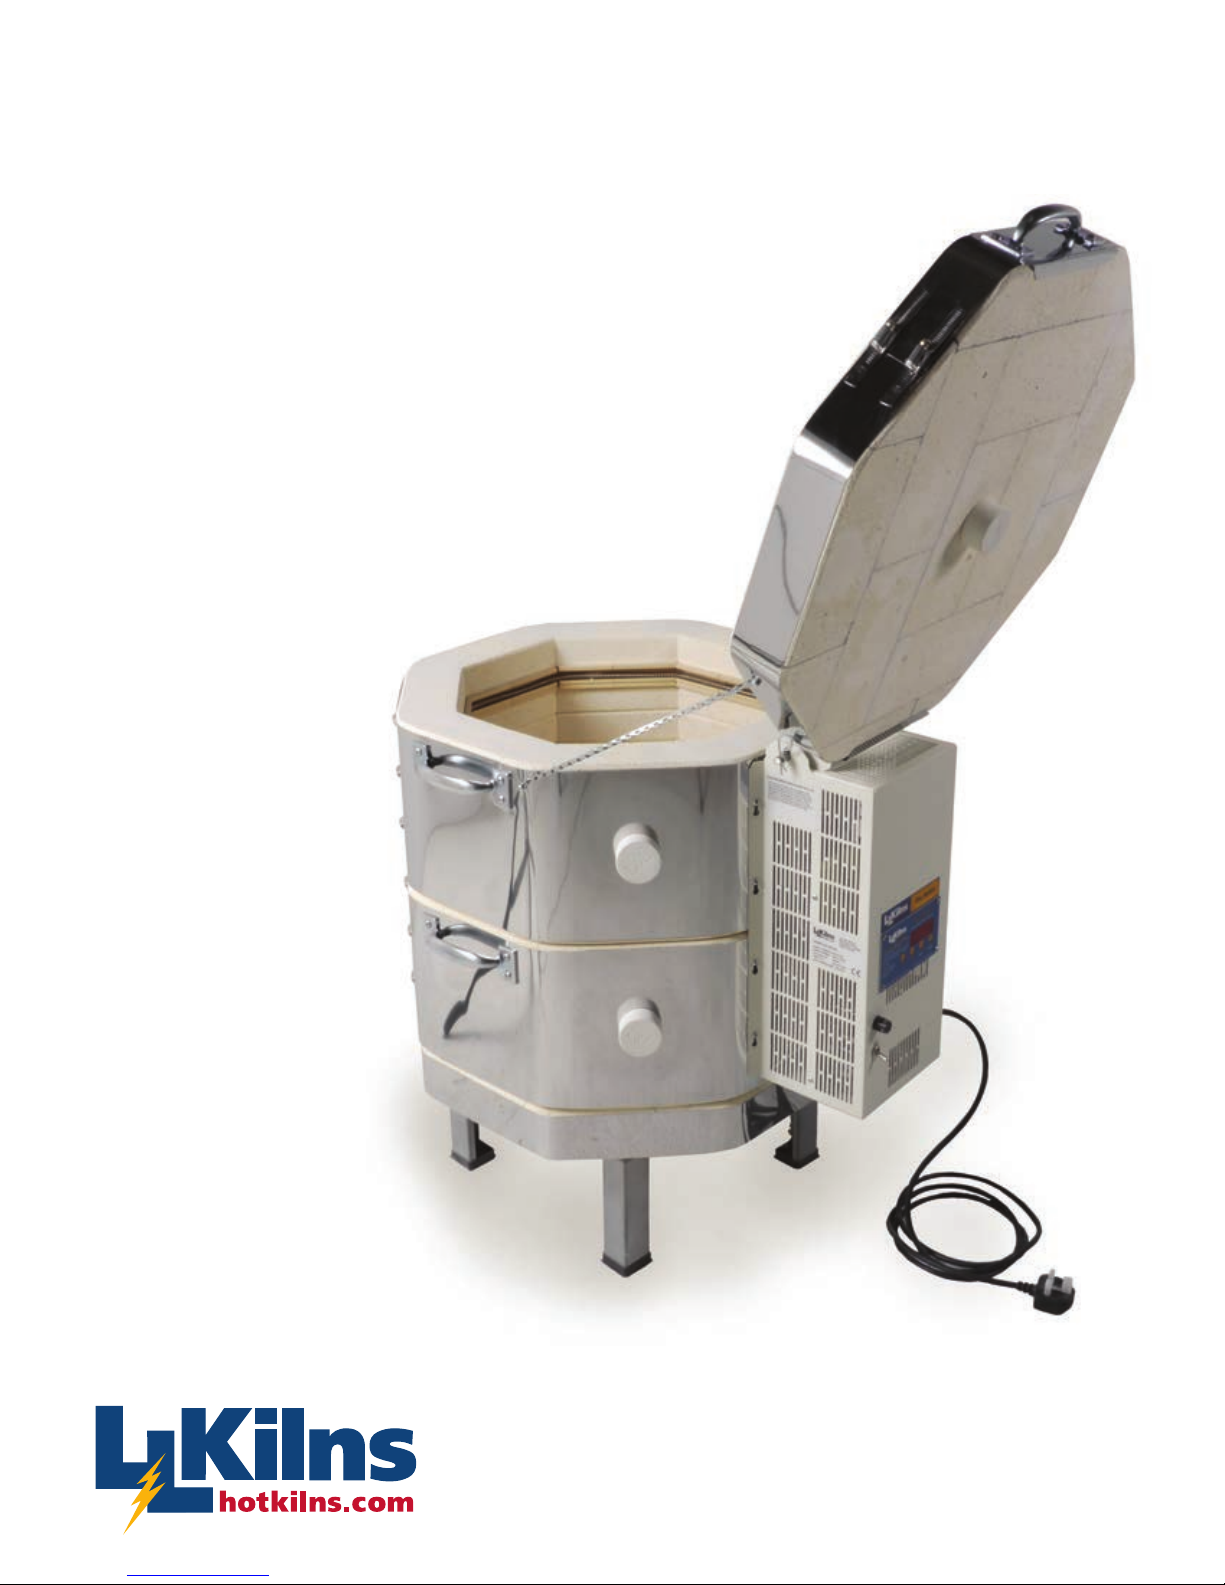
• Easy-Fire Kilns (e Series)
• School-Master Kilns (SM Series)
• Easy-Fire XT Kilns (eXT Series)
• Jupiter Automatic Kilns (JD Series)
• eQuad-Pro Production Kilns (eQ Series)
• JH Crystalline Kilns (JH Series)
• Hercules Front-Loading Kilns (EL-H Series)
• Easy-Load Front-Loading Kilns (EL Series)
• DaVinci Automatic Kilns (X and T Series)
• Doll/Test Kilns (DL and DLH Series)
• Liberty-Belle Kilns (LB Series)
• Fuego Kilns
OBSOLETE MODELS
• Jupiter Manual Kilns (J Series)
• Econo Kilns (K Series and J Series)
• Programmatic Kilns (B Series)
• Robin Kilns
• Dyna-Kilns (C & H Series)
• Dyna-Kilns (SQ Series)
• Dura-Fire Kilns (D Series)
• Enameling Kilns (E48, E49, R Series)
• Oval Kilns (OV Series)
• Genesis Kilns (G Series)
• Most other L&L kilns
RESELLERS ARE NOT AUTHORIZED TO
MODIFY THESE CAUTION INSTRUCTIONS
Distributors and installers of L&L kilns are not authorized
by L&L to make modifications or contradict these Caution
Instructions (or our Installation Instructions). If L&L’s
instructions are not followed, L&L specifically disavows
responsibility for any injury or damage that may result.
DATED INFORMATION
The information in these Caution Instructions is believed
to be correct to the best of our knowledge at the time of
publication (see the date at the bottom of this sheet). You
can view the most recent update from our web site at
hotkilns.com/cautions at any time.
CAUTION INSTRUCTIONS .................................................................. 1
KILNS THESE CAUTIONS APPLIES TO ....................................................................... 1
RESELLERS ARE NOT AUTHORIZED TO MODIFY THESE CAUTION INSTRUCTIONS
1
DATED INFORMATION .................................................................................................. 1
SAFETY NOTICE............................................................................................................ 2
ELECTRICAL SAFETY ........................................................................ 2
GENERAL ....................................................................................................................... 2
ELECTRICAL HAZARDS ..................................................................... 2
SHOCK............................................................................................................................ 2
ARC-FLASH .................................................................................................................... 2
ARC-BLAST .................................................................................................................... 2
SAFETY PRINCIPLES.......................................................................... 2
INSTALLATION CAUTIONS ................................................................ 3
USE A QUALIFIED ELECTRICIAN................................................................................. 3
CLEARANCES AND FLAMMABLE SURFACES............................................................ 3
CHECK TEMPERATURES AROUND KILN ................................................................... 3
LEVELING THE KILN...................................................................................................... 3
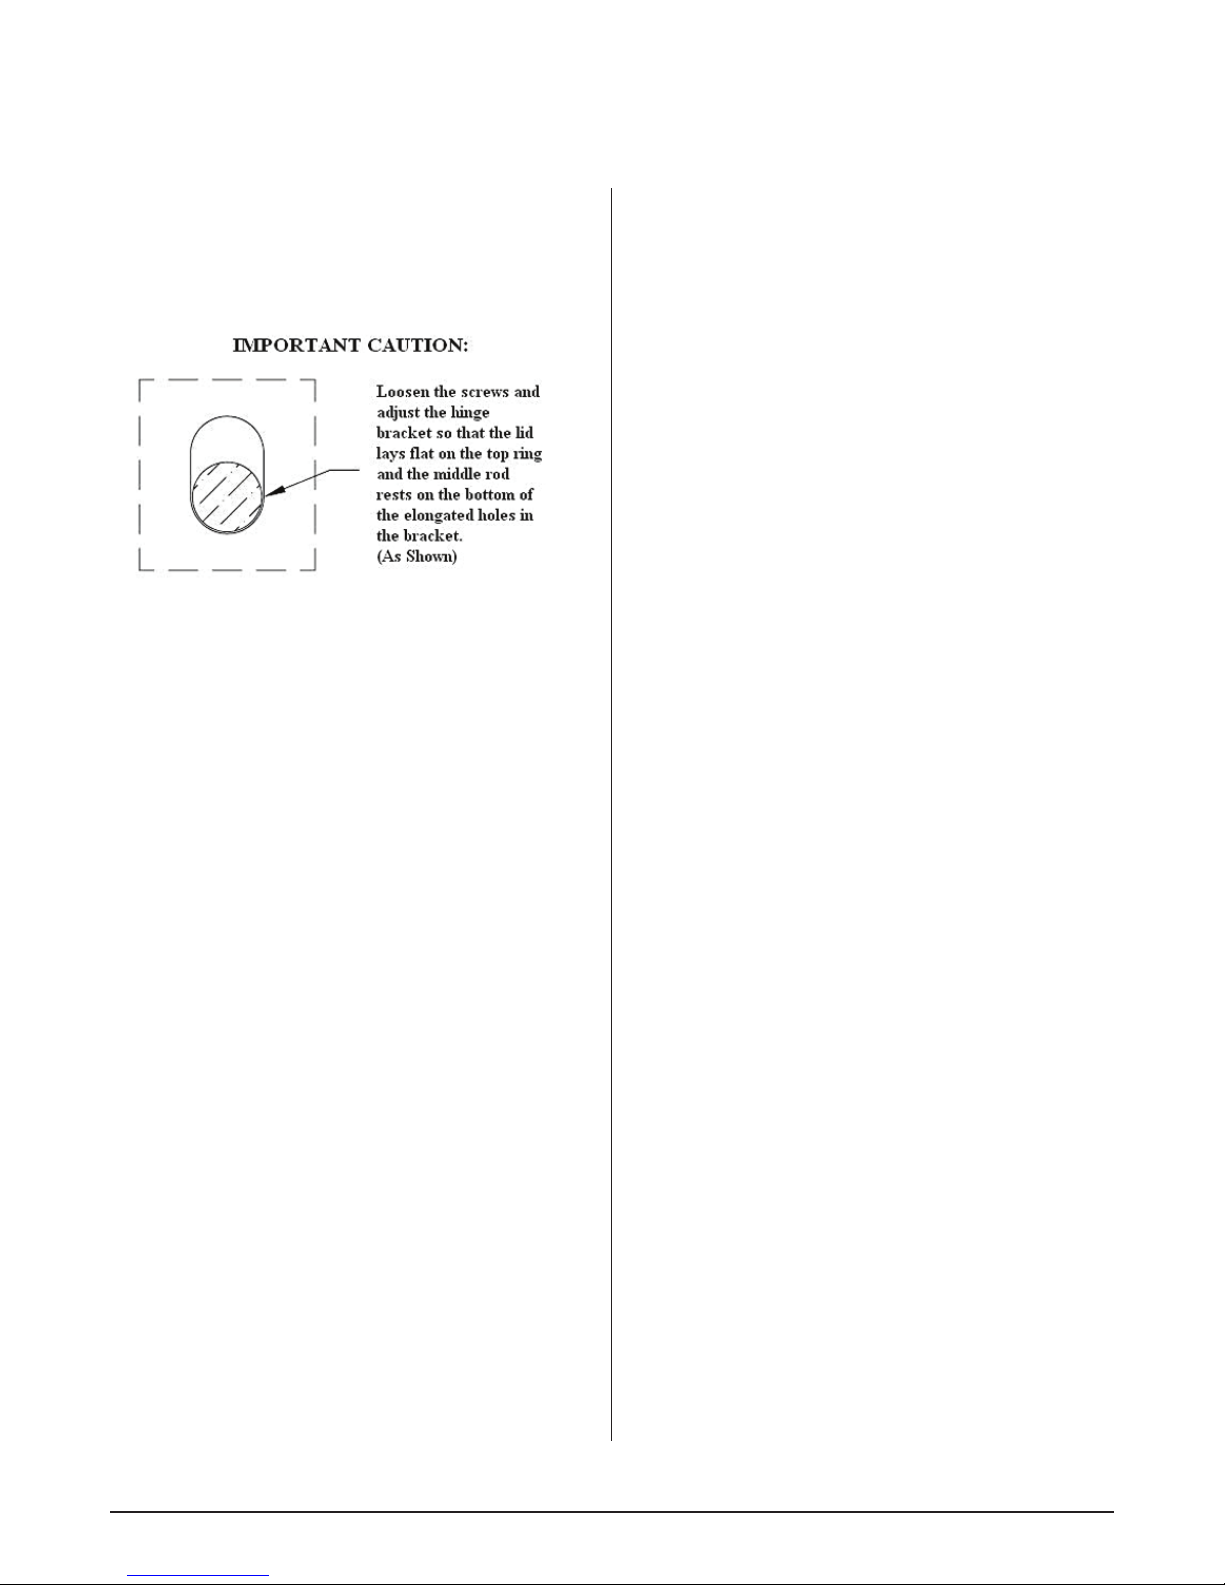
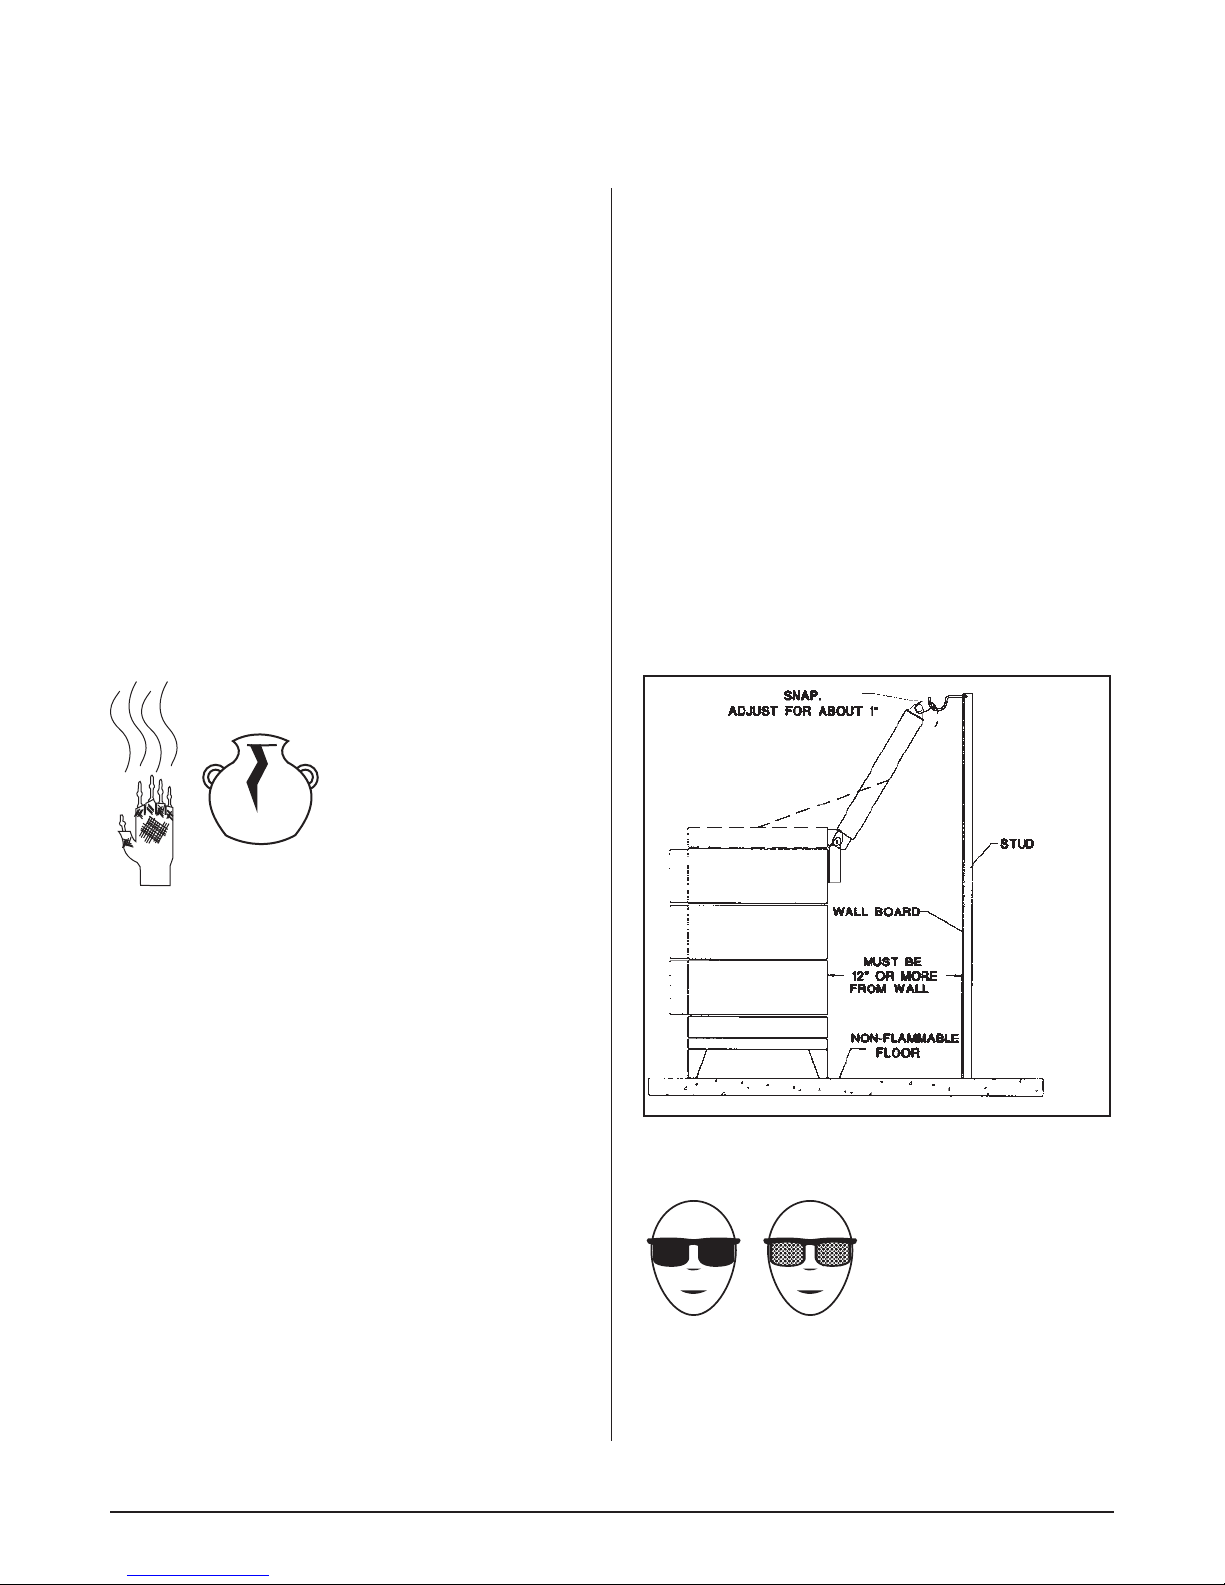
ADJUSTING THE HINGE PROPERLY........................................................................... 3
THERMOCOUPLES........................................................................................................ 4
USE THE SUPPLIED KILN STAND................................................................................ 4
DON’T USE AN EXTENSION CORD ............................................................................. 4
POWER CORD MUST BE PROPERLY RATED ............................................................ 4
USE COPPER WIRE FOR HOOK UP............................................................................ 4
PROTECT POWER CORD FROM KILN CASE ............................................................. 4
KEEP KILN DRY & IN PROTECTED SPACE ................................................................ 5
KEEP A FIRE EXTINGUISHER NEAR KILN.................................................................. 5
SPRINKLER CAUTIONS ................................................................................................ 5
GENERAL ENVIRONMENT CAUTIONS ............................................. 5
VENTILATION IS ESSENTIAL........................................................................................ 5
AMBIENT TEMPERATURES.......................................................................................... 6
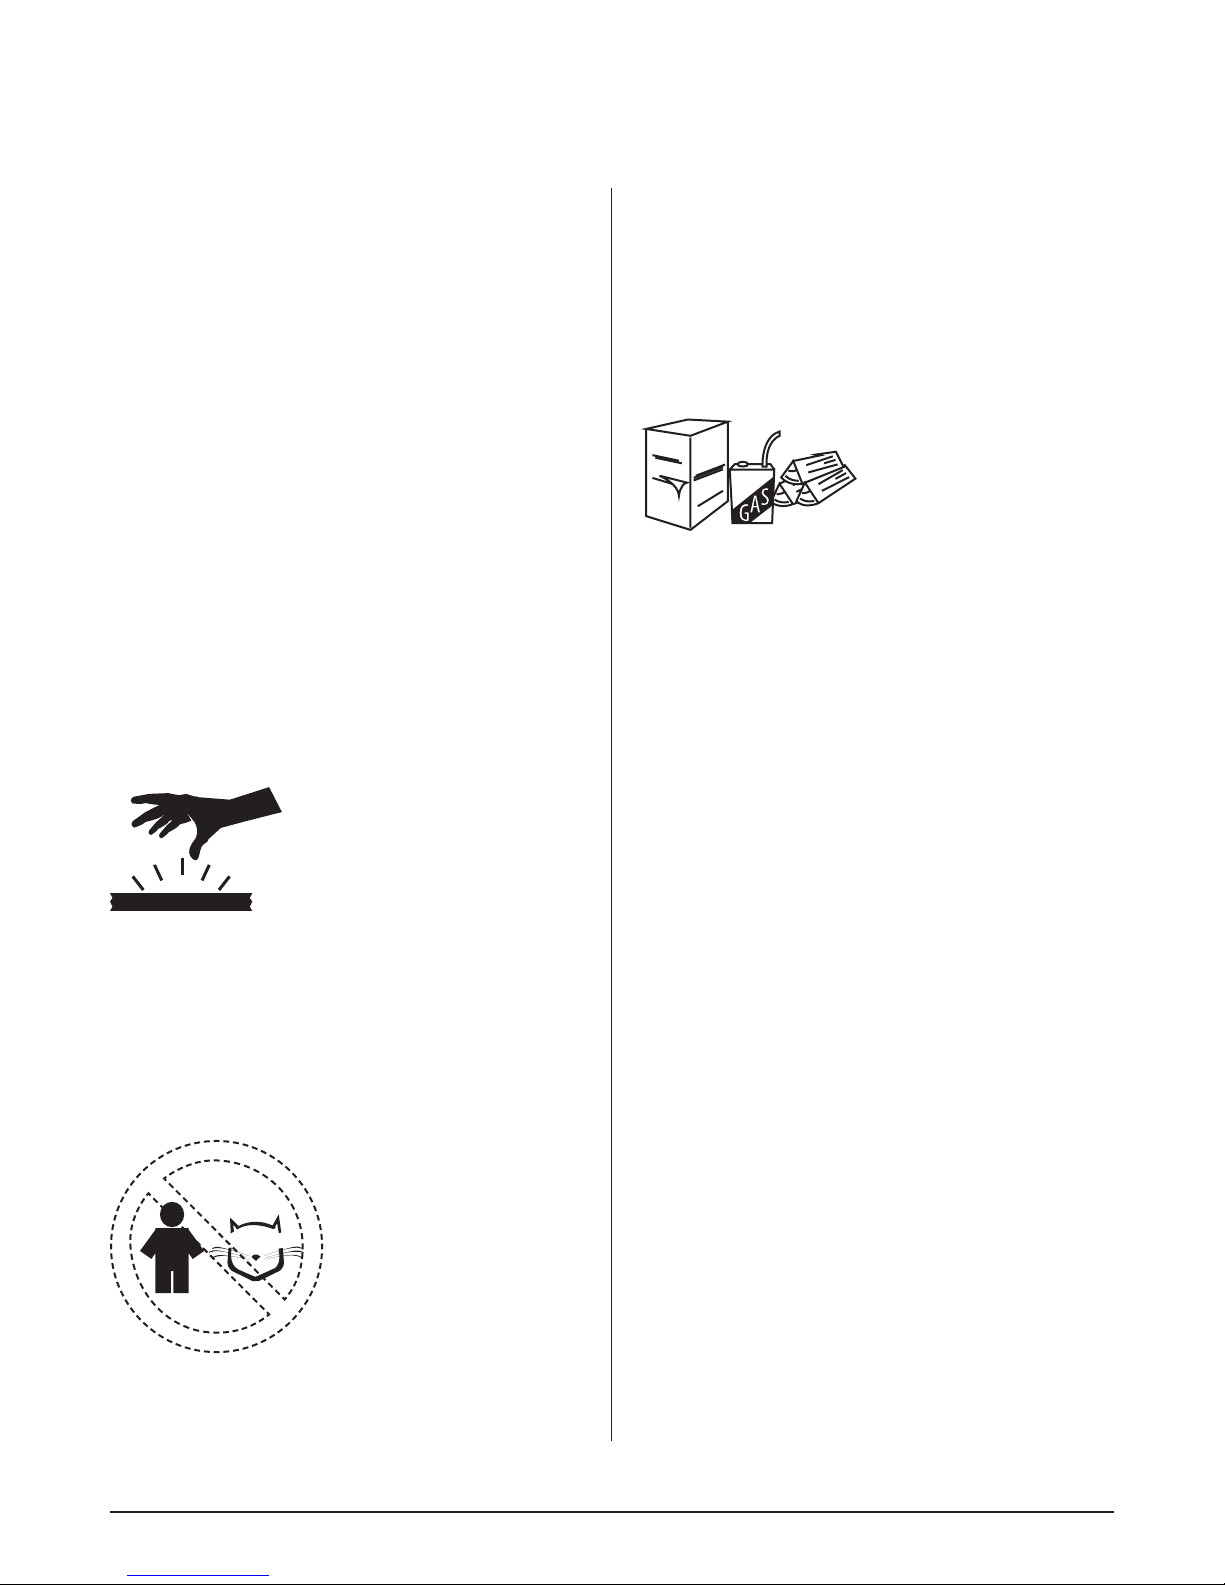
SURFACE IS HOT AND CAN CAUSE BURNS.............................................................. 6
KEEP CHILDREN/ANIMALS AWAY FROM KILN .......................................................... 6
KEEP FLAMMABLES AWAY FROM KILN ..................................................................... 6
PRACTICE GOOD HYGIENE......................................................................................... 6
PROPER USE OF KILN WASH...................................................................................... 6
6. Clean off the old wash and reapply new wash each time you fire or when it begins to
chip away. ...................................................................................................................... 6
TRIPPING HAZARDS ..................................................................................................... 7
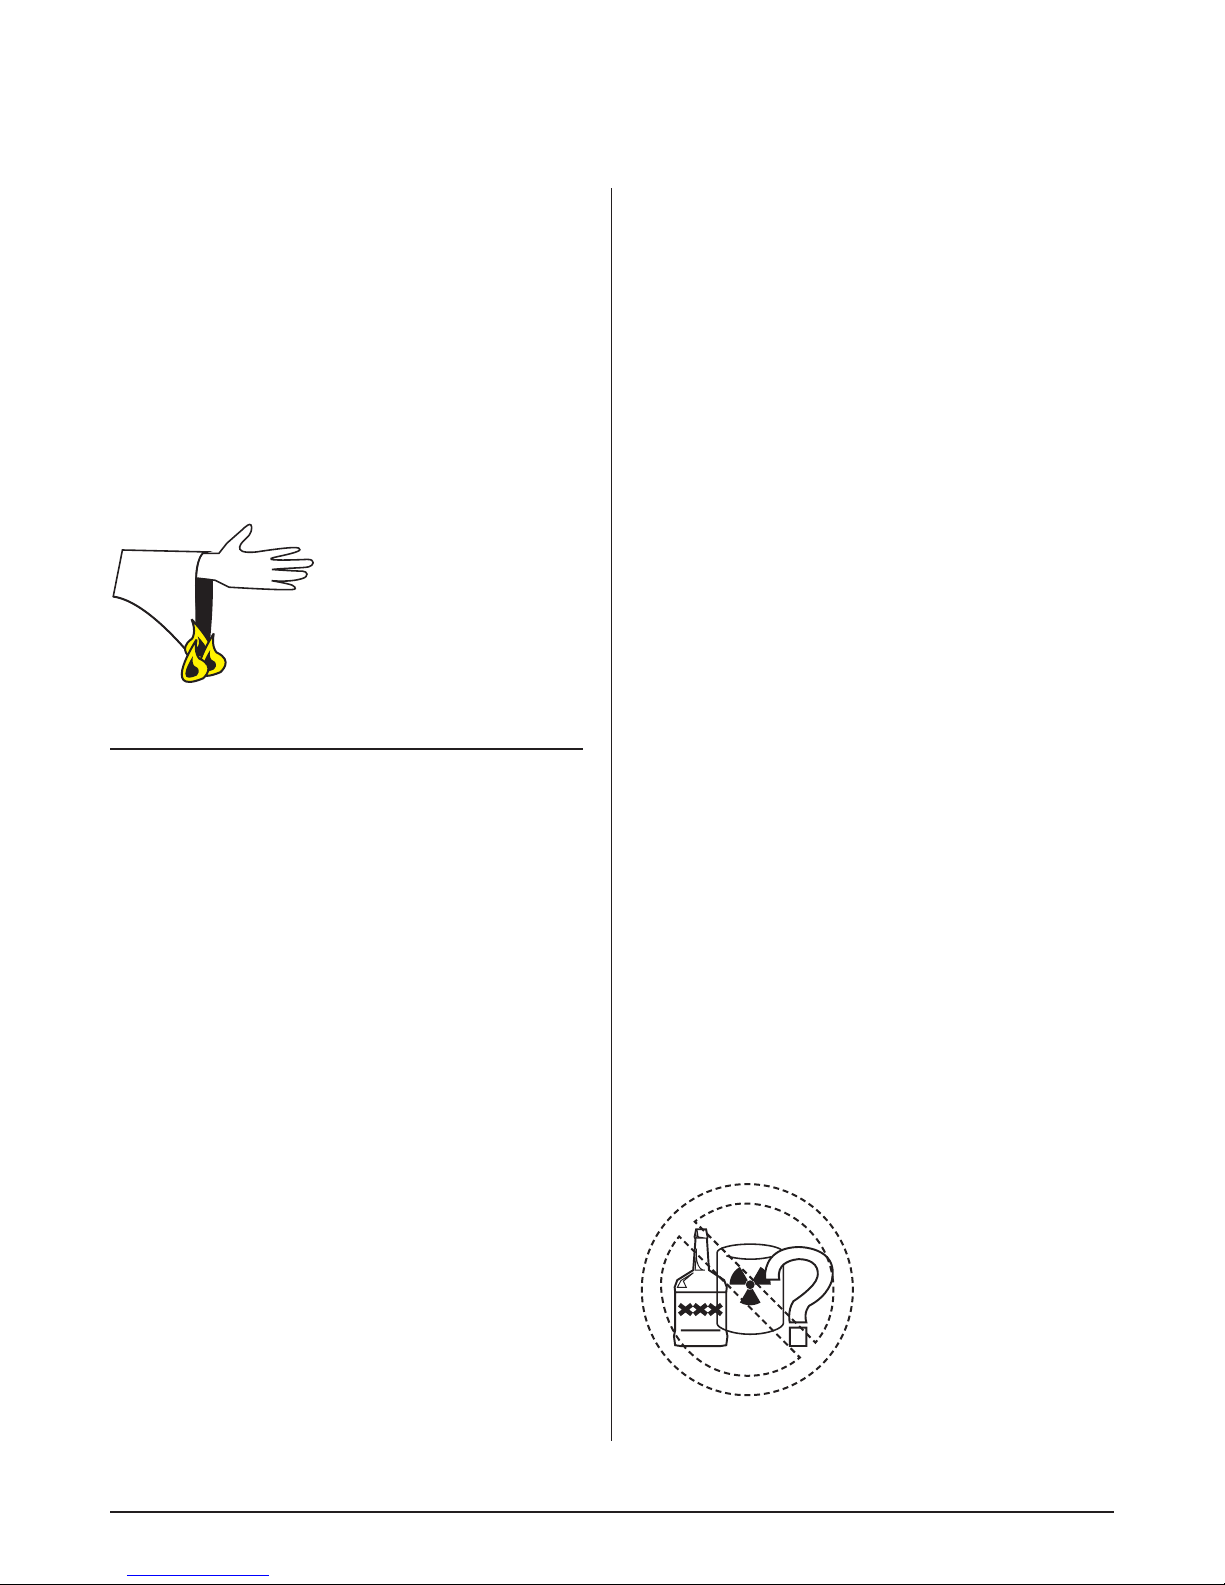
CLOTHING TO AVOID.................................................................................................... 7
PREFIRING CAUTIONS ....................................................................... 7
KILN WASH CONTAINS SILICA .................................................................................... 7
DO NOT USE SILICA SAND .......................................................................................... 7
NEVER FIRE MOIST GREENWARE.............................................................................. 7
CAUTION WITH USE OF WAX ...................................................................................... 7
DO NOT FIRE TEMPERED GLASS............................................................................... 7
STORE SHELVES IN A DRY LOCATION ...................................................................... 7
DO NOT USE CRACKED SHELVES.............................................................................. 7
DO NOT FIRE TOXIC, FLAMMABLE, OR UNKNOWN MATERIALS ............................ 7
LOADING & UNLOADING CAUTIONS ............................................... 8
TURN OFF POWER WHILE LOADING.......................................................................... 8
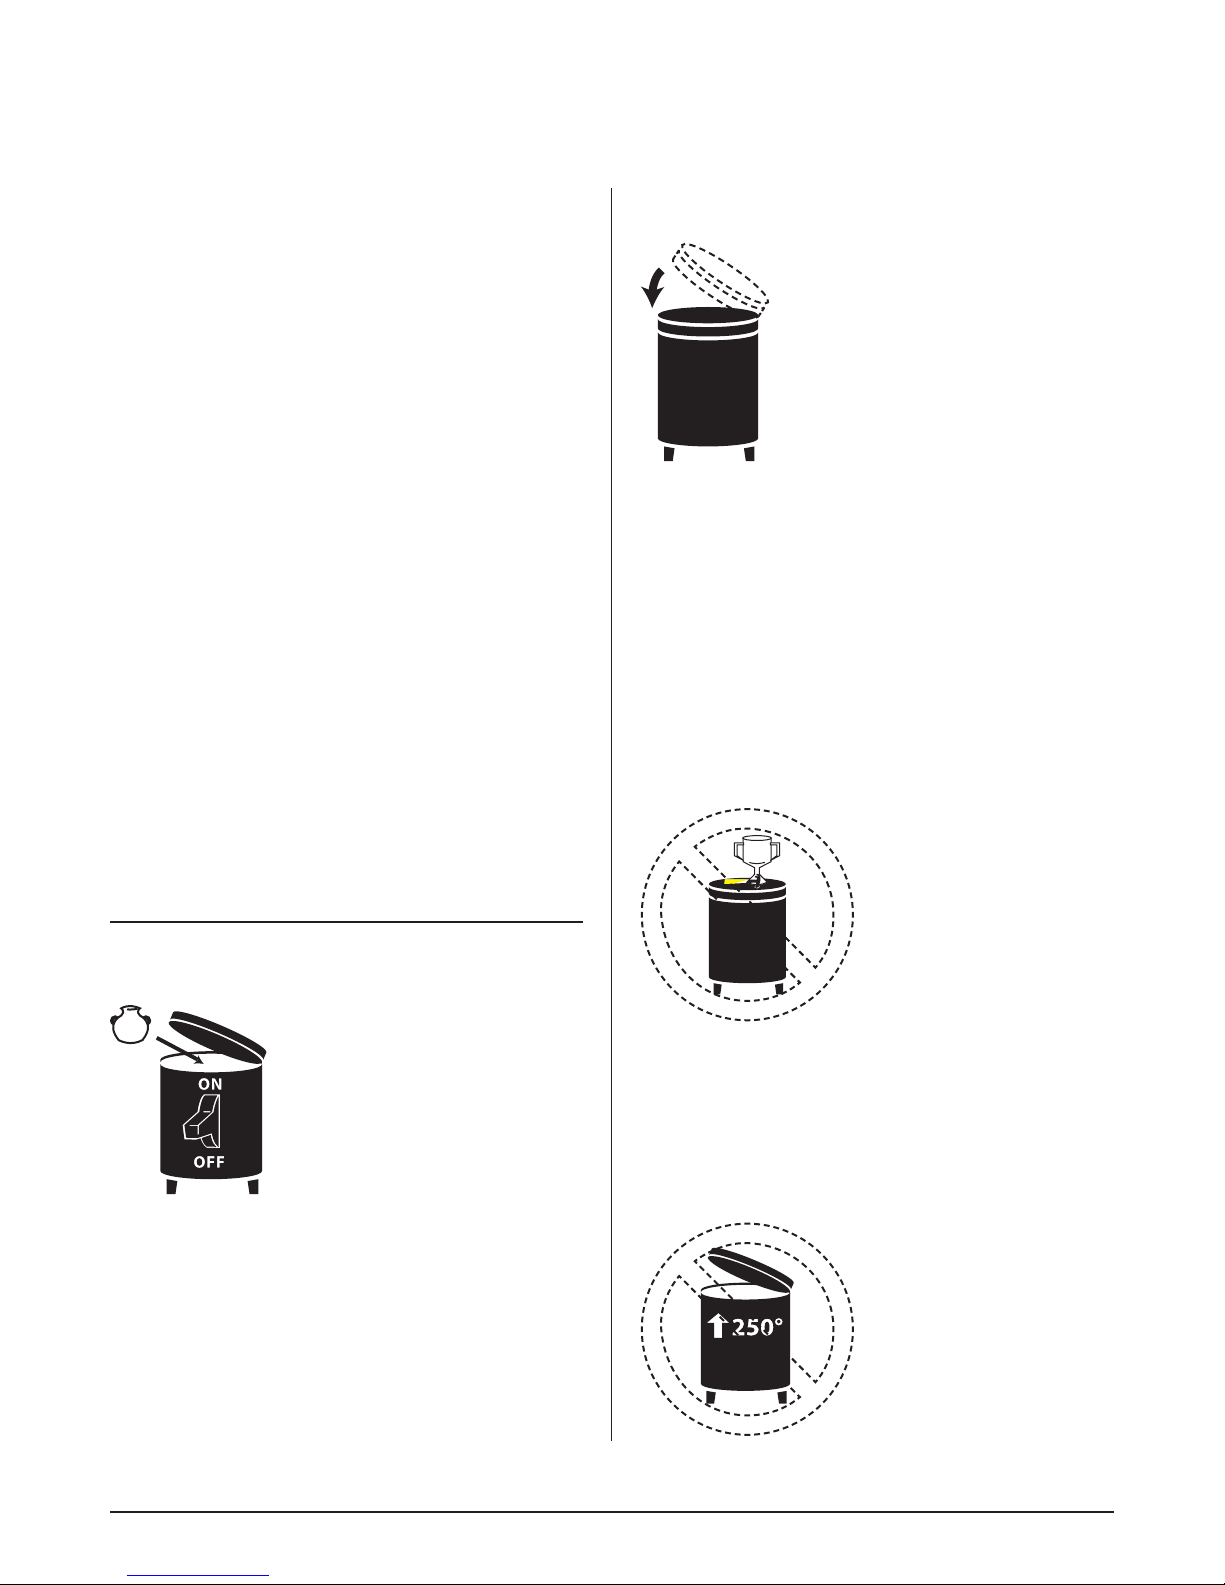
KEEP LID CLOSED WHEN KILN IS NOT IS USE......................................................... 8
DO NOT STORE ANYTHING ON LID ............................................................................ 8
DO NOT OPEN THE DOOR ABOVE 250°F.................................................................. 8
DO NOT UNLOAD KILN WHILE HOT ............................................................................ 9
BE CAREFUL OF SHARP OBJECTS & GLAZE ............................................................ 9
SECURE LID WHILE LOADING OR UNLOADING IF YOU HAVE A SPRING-LOADED
EASY-LIFT HINGE.......................................................................................................... 9
IF YOU HAVE A DAVINCI COUNTERBALANCED LID ................................................. 9
IF YOU HAVE A BASIC HINGE WITH CHAIN SUPPORTS .......................................... 9
VIEWING INTO THE KILN.............................................................................................. 9
FIRING CAUTIONS ............................................................................ 10
ATTEND THE FIRING................................................................................................... 10
MAKE SURE YOUR KILN SITTER IS ADJUSTED ...................................................... 10
USE KILN WASH ON THE CONE SUPPORTS........................................................... 10
UNDERSTAND YOUR CONTROL ............................................................................... 10
PROGRAM REVIEW ON AUTOMATIC KILNS ............................................................ 10
DO NOT CONFUSE CONE NUMBERS ....................................................................... 10
USE THE PROPER THERMOCOUPLE ....................................................................... 10
CHECK THERMOCOUPLE CALIBRATION ................................................................. 11
SHUT OFF KILN AT DISCONNECT OR CIRCUIT BREAKER .................................... 11
DO NOT FIRE KILN ABOVE 2350°F (1290°C, Cone 10) ........................................... 11
POST FIRING CAUTIONS.................................................................. 11
CHECK FOR GLAZE AND CERAMIC CHIPS.............................................................. 11
GENERAL MAINTENANCE CAUTIONS ........................................... 12
ELECTRICAL SAFETY ................................................................................................. 12
CHECK WIRES & TERMINALS.................................................................................... 12
CHECK TEMPERATURE OF CORD............................................................................ 12
CHECK FOR CORRODED CONNECTIONS ............................................................... 12
THE WRONG PARTS CAN BE HAZARDOUS............................................................. 12
VIDEO ABOUT GENERAL MAINTENANCE ................................................................ 12
KILN MODIFICATIONS CAUTIONS .................................................. 13
COATINGS.................................................................................................................... 13
OTHER MODIFICATIONS ............................................................................................ 13
DO NOT OVERINSULATE KILN .................................................................................. 13

CAUTION INSTRUCTIONS FOR L&L KILNS
cautions.pdf REV: 11/1/2016 Page 2
2016 L&L Kiln Mfg, Inc. 505 Sharptown Rd, Swedesboro NJ 08085 P:856.294.0077 F:856.294.0070 [email protected] hotkilns.com
SAFETY NOTICE
1. All cautions and requirements recommended by L&L
Kiln Mfg. Inc. are meant to assist users to properly and
safely operate their kilns. Many of these cautions apply to
kilns and ceramic processes in general. Other process and
materials are outside the scope of these Cautions. If you
are firing other materials than ceramics there may be issues
such as outgassing or explosive hazards that you need to
carefully investigate before firing in a kiln.
2. By making use of, and/or downloading from, this web
site, user acknowledges that process and manufacturing
systems improperly installed, maintained, or operated
can pose serious and dangerous threats to worker safety,
environmental integrity, and product/process quality.
3. Kilns operate at high temperatures and make use of high
voltages/amperages and if improperly installed, maintained,
or used, can cause serious personal or property damages.
4. Commercial kilns are provided with various safety,
performance, and operating limits, designs and devices
which, if disconnected, altered, tampered with, or changed
by user, user’s employees, user’s agents, or others acting
on user’s behalf or with user’s knowledge, will become
user’s sole risk and responsibility.
5. User also has the sole responsibility for assigning
properly trained persons to operate the kilns who have
demonstrated common sense and a general aptitude for
such work.
6. It is user’s sole responsibility to understand and assure
adherence to all safety notices and installation, operating,
and maintenance instructions provided by L&L Kiln Mfg.,
Inc.
ELECTRICAL SAFETY
GENERAL
Electricity can be dangerous if not approached carefully.
There are three basic hazards that cause injury or death –
shock, arc-flash, and arc-blast. It is important to remember
that even a small amount of current passing through the
chest can cause death. Most deaths occurring for circuits
of less than 600 volts happen when people are working
on “hot,” energized equipment – PLEASE DISCONNECT
AND LOCK OUT ALL ELECTRICAL POWER BEFORE
ATTEMPTING KILN REPAIRS!
ELECTRICAL HAZARDS
SHOCK
An electrical shock is a current that passes through the
human body. Any electrical current flows through the path
of least resistance towards ground; if an external voltage
contacts a human body, e.g. by touching a live wire with
the hand, the voltage will try to find a ground, and a current
will develop that flows through the body’s nervous system
or vascular system, and exit through the closest part of the
body to ground (e.g., the other hand which may be touching
a metal pipe.) Nerve shock disrupts the body’s normal
electrical functions, and can stop the heart or the lungs, or
both, causing severe injury or death.
ARC-FLASH
An arc-flash is an extremely high temperature conductive
mixture of plasma and gases, which causes very serious
burns when it comes into contact with the body, and can
ignite flammable clothing. Arc temperatures reach up to
35,000°F – which is 4X the temperature of the sun’s surface.
ARC-BLAST
Arc-blast is a pressure wave resulting from arcing, which
can carry molten metal fragments and plasma gasses at
very high speeds and distances. This can not only carry
very hot shrapnel to injure a person, but can actually be
strong enough to destroy structures or knock workers off
ladders.
SAFETY PRINCIPLES
Be safe! Make sure any equipment that is being installed
or serviced is disconnected from all sources of power.
In industry, it is important to have ‘Lockout and tagout’
procedures in place to make sure that power stays
disconnected while people are servicing equipment. It is just
as important in residential and commercial sites – DO NOT

CAUTION INSTRUCTIONS FOR L&L KILNS
cautions.pdf REV: 11/1/2016 Page 3
2016 L&L Kiln Mfg, Inc. 505 Sharptown Rd, Swedesboro NJ 08085 P:856.294.0077 F:856.294.0070 [email protected] hotkilns.com
WORK ON LIVE EQUIPMENT UNLESS ABSOLUTELY
NECESSARY!
Use the right tools for the job – do not improvise. For
instance, use a proper fuse puller; don’t use a screwdriver
to pry out an open fuse.
Protect the person; use proper gloves, shoes, and clothing.
In industry it is recommended to wear safety goggles or
face shields to prevent arc-flash or arc-blast injuries. Wear
rubber soled shoes.
Make sure the environment around the equipment being
serviced is safe. For instance, when working around
electricity, it always very dangerous for the floor to be
wet. Make sure there is adequate space to work safely.
Be aware that current flow across your chest can be fatal.
If possible, use only one hand to manipulate test leads
when conducting any necessary measurements on live
equipment. Use a clamp for one lead, and use one hand
to guide the other test lead. Keep the other hand as far as
possible from the live circuit components.
INSTALLATION CAUTIONS
USE A QUALIFIED ELECTRICIAN
1. Have electrical installation performed by an licensed
electrician or other qualified technician.
2. There is danger of electric shock.
3. There is danger that an improperly sized or installed
circuit could cause a fire.
CLEARANCES AND FLAMMABLE SURFACES
1. Make certain floor is not flammable.
2. Install kiln so that the hot surface of the kiln is no
closer than 12” (30 cm) to any wall. 18” (46 cm) is
preferable.
3. Be careful about enclosed spaces: In general, it is not a
good idea to install a kiln in a small confined space (such
as a closet).
4. Maintain a minimum of 36” (91 cm) between the hot
surfaces of two adjacent kilns, especially if they are going to
be used at the same time. (The kilns will heat each other).
5. The essential issue with kiln clearance is to keep excessive
heat from flammable surfaces. Remember, even when you
follow clearance and ventilation recommendations, the kiln
is giving off heat. Try not to place the kiln near things that
can be affected by elevated temperatures. An example
would be an electrical fuse panel which you do not want to
overheat.
CHECK TEMPERATURES AROUND KILN
1. Check temperatures around the kiln when it is at high fire
to be sure that you are not creating an unsafe condition.
2. Combustible surfaces that stay below 71°C (160°F) are
generally considered safe from the point of view of starting
a fire.
LEVELING THE KILN
1. Level the kiln while you are installing it.
2. Use thin metal shims under the legs to accomplish the
leveling (never wood or other combustible materials).
3. Make sure that the base will not wobble.
4. Leveling is important because the kiln sitter (in older
manual kilns) is affected by gravity. If the kiln is not properly
leveled the kiln sitter might be either too reactive or too
sluggish.
5. You do not want your ware to be unstable in the kiln. It
might fall over.
6. If kiln is not leveled this could lead to the cracking of the
bottom and the top. In particular, the bottom could easily
crack when you first set the weight of the kiln on the bottom
while setting up the kiln for the first time.
ADJUSTING THE HINGE PROPERLY
1. See the assembly instructions for your specific kiln.
(Assembly instructions are available at hotkilns.com/
assembly-instructions)
2. CAUTION: DO NOT attempt to disengage the spring
hinge without first reading the detailed assembly
instructions. The spring is under great pressure and
could cause severe injury if it is removed under pressure.
RELIEVE ALL SPRING TENSION BEFORE REMOVING!
OPEN LID COMPLETELY!
3. The hinge of any kiln must be adjusted so that expansion
caused by the heating process has room to expand up and
down. (L&L includes expansion slots in the hinges.)
4. An improperly adjusted hinge can damage the top kiln
rim and/or lid by compressing and breaking the brick near
the hinge.

CAUTION INSTRUCTIONS FOR L&L KILNS
cautions.pdf REV: 11/1/2016 Page 4
2016 L&L Kiln Mfg, Inc. 505 Sharptown Rd, Swedesboro NJ 08085 P:856.294.0077 F:856.294.0070 [email protected] hotkilns.com
5. CAUTION: It is critical that the hinge bar sits in the bottom
of slot. This is to allow the lid to rise and fall slightly as the
kiln heats and expands without putting stress on the lids
connection points and potentially damaging the lid.
THERMOCOUPLES
1. Thermocouples (in automatic kilns) must be inserted into
the kiln at least 1” (2.5 cm) in from the inside surface of the
kiln.
2. They must protrude into the kiln itself because, if
the measuring tip of the thermocouple is buried inside
the insulation, the thermocouple will measure a lower
temperature than the actual temperature in the kiln.
3. This could cause an overfire of the kiln.
4. Replace thermocouples once they are no longer
reasonably accurate. (Note: Type K thermocouples last
about the same as kiln elements so it is recommended to
change thermocouples when you change elements.)
USE THE SUPPLIED KILN STAND
1. Do not use kiln without the factory supplied stand.
2. Never set a kiln on a floor without significant air space
circulating under the kiln.
3. L&L stands typically raise the floor of the kiln by 8” (20
cm).
4. Using a proper stand is critical because, without a kiln
stand that moves the radiant heat of the kiln away from
the floor, some flooring could catch on fire. For instance,
over time the radiant heat from the kiln can cause wood to
lose its moisture and lower the autoignition temperature.
(The autoignition temperature is the specific temperature at
which a substance ignites and causes a fire.)
DON’T USE AN EXTENSION CORD
1. Never use an extension cord with your kiln. The extra
length of the wire could cause the cord to overheat and
catch on fire.
2. Extension cords, with their multiple connections and
potentially mismatched wire gauge for the load, could cause
a fire when used with a continuous resistive load like a kiln.
3. Locate the outlet close enough to the kiln to plug directly
into it with the kiln’s supplied power cord.
4. Kilns that pull over 48 amps and some three phase kilns
generally will not have a power cord. These kilns need to be
direct-wired in to the power supply.
POWER CORD MUST BE PROPERLY RATED
1. All L&L power cords are rated for 105°C (221°F).
2. Any cord temperature rating less than 105°C can cause
a malfunction and possible fire where the power leads
connect to the control box.
3. It is OK, and will not void the warranty, to remove the plug
that comes with the kiln and direct wire the kiln. However,
the connection wires must be rated for a minimum of 105°C
(221°F).
USE COPPER WIRE FOR HOOK UP
1. Do not use aluminum wire on the final connection to the
kiln.
2. The specific reason particular to kilns is that the wire
tends to get hotter near the kiln than it might going into
some other types of appliance.
3. Being a resistive load, there is constant heat being
generated by the conductors for quite a few hours. When
aluminum wire gets hot it accelerates oxidation. Aluminum
oxide is a resistor; copper oxide is not as much. If the
connection at the terminal board gets oxidized it will really
heat up - to the point where it could cause a fire.
4. Note: Depending on local codes it may be OK to use
aluminum wire to your subpanel - as long as that wire is not
exceeding its temperature rating while kiln is firing on full
power for an extended period of time.
PROTECT POWER CORD FROM KILN CASE
1. Route Power Cord (or electrical connection wires) away
from kiln in such a way that the wires can not touch the hot
case of the kiln.
2. Secure the cord so it can not move.

CAUTION INSTRUCTIONS FOR L&L KILNS
cautions.pdf REV: 11/1/2016 Page 5
2016 L&L Kiln Mfg, Inc. 505 Sharptown Rd, Swedesboro NJ 08085 P:856.294.0077 F:856.294.0070 [email protected] hotkilns.com
3. If the cord touches the hot case it could melt and cause
a short circuit and/or fire.
KEEP KILN DRY & IN PROTECTED SPACE
1. The kiln must be kept dry.
2. It is best to keep it in an enclosed room away from
inclement weather. See specific details in the INSTALLATION
INSTRUCTION section of your instruction manual or on-line
at: hotkilns.com/easy-school-install or: hotkilns.com/
general-installation-instructions.
3. Note that warranty does not cover damage from corrosion
and electrical damage caused by inclement weather.
4. Water in contact with a kiln can cause an electrocution
hazard.
5. If you keep a kiln outside (even in a very dry environment)
and cover it with a tarp to protect it from rain you could still
cause corrosion from the dew that forms on the cold metal
surface of the kiln in the morning.
KEEP A FIRE EXTINGUISHER NEAR KILN
1. Keep an adequate fire extinguisher near the kiln and
check it on a regular basis.
2. Check with your local fire authorities to see if there are
any specific requirements concerning sprinkler systems,
automatic foam extinguishers, etc.
3. Use a fire extinguisher that is rated for electrical fires
(ABC rating is recommended).
SPRINKLER CAUTIONS
1. If you have a sprinkler system be careful to check
the temperature rating and location of the heads so that
you do not inadvertently cause them to actuate under
normal firing conditions.
2. Be sure to monitor temperature while the kiln is at its
highest firing temperature and conditions are at their worse
(for instance when the door to the kiln room is closed or
the ventilation fan is turned off). Serious damage to the
kiln and your premises can take place if the sprinkler
system goes off when the kiln is at high temperature -
especially if no one is in the building when it happens.
3. See the following web page for guidance on how
to calculate ventilation requirements for a kiln room:
hotkilns.com/calculate-kiln-room-ventilation
GENERAL ENVIRONMENT CAUTIONS
VENTILATION IS ESSENTIAL
1. Kilns generate harmful fumes when firing ceramics.
2. Fumes include carbon monoxide, sulfur oxides, hydrogen
fluoride and metal vapors (all of which can be very toxic).
3. Install kiln in well-ventilated area.
4. Never operate in an enclosed space such as a
closet unless you have good ventilation in that space.
See the following web page for guidance on how to

CAUTION INSTRUCTIONS FOR L&L KILNS
cautions.pdf REV: 11/1/2016 Page 6
2016 L&L Kiln Mfg, Inc. 505 Sharptown Rd, Swedesboro NJ 08085 P:856.294.0077 F:856.294.0070 [email protected] hotkilns.com
calculate ventilation requirements for a kiln room:
hotkilns.com/calculate-kiln-room-ventilation
5. Aside from issues of ventilating the fumes from the firing,
the heat build up in an enclosed room could present a
significant fire hazard. See the INSTALLATION cautions.
6. Severe corrosion can be caused by kiln fumes, salt air or
other environmental conditions.
7. Good venting can minimize these problems.
8. Ventilation must be to the outside.
9. Be careful not to locate the outlet of the vent near an
open window.
AMBIENT TEMPERATURES
1. The kiln should operate in an environment that is
between -18°C (0°F ) and 38°C (100°F).
2. Note that the control, if set up for degrees centigrade,
may give you an error code if room temperature drops
below 0°C (32°F). The DynaTrol and most other controls do
not handle negative numbers.
SURFACE IS HOT AND CAN CAUSE BURNS
1. Kiln surface can be extremely hot: up to 260°C (500°F).
2. You can be severely burned if you touch the hot surface.
3. Display a sign near the kiln that specifically warns
everyone of how hot the kiln is.
KEEP CHILDREN/ANIMALS AWAY FROM KILN
1. Protect any children, animals, and unqualified adults
(anyone who is not able to understand these cautions) that
may be near the kiln.
2. Aside from fumes that must be ventilated, and flammability
concerns, they must be protected from the heat of the kiln
and the electrical dangers.
3. Ideally, the kiln should be secured in a space away from
any children (especially in a schoolroom situation where
children might not always follow safety precautions).
KEEP FLAMMABLES AWAY FROM KILN
1. Do not put sealed containers or combustible materials
such as solvents, paper, rags, kerosene, paints, cesium,
magnesium, aluminum powder, calcium, sawdust, plastic
dust, coal, flour and powdered metal., in or near kiln. An
explosion or fire could result.
2. The kiln elements could act as an ignitor of flammable
fumes when hot.
PRACTICE GOOD HYGIENE
1. Clay contains silica dust which can be harmful (see silica
caution) and some glazes contain heavy metals such as
lead, cadmium and copper.
2. While this caution is outside the scope of kiln safety it is
worth mentioning here.
3. Keep your room clean and your kiln clean.
PROPER USE OF KILN WASH
1. Make sure the floor of the kiln and the tops of the shelves
are coated with kiln wash.
2. This will protect these surfaces from melting glaze and
ceramics.
3. Do not coat the undersides or sides of the shelves.
4. Do not apply kiln wash to the brick sides or element
holders. (Damage to the elements could result).
5. If you have a kiln sitter, put kiln wash on the cone
supports (not the sensing rod) for accurate cone action.
6. Clean off the old wash and reapply new wash each time
you fire or when it begins to chip away.

CAUTION INSTRUCTIONS FOR L&L KILNS
cautions.pdf REV: 11/1/2016 Page 7
2016 L&L Kiln Mfg, Inc. 505 Sharptown Rd, Swedesboro NJ 08085 P:856.294.0077 F:856.294.0070 [email protected] hotkilns.com
TRIPPING HAZARDS
1. Be sure to remove tripping hazards near the kiln.
2. In particular be sure to keep the kiln cord out of traffic
areas.
CLOTHING TO AVOID
1. When working around a hot kiln be careful of the kinds of
clothes you are wearing.
2. Some clothes could potentially catch on fire if they touch
the hot surface of a kiln.
3. Also avoid loose fitting clothes that could catch on the
kiln.
PREFIRING CAUTIONS
KILN WASH CONTAINS SILICA
1. Long term exposure to silica dust could cause lung
damage.
2. See the MSDS sheets in your instruction manual or here:
hotkilns.com/msds.
3. Exercise proper caution when mixing the dry powder and
when removing it from your shelves.
4. Use a NIOSH approved particulate respirator for dust and
use proper ventilation. You can buy these from safety supply
houses. (NIOSH_approval #TC-21C-132 is an example).
DO NOT USE SILICA SAND
1. Do not use silica sand in the kiln.
2. Some people like to use this as a work support medium.
3. The silica sand will attack the elements and thermocouples.
4. It can migrate in the kiln from expansion and movement
due to heat.
5. If you must use sand to support or stabilize your load try
alumina oxide or zirconia oxide sand.
NEVER FIRE MOIST GREENWARE
1. Never load moist greenware or pots in your kiln.
2. The expanding water vapor in the ware could cause the
ware to explode, damaging your kiln interior.
3. We recommend using a dry out segment in your bisque
program at 66°C (150°F). (Note that, because of the
thermocouple offset programmed into our DynaTrol when we
use the ceramic protection tubes, the display temperature
will read 93°C (200°F) when the real temperature is 66°C
(150°F)).
4. Remember that there may be water trapped in the work
even if you can’t always see it. If you place a piece of
greenware next to your wrist and it feels cool to the touch it
probably has too much moisture in it to fire.
CAUTION WITH USE OF WAX
1. When you heat wax (in wax resist and lost wax
processes) it will volatilize and potentially condense in the
cooler ventilation ducts.
2. Over time this can cause a fire hazard because the wax
is flammable.
3. Depending on how the vent motor is mounted, the wax
can also gum up the vent motor.
4. If you use these processes it is entirely up to you to
engineer and monitor the safety of the installation.
5. The use of wax will void the warranty of the vent system.
DO NOT FIRE TEMPERED GLASS
1. Tempered glass can explode when fired.
STORE SHELVES IN A DRY LOCATION
1. Shelves can absorb moisture.
2. This can cause them to explode when fired. (This is
especially true of nitride bonded silicon carbide shelves).
DO NOT USE CRACKED SHELVES
1. Cracked shelves can fail in the middle of a firing causing
the whole load in your kiln to collapse.
DO NOT FIRE TOXIC, FLAMMABLE, OR
UNKNOWN MATERIALS

CAUTION INSTRUCTIONS FOR L&L KILNS
cautions.pdf REV: 11/1/2016 Page 8
2016 L&L Kiln Mfg, Inc. 505 Sharptown Rd, Swedesboro NJ 08085 P:856.294.0077 F:856.294.0070 [email protected] hotkilns.com
1. Plastics, organic materials, bakeable modeling clay,
mothballs and a large variety of materials can decompose
under heat causing the release of highly toxic fumes or
rapid uncontrollable combustion.
2. Rocks, marbles, cement and other materials may explode
under high temperatures.
3. Before firing anything but ceramics, glass and metal
(obtained from a known reputable source) in a kiln carefully
investigate what happens under heat.
4. This is the sole responsibility of the user.
5. The kiln is not designed to be used for firing hazardous
materials. Doing so will void kiln warranty.
6. Adding propane, wood, charcoal or other materials
intended to produce a reduction atmosphere can be
hazardous if the volume is sufficient. Note that these
materials can cause an explosion under certain conditions
(just the right amount of air and flammable gasses at just
the right temperature) which could cause injury or death.
Moreover, a reducing atmosphere can cause premature
element failure by reducing the protective oxide coating on
the elements. Also note that carbonaceous materials will
produce poisonous carbon monoxide and highly flammable
hydrogen as they decompose at high temperatures. Also
note that the “auto-ignition” temperature of flammable
gasses is generally above 1400° F.
LOADING & UNLOADING CAUTIONS
TURN OFF POWER WHILE LOADING
1. Turn off power to the kiln when loading or servicing.
2. If power is on when you are loading or unloading the kiln
it is possible to touch the elements and get electrocuted.
3. We recommend having the kiln attached to a fused
disconnect switch with a lockout device (in any institutional
or industrial installations where someone could turn on the
kiln while someone else was working on it).
KEEP LID CLOSED WHEN KILN IS NOT IS USE
1. Keep lid closed when not operating the kiln.
2. Otherwise the weight of the lid over time may force the
hinge and stainless wrap to move down.
3. This will affect the way the lid closes and may cause the
lid to crack.
4. It will also keep the kiln cleaner by keeping dust out.
5. In addition, if the kiln somehow gets turned on accidentally,
an open kiln could present a fire hazard.
DO NOT STORE ANYTHING ON LID
#1
POT TER
1. Do not use the lid as a storage shelf.
2. The lid could crack.
3. Also - this practice could lead to a fire if you accidentally
leave combustible materials on the lid.
DO NOT OPEN THE DOOR ABOVE 250°F

CAUTION INSTRUCTIONS FOR L&L KILNS
cautions.pdf REV: 11/1/2016 Page 9
2016 L&L Kiln Mfg, Inc. 505 Sharptown Rd, Swedesboro NJ 08085 P:856.294.0077 F:856.294.0070 [email protected] hotkilns.com
1. Do not open the kiln door until the kiln has cooled down
to 250°F (120°C).
2. You could burn your hand on the handle and/or the
radiant heat from the kiln.
3. Be careful when you do open the door at this temperature
because you can still get burned.
4. Use heat resistant gloves when opening the door. (These
are available from L&L).
5. For ventilation purposes, some people fire with the lid
slightly propped open 1” to 3” during the beginning phase of
the firing (if they do not have a downdraft vent system). Be
aware of the potential dangers of doing this (heat, live
electricity, fumes and potentially cracking the lid) and
take appropriate measures to protect yourself, the kiln,
and the kiln room.
DO NOT UNLOAD KILN WHILE HOT
1. You may burn yourself
2. You may harm your work.
BE CAREFUL OF SHARP OBJECTS & GLAZE
1. Stilt marks and other sharp protrusions can cut you.
2. Remember that glaze is like glass.
3. Wear safety glasses while grinding or knocking of stilt
marks.
4. Check the shelves for broken bits of glaze which may
have attached to the shelves. These can be like shards of
glass that can cause a serious cut.
SECURE LID WHILE LOADING OR UNLOADING
IF YOU HAVE A SPRING-LOADED EASY-LIFT
HINGE
1. Be sure to LOCK THE LID IN PLACE with the spring-
loaded plunger pin located on the side of the hinge.
IF YOU HAVE A DAVINCI COUNTERBALANCED
LID
1. Be sure to LOCK THE LID IN PLACE with the safety
hooks when in the up position.
2. There is one on each side of a DaVinci kiln. Use both
chains.
IF YOU HAVE A BASIC HINGE WITH CHAIN
SUPPORTS
1. A special safety system is supplied with your Fuego,
Liberty-Belle, e18S, e18T, J18, or J18X kiln (and some
other older models). This is a door safety chain.
2. It secures the lid in an open position when you are
loading or unloading the kiln and ensures that the lid can
not accidentally come down on you. You must install and
use this for your safety’s sake.
This drawing shows the safety chain installation and use for
the standard older Jupiter hinges.
VIEWING INTO THE KILN
1. Use dark glasses (shade number 1.7 to 3.0) to view
inside the kiln through the peepholes when firing. These will
protect you from the radiant infrared radiation and will also
protect your eyes in case the ceramic ware explodes. Do

CAUTION INSTRUCTIONS FOR L&L KILNS
cautions.pdf REV: 11/1/2016 Page 10
2016 L&L Kiln Mfg, Inc. 505 Sharptown Rd, Swedesboro NJ 08085 P:856.294.0077 F:856.294.0070 [email protected] hotkilns.com
not use regular sunglasses for this - they are not designed
to protect your eyes from this type of radiation.
2. Use heat resistant gloves when opening peephole plugs.
They are very hot and can burn you.
3. Do not open the kiln lid unless the kiln is turned off
(except for carefully controlled troubleshooting tests). There
is danger from electrocution. Cracks caused by propping
open the lid are not covered by the warranty.
4. Use heat resistant gloves when opening a hot lid.
5. Do not open the lid when the kiln is above 121°C (250°F).
FIRING CAUTIONS
ATTEND THE FIRING
1. We recommend attending the kiln while firing.
2. NO AUTOMATIC SAFETY DEVICE IS FOOLPROOF!
Be especially careful about attending the kiln when it is
supposed to shut off. (The Delay feature in automatic kilns
gives you control over this).
3. If you have a manual kiln with a Kiln Sitter PLEASE
BE EXTRA CAREFUL! Kiln sitters can be very unreliable
because of the moving parts, dirt or clay that can get into
the tube, the way cones are placed on the tube, corrosion,
etc. DO NOT FIRE THIS KILN UNATTENDED WHEN
THE KILN IS SUPPOSED TO TURN OFF AND LEARN
HOW TO USE THE TIMER BACK UP. Neither L&L Kiln
Mfg., Inc. nor Edward Orton Jr. Ceramic Foundation
warranty the kiln or kiln sitter against damage caused by
overfiring. ALMOST ALL OVERFIRED KILNS WE SEE
ARE FROM A MALFUNCTION OF A KILN SITTER. We
highly recommend firing all manual kilns with witness
cones that you can see through the peephole and/or a
pyrometer so you have some idea of what is happening
inside the kiln.
4. The controller is used to control temperature; it is not a
safety device.
MAKE SURE YOUR KILN SITTER IS ADJUSTED
1. If you have a manual kiln (or the Kiln Sitter backup on an
automatic kiln) be sure it is properly adjusted.
2. See the Kiln Sitter instructions.
3. Overfiring could result.
4. Note that the kiln sitter could have gone out of adjustment
during shipment. Do NOT assume that it is adjusted when
first firing the kiln.
5. The tube assembly should be replaced if gets overly
corroded or contaminated with condensed glaze or other
materials. Dawson recommended checking the pivot point
for corrosion and sluggishness every 6 to 12 months.
USE KILN WASH ON THE CONE SUPPORTS
1. If you have a kiln sitter, put kiln wash on the cone support
(but not the sensing rod) for accurate cone action.
2. This will keep the cones from sticking when they bend.
3. We recommend cleaning off the old wash and reapply
new wash each time you fire.
UNDERSTAND YOUR CONTROL
1. Become familiar with either the control (if you have an
automatic kiln) or the Kiln Sitter (if you have a manual
control or have that as your backup control).
2. Do this before operating the kiln.
PROGRAM REVIEW ON AUTOMATIC KILNS
1. Review the current program before firing to ensure the
correct profile is programmed.
2. You may pick up an important mistake and save a whole
load.
3. Hit Review Prog after you have done your programming
and the control display will scroll through the program. It
only takes a minute or less.
DO NOT CONFUSE CONE NUMBERS
1. Cone ratings are not intuitive. Cones with an “0” in front
of them (like cone 05) are lower in temperature rating and
the higher the number the lower the temperature rating. On
the other hand cones with no “0” in front (like Cone 5) raise
in temperature as the number gets higher.
2. For instance, Cone 05 is a much lower temperature than
Cone 5 for instance. If you fire Cone 05 clay to Cone 5
you could cause a serious overfiring of the material which
could melt in your kiln and cause severe damage to the kiln
interior.
3. See the Orton cone chart. (hotkilns.com/orton-cone-
chart)
USE THE PROPER THERMOCOUPLE
1. Never use a different type of thermocouple with your
controller unless it has been set up from the factory (or
unless you carefully go through the process of changing
from one type to another).

CAUTION INSTRUCTIONS FOR L&L KILNS
cautions.pdf REV: 11/1/2016 Page 11
2016 L&L Kiln Mfg, Inc. 505 Sharptown Rd, Swedesboro NJ 08085 P:856.294.0077 F:856.294.0070 [email protected] hotkilns.com
2. For instance if you used a Type S thermocouple on a
control set up for Type K you would overfire your kiln.
3. On some controls (like the newer DynaTrols) it is possible
to change thermocouple types. However, this involves both
a programming change and a jumper change on the control.
It also requires you to change out all the thermocouple lead
wire to properly calibrated wire for the new thermocouple
type. (See: hotkilns.com/change-thermocouple-type)
CHECK THERMOCOUPLE CALIBRATION
1. Thermocouples will drift in reading over time.
2. This could potentially lead to an overfiring before the
thermocouple actually fails.
3. Although you can not easily check thermocouple
calibration, the general accuracy of the entire kiln system
can be checked by firing with witness cones. See the LOG,
CONES & CERAMIC FIRING section or hotkilns.com/
troubleshooting-cones. Also see this video: hotkilns.
com/firing-kiln-witness-cones.
4. L&L recommends changing your Type K
thermocouples when you change your elements.
SHUT OFF KILN AT DISCONNECT OR CIRCUIT
BREAKER
1. It is possible for electrical contacts on contactor relays to
fuse together.
2. If this happens power will continue to flow to the elements
and your kilns could overfire even though everything on the
kiln is shut off.
3. You should turn kiln off from the circuit breaker or fused
disconnect switch after turning off the kiln itself.
DO NOT FIRE KILN ABOVE 2350°F (1290°C, Cone
10)
1. Most L&L kilns are rated for use to 2350°F (1290°C,
Cone 10).
2. The rating of the kiln is listed on its data nameplate
normally affixed to the control panel.
3. DO NOT FIRE ANY HIGHER THAN THIS or hold for
extended periods of time at those temperatures.
4. The elements, element holders and firebrick could melt.
POST FIRING CAUTIONS
CHECK FOR GLAZE AND CERAMIC CHIPS
1. Check element holders and walls for glaze, clay chips or
anything that could melt at a high temperature.
2. If melted clay or glaze comes in contact with an element,
a rapid failure could result. The molten material traps the
heat radiating from the element and subsequently raises
the surface temperature of the wire. The temperature will
quickly pass the maximum recommended temperature for
the wire and burn it.
3. To clean holders, a good shop vacuum with a HEPA
filter will handle dust and loose crumbs. A very gentle chisel
or grinder may help with glaze contamination on element
holders, but remember that the elements themselves are
quite brittle when they are cool.
4. Replace the contaminated holder if you can not clean it.
5. Remove any glaze that has splattered on the firebrick or
shelves. (USE SAFETY GLASSES WHEN DOING THIS
BECAUSE GLAZE CAN BE LIKE BROKEN GLASS).
Vacuum afterward. Note about vacuuming: it is possible
to build up a strong static electricity charge when you are
vacuuming. If this somehow manages to discharge into the
control it can ruin the electronic circuit. Make sure vacuum
is grounded and periodically touch some grounded metal
surface away from the kiln to discharge the energy.

CAUTION INSTRUCTIONS FOR L&L KILNS
cautions.pdf REV: 11/1/2016 Page 12
2016 L&L Kiln Mfg, Inc. 505 Sharptown Rd, Swedesboro NJ 08085 P:856.294.0077 F:856.294.0070 [email protected] hotkilns.com
GENERAL MAINTENANCE CAUTIONS
ELECTRICAL SAFETY
1. Shut off kiln when servicing it. Use an approved lock out/
tag out procedure to make sure that no one servicing the
kiln gets injured or killed.
2. The elements carry high voltage and can electrocute
you. Many of the tests described in the troubleshooting
manual are performed under power. They should be done
ONLY by someone who is familiar with electrical safety
such as an electrician or trained maintenance person.
3. As long as the kiln is unplugged or turned off at the fused
disconnect switch or circuit breaker (and checked with a
reliable meter to be sure) you are safe.
4. When checking element resistance, disconnect kiln
from power by unplugging kiln or turning off at the
fused disconnect switch or circuit breaker. Lock out if
appropriate.
CHECK WIRES & TERMINALS
1. Check wires for deterioration or oxidation or burns.
2. Replace any that seem brittle or where the wire insulation
has deteriorated, fallen off or burned off.
3. Check terminals for oxidation (discoloration).
4. If you are near salt air or if you notice corrosion on
the stainless exterior of the kiln for whatever reason (like
certain fumes generated by your work) then do this far more
frequently.
5. Check power connection terminals in the kiln and
control box for tightness. Be sure to do this with the power
disconnected (unplugged) for the kiln. If these terminal
connections get loose heat can be generated (because the
electrical resistance gets greater) and this can cause a fire.
6. Check thermocouple connections for corrosion, tightness
and oxidation as well. A bad thermocouple connection can
change the accuracy of the temperature reading which
could cause an overfiring.
CHECK TEMPERATURE OF CORD
1. Occasionally check temperatures of the main power cord
at the main receptacle and the main kiln breaker while the
kiln is at its hottest.
2. If these are hotter than normal, it could be a sign of a
loose or corroded connection, or possibly the wire gauge
used in the power hook-up is the wrong size for the amount
of current being drawn by the kiln.
3. Immediately diagnose and fix this because it could cause
a fire.
4. Also check temperature of any other cords on the kilns
(such as element jumper cords).
CHECK FOR CORRODED CONNECTIONS
1. When replacing infinite zone switches (and other electrical
components), replace the electrical connectors.
2. At the very least check for discoloration (an indication of
oxidation).
3. Electrical connectors will typically oxidize over time where
there is heat and this can cause further overheating of the
part at the connection point. This can in turn lead to early
failure of the part, wire and connector.
4. Make certain that the new connectors are firmly crimped
onto the wire.
THE WRONG PARTS CAN BE HAZARDOUS
1. Non-L&L elements can present a potential hazard to
the kiln or cause a fire (by drawing too much amperage).
2. The wrong type of fuse, relay, switch or other component
can cause a fire or other hazardous condition.
3. An improperly rated cord can cause a fire.
VIDEO ABOUT GENERAL MAINTENANCE
See this video for some general maintenance tips:
hotkilns.com/maintaining-kiln

CAUTION INSTRUCTIONS FOR L&L KILNS
cautions.pdf REV: 11/1/2016 Page 13
2016 L&L Kiln Mfg, Inc. 505 Sharptown Rd, Swedesboro NJ 08085 P:856.294.0077 F:856.294.0070 [email protected] hotkilns.com
KILN MODIFICATIONS CAUTIONS
COATINGS
1. We can not at this time recommend any coatings for the
elements.
2. Use of ceramic coatings will void the warranty on the
elements and potentially the firebrick or element holders if
it contaminates them.
3. Some people have reported success with ITC coating
and some people seemed to have caused problems with
this coating.
4. We have not adequately tested these coatings so we
can only say, at this time, that any trouble that results from
the use of ITC and other coatings must be at the risk of the
user.
5. We do use a proprietary coating on all our firebrick that
improves firebrick life and reduces dusting.
OTHER MODIFICATIONS
1. All customer modification is made solely at the risk of the
customer.
2. Modifications will void the warranty.
3. L&L takes no responsibility for hazardous conditions
created by unauthorized modifications.
4. Any authorization for an engineering change must be in
writing from the factory.
DO NOT OVERINSULATE KILN
1. You may add insulation to the bottom, and to some extent
the top.
2. If you put too much insulation on a lid it may weaken
because it relies on the cooling of the lid to maintain its
structural strength. This could lead to cracking or potentially
a collapse of the lid.
3. See the various troubleshooting guides for information
about this.
4. However, never wrap insulation around the perimeter of
a typical sectional kiln.
5. You could trap heat in the wiring boxes and cause an
electrical fire.
6. Also the stainless steel wrap that hold the kiln together
will expand and loosen the structure of the kiln.

REGULAR MAINTENANCE OF YOUR L&L KILN
maintain.pdf REV: 11/1/2016 Page 1
2016 L&L Kiln Mfg, Inc. 505 Sharptown Rd, Swedesboro NJ 08085 P:856.294.0077 F:856.294.0070 [email protected] hotkilns.com
WATCH THIS VIDEO
This video shows you the basics of how to do routine
maintainence on your L&L kiln:
hotkilns.com/maintaining-kiln
REGULAR KILN MAINTENANCE
To keep your kiln in top operating condition, we recommend
the following minimum housekeeping:
AFTER EACH FIRING
1) Turn off the kiln at the circuit breaker or fused disconnect
switch.
2) Check element holders and walls for glaze, clay chips or
anything that could melt at a high temperature. If melted
clay or glaze comes in contact with an element, a rapid
failure could result. The molten material traps the heat
radiating from the element and subsequently raises the
surface temperature of the wire. The temperature will
quickly pass the maximum recommended for the wire and
burn it up. To clean holders, a good shop vacuum with
a HEPA filter will handle dust and loose crumbs. A very
gentle chisel or grinder may help with glaze contamination
on element holders, but remember that the elements
themselves are quite brittle when they are cool. Replace
the contaminated holder if you can not clean it. Remove
any glaze that has splattered on the firebrick or shelves.
(CAUTION: USE SAFETY GLASSES WHEN DOING THIS
BECAUSE GLAZE CAN BE LIKE BROKEN GLASS).
Vacuum afterward.
VACUUMING NOTE: It is possible to build up a strong
static electricity charge when you are vacuuming. If this
somehow manages to discharge into the control it can ruin
the electronic circuit. Make sure the vacuum is grounded
and periodically touch some grounded metal surface away
from the kiln to discharge the energy.
3) Make sure the tops of the shelves are coated with kiln
wash as it will keep running glaze from ruining the shelf.
Some people also apply the kiln wash to the kiln bottom.
Because this has both its benefits and detractants, we
recommend that it only be done based on the kiln user’s
individual preferences. (Do not coat the undersides or the
sides of the shelves because you do not want the kiln wash
to fall off into the kiln).
4) Keep a kiln log of firings. Tracking the performance
of your kiln over time may turn out to be an extremely
valuable tool if you ever need to diagnose future problems.
Remember that you can easily get the firing time and final
temperature at the end of the firing by hitting the Prog
Review button if you have a DynaTrol.
CAUTION: KILN WASH AND CLAY CONTAIN
SILICA
1. Long term exposure to silica dust could cause lung
damage.
2. See the MSDS sheets.
3. Exercise proper caution when mixing the dry powder
and when removing it from your shelves.
4. Use a NIOSH approved particulate respirator for dust
and use proper ventilation. You can buy these from
safety supply houses. (NIOSH_approval #TC-21C-132
is an example).
AFTER 10 FIRINGS
1) Check temperatures of the main power cord at the main
receptacle and the main kiln breaker while the kiln is at its
hottest. If these are hotter than normal, it could be a sign of
a loose or corroded connection, or possibly the wire gauge
used in the power hook-up is the wrong size for the amount
of current being drawn by the kiln. Immediately diagnose
and fix this because it could cause a fire.
2) If you have a plug on your kiln, unplug it from the
receptacle and check for oxidation, any burn marks,
discoloration, or melted spots on the plug. If you see this
replace the plug (and the receptacle) before using the kiln
again. Make sure the receptacle feels tight when you press
the plug into the outlet. A loose receptacle indicates worn
springs, which will lead to overheating.
NOTE: An oxidation inhibitor can be used on the plug’s
prongs.
3) Check element resistance. You will need a digital
multimeter (see the Troubleshooting Guide). Keep track of
this information.
4) Check tightness of case and retighten if necessary. (the
case will expand and contract during each firing and may
eventually become loose. Brick also shrinks slightly with

REGULAR MAINTENANCE OF YOUR L&L KILN
maintain.pdf REV: 11/1/2016 Page 2
2016 L&L Kiln Mfg, Inc. 505 Sharptown Rd, Swedesboro NJ 08085 P:856.294.0077 F:856.294.0070 [email protected] hotkilns.com
use - especially if used at the higher temperatures like cone
10).
5) Repair any firebrick problems.
6) If you have a manual kiln (or the Orton AutoCone backup
on an automatic kiln) be sure it is properly adjusted. See
the AutoCone instructions. Overfiring could result. The
tube assembly should be replaced if it gets overly corroded
or contaminated with condensed glaze or other materials.
Orton recommends checking the pivot point for corrosion
and sluggishness every 6 to 12 months.
AFTER 30 FIRINGS OR ANNUALLY
1) Check wires for deterioration or oxidation. Replace
any that seem brittle or where the wire insulation has
deteriorated or fallen off.
2) Check terminals for oxidation (discoloration). If you are
near salt air or if you notice corrosion on the stainless
exterior of the kiln for whatever reason then do this far more
frequently.
3) Check power connection terminals in the kiln and
control box for tightness. Be sure to do this with the power
disconnected (unplugged) for the kiln. If these terminal
connections get loose, heat can be generated (because the
electrical resistance gets greater) and this can cause a fire.
CHECK THERMOCOUPLE CALIBRATION
Thermocouples will drift in reading over time. This could
potentially lead to an overfiring before the thermocouple
actually fails. Although you can not easily check
thermocouple calibration, the general accuracy of the entire
kiln system can be checked by firing with witness cones.
See troubleshoot-cones.pdf.
Replace thermocouples once they are no longer reasonably
accurate. (Note: Type K thermocouples last about the
same as kiln elements so it is recommended to change
thermcouples when you change elements.)

OPERATION OF L&L KILNS WITH A ONE-TOUCH™ (Deg F)
one-touch-operation-deg-f,pdf REV: 1/24/19 Page 1
2016 L&L Kiln Mfg, Inc. 505 Sharptown Rd, Swedesboro NJ 08085 P:856.294.0077 F:856.294.0070 [email protected] hotkilns.com
Basic instructions are
printed directly on the
faceplate for easy reference.
Press the Enter button to
start the program you have
selected to fire.
Press and hold down Delay
to enter a countdown time
to delay the start of your
program.
Press and hold down Review
to see what program you
are running.
The display area provides
lots of information such as
temperatures, program
prompts, etc.
Choose one of either the
Bisque or Glaze programs.
They are preprogrammed for
immediate no hassle use.
Press for 5 seconds to bring
up easy options like cone,
heating & cooling rate and
hold time
The Custom option allows
more experienced users to
create and save four of your
own ramp/hold programs.
22. TABLE OF CONTENTS
1. WATCH THE VIDEO FIRST! ...................................................2
2. HOW YOUR KILN WORKS .....................................................2
3. TYPEFACE CONVENTIONS ...................................................2
4. NOTE ABOUT CONES ............................................................2
5. CONE 6 & CONE 10 VERSIONS.............................................2
6. DEGREES CENTIGRADE........................................................2
7. FIRST FIRING ..........................................................................2
7.1 FIRST FIRING IN ONE FIRING (16 HOURS) ......................2
7.1.1 START.
7.1.2 CHOOSE CUSTOM PROGRAMMING
7.1.3 PICK CUSTOM PROGRAM #1
7.1.4 MOVE THROUGH THE PROGRAM AND START
7.1.5 REVIEW PROGRAM
7.1.6 COMPLETE
7.2 FIRST FIRING IN TWO FIRINGS (2 x 9 HOURS) ...............3
8. TURNING ON THE KILN .........................................................3
9. THREE MODES OF OPERATION ...........................................3
9.1 SIMPLE (Bisque or Glaze) ..................................................3
9.2 SIMPLE WITH CHANGES (Bisque or Glaze).......................4
9.2.1 TO CHANGE A SIMPLE OPTION
9.2.2 EXAMPLE: CHANGE CONE OF BISQUE FIRE
9.2.3 EXAMPLE: CHANGE SPEED OF BISQUE FIRE
9.3 CUSTOM (Ramps and Holds): .............................................5
10. RESETTING FACTORY DEFAULTS.....................................5
11. HOW TO CANCEL A FIRING ................................................5
12. STANDARD (SIMPLE) PROGRAMS.....................................5
12.1 STANDARD BISQUE PROGRAMS....................................6
12.1.1 Slow Bisque (Default Bisque Program)
12.1.2 Medium Speed Bisque
12.1.3 Fast Speed Bisque
12.2 STANDARD GLAZE PROGRAMS .....................................6
12.2.1 Slow Glaze
12.2.2 Medium Glaze (Default Glaze Program)
12.2.3 Fast Glaze
12.3 SIMPLE COOL DOWN SPEEDS .......................................7
13. CUSTOM RAMP/HOLD PROGRAMMING.............................7
13.1 REUSE A PREVIOUS PROGRAM.....................................7
13.2 CHANGING A PROGRAM (STEP BY STEP).....................7
13.2.1 START
13.2.2 CHOOSE CUSTOM PROGRAMMING
13.2.3 PICK A PROGRAM
13.2.4 SPECIFY NUMBER OF SEGMENTS
13.2.5 ENTER RAMP RATE
13.2.6 ENTER HOLD TEMPERATURE
13.2.7 ENTER HOLD TIME
13.2.8 REPEAT STEPS FOR EACH SEGMENT
13.2.9 SET A DELAY (OPTIONAL - CAN BE SKIPPED)
13.2.10 START FIRING!
13.2.11 REVIEW PROGRAM
13.2.12 COMPLETE THE FIRING
14. KILN OPERATION DURING A
CUSTOM FIRING PROGRAM .....................................................9
14.1 DESCRIPTION ...................................................................9
14.2 OPTIONS DURING FIRING ...............................................9
14.2.1 DISPLAYING THE CURRENT SET-POINT AND
ACCESSING THE FOLLOWING OPTIONS
14.2.2 SKIP STEP
14.2.3 ADD TIME TO HOLD PERIOD
14.2.4 ADD TEMPERATURE TO HOLD PERIOD
15. CUSTOM PROGRAMS ........................................................10
15.1 CUSTOM PROGRAM 1....................................................10
15.2 CUSTOM PROGRAM 2....................................................10
15.3 CUSTOM PROGRAM 3....................................................10
15.4 CUSTOM PROGRAM 4....................................................10
16. OPTIONS..............................................................................10
16.1 ACCESSING OPTIONS....................................................10
16.2 OPTIONS..........................................................................10
16.2.1 SOUND: BEEPING ON OR OFF AT END OF PROGRAM
16.2.2 MAXIMUM TEMPERATURE
16.2.3 TEMPERATURE INDICATION
16.2.4 THERMOCOUPLE OFFSET
17. MESSAGES & DISPLAYS...................................................11
18. ERROR CODES...................................................................12
19. SOFTWARE VERSION ........................................................12
20. CENTIGRADE INSTRUCTIONS ..........................................12
21. SPECIFICATIONS................................................................12

OPERATION OF L&L KILNS WITH A ONE-TOUCH™ (Deg F)
one-touch-operation-deg-f,pdf REV: 1/24/19 Page 2
2016 L&L Kiln Mfg, Inc. 505 Sharptown Rd, Swedesboro NJ 08085 P:856.294.0077 F:856.294.0070 [email protected] hotkilns.com
1. WATCH THE VIDEO FIRST!
We highly recommend watching the video before you read
this instruction manual for quicker understanding of how this
great control works. Go to hotkilns.com/one-touch-video
2. HOW YOUR KILN WORKS
The One-Touch™ Intuitive Kiln Control was designed for
busy school teachers, contemporary studios, and hobbyists.
No programming is necessary - simple adjustments are
easy, yet sophisticated programming is also easy.
The One-Touch automatic program control uses one
thermocouple to measure the temperature of the kiln.
The control automatically adjusts power by turning power
contactors on and off to control the heat up of the kiln
according to the program you are firing.
The preprogrammed Bisque and Glaze programs are set
to fire to the most universally accepted versions of these
programs, which makes firing basic ceramics easy. These
are a slow bisque to Cone 04 and a Medium Glaze to Cone
06.
There are three modes of operation:
1. Simple (just the basic Bisque and Glaze programs as
mentioned above)
2. Simple with Changes (you can adjust a few basic
parameters like heat up speed, cool down speed,
candling time at a low temperature, and the cone to
fire to)
3. Custom where you program all ramps and holds
yourself.
3. TYPEFACE CONVENTIONS
1. Typeface font: CUSTOM indicates a Button on the
control.
2. Typeface font: CUS1 indicates what you see in the
display.
3. Typeface font: URL indicates a web link.
4. NOTE ABOUT CONES
Cones measure “heat work” rather than just final set point
temperature. It is like baking a turkey. You can bake it slow
at a low temperature or bake it fast at a high temperature.
The One-Touch™ control adjusts the final set point
temperature based on the actual final ramp rate of the kiln
(in the last segment of any program). It does this to achieve
a particular result (which is the correct bending of the cone)
rather than a particular final temperature.
For a full explanation of cones go to hotkilns.com/what-
cone-numbers-mean
If you want to see the Orton Cone Chart go to hotkilns.
com/orton-cone-chart.
Note: you can adjust how the kiln fires by adjusting the
thermocouple offset. For instance, if your kiln is firing cool
(according to a witness cone placed in the kiln) then you can
add positive Offset. If it is firing hot then you can reduce the
offset or put in a negative offset. See the OPTIONS section
on page 11 for instructions on how to do this.
5. CONE 6 & CONE 10 VERSIONS
There are two versions of the control: Cone 6 and Cone 10.
The Cone 6 versions are used on the School-Master kilns
to limit the maximum temperature of the kiln. Liberty-Belle,
Doll, Fuego and Robin kilns use the Cone 10 version. There
are only minor differences as noted in these instructions.
The main issue is the maximum temperature that the control
will let the kiln go to.
6. DEGREES CENTIGRADE
Your control comes set up to display Degrees Centigrade.
This can easily be changed to display in Degrees Fahrenheit
(see the OPTIONS section).

OPERATION OF L&L KILNS WITH A ONE-TOUCH™ (Deg F)
one-touch-operation-deg-f,pdf REV: 1/24/19 Page 3
2016 L&L Kiln Mfg, Inc. 505 Sharptown Rd, Swedesboro NJ 08085 P:856.294.0077 F:856.294.0070 [email protected] hotkilns.com
7. FIRST FIRING
Three of the CUSTOM programs have been programmed
by the factory to simplify the first firing process.
Once this process has been completed they may be
reprogrammed at will.
7.1 FIRST FIRING IN ONE FIRING (16 HOURS)
7.1.1 START.
1. Start with the display reading IdLE and flashing a
temperature or StOP and temperature.
7.1.2 CHOOSE CUSTOM PROGRAMMING
1. Press CUSTOM
2. See CUSt
3. Press ENTER
7.1.3 PICK CUSTOM PROGRAM #1
1. You will see CUS1, CUS2, CUS3 or CUS4. These
are the four custom programs.
2. Scroll to CUS1 with the UP and DOWN button.
3. Select CUS1 by pressing the ENTER button.
7.1.4 MOVE THROUGH THE PROGRAM AND START
1. Press ENTER for each display prompt that you see as
the control scrolls through the enter CUS1 program
until you see FIrE.
2. Press ENTER again when you see FIrE and the
One-Touch control will start firing the kiln using the
CUS1 program.
3. You will know it is firing because the display just reads
the kiln temperature steadily. You will probably also
hear the relays clicking on and off.
4. There is a list of Preprogrammed Custom Programs
later in this manual which will show you a list of values
for CUS1 you see while pressing ENTER.
7.1.5 REVIEW PROGRAM
1. Press the REVIEW button to review the program.
2. You can do this when you see the FIrE display,
CUS1, CUS2, CUS3, CUS4 or while firing (when
you see the kiln temperature).
3. The display will scroll though the name of the program
(i.e. CUS4), then the number of segments, then all the
ramps, temperatures and holds in sequence.
4. The display changes rapidly so you may have review
more than once to see everything.
7.1.6 COMPLETE
1. When the program is complete, you will see CPLt.
2. If the Beep option has been turned to “On” then the
control will beep about 15 times. If the beep option
is set for “OFF,” then there is no sound. If the beep
option is set for “FULL,” the control will beep until any
button is pressed. See the OPTIONS section in these
instructions for how to change this option.
7.2 FIRST FIRING IN TWO FIRINGS (2 x 9
HOURS)
1. Go through the above process but do it in two
programs. It works the same as above except that you
run the two separate programs at different times.
2. CUS2 is the first program and that takes about 9
hours.
3. CUS3 is the second program and that also takes
about 9 hours.
4. See the list of Preprogrammed Custom Programs later
in this manual for a list of values you see while pressing
ENTER.
8. TURNING ON THE KILN
1. Make sure your circuit breaker or fused disconnect
switch is turned on and the kiln is plugged in.
2. Turn on kiln with the toggle On/Off switch on the control
box.
3. You will see a software code flash briefly. Then you
will see either IdLE or StOP alternating with a
display of the current kiln temperature.
9. THREE MODES OF OPERATION
9.1 SIMPLE (Bisque or Glaze)
1. Press one of two buttons marked BISQUE and
GLAZE.
2. You will then see either bISC or GLA depending on
which button you pressed.
3. The bISC is a slow bisque to Cone 04. The GLA is
a medium glaze to Cone 06.

OPERATION OF L&L KILNS WITH A ONE-TOUCH™ (Deg F)
one-touch-operation-deg-f,pdf REV: 1/24/19 Page 4
2016 L&L Kiln Mfg, Inc. 505 Sharptown Rd, Swedesboro NJ 08085 P:856.294.0077 F:856.294.0070 [email protected] hotkilns.com
4. Press ENTER and the display reads FIrE.
5. You can add a delay time to the program by pressing
the DOWN arrow when you see FIrE but before you
press ENTER.
6. After you press the DELAY button, you will see dELA
flashing with a time value, typically 00.00 which
represents 00 hours and 00 minutes.
7. After you see this flashing display, you can press the
UP or DOWN button to adjust the time. For instance
if you want a delay time of one hour and thirty minutes
you would enter a value of 01.30.
8. Once you have the value you want, press ENTER and
you will see FIrE again.
9. This will delay the start of the actual firing by the
number of minutes and hours that you have chosen.
10. Press ENTER and the control will begin the firing
cycle. If you have entered a delay, then you will
see dLY flashing with a countdown of the time (for
example 01:30 for 1 hour and 30 minutes)
11. Press the REVIEW button to review the program.
12. You can do this when you see the FIrE display
(which will be before the kiln has started to fire) or while
firing (when you just see temperature continuously.
13. The display will scroll though:
• The name of the program (i.e. bISC)
• Then CndL (for candle low fire followed by a time)
• Then COnE followed by a number like 04
• Then °F or °C to let you know the temperature scale
• Then a temperature like 1063 which is the anticipated
maximum temperature.
• Then HLd followed by a time value like 00:00,
which is any hold time at top temperature that you may
have programmed into the control.
• NOTE: Setting for COOL and HtUP are not shown
so you need to make sure these are right before you
fire your program.
14. Press ENTER anytime to stop the program.
15. When the program is complete, you will see CPLt.
16. If the Beep option has been turned to “On,” then the
control will beep about 15 times. If it was set for “OFF,”
then there will be no beeping. If it was set for “FULL,”
then it will beep until a button is pressed. (See Options
later in the manual for how to set this.)
9.2 SIMPLE WITH CHANGES (Bisque or Glaze)
1. It is easy to change simple options like candle time,
cone to fire to, hold time at peak temperature, cool-
down rate and heat-up rate (plus, you can restore the
default values in case you lose track of where you are).
Note that the heat up rate is what changes a Bisque or
a Glaze program to Slow, Medium or High.
9.2.1 TO CHANGE A SIMPLE OPTION
1. When you press BISQUE or GLAZE and hold it for
5 seconds, then you will see either CndL,COnE,
HLd, COOL, rStr, or HtUP.
2. Once you see one of these displays remove your finger
from the button. (NOTE: If you do not hit another
button for 5 seconds the control will return to idle. If this
happens just start over.)
3. Once you see any of these displayed options you can
scroll to other displayed options by pressing the UP or
DOWN button.
4. Here are the options you can change:
CndL Candle Time (this is a low temperature
firing used to dry moisture from the
clay)
COnE Cone to fire to (022 to 10)
HLd Hold or Soak time at peak temperature
in hours and minutes up to 99 hours
and 99 minutes (Format: 00.00)
COOL Cool down rate. OFF (natural
cooling), SLO (Slow = 52°C/hour),
MEd (Med = 121°C/hour), FASt
(Fast = 260°C/hour)
rStr Restore default original values
HtUP Heat up rates. SLO (Slow), MEd
(Medium), FASt (Fast). This is what
changes the program to Slow, Medium
or High. The rates depend on wether
you are in Glaze or Bisque - see
the programs later in the manual for
details.
5. Once you see the what you want to change press
ENTER.
6. Once you have entered a option to change, the UP and
DOWN button will then allow adjustment of the value
Table of contents