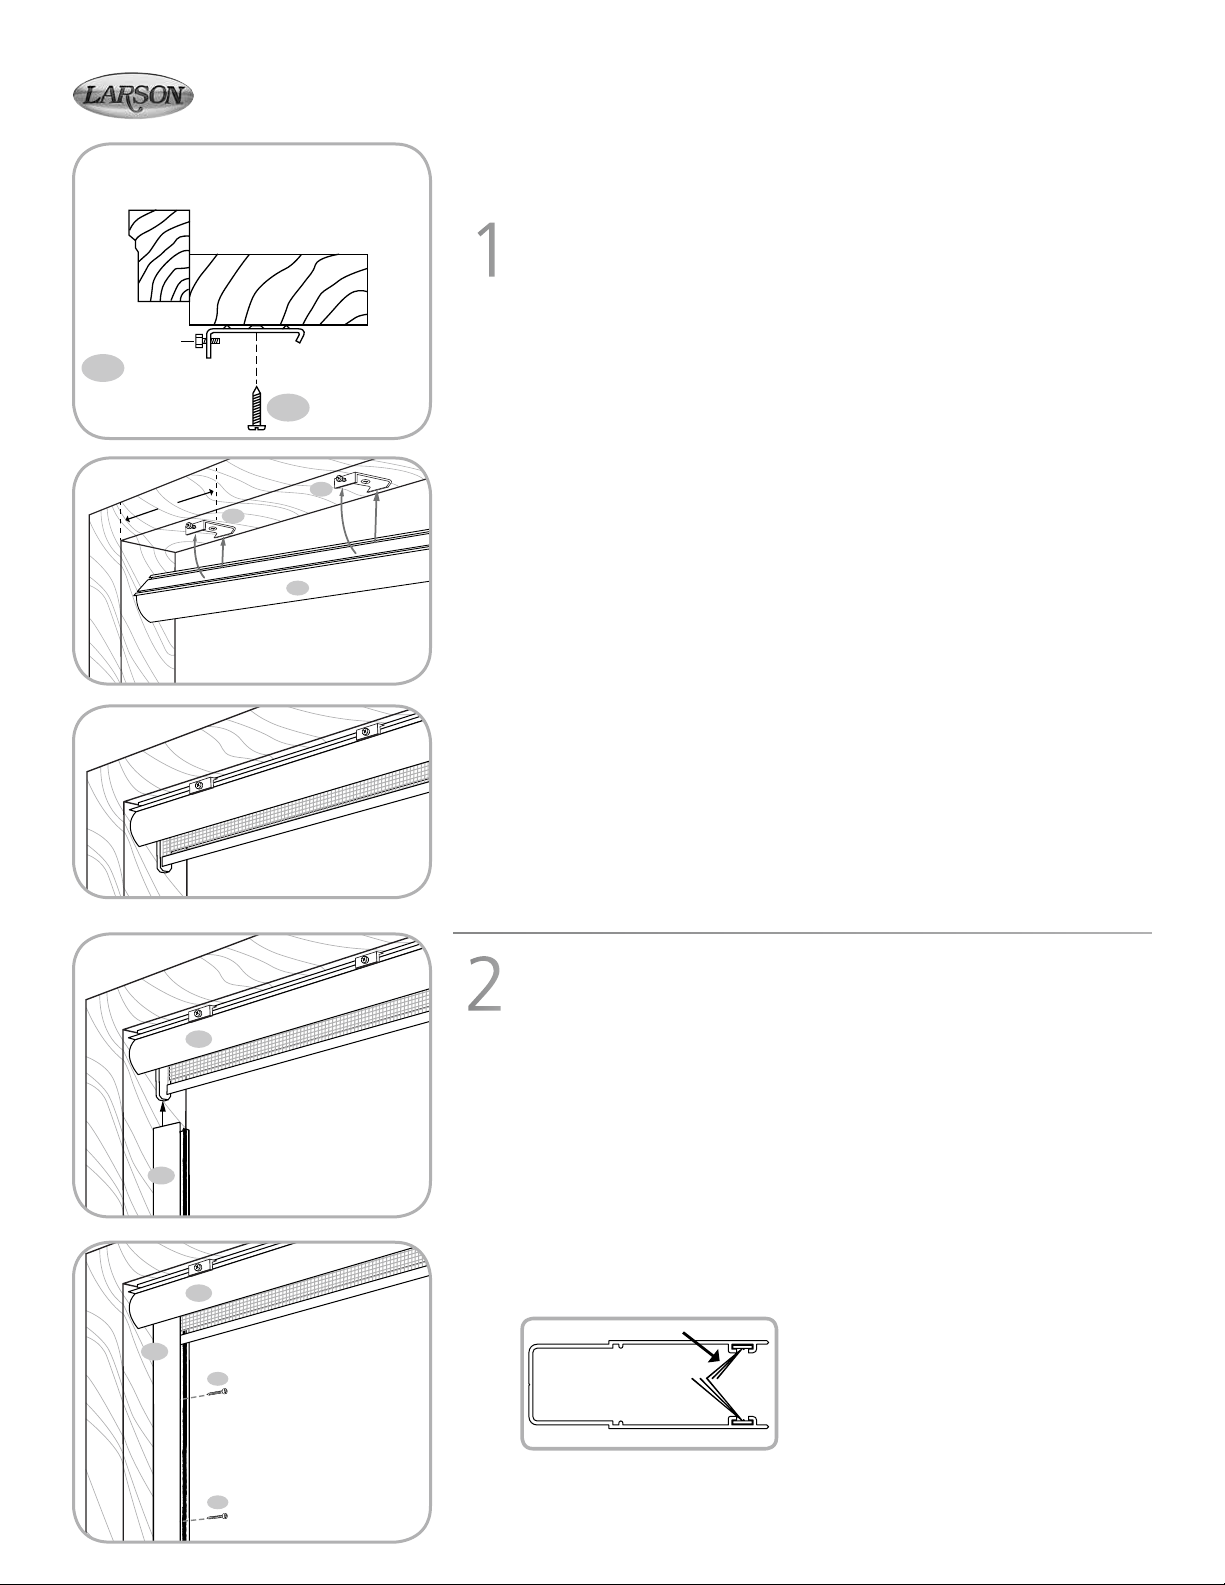
MOUNTING THE SCREEN CASSETTE
On a recess installation, the Screen Cassette Assembly will be fastened to the
inside top with Recess Mount Clips. Measure how deep into the frame you wish
the Cassette Assembly to be installed. Using the #8 x 3/4”(19mm) Phillips Pan
Head Screws, attach the Mount Clips to the top approximately 6” in from each
side. For wider openings, space any remaining clips evenly along the top.
Make certain that the Set Screws are facing the front (1A). With clips screwed
to the jamb securely, position the Screen Casette Assembly so that the back
flanges of the Mount Clips fit into the groove at the top and back of the Cassette
Assembly (1B). Then bring the front of the Casette up, so that the top of the
Cassette Assembly is flat against the clips. With the Cassette Assembly positioned
correctly within the opening, tighten the Mount Clip Set Screws so that the
Cassette Assembly is secure and straight within the opening (1C).
INSTALLING THE SIDE GUIDE RAILS
Slide the top end of both Side Guide Rails onto the nylon tabs that protrude from
the End Caps of the Screen Cassette Assembly with the shorter pile to the inside
and with the plastic end cap toward the sill (2A). (NOTE: make sure the left and
right edges of the Screen and Screen Pull Bar are inside the Side Guide Rails).
Attach the Side Guide Rails to the opening using #8 x 3/4”(19mm) Phillips Pan
Head Screws (2B).
MOTORIZED SCREENS: If you purchased a motorized screen you will need to
set the limits (the start and stop points of the screen) once the screen is
installed. Please see the separate operating instructions that accompanied your
remote control.
1
2
SIDE VIEW
OUTSIDE
DOOR HEAD
INSIDE
D
C
SET SCREW
PAGE 2
1A
1B
1C
2A
2B
Inside
Outside
GrandVue RECESS INSTALLATION


