lassele LCB-53 User manual

Chef Bases
LCB-53
LCB-71
LCB-74
LCB-83
LCB-86
LCB-93
LCB-96
LCB-98

Contents
♦Specifications ………………………………....
♦Installation …………………………………….
♦Maintenance & cleaning ……………………..
♦Operation & Installing Castors ………….....
♦Trouble-Shooting ……………………………..
3
4
4
5
6

Product Chef Bases
Model LCB-53
(LCB--53M) LCB-71
(LCB-71M) LCB-74
(LCB-74M) LCB-83
(LCB-83M) LCB-86
(LCB-86M) LCB-96
(LCB-96M)
Capacity (ℓ) 277 405 405 487 487 606
Exterior Dimensions
(Including 4”Casters)
[mm]
W 1340 1790 1882 2115 2192 2440
D 775 775 775 775 775 775
H 637
(648)
637
(648)
637
(648)
637
(648)
637
(648)
637
(648)
Net Weight (kg) 107 135 138 155 158 165
Rated Voltage AC220V /50Hz
Type of Power Cord -
Amps 1.6 1.6 1.6 3.0 3.0 3.0
Compressor (HP) 1/5 HP 1/5 HP 1/5 HP 3/8 HP 3/8 HP 3/8 HP
Drawers 2 4 4 4 4 4
Vessel - Pan Quantity
(Full size pan) 6 8 8 10 10 12
Refrigerant R-134a
Range of Temperature 1~5°℃
Specifications
♦Specifications and Designs are subject to change without notice.
♦The name plate (including Serial No.) is located on the upper left side of the cabinet interior.
3

Installation
Maintenance & Cleaning
1. INDOOR USE ONLY
•This unit is intended for indoor use only.
2. FOR LOCATION
•Be sure that the location is strong enough to support the total weights of the unit and the content.
•Keep the unit away from sunlight and other heat generating equipment.
•The minimum clearance between the back of the unit and the wall should be 7 inches at least.
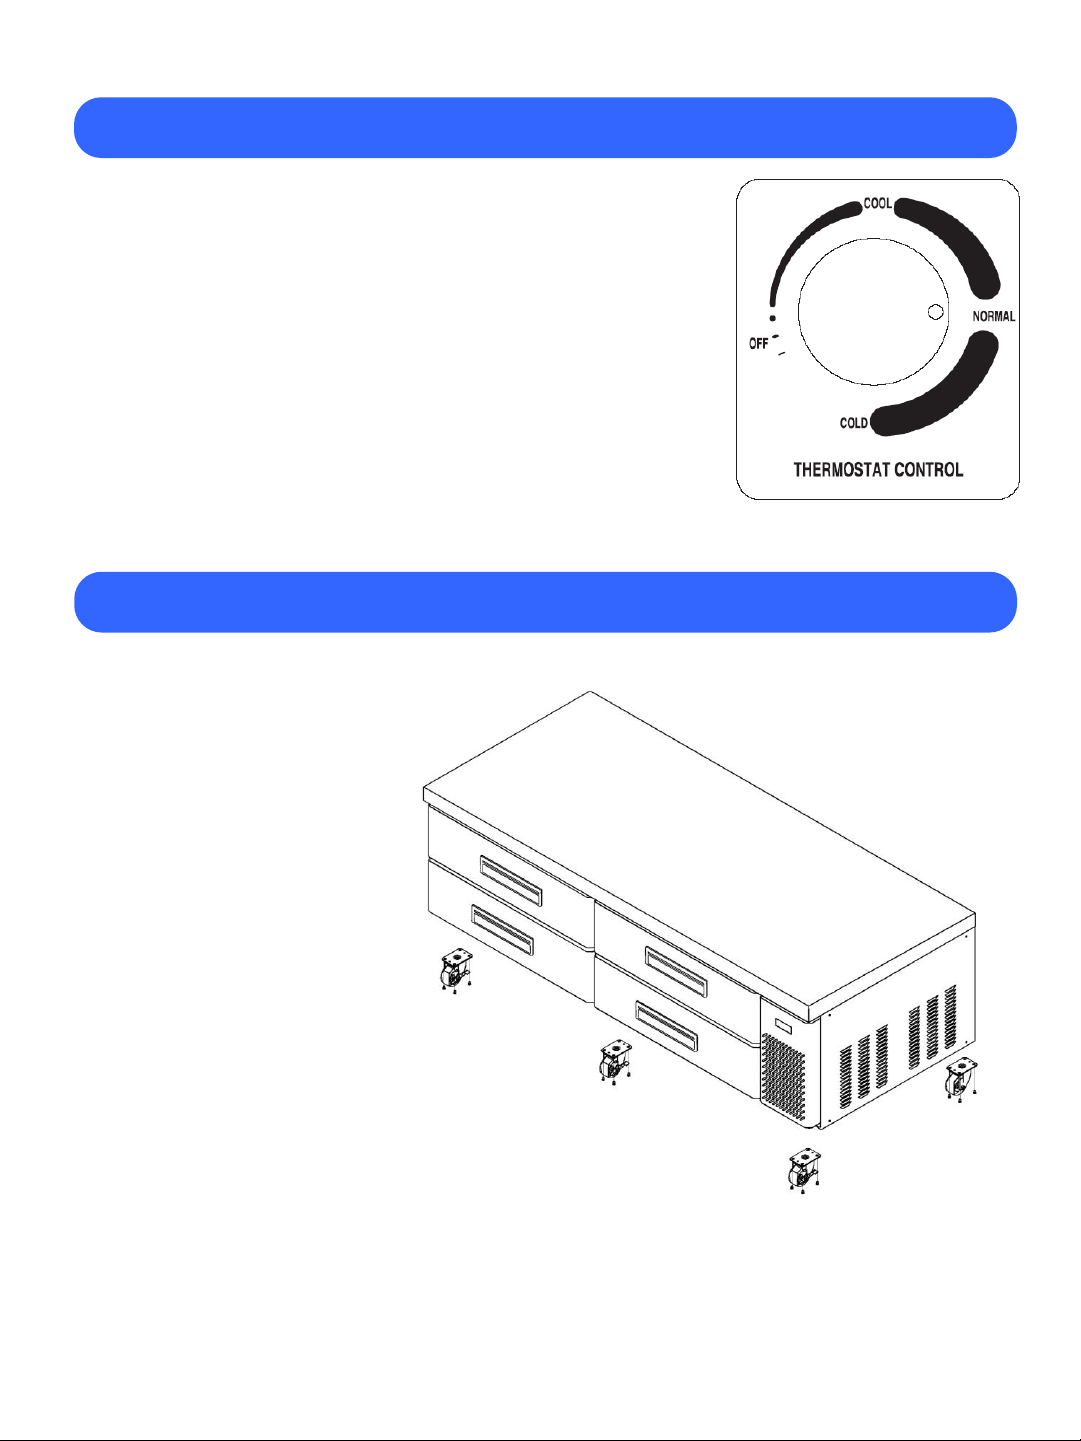
3. INSTALLING CASTORS
•Be sure that castors with brake should be installed in front.
4. LEVELING
•The unit should be leveled to provide adequate drainage.
5. ELECTRICAL CONNECTION
•The unit should be plugged into a 220V/60Hz, grounded wall receptacle to
prevent electrical shock and fire hazards.
•Do not plug other electrical units into same wall receptacle this unit is plugged into.
•Do not use an extension cord.
•Compressor warranties are void if the compressor burns out due to low voltage.
1. To maintain proper refrigeration performance, the condenser fins should be
checked monthly and clean with a soft brush or vacuum cleaner as needed.
2. Wait at least 6mimutes after unplugging the unit before plugging in.
3. The interior and exterior of the unit can be cleaned using plugging in water.
• Do not use an abrasive cleaners to avoid scratches on the surfaces.
4. The door-gasket should be cleaned to avoid maintain proper sealing.
4

Operation
1. The temperature controller (thermostat) is located on the upper
left of the back side of the cabinet interior.
2. The controller has been preset "NORMAL" position at the factory.
3. Set the control-knob toward "COOL" for higher temperature and
"COLD" for lower temperature.
4. The thermostat controls compressor's ON/OFF by sensing inside
temperatures of cabinet.
5. The unit is equipped with an off-cycle defrost .
Installing Casters
1. Remove the outer packing.
2. Install the castors in the area.
3. Maker sure that castors with brakes should be installed in front.
5

Troubleshooting
Problem Possible Cause Action
Compressor
will not start
Power connection failure. Check Power Cord and plug it in.
Power switch is in off position. Change it on position.
The unit does not
refrigerate well
Temperature set point is too high.Correct temperature set point.
The door is opened too frequently.
Do
not open the door
Frequently
.
Loading of too much warm or
moist product.
Do
not load warm or
moist
product.
Not enough ventilation. Move the unit in a well
ventilated place with at least 7
inches of clearance on all sides.
Condenser is clogged. Clean it.
Condensation
on cabinet exterior High moisture air can produce
dews during the rainy season. Wipe with cloth.
※The following is not an indication of problem or malfunction;
A water-flowing sound can be heard when the unit is operating.
This is the sound of refrigerant flowing.
6
This manual suits for next models
7
Table of contents
Other lassele Food Prep Table manuals