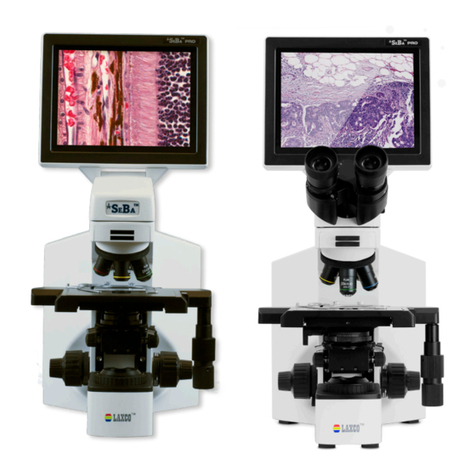
Laxco SEBA2 User manual

Quick Start Guide
sebamicro.com
Doc. Control No. SEBA-PKG-DOC-001531 REV 0
SeBa2 and SeBa3
Digital Imaging Systems
with &

sebamicro.com
Touchscreen Display
SeBaAccess Reader
On/O Switch
Transmitted LED
USB Port
X/Y Mech. Stage
Condenser
Objective Turret
Coarse/Fine
Focus Knobs
Field Diaphragm
USB Ports (x3)
HDMI Output
Power Input Jack
Coarse/Fine
Carrying Handle
Focus Knobs
Illumination Adjustment
(Dimmer)

sebamicro.com
Touchscreen Display
SeBaAccess Reader
On/O Switch
Transmitted LED
USB Port
USB Ports (x3)
HDMI Output
Power Input Jack
Coarse/Fine
Carrying Handle
X/Y Stage Adjustment Knobs
X/Y Mech. Stage
Condenser
Objective Turret
Focus Knobs
Coarse/Fine
Focus Knobs
Field Diaphragm
Illumination Adjustment
(Dimmer)

sebamicro.com
Thank you for purchasing the SeBa Digital
Imaging System. The SeBa system is
shipped fully configured and ready to use.
This Quick Start Guide is a quick reference
for you to use to familiarize yourself with
the operation. For complete details of
the SeBa system please refer to the User
Manual located on the SeBa USB drive.
Items included:
- SeBa Imaging System
- Power Supply
- SeBa Access Card
- SeBa USB Drive
- Dust Cover
- Immersion Oil
- Lens Paper
- Allen Wrench
- Quick Start Guide
- PH Models
- Phase Sliders
- DF Models
- Darkfield Slider
- PL Models
- Analyzer
- Polarizer
Power On
SeBa Access Login
1. Turn on power switch which is
located on the right side of the SeBa
system.
2. The SeBa Touchscreen user
interface will open automatically after
turning on the power.
1. To connect to your SeBaShare
account, place your SeBa Access card
in front of the SeBa logo on the front of
the microscope.
2. A green LED will illuminate when
the SeBa Access card is successfully
read and a message will display on the
screen (for logging and logout).
View Live Image
1. Place slide into the slide insert on the
microscope stage.
2. Select desired objective
3. Focus the sample on screen by
using the coarse and fine focus knobs.
4. Adjust Illumination to desired level.
5. Move the position of the sample by
adjusting the x/y position of the stage
to desired position.
6. Adjust image by using the settings
menu on the touchscreen interface.
Initial Setup
1. Remove the SeBa from its packaging
and place it on a solid flat surface.
2. Ensure power switch is in the “O”
(OFF) position.
3. Plug power supply into the back of
the microscope and plug cord into an
outlet.
4. Optional: Connect optional
accessories into USB port(s) (mouse,
keyboard, USB drive.
sebamicro.com
Touchscreen Interface
Capture still
image
Record live
image
User Settings
Eects Menu Measure Menu Playback Menu
Adjust exposure,
white balance, color,
brightness, contrast
of live image.
Perform
measurements on
live image.
Review captured
images and upload
to SeBaShare
Note: To return to full screen mode and “hide” the Eect,
Measure or Playback menu simply touch in the middle of
the screen.

sebamicro.com
2. To choose multiple images to
upload, press the gallery icon in the
upper left hand corner of the screen.
This will open up the “grid view” as
seen below.
3. Press and hold on an image until
“1 item selected” is displayed in the
upper left hand corner of display.
4. Select additional images to upload.
You can select all images by pressing
the “x images selected” and choose
“Select All”.
5. To upload the images to SeBaShare
tap the SeBa cloud icon in the upper
right hand corner. Follow prompts on
screen to complete upload to desired
folder.
View captured images
1. Press the Playback icon to open the
Playback menu.
2. To open a captured image for review
“double tap” the desired image from the
Playback Menu (see previous page). This
will open up the full screen image. To
view other images, swipe the screen left
or right.
1. To upload the displayed image,
press the SeBaShare Icon located in
the upper right hand corner of the
screen. If menu disappears, touch the
screen to make the menu reappear.
SeBaShare Interface
Upload to SeBaShare
Note: To return to a live image or previous screen press
the icon on the lower menu. This menu can always
be accessed by dragging a finger down from the top of
the display.
Return to previ-
ous screen
Go to Home
Screen
Show open pro-
grams

sebamicro.com
Initial Login/Account Setup
1. Go to www.sebashare.com.
2. Your initial username is located on a
silver sticker located on your SeBaAccess
card. The username is also your initial
password to login to SeBaShare.
3. Enter your Username and Password and
click the arrow or press enter key to login.
1. To access your personal account
settings click on the drop down menu
in the upper right hand corner of the
SeBaShare homepage and choose
“Personal”.
2. On the “Personal” page enter your
email address. This can now be used
as your new username for logging in
to SeBaShare.
3. Enter a new password and click
“Change Password”.
SeBaShare Cloud Login
Changing Username and
Password

Doc. Control No. SEBA-PKG-DOC-001531 REV 0 Copyright © 2016 LAXCO Inc. All rights reserved.
Disclaimer:
Information provided by Laxco Inc. is believed to be accurate and reliable. However, no responsibility is assumed by Laxco Inc. for
its use. The information contained in this publication is subject to change without notice. Words that Laxco Inc. considers trademarks
have been identified as such. However, neither the presence nor absence of such identification affects the legal status of any
trademark. Units of measurement in this document conform to SI standards and practices. All rights reserved.
The design of this product is under constant review. Every eort is made to maintain in an updated form. The right is reserved to
change specifications and equipment at any time without prior notice.
LAXCO, Inc. | 22118 20th Ave SE | Suite 142 | Bothell, WA 98021 | Tel: +1 425-686-3082 | info@laxcoinc.com | www.laxcoinc.com
This manual suits for next models
1
Table of contents
Other Laxco All In One Printer manuals