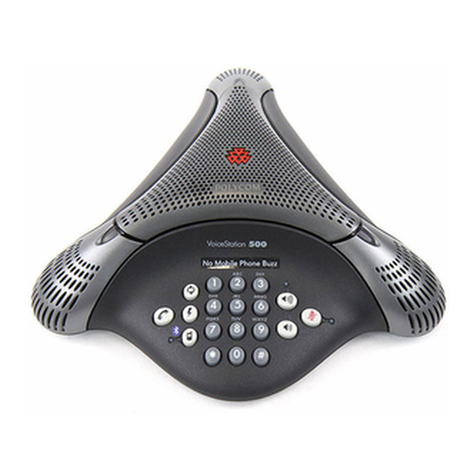
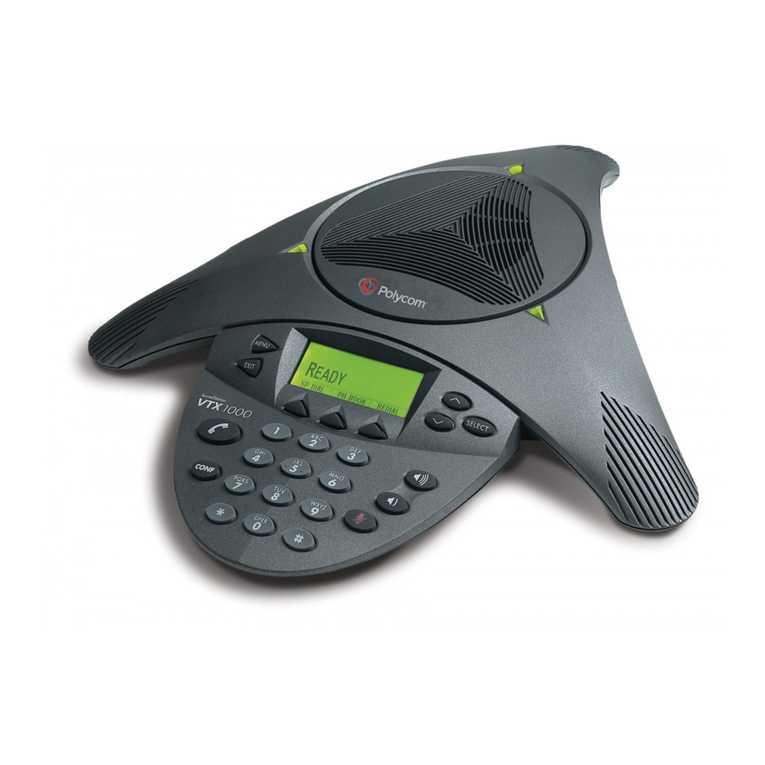
Lazerbuilt PhoneLog Summit User manual

PhoneLog Summit
Model
Full-Duplex
Conference Phone
User Guide

Important Safety Instructions
Please take a little time to read and understand the information and
instructions contained in this user guide. If having read this guide, you
require further help or information, please contact the helpline on the
telephone number shown in this guide and under the base of your product.
!Read and understand all instructions.
!Connect the product to an accessible, switched mains wall outlet.
!Follow all warnings and instructions marked on the product.
!Unplug the product from the wall outlets before cleaning. Do not
use liquid or aerosol cleaners. If necessary, use a soft cloth with a
mild detergent.
!Do not use this product near water.
!Slots may have been included in the cabinet for ventilation
purposes. Never push objects of any kind through slots in the
product as they may touch dangerous voltages or short out parts
that could result in a risk of fire or electric shock.
!Never spill liquid of any kind on to the product.
!Do not disassemble the product but refer to qualified service
personnel in the following eventualities.
!If liquid has been spilt onto the product
!If the power cord becomes damaged or frayed.
!If the product does not operate normally by following the
instructions contained in this user guide.
!If the product has been dropped or the case has been damaged.
Important note
This product has been designed for operation in conjunction with a mains
electricity supply. It will not operate when disconnected from this supply. In
the event of a mains power failure, it will not be capable of making or
receiving calls, including those to the emergency services.
Save these instructions for future use.

Introduction
Your 'Summit' Conference Phone uses digital technology to provide
excellent handsfree audio quality and simplicity of use.
It includes the following features.
Full Duplex Operation
Unlike many speakerphones which allow only one party to talk at any
one time (simplex operation), the Summit allows all parties to talk and
listen at the same time (duplex operation).
Two Digital Signal Processors
The Summit incorporates 2 digital signal processors which minimises
echo and feedback.
Volume Control
A control is provided to adjust the volume of the received speech.
Recall
A recall button is provided to activate network services such as call
waiting or may be used in conjunction with a PABX to transfer calls.
Redial
Automatically dial the last number you called.
Mute
Turn off the microphone so that the person at the other end does not
hear you speak. Ideal for those private 'asides'.
Ringer Switch
Allows the adjustment of the ringer volume.
Extension Microphone (optional extra)
For the larger conference room, provision is made for a second
microphone, which may be placed up to 15 feet from the conference
unit.

Product Features
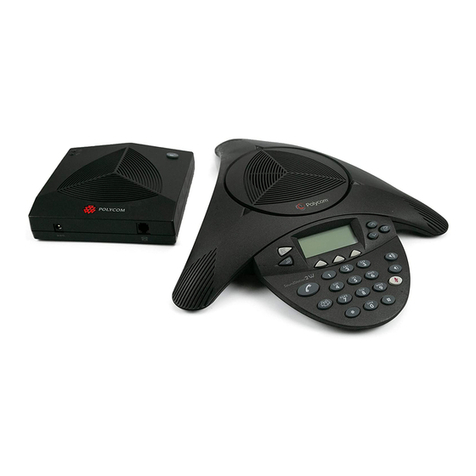
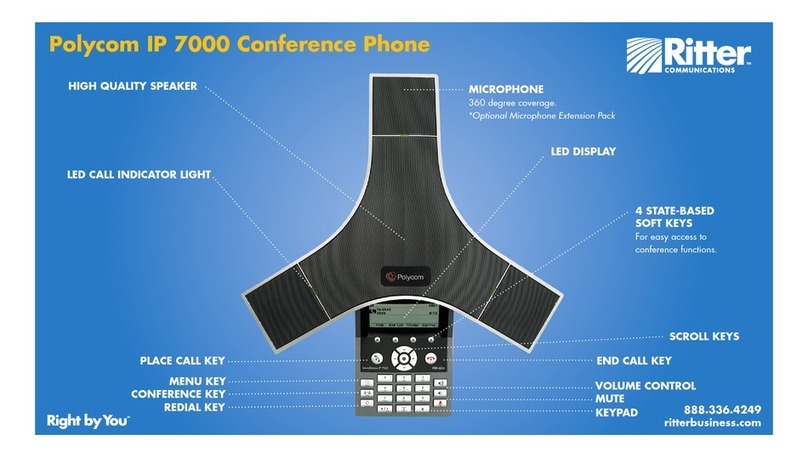
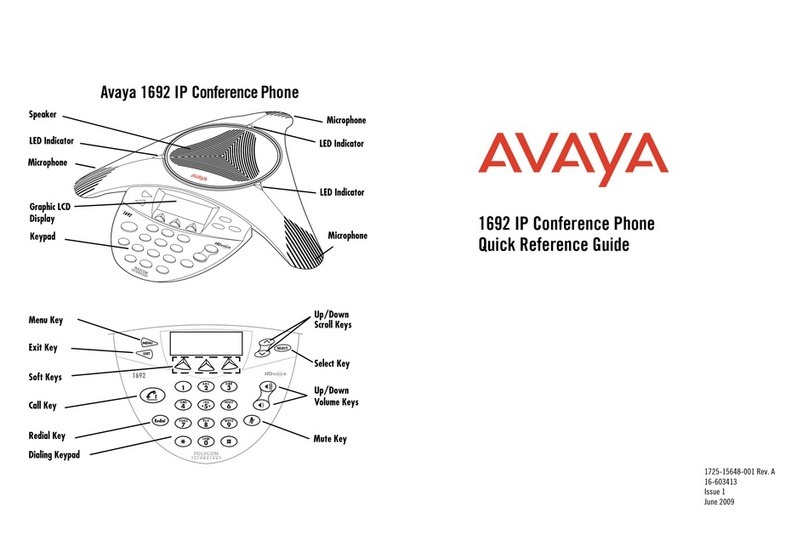
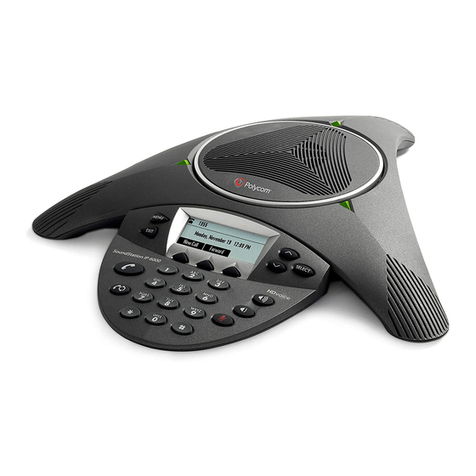
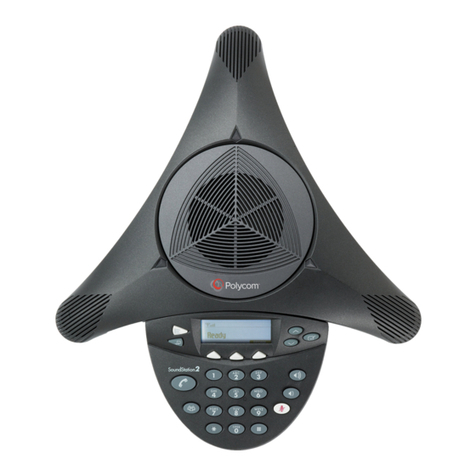
Internal Microphone : Used for
talking into the conference
phone. For best results, it is
recommended that you speak in
front of the microphone no farther
than 8 to 10 feet away.
Speaker : For best results, do
not cover with an object of any
kind, (including your hand).
Telephone Dial Keys : Used to
dial outgoing calls. Use as you
would any push button
telephone.
AC 9V socket : Used to connect
the AC adapter supplied with the
unit.
Line Socket : Connects the
conference unit to the telephone
wall socket.
Extension Microphone Socket
:Used to connect the optional
extension microphone.
Pulse / Tone Switch : Selects
the form of dialling that the
conference phone uses when
making outgoing calls. Also used
to select between timed break
recall and earth recall signals.
Ringer Switch : Adjusts the
volume of the ringer between
High, Low and Off.

!Recall Key : Generates a recall signal, required by a PABX to put a
call on hold, or when activating additional network services such as
call waiting.
!Mute Button: Disconnects the microphone for private
conversations.
!Mute Indicator Light : Indicates that the unit is in a Mute mode.
!ON/OFF Button : Turns the conference phone ON or OFF.
!Power Indicator Light : Lights when the unit is ON.
!Redial Key : Activates the last number redial facility.
!Tone Key : When the unit is for Pulse dialling, allows temporary
dialling in the Tone mode.
!UP and Down Volume Buttons : Raises or lowers the speaker
volume.
Product Features

Installation
To Connect the
Conference Phone
Even thought the Summit
conference phone has a built-in
dialler, we recommend that it be
connected in parallel with an
ordinary telephone. In this way,
calls can be made during power
fail conditions.
1 Plug one end of the telephone
cord provided, into the line
socket at the rear of the unit.
Plug the other end into the
telephone wall socket.
2 Connect the power adapter
jack plug, into the unit and the
adapter into a switched mains
wall outlet.
3 Switch ON the mains supply at
the wall outlet.
4 Press the ON/OFF button. If
you do not hear dial tone from
the loudspeaker, please check
the connections. If the problem
still persists, please read the
troubleshooting section at the
end of this guide.
Choosing a Location
For best results, please note the
following :-
!Everyone who is speaking
should be no further than
8 to 10 feet from the
Summits in-built
microphone (or 3 to 9 feet
from the optional
extension microphone).
!Ensure that the unit is
positioned such that the
wires will not be the way
of normal activities.
!You may wish to choose a
location that is free from
background noise.
!Your results may vary
depending on the
acoustics of the room and
the number of people
speaking.

Setting the Pulse / Tone
switch.
Before you can dial a call on the
Summit conference phone, you
must select which form of dialling
it will use.
All domestic telephone lines in
the U.K. now accept Tone
dialling. This is both fast and
accurate and should be selected
if possible.
When connected as an extension
of an office telephone system
(PABX), the setting of this switch
will be dependant on the
telephone system in question. If
in doubt, please contact your
system supplier or following the
procedure below.
1 Set the switch to the Tone
position
2 Turn the unit ON (ON/OFF
button) and listen for dial tone.
3 Dial a known number
(remember to include any line
access digit required by the
PABX usually 9).
4 If the call is successful (ringing
or engaged tone) the switch may
be left in the Tone position. If the
call is unsuccessful, terminate
the call by pressing the ON/OFF
button. Set the switch to the
Installation
Pulse position and try the test
above again.
Using the Tone Button
If you have set the Tone / Pulse
switch to the Pulse position, you
may temporarily change to Tone
dialling by pressing the Tone
button. This may be required
when accessing automated
telephone services, which require
Tone signals.
Setting the Ringer Volume
Your Summit conference phone
will ring for incoming calls. The
Ringer Volume Switch may be
used to adjust the volume of the
ringer between High, LOW or
OFF. With the switch set to the
OFF position, the unit will not ring
for incoming calls but can still be
used to make outgoing calls, or
to answer incoming calls ringing
on a parallel extension phone

Operation
Making a Call Using the
Summit Conference
Phone
1 Press the ON/OFF button and
listen for dial tone.
2 Dial the required number on
the keypad (when connected to
an extension of a PABX,
remember to include any line
access digit required).
3 When the other party answers,
you may conduct a conversation
using the built-in microphone.
4 When you have finished the
call, press the ON/OFF button
again.
Receive Volume
You may adjust the volume of
receive speech, by pressing the
UP and DOWN buttons. When
you have reached the maximum
or minimum positions, the unit
will beep 3 times.
As this beep may be quite loud
over the telephone line, it is
recommended that you advise
the other party before adjusting
the volume.
Note : With the volume in the
minimum position, the incoming
speech will be very quiet. This
position may be useful if you
wish
to include a non active party in
your call i.e. you would like
another partly to listen in to a
conversation or discussion you
are having, but not be able to
take part in it.
Mute
The Summits microphone(s) may
be turned off, by pressing the
Mute button. This will still allow
you to hear the other party but
they will not be able to hear you.
Press the Mute button again to
return to normal conversation.
Note : If you have installed the
optional extension microphone,
this will also be muted.
To Answer an Incoming
Call
Calls may be answered on the
Summit conference phone by
pressing the ON / Off button, (the
Mute and Volume buttons will
work in the normal way).
The ON / OFF button should be
pressed again when the call is
completed.

Operation
Making a Call using a
Parallel Telephone
You can also make a call on a
parallel (extension) telephone
and then transfer the call to the
Summit conference phone.
The call should be dialled on
your telephone in the normal
way.
When you wish to transfer the
call, press the ON / OFF button
on the conference unit and hang
up the telephone by returning the
handset to its cradle.
Caution : If you do not hang up
the telephone, you may
experience a whistling noise
caused by feedback between the
2 products.
Redial
To call the last number you
dialled on the conference unit,
you can use the Redial function.
Turn the unit ON by pressing the
ON / OFF button and press the
Redial Key.
Note : The Redial function may not
operate under all possible conditions of
connection to PABX equipment. Some
PABX equipment may require a pause
between the line access digit and the
telephone number. A pause is not
available on this product.
Recall
The Summit conference phone
generates a recall signal for use
when connected to an office
PABX (transferring or placing
calls on hold etc.) or when
accessing additional network
services such as call waiting.
With the Pulse / Tone switch set
in the Pulse position, the unit will
generate an Earth recall.
With the switch set to the Tone
position, the unit will generate a
Timed Break Recall (TBR) of
approximately 100mS.
Ringer Equivalence
Number (REN)
If you connect too many devices
to your telephone line, they may
not ring correctly. On each
product you have connected to
your telephone line, will be
printed a REN number. Add
these REN numbers together
and ensure that they do not
exceed a total of 4.
The REN of the Summit
conference phone is 1.
Note : Any unmarked BT
instrument may be assumed to
have a REN of 1.

Extension Microphone (Option)
Using the optional
Extension Microphone
The optional Extension
Microphone will increase the
area over which people taking
part in the conference may be
located. If there are people
placed further than 8 to 10 feet
from the conference phone, then
the Extension Microphone should
be used.
It is recommended that the
extension microphone is
positioned around 15 feet from
the conference phone base unit.
Locating the extension
microphone within 3 feet of the
base unit may result in
interference.
It is installed by plugging the
connector plug into the socket
provided at the rear of the base
unit.
The Extension unit includes its
own Mute button and Indicator
light. When the indictor light
shows Green, the microphone is
active. When it shows Red, it is
muted.
Pressing the Mute button on
either the base unit or the
Extension Microphone unit, will
cause both of the microphones to
be muted.

General Information
Care and Maintenance
The following suggestions will help you care for this product.
!Keep the unit dry. If it gets wet, wipe it dry immediately. Liquids may
contain minerals that can corrode electronic parts.
!Use and store the conference phone in normal temperature
environments. Extreme temperatures can shorten the life of electronic
components and can distort or melt plastic parts.
!Treat the unit with care. Dropping it may result in damage to circuit
boards or cabinet parts.
!Occasionally wipe the conference phone with a damp cloth to clean
it. Do not use harsh chemicals, cleaning solvents or strong detergents.
Specification
!Full Duplex Handsfree
Speakerphone
!Pulse Dialling 10 P.P.S
(33/67)
!Tone Dialling
!Last Number Redial
!Mute
!Recall (Pulse mode
Earth)
!Recall (Tone mode Timed
Break 100mS)
!Extension Microphone
(optional)
This product is designed for connection to the PSTN telephone network of
Great Britain and Northern Ireland.
It should be used in conjunction with A30980BC mains adapter supplied.
This adapter must be connected to a standard A.C. mains wall outlet of
230 Volts 50 Hz.
Complies with the European RTTE directive
Complies with the European EMC directive 89/336/EEC.
Complies with the European Low Voltage directive 72/23/EEC.

Troubleshooting
If the actions suggested in this troubleshooting section do not resolve your
problems. Please call the telephone helpline (during office hours) on the
following UK number.
Telephone Helpline 01438 749009
The Indicator Lights do not light
!Make sure the unit is connected to the mains wall outlet and the
mains supply is switched ON.
!Ensure the adapter plug is correctly located in the socket provided
at the rear of the unit.
!Ensure the conference phone is switched ON by pressing the ON /
OFF button.
There is no dial tone
!Ensure the telephone line cord is correctly fitted into the telephone
wall outlet and into the line socket at the rear of the product.
!Check the telephone line by replacing the Summit conference
phone with a known working phone.
!If connected to an extension of a PABX telephone system, ensure
that the PABX system will support analogue devices and that the
socket to which you have connected the conference unit is installed
and configured to accept a simple analogue telephone (non key
system phone). The conference unit may also be checked by
temporarily plugging it into the telephone socket used for the fax
machine (this will be of the same type as that required for the
conference unit)
You can receive calls but are unable to dial out.
!Ensure that the Pulse / Tone switch, at the rear of the unit, is set to
the correct position. If in doubt, consult your system or network
provider.
Helpline

The conference unit does not ring.
!Check that the Ringer Volume switch is not in the OFF position.
!Make sure the unit is correctly connected to the telephone wall
socket and the mains outlet.
!If connected as an extension to a PABX, ensure that the PABX will
support simple telephone operation.
Breaks in speech occur.
!The conference phone may take longer to adapt to some room
conditions than others. Continue the conversation whilst the
conference unit adapts to the room conditions.
!The phone at the other end of the line may not be full duplex. For
the best performance, ensure the phone at the other end of the line
is either full duplex or is a non handsfree handset telephone.
Troubleshooting

In the unlikely event that your conference phone develops a fault within
the first month of purchase, it should be returned, with a copy of your
purchase invoice, to your retailer who will exchange it for a new one.
If it becomes faulty within the guarantee period but after the first month, it
should be returned for repair to Lazerbuilt (at the address shown above),
either directly or via your retailer.
After the guarantee period, return your product to Lazerbuilt, indicating the
problems you are experiencing. Include your name, address, telephone
number and a postal order/cheque for £5.00 to cover the handling charge.
Lazerbuilt will then send you an estimate for the repair.
Before returning your product for repair or exchange
If you believe that your product is not functioning correctly, please
undertake the following course of action :-
1 Ensure you have read and understood the instructions and are operating
the product as described in the instructions.
2. Read the TROUBLESHOOTING section of this user guide and follow
any advice given for the problem you are finding.
3. Call the HELPLINE on the telephone number show in this guide
Telephone Helpline 01438 749009
Helpline
Before returning your product for exchange or servicing, please phone the
helpline. In many cases, we are able to help with a solution to your
problems without requiring the unit to be returned.
The helpline staff are available during officer hours.
Guarantee Procedure

Guarantee Procedure
Guarantee Registration
To register your guarantee, please fill in the card enclosed with your
product and return within 10 days of purchase to :-
Lazerbuilt Ltd
20 Gunnels Wood Park
Stevenage
Herts, SG1 2BH
If your guarantee is not registered, Lazerbuilt will require proof of purchase
before carrying out any in-guarantee repairs.
Please retain your purchase receipt.
Table of contents
