Installation
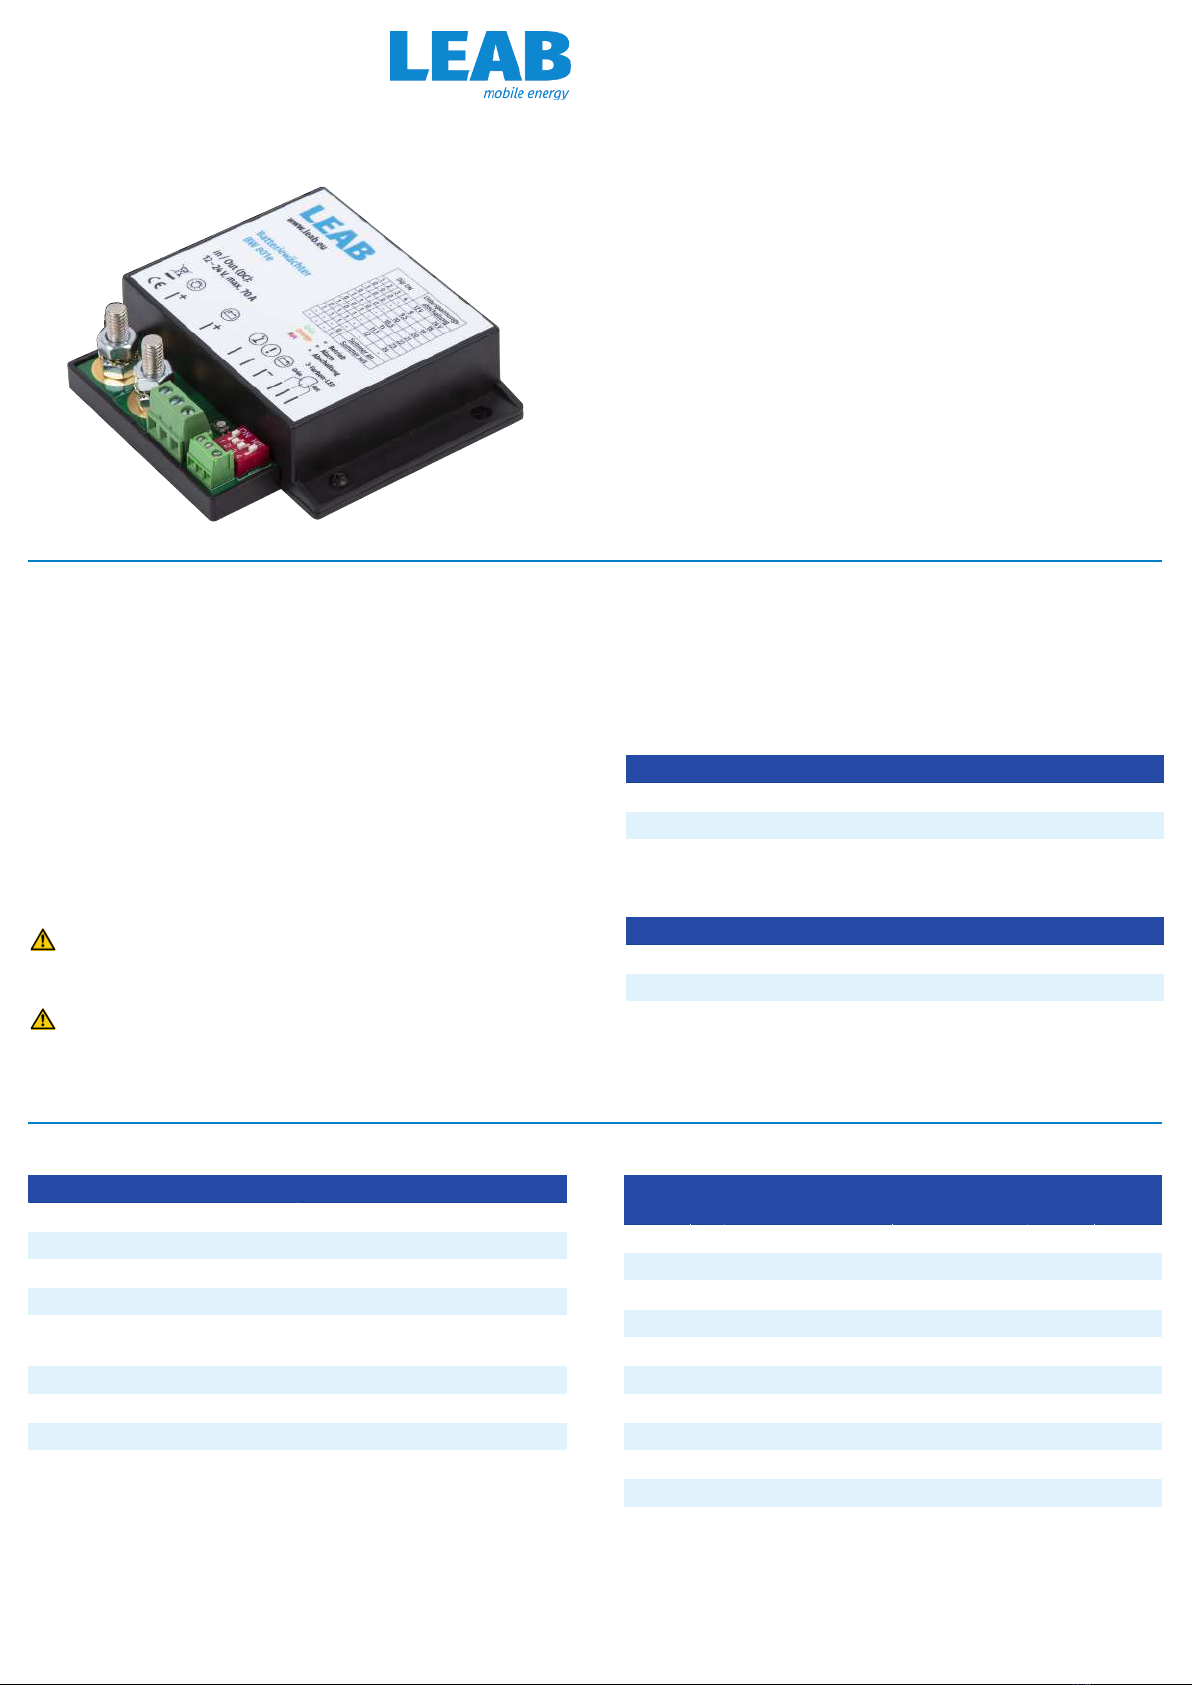
1Consumer connector 2Battery connector
3Operating display 4“External switch” connector
5“Alarm output” connector 6“Ground” connector
7“Green” LED connector (+) 8LED connector (-)
9“Red” LED connector (+) 10 DIP switch
To install the device, proceed as follows:
1. Disconnect the battery from the vehicle power circuit.
WARNING!Disconnect the negative cable first.
2. Set the desired switch-off voltage on the DIP switches (10).
3. Connect an earth wire from the battery monitor’s ground (6) connector
to the battery's negative terminal.
NOTE!Only the switching current (1 A) is permissible. The consumer load
must not lead via the 'ground’ connector (6).
4. Disconnect the positive lead from the battery to the consumers and
connect the battery monitor at the screw terminals (1) and (2).
5. Connect the battery to the vehicle power circuit.
ðThe device is ready for operation. When the battery voltage is suffi-
cient, the operating display (3) lights green.
Optional connections
Fig.1:
3-colour LED
– Connect an external buzzer via the ‘alarm output’ connector (5).
NOTE!Contact to ground, max. 1 A.
– Use the battery monitor as a main switch for connected consumers
by running a line with a switch between the negative terminal of the
battery and the connector for “external switch” (4).
– Connect the 3-colour LED by connecting the anode for green
(shortest leg) to the “Green” LED connector (7), the cathode (longest
leg) to the LED connector (8) and the anode for red to the “Red” LED
connector (9).
Operating status
Indicator Operating status
LED lit green
Alarm output inactive
Internal buzzer off
Battery voltage is above the alarm
threshold setting, device is active.
LED flashes green
Alarm output inactive
Internal buzzer off
External switch (4) is closed, consumers are
switched off.
LED lit orange
Alarm output active
Internal buzzer beeps at in-
terval*
Safety level 1: Below alarm threshold. Bat-
tery voltage will soon reach the switch-off
voltage.
1. Switch the consumers off or charge the
battery
LED flashes red
Alarm output inactive
Internal buzzer beeps 1x
Safety level 2: Below switch-off voltage.
Consumers have been disconnected from
the battery to avoid deep discharge.
2. To supply consumers again, charge the
battery to the switch-on voltage.
LED no colour Device is switched off or incorrectly in-
stalled.
* Internal buzzer interval: 600s – 300s – 150s – 75s – 37s – 18s – 9s.
After that: Internal buzzer beeps every 9 seconds until the switch-off
voltage is reached.
NOTE!The operating status of the device is shown by the operating dis-
play (3), the 3-colour LED, the alarm output (5) and the internal buzzer.
Decommissioning
To decommission the device, proceed as follows:
1. Disconnect the battery from the vehicle power circuit.
WARNING!Disconnect the negative cable first.
2. Remove the leads on the connectors (1), (2), (4), (5) and (6) from the
vehicle.
ðThe device is decommissioned.
Disposal
Dispose of the device in accordance with the Waste Elec-
trical and Electronic Equipment Regulations (WEEE).
The system must not be disposed of with household
waste. Take it to a recycling point or return it to your point
of sale.
EU Declaration of Conformity
The BW 801e complies with the requirements of the fol-
lowing directives:
– 2014/30/EU: EMV
– 2011/65/EU: RoHS
LEAB Automotive GmbH // Thorshammer 6 // 24866 Busdorf