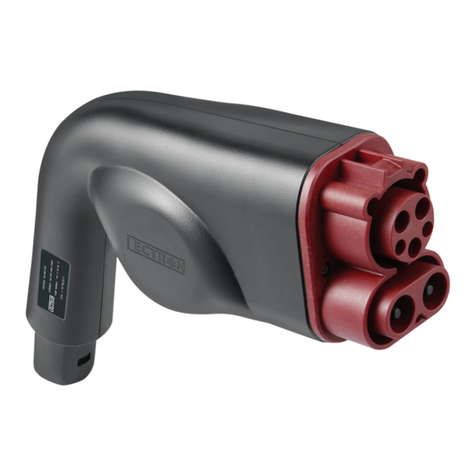
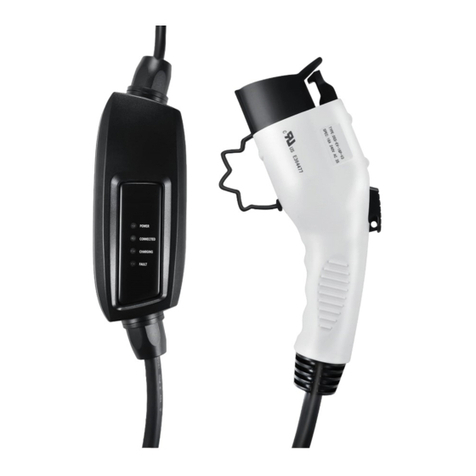
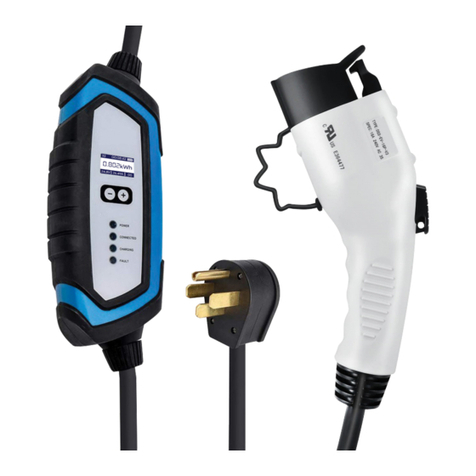
Lectron Level 1 User manual

Portable Electric Car Charger
(Level 1, 16A) User Manual

Package Includes
Safety Information
• 1 x Portable Electric Car Charger
• 1 x User Manual
• It is recommended that electrical outlets for your charger should be installed by a
licensed and qualified electrician. To avoid serious injury or death; installation
must comply with the provisions of the National Electric Code (NEC) and all local
codes. In cases of any conflict between the local codes and the NEC, local codes
shall take precedence.
• This product must be grounded. If it should malfunction or break down, ground-
ing provides a path of least resistance for electric current to help reduce the risk
of electric shock. This product includes a cord that is equipped with a grounding
conductor and a grounding plug. The plug must be inserted into an appropriate
outlet that is properly installed and grounded in accordance with all local codes
and ordinances.
• Do NOT DROP the charger or coupler (see image in the Charger Components
section below).
• If the output plug separates from the charger module or the charge coupler, DO
NOT ATTEMPT TO REPAIR THE CABLE YOURSELF. Contact LECTRON Customer
• When using your charger, basic precautions should always be followed, including
the following:
• Read warnings on the charger cord label before operating the charger for
the first time. Read all instructions in this guide before using this charger.
• Never use the charger with an extension cord.
• Never use the charger with any AC adapter.
• Shock hazard – make sure the plug is fully inserted into the wall outlet
so that there are no exposed blade surfaces.

Charger Components
• Children should be supervised when in the vicinity of the charger while
plugged in.
• To reduce the risk of fire, connect only to a circuit provided with 20 amps
maximum branch circuit overcurrent protection.
• Power
• Connected
• Charging
• Fault
Charge Coupler
Release Button

Charging Your Vehicle
1. Insert the charger into an appropriate wall outlet.
2. The indicator lights for Power & Connected will light up and stay solid to show
that the charger is receiving AC power and is ready for use.
Note:
Ensure that the car is parked and the engine is turned OFF.
FAULT
CHARGING
CONNECTED
POWER

3. Plug the Charge Coupler into your vehicle’s charging outlet until it clicks. Once
latched, the Charge Coupler will not disengage until the release button has been
pressed manually.
4. Charging begins automatically. Power will be delivered in accordance to the
demand of the vehicle. While chaging, the Charging Indicator will blink
continuously. Always verify that the vehicle charging status indicator by
checking your vehicle panel.
FAULT
CHARGING
CONNECTED
POWER

5. When the vehicle is fully charged, the Charging Indicator light will stay solid. Your
vehicle has a “dashboard gauge” which can verify that the vehicle is fully charged.
Refer to the vehicle owner’s manual to find the location of the gauge on your
dashboard.
6. Disconnect the charger when the charge is completed by pressing the release
button on the Charge Coupler and removing it from the vehicle.
FAULT
CHARGING
CONNECTED
POWER
Fully Charged
210 V6/6 A+ 0 km

Troubleshooting
Please refer to this troubleshooting guide for possible solutions to common errors
or difficulties when charging your vehicle using the portable charger.
Problem Possible Cause Solution
Charging Indicator does
not illuminate.
No power to the charger. 1. Check the circuit breaker and other circuit loads.
2. Try another wall outlet.
3. Ensure that the charger module (and adapter if
operating in 120 VAC mode) is fully inserted into the wall
outlet.
Charger internal failure. Contact Lectron Customer Support at
Vehicle will not charge.
Fault Indicator remains
solid.
Charge Coupler is not inserted into the
vehicle.
1. Inspect the charge coupler.
2. Remove the charge coupler from the vehicle, then
reinsert it into the vehicle receptacle until it clicks.
Vehicle is not in a state to accept any
charge.
Verify that the vehicle charge timer is set to permit
charging. Refer to the vehicle owner’s manual for charge
timer instructions.
Communication error between the
charger and vehicle.
Contact Lectron Customer Support for assistance.
Fault Indicator is blinking
rapidly.
Utility fault. 1. Disconnect the charger module from the wall outlet,
then reconnect it.
2. If the condition persists, have a qualified electrician
inspect the ground circuit of the wall outlet.
Above the temperature limit.
Cases:
1. Temperature is too high. The
charger will restart charging when it
cools down.
2. House/socket wiring may be
faulty.
1. Inspect the charger module for overheating.
2. Disconnect the charger from the wall outlet.
3. Have a qualified electrician inspect the wall outlet
and adapter.
a. Carefully unplug the charger module from the
wall outlet and allow to cool.
b. If the condition persists, contact Lectron
for assistance.

Specif i cation
Line Input Power : 110-120V (NEMA 5-15)
Voltage Range : 110-120V AC (NEMA 5-15)
Frequency : 60 Hz
Maximum Current : 16A
Cable Length : 18’(5.5m) of cable. Total reach length of 21’
Plug : NEMA 5-15 Plug
EV connector : SAE-J1772
Dimensions : 9.45’ (24cm) x 3.5’ (8.9cm) x 2.4’ (6cm)
Weight : 2.1 kg (4.6lbs)
Operating Temp : -30°C to +50°C (-22°F to +122°F)
Certification : cULus lited, FCC Part 15 Class B
For more information, visit:
www.ev-lectron.com
or contact us at
Made in China

Cargador Portátil de Coche Eléctrico
(Nivel 1, 16A) Manual de Usuario

Información de Seguridad
• Se recomienda que las tomas de corriente de tu cargador sean instaladas por un
electricista autorizado y cualificado. Para evitar lesiones graves o la muerte; la
instalación debe cumplir con las disposiciones del Código Eléctrico Nacional (NEC)
y todos los códigos locales. En caso de cualquier conflicto entre los códigos locales
y el NEC, los códigos locales tendrán prioridad.
• Este producto debe estar conectado a tierra. En caso de mal funcionamiento o
avería, la conexión a tierra proporciona un camino de menor resistencia para la
corriente eléctrica que ayuda a reducir el riesgo de descarga eléctrica. Este
producto incluye un cable equipado con un conductor de tierra y un enchufe con
toma de tierra. El enchufe debe insertarse en una toma de corriente apropiada
que esté correctamente instalada y conectada a tierra de acuerdo con todos los
códigos y ordenanzas locales.
• NO DEJES CAER el cargador ni el acoplador (véase la imagen en la sección de
Componentes del Cargador).
• Si el enchufe de salida se separa del módulo cargador o del acoplador de carga,
NO INTENTES REPARAR EL CABLE TÚ MISMO. Ponte en contacto con el Servicio de
Atención al Cliente de LECTRON ([email protected]) para recibir ayuda.
• Al utilizar tu cargador, siempre debes seguir las precauciones básicas, entre ellas
las siguientes:
• Lee las advertencias de la etiqueta del cable del cargador antes de uti
lizarlo por primera vez. Lee todas las instrucciones de esta guía antes de
utilizar este cargador.
• No utilices nunca el cargador con un cable alargador.
Contenido del Paquete
• 1 x Cargador Portátil de Coche Eléctrico
• 1 x Manual de Usuario

• No utilices nunca el cargador con cualquier adaptador AC.
• Peligro de descarga: asegúrate de que el enchufe está completamente
insertado en la toma de corriente para que no haya superficies de
cuchillas expuestas.
• Los niños deben ser supervisados cuando estén cerca del cargador
mientras está enchufado.
• Para reducir el riesgo de incendio, conecta únicamente a un circuito pro
visto de una protección de sobrecorriente de 20 amperios como máximo.
Componentes del Cargador
• Energía
• Conectado
• Cargando
• Fallo o Avería
Acoplador de Carga
Botón de
Liberación

Cómo Cargar Tu Vehículo
1. Inserta el cargador en una toma de corriente adecuada.
2. Los indicadores luminosos de "Power" y "Connected" se encenderán y
permanecerán fijos para indicar que el cargador está recibiendo alimentación AC
y está listo para su uso.
Nota:
Asegúrate de que el coche está aparcado y el motor está apagado.
FAULT
CHARGING
CONNECTED
POWER

3. Enchufa el Acoplador de Carga en la toma de corriente de tu vehículo hasta que
haga clic. Una vez encajado, el Acoplador de Carga no se desenganchará hasta
que se haya pulsado manualmente el botón de liberación.
4. La carga comienza automáticamente. La energía se suministrará de acuerdo con
la demanda del vehículo. Durante la carga, el Indicador de Carga parpadeará con-
tinuamente. Comprueba siempre que indicador de estado de carga del vehículo
revisando el panel del mismo.
FAULT
CHARGING
CONNECTED
POWER

5. Cuando el vehículo esté completamente cargado, la luz del Indicador de Carga
permanecerá fija. Tu vehículo dispone de un "medidor del salpicadero" que
puede verificar que el vehículo está completamente cargado.Consulta el manual
del propietario del vehículo para encontrar la ubicación del medidor en tu
salpicadero.
6. 6. Desconecta el cargador cuando la carga se haya completado pulsando el
botón de liberación del Acoplador de Carga y retirándolo del vehículo.
FAULT
CHARGING
CONNECTED
POWER
Totalmente Cargado
210 V6/6 A+ 0 km

Solución de problemas
Consulta esta guía de resolución de problemas para encontrar posibles soluciones a
los errores o dificultades más comunes al cargar tu vehículo con el cargador portátil.
Problema Causa Posible Solución
El Indicador de Carga no
se ilumina.
No hay energía en el cargador. 1. Comprueba el disyuntor y otras cargas del circuito.
2. Prueba con otra toma de corriente.
3. Asegúrate de que el módulo cargador (y el adaptador si
funciona en modo de 120 VAC) está completamente
insertado en la toma de corriente.
Fallo interno del cargador. Contacta con el Servicio de Atención al Cliente de
El vehículo no se carga.
El Indicador de Fallo
permanece fijo.
El Acoplador de Carga no está inserta-
do en el vehículo.
1. Inspecciona el acoplador de carga.
2. Retira el acoplador de carga del vehículo y vuelve a
introducirlo en el receptáculo del vehículo hasta que haga
clic.
El vehículo no está en condiciones de
aceptar ninguna carga
Comprueba que el temporizador de carga del vehículo
está ajustado para permitir la carga. Consulta el manual
del propietario del vehículo para ver las instrucciones
del temporizador de carga.
Error de comunicación entre el
cargador y el vehículo.
Contacta con el Servicio de Atención al Cliente de
Lectron para obtener ayuda.
El Indicador de Fallo
parpadea rápidamente.
Fallo de utilidad. 1. Desconecta el módulo cargador de la toma de corriente
y vuelve a conectarlo.
2. Si el problema persiste, haz que un electricista cualifica-
do inspeccione el circuito de tierra de la toma de corriente.
Por encima del límite de
temperatura.
Casos:
1. La temperatura es demasiado
alta. El cargador reiniciará la carga
cuando se enfríe.
2. El cableado de la casa/enchufe
puede estar defectuoso.
1. Inspecciona el módulo cargador para ver si está
sobrecalentado.
2. Desconecta el cargador de la toma de corriente.
3. Haz que un electricista cualificado inspeccione la
toma de corriente y el adaptador.
a. Desenchufa cuidadosamente el módulo
cargador de la toma de corriente y deja que se
enfríe.
b. Si el problema persiste, ponte en contacto con
el Servicio de Atención al Cliente de Lectron en

Especificaciones
Potencia de Entrada de Línea : 110-120V (NEMA 5-15)
Rango de Voltaje : 110-120V AC (NEMA 5-15)
Frecuencia : 60 Hz
Corriente Máxima : 16A
Longitud del Cable : 18'(5,5m) de cable.
Longitud total de alcance de 21'
Enchufe : Enchufe NEMA 5-15
Conector de Coche Eléctrico : SAE-J1772
Dimensiones : 9,45' (24cm) x 3,5' (8,9cm) x 2,4' (6cm)
Peso : 2,1 kg (4,6lbs)
Temperatura de Funcionamiento : -30°C a +50°C (-22°F a +122°F)
Certificación : cULus lited, FCC Parte 15 Clase B
Para más información, visita:
www.ev-lectron.com
o contacta con nosotros en
Fabricado en China

Chargeur électrique portable pour
voiture (Niveau 1, 16A) Manuel
d'utilisation
Vous avez besoin d'aide ? Envoyez-nous un email à: [email protected]

L’emballage comprend
Informations relatives à la sécurité
• 1 x Chargeur électrique portable pour voiture
• 1 x Uanuel de l'utilisateur
• Il est recommandé que les prises électriques de votre chargeur soient installées
par un électricien agréé et qualifié. Pour prévenir toute blessure grave ou mor-
telle, l'installation doit être conforme aux dispositions du Code National de l'Elec-
tricité (NEC) et à tous les codes locaux. En cas de conflit entre les codes locaux et
le NEC, les codes locaux seront prioritaires.
• Ce produit doit être mis sous terre. En cas de dysfonctionnement ou de panne, la
mise sous terre garantit un chemin de moindre résistance pour le courant élec-
trique afin de réduire le risque de choc électrique. Ce produit comprend un
cordon équipé d'un conducteur de mise sous terre et d'une fiche de mise sous
terre. La fiche doit être insérée dans une prise appropriée, correctement installée
et mise sous terre, conformément à toutes les réglementations en vigueur.
• Ne PAS faire tomber le chargeur ou le coupleur (voir l'image dans la section Com-
posants du chargeur ci-dessous).
• Si la fiche de sortie se sépare du module de charge ou du coupleur de charge,
N'ESSAYEZ PAS DE RÉPARER LE CÂBLE VOUS-MÊME. Contactez LECTRON Support
• Lorsque vous utilisez votre chargeur, vous devez toujours respecter les instruc-
tions, notamment les suivantes:
• Lisez les avertissements sur l'étiquette du cordon du chargeur avant
d'utiliser le chargeur pour la première fois. Lisez toutes les instructions
de ce guide avant d'utiliser ce chargeur.
• N'utilisez jamais le chargeur avec une rallonge.
• N'utilisez jamais le chargeur avec un quelconque adaptateur secteur.

• Risque de choc - assurez-vous que la fiche soit complètement insérée
dans la prise murale de sorte qu'il n'y ait pas de surface de lame
exposée.
• Les enfants doivent être surveillés lorsqu'ils se trouvent à proximité du
chargeur lorsqu'il est branché.
• Afin de réduire le risque d'incendie, ne branchez l'appareil que sur un
circuit doté d'une protection contre les surintensités de 20 ampères
maximum.
Composants du chargeur
• Alimentation
• Connecté
• Chargement
• Défaut
Coupleur de charge
Bouton de
déverrouillage

Recharge de votre véhicule
1. Insérez le chargeur dans une prise murale appropriée.
2. Les voyants d'alimentation et de connexion sont allumés de manière fixe pour
indiquer que le chargeur reçoit du courant alternatif et est prêt à être utilisé.
Remarque:
Assurez-vous que la voiture est garée et que le moteur est éteint.
FAULT
CHARGING
CONNECTED
POWER
Table of contents
Languages:
Other Lectron Automobile Accessories manuals
Popular Automobile Accessories manuals by other brands

Cequent Performance Products
Cequent Performance Products 24764 installation instructions

Fishbone Offroad
Fishbone Offroad FB25033 installation instructions

Whelen Engineering Company
Whelen Engineering Company UBF5150 installation guide

Happy Orange
Happy Orange USB-C quick start guide

VBG
VBG Onspot Mounting instructions

VBG
VBG Onspot Mounting instruction/Spare Parts List