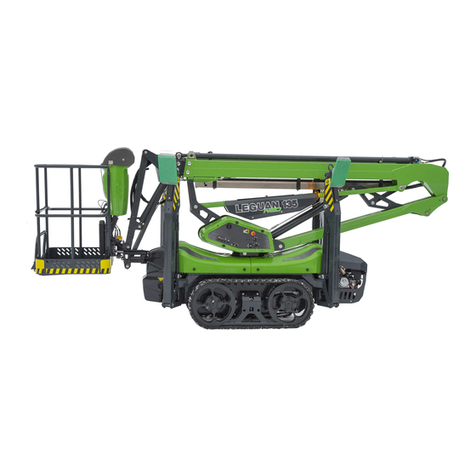
Leguan 125 Operating manual

Operators and Service Manual
2014-
Version 6/2015
27.8.2015

2
_________________________________________________________________________________________
TABLE OF CONTENTS
page
1. INTRODUCTION AND WARRANTY CONDITIONS 4
1.1 INTRODUCTION 4
1.2 WARRANTY CONDITIONS 4
2. GENERAL INFORMATION 7
3. TECHNICAL SPECIFICATION, LEGUAN 125M1 8
3.1 REACH DIAGRAM 10
4. SIGNS AND STICKERS 11
5. SAFETY INSTRUCTIONS 12
ATTENTION ! 12
5.1 BEFORE STARTING OPERATION 12
5.2 OVERTURNING HAZARD 13
5.3FALLING HAZARD 13
5.4 COLLISION HAZARD 13
5.5 ELECTROCUTION HAZARD 14
5.6 EXPLOSION /FIRE HAZARD 14
5.7 DAILY INSPECTION BEFORE STARTING OPERATION 14
6. CONTROLS 15
6.1 CONTROLS AT PLATFORM 15
6.2 CONTROLS AT GROUND LEVEL 16
6.2.1 Battery disconnect switch at ground level 16
6.2.2 Controls on the control valve box at ground level 16
6.2.3 Emergency lowering buttons at ground level and releasing of slewing 16
6.2.4 230V connection and switches 17
6.2.5 Lower controls (Option) 17
7. STARTING THE ENGINE / ELECTRIC MOTOR 18
8. DRIVE CONTROL 19
8.1 DEFINING THE GRADIENT OF THE SLOPE 20
9. OPERATION OF THE OUTRIGGERS 22
10. OPERATION OF THE BOOMS 23
11. EMERGENCY LOWERING 24
12. ENDING THE OPERATION 24
13. TRANSPORTING INSTRUCTIONS 25
14. SERVICE, MAINTENANCE AND INSPECTION INSTRUCTIONS 26
14.1 GENERAL INSTRUCTIONS 26
14.2 SERVICES AND CHECKS,MAINTENANCE SCHEDULE 28
15. SERVICE INSTRUCTIONS 29
15.1 GREASING OF THE MACHINE 29
15.2 HANDLING OF FUEL AND REFUELING 29
15.3 HYDRAULIC OIL AND OIL FILTER CHANGE 29
15.4 HYDRAULIC OIL LEVEL 29
15.5 BATTERY CHECK 29
15.6 CHECK OF SET UP OUTRIGGER CONTROL SYSTEM 30
15.7 WATER LEVEL CHECK 30
15.8 ADJUSTMENTS IN HYDRAULIC SYSTEM 30
15.9 COMPONENTS IN OVERLOAD CONTROL SYSTEM 32
15.10 ELECTRIC SENSORS 33
15.11 CHECK AND ADJUSTMENT OF TRACK TENSION 34
16. REPAIR INSTRUCTIONS 35
16.1 WELDING 35
17. INSTRUCTIONS FOR TEMPORARY STORAGE 35

3
_________________________________________________________________________________________
18. TROUBLESHOOTING 36
18. SERVICE HISTORY 39
Attachments:
Hydraulic schematic
Electric schematic

4
_________________________________________________________________________________________
1. INTRODUCTION AND WARRANTY CONDITIONS
1.1 Introduction
LEGUAN LIFTS wants to thank you for purchasing this Leguan access platform. It is the
result of Leguan’s long experience in design and manufacturing of access equipment.
We ask you that you read and understand the contects of this manual completely
before operating the access platform. This will improve your operating and maintenance
efficiency, help avoid breakdowns and damage and extend your machine’s life.
Pay special attention to this symbol. It indicates important safety factors that require
special attention. Every operator must read and understand this manual before starting
operation, and the instructions in this manual must be followed. If you are lending the
access platform out to somebody, make sure that he familiarises himself with and
understands these instructions. If there is anything unclear with the operation please
contact your Leguan dealer.
If spare parts are needed, use only original LEGUAN parts. They will provide your
machine with the maximum life expectancy and ensure optimum safety.
The manufacturer does not warrant any damages which are the result of using the
access platform.
It is not possible to give explicite operating instructions to all operating conditions of the
machine. Therefore the manufacturer is not responsible for any damage caused by
eventual faults in this Operators Manual.
The manufacture does not accept any responsibility for consequential losses resulting
from the use of this self propelled access platform.
1.2 Warranty conditions
This product is warranted for a period of twenty four (24) months.
Warranty covers manufacturing and material defects. All warranty obligations end when
the warranty period ends. Warranty repair that has been started will be completed
regardless of the ending date of warranty period.
A condition for the warranty is that both the buyer and the seller have accepted the
delivery. If the buyer is not present when the delivery takes place and doesn’t make a
complaint within 14 days of delivery of this access platform, it is considered that the sale
is closed and the warranty period has started.
Warranty is limited to the repair of a faulty access platform without cost at an authorized
Leguan service workshop. Warranty period for parts that are changed in connection
with the repair will end when the warranty period for the access platform ends. Parts
that have been changed in the warranty repair will remain Leguan Lifts’ property without
compensation.

5
_________________________________________________________________________________________
Warranty does not cover:
-damages caused by wrong or negligent use of this product, or mischief
-any repairs or modfications to the product, performed without the prior
authorisation of the manufacturer
-damages caused by not following service and maintenance instructions
-adjustments, repairs and spare parts replacements caused by normal wear
-damages caused by excessive loads on the access platform, sudden
unexpected incident, natural disaster
-damages caused by external mechanical or chemical reasons (paint
damages, especially caused by stone chips, air and environmental pollution
and strong cleaning agents)
-eventual visible patterns or unevenness of painted surfaces
-warranty claims that haven’t been sent to the manufacturer within 14 days
from the date the buyer has noticed the defect. In all conditions the buyer
shall act so that his action doesn’t make the eventual defect(s) worse.
The manufacturer does not accept any responsibility for consequential losses resulting
from the use of this access platform.
In the event a fault occurs which is attributable to manufacturing or assembly defect,
contact the dealer without delay.

6
_________________________________________________________________________________________
KONEEN EY-VAATIMUSTENMUKAISUUSVAKUUTUS
EC DECLARATION OF CONFORMITY FOR MACHINERY
TÄTEN VAKUUTAMME, ETTÄ
HEREWITH DECLARES THAT
HENKILÖNOSTIN NIMELLISKUORMA
AERIAL PLATFORM NOMINAL LOAD
MALLI NOSTOKORKEUS
MODEL PLATFORM HEIGHT
TÄYTTÄÄ SEURAAVIEN SÄÄDÖSTEN VAATIMUKSET:
MEETS THE PROVISIONS OF:
1. Konedirektiivi 2. Pienjännitedirektiivi 3. Sähkömagneettista yhteensopi-
vuutta koskeva direktiivi
Machinery Directive Low Voltage Directive Electromagnetic compatibility
2006/42/EC 2006/95/EEC 2004/108/EEC
KONEEN SUUNNITTELUSSA ON LISÄKSI KÄYTETTY SEURAAVIA
TEKNISIÄ ERITELMIÄ:
FOLLOWING TECHNICAL SPECIFICATIONS ARE USED WHEN
THE MACHINERY WAS DESIGNED:
Yhdenmukaistetut standardit:
Harmonized Standards: EN280+A2
Ilmoitettu laitos/Notified Body INSPECTA TARKASTUS OY
Testausraportti/Test Report 11573
Valmistaja / Manufacturer:
Ylötie 10
LEGUAN LIFTS OY 33470 YLÖJÄRVI
www.leguanlifts.com FINLAND
e-mail : leguan@avanttecno.com
LEGUAN
125M1
200 KG
10,5 m

7
_________________________________________________________________________________________
2. GENERAL INFORMATION
LEGUAN 125M1 is a self propelled Mobile Elevating Work Platform –or commonly
called access platform, designed for indoor and outdoor use. An access platform is
destined for lifting of persons and their equipment only. It is not allowed to use an
access platform as a crane.
LEGUAN 125M1 access platform has two nominal loads and two working areas. With
max. 135 kg load on the platform the machine can be operated over the whole working
area. If the load on the platform exceeds 135 kg, the working area is restricted up to
max. 200 kg load on the platform. ’
LEGUAN is designed and built in accordance with the international safety standards
and MEWP (Mobile Elevating Work Platform) standars.
The picture below shows the main parts of this access platform:
1. Chassis
2. Transmission, either with
wheels or with crawler tracks
3. Outrigger
4. Outrigger cylinder
5. Transport support
6. Electric motor
7. Connection box of control
system with emergency
lowering buttons
8. Pedestal
9. Valve box at ground level
10. Lower boom cylinder
11. Lower boom
12. Self levelling bar
13. Linkage piece
14. Upper boom cylinder
15. Telescoping cylinder
16. Upper boom
17. Telescopic boom
18. Platform
19. Controls box at platform
20. Valve, release of slewing
5
3
4
1
62
7
8
9
10
11
12
13
14
15
16
17
18
19
20

8
_________________________________________________________________________________________
3. TECHNICAL SPECIFICATION, LEGUAN 125M1
Working height, safe working load <135 kg
12,5 m
safe working load 135 - 200 kg
11,3 m
Max. platform height, SWL <135 kg
10,5 m
SWL 135 –200 kg
9,3 m
Max. outreach, SWL <135 kg
6,5 m
SWL 135 –200 kg
5,1 m
Safe working load, max.
200 kg
Transport length
5158 mm
Transport length without platform
4500 mm
Transport height, 23” tyres
1840 mm
20” tyres
1800 mm
Tracks
1840 mm
Width, 23x8.50-12” tyres
1020 mm
20x8.00-10” tyres
999 mm
Tracks
1281 mm
Platform dimensions, W x L, 2 persons
1200 x 700 mm
Slewing
360º
Gradeability
35%
Support dimensions (outrigger spread)
2938 x 2892 mm
Max. unevenness of set up
2º
Max. gradient of slope for set up
22% (13º)
Weight, depending on equipment
1500 - 1700 kg
Drive system
4WD or rubber tracks
Drive speed
1,6 km/h / 4,1 km/h
Lowest operating temperature
- 20° C
Starter battery / Electric system
12V
Sound power level at platform controls, LWA
101 dB

9
_________________________________________________________________________________________

10
_________________________________________________________________________________________
3.1 Reach diagram

11
_________________________________________________________________________________________
4. SIGNS AND STICKERS
1. Type plate and CE marking
2. Safe working load (SWL) and reach diagram
3. Max. horizontal force and wind speed
4. General user instructions
5. Daily inspection
6. Always use outriggers
7. Symbol stickers (pictograms) of controls
8. Emergency lowering
9. Residual current device
10. Voltage of electric motor
11. Max. support force
12. Distance from energized electric wires
13. Tie down points
14. Tyre pressure
15. LEGUAN 125 sticker
1
2
9
4
312
7 8
5 6
10
11 13
8
8
14
15

12
_________________________________________________________________________________________
5. SAFETY INSTRUCTIONS
The operator must know and follow all safety instructions. The operator must receive
sufficient instructions in ordert to be able to use the lift correctly and safely. This Operators
Manual must always be kept in the box on the platform.
ATTENTION !
In order to prevent unpermitted use of the access platform, take the main battery disconnect
key that is located on ground level and the engine ignition key, if fitted, with you after ending
operation.
CAUTION! DANGER !
THE ACCESS PLATFORM IS NOT VOLTAGE INSULATED. NEVER USE IT NEAR ANY
VOLTAGE CARRYING PARTS OR DEVICES. DO NOT DRIVE ANY PART OF THE ACCESS
PLATFORM OR PLATFORM CLOSE TO UNINSULATED CABLES OR OTHER VOLTAGE
CARRYING PARTS OR DEVICES.
WHEN WORKING WITH THE ACCESS PLATFORM THE OPERATOR(S) MUST ALWAYS
WEAR CERTIFIED SAFETY HARNESS WHICH IS PROPERLY CONNECTED TO THE
PLATFORM.
5.1 Before starting operation
- All warnings and labels must be read carefully.
-Only persons with min. 18 years of age are allowed to use the access platform. They
must have received sufficient operating instrucions.
-Operator must know all the functions of this access platform as well as the Safe
Working Load, loading instructions and safety instructions.
-If there is heavy traffic in the working area, it must be fenced off widely enough and
marked with a fence or with a line. Road traffic regulations must be followed as well.
-Make sure that there are no bystanders in the working area.
-Do not use faulty access platform. Inform about all faults and defects and make sure
that they are repaired before starting operation.
-Follow check and service instructions and intervals.
-The operator must check this access platform visually at the beginning of each work
shift. This check is necessary in order to make sure that the machine is all right before
making the daily inspection prior to starting operation.
-If combustion engine is used indoors, make sure that the ventilation is sufficient.

13
_________________________________________________________________________________________
5.2 Overturning hazard
-Safe working load, number of persons and additional load on the platform must never
be exceeded.
-When wind speed is equal to or greater than 12,5 m/s - 28 mph, the use of the access
platform must be discontinued immediately and the platform must be lowered down to
transport position.
-Ensure that the access platform is used on dry, solid, level ground only. The ground is
solid enough if it can carry min. 3 kg/cm2. On softer grounds use extra support plates
under the outriggers (plate dimensions 400 x 400 mm).
-Do not use a ladder, chair, stool, scaffolding or by any other means try to increase
reach capability of this access platform.
-In case the platform has got stuck or jammed, or it is too close to a building or a wall to
be moved, do not try to release the platform by operating the controls. All persons must
leave the platform first (with the help of a rescue service of fire brigade if necessary),
only after that one can try to lower the platform by using the emergency lowering.
-Do not try to increase the area of the platform or the load. Increasing of the area
exposed to wind will weaken the stability of the access platform.
-Weight must be equally distributed on the platform. Make sure that additional weight
cannot shift on the platform.
-Do not drive on gradients that are steeper than the max. values given for this access
platform and for the slope.
-Never use this access platform as a crane or an elevator. This access platform is
intended for lifting of the max. allowed number of persons and additional load only.
-Check and make sure that all tyres are in good condition. If the tyres are air filled make
sure that there is correct pressure in the tyres.
-In order to ensure the safe operation of this access platform the manufacturer has
conducted approved tests for the LEGUAN 125 in accordance with the standard EN280
+A2 : static stability test in accordance with paragraph 6.1.4.2.1 and dynamic overload
tests in accordance with paragraph 6.1.4.3 of the EN280 +A2.
5.3 Falling hazard
-The operator(s) must always wear certified safety harnesses when operating this access
platform. The harnesses must be connected to the fastening point at platform mounting
bracket.
-Do not stretch or reach out over the handrails. Stand steadily on the platform floor.
-Keep platform floor clean.
-Always close the platform gate before starting operation.
-Do not drop or throw any material down from platform.
-It is not allowed to go to or step out from the platform when the booms are lifted.
5.4 Collision hazard
-Adjust the drive speed so that it is safe with regard to the ground conditions.
-The operator must follow all regulations concerning the use of safety equipment on the
work site.
-Make sure that there are no overhead obstacles on the work site that could prohibit
lifting of the platform, or objects that might cause a collision.
-Do not operate this access platform in the working area of another overhead lifting
device or similar equipment that is moving, unless this lifting device is secured so that
there is no risk of collision.
-Beware of crushing hazard when holding the handrail of the platform in an eventual
collision situation.
-When operating the machine beware of eventual limited visibility and trapping hazard.

14
_________________________________________________________________________________________
5.5 Electrocution hazard
-This access platform is not voltage insulated nor protected against contact with voltage
carrying parts, or when approaching them.
-Do not touch the machine if it comes in contact with voltage carrying electric line.
-Persons on the platform or at ground level must not touch or operate the platform before
power has been cut off from the electric line.
-During welding repairs, it is not allowed to use any part of this access platform as earth
conductor.
-Do not use this access platform during thunderstorm or high winds.
-Leave clearance to electric lines, taking into account movements of platform,
movements of electric line, and high winds and gusts.
The minimum safety clearances to voltage carrying electric lines are shown in the following
table. These clearances must be respected.
VOLTAGE
MIN. DISTANCE
0 –1000V
2 m
1- 45 kV
3 m
110 kV
5 m
220 kV
5 m
400 kV
5 m
5.6 Explosion / fire hazard
-It is not allowed to start the motor/engine in a place where one can smell LPG, petrol,
solvent or other flammable substance.
-Do not fill with fuel when the engine is running.
-Charge the battery only in places with sufficient ventilation, where there is no open fire
or no works which could cause spark emissions (like welding).
5.7 Daily inspection before starting operation
- ground - controls
- supports - driving area
- horizontal levelling - platform
- emergency stop button - oil leakages
- emergency lowering - working area
ATTENTION! If you note faults or missing equipment on this access platform, do not put it into
operation before the faults have been corrected. Never set the access platform up in a place
where the ground may be too soft. Beware of soft grounds and potholes in particular.

15
_________________________________________________________________________________________
6. CONTROLS
6.1 Controls at platform
The controls and indicators on the control panel at platform may be slightly different in different
models. Indicators and switches that are marked as options are not mounted on all models..
1. Ignition switch: Stop –ON - Start
2. Function selector switch: Drive –
Outrigger operation –Boom operation
3. EMERGENCY STOP switch
4. Drive speed area selector switch
5. Selector switch of propelling: electric
motor or combustion engine
6. Emergency lowering, upper boom
7. Overload control indicator
8. Indicator of working area; when the
light is on, SWL is under 135 kg.
9. Choke
10. Emergency lowering, lower boom
11. Control lever, lower boom
12. Control lever, upper boom
13. Control lever, slewing
14. Control lever, telescoping boom
15. Control lever, platform self levelling
1
2
3
5
4
6
10
7
9
8
11
13
12
15
14

16
_________________________________________________________________________________________
6.2 Controls at ground level
6.2.1 Battery disconnect switch at ground level
Battery disconnect switch connects and
disconnects the circuit from the + line of the
battery. When main current is switched off,
all low voltage functions are cut off, except
for emergency lowering. DO NOT switch off
the main current when the booms are not in
transport position!
The battery charger charges the battery
even if the disconnet switch is switched off.
6.2.2 Controls on the control valve box at ground level
1. Control levers, drive
2. Water level
3. Hour meter
4. Outrigger pressure indicators, red LEDs
5. Boom lifting indicator, and max. support
force 9kN
6. Control levers, outriggers
6.2.3 Emergency lowering buttons at ground level and releasing of slewing
1. Emergency lowering, upper boom
2. Emergency lowering, lower boom
3. Valve, release of slewing
1
2
3
5
4
6
1 2
3

17
_________________________________________________________________________________________
6.2.4 230V connection and switches
1. 230V 50Hz, 16A connecting cable: either on the side
of chassis or in the rear next to electric motor.
2. Switch of residual current device. The switch must
be in ”ON” position in order that any 230V device will
work, including the 230V outlets. With the TEST
button one can test the function of the residual
current device, and also if there is 230V current
coming from the network. If the residual current
device does not go off when pushing the TEST
button, it is either defect or then there is no current
coming from the network (connecting cable must be
connected of course).
3. Battery charger. There are two indicators on the
charger which show the charge level of the battery:
Yellow indicator on = low charge; Yellow and green
indicator on = battery almost fully charged; Green
indicator on = battery fully charged / trickle charge
6.2.5 Lower controls (Option)
1. Selector key switch of lower / upper
controls
2. Ignition switch: Stop –ON - Start
3. Overload control indicator
4. EMERGENCY STOP switch
5. Control lever, lower boom
6. Control lever, upper boom
7. Control lever, slewing
8. Control lever, telescoping boom
Function of lower controls:
1. Ignition switch at platform must be turned to ”ON” position.
2. Select with the selector key switch no. 1 either lower controls at ground level
or upper controls at platform. The machine can be operated either with lower
or upper controls, but not with both at the same time.
3. When lower controls are selected the engine/electric motor can be started
and stopped with the ignition switch no. 2 at lower controls.
4. When the engine/motor is running the booms can be operated –except for
platform self levelling –with the control levers of lower controls.
When working in public areas take the selector key (1) with you. This prevents
unauthorized operation of lower controls, and the booms can be operated from
the platform.
ATTENTION! The EMERGENCY STOP switches at both lower and upper controls
work always, regardless of the position of the selector switch of lower/upper
controls.
1
2
1
2
4
3
7
6
5
8

18
_________________________________________________________________________________________
7. STARTING THE ENGINE / ELECTRIC MOTOR
Read carefully this Operators Manual and also the Operators Manual for the engine before
starting operation. Read and understand all safety instructions before starting operation.
It is the operator’s responsibility to follow all operating and safety instructions.
This access platform is destined for lifting of persons and additional load only. Lifting of
materials is unsafe and not allowed.
If several persons are operating this machine during the same work shift, all of them must be
trained and they must follow all operating and safety instructions.
1. Switch on the battery disconnect switch.
2. When using the electric motor connect the 230V cable and check also function
of residual current device. With the TEST button you can also check that there
comes 230V to the machine.
3. Make sure that the booms are down in transport position. If necessary, press on
the emergency lowering buttons one by one.
4. Check emergency stop switch; release by turning the switch if it is switched on
5. Fasten safety harnesses on the fastening points at platform mounting bracket
and close the gate.
6. Select propelling with the switch no. 5 at platform (electric motor/combustion
engine, see page 14) and select slower drive speed (switch no. 4 at platform).
7. Adjust hand throttle lever of the engine ( no. 1) to about ¾ throttle.
8. If ambient temperature is below +5ºC press on the choke button when starting.
9. Start the engine/motor by turning the ignition switch to the right, to ”Start”.
10. Once the engine has started reduce throttle to desired engine revs level.
ATTENTION! The engine must always be stopped with the ignition switch.
1

19
_________________________________________________________________________________________
8. DRIVE CONTROL
ATTENTION! The machine can only be moved when the booms are down in transport
position!
When driving with the machine special attention must be paid to the following things:
1. Drive on solid and level grounds only, with sufficient carrying capacity.
2. Working materials and tools must be fastened and secured against rolling
and/or sliding.
3. Safety harnesses must always be attached to the fastening points at
platform mounting bracket when the engine or electric motor is running.
4. Operate the control levers smoothly, avoid jerky movements.
Instructions for driving:
1. Start the engine and turn the function selector switch no. 2 at platform (see page
14) to ”Drive” position.
2. Make sure that the drive speed area selector switch (no. 4 at platform) is in
desired position. Changing of drive speed area is not allowed when the
machine is moving!
3. Driving forward and backward happens by moving the levers of the drive control
valve (see page 15). By pushing the left lever left side wheels turn forward; by
pulling the lever left side wheels turn backward. Right side wheels turn in the
same manner by pushing and pulling the right side lever.
4. Turning of the machine is based on the skid steer principle: When you want to
turn the machine either to the right or to the left, push/pull the drive control lever
on the inner curve side. By doing this the inner wheels brake and consequently
the machine turns.
If you want to turn the machine on the spot, push one side control lever and pull the other
side control lever to the extreme end position. They way the machine moves and turns
depends also on ground conditions –start the driving carefully and at low speed.
Transmission of the LEGUAN 125 is hydrostatic. Each wheel is equipped with a hydraulic
motor - the machine is four wheel drive. If the machine is equipped with rubber tracks there
are two hydraulic motors in the track system.
ATTENTION! Learn how to drive with the machine at a low speed. Operate the drive
control levers with ease in order to avoid abrupt and jerky movements. When driving
pay special attention to stability and the dimensions, especially length, of the
machine.

20
_________________________________________________________________________________________
8.1 Defining the gradient of the slope
Measure the slope with a digital clinometer, or do as follows:
Take a water level, a straight piece of wood at least 1 m long, and a pocket tape measure.
Put the wood stick on the gradient. Put the water level on the lower edge of the stick and lift
the stick until it is in horizontal position. Keep the stick level and measure the distance from
the lower end of the stick to the ground. Divide the distance (height) by the length of the
wood stick (distance) and multiply the result by 100.
Example:
Wood stick length = 2 m
Height = 0,5 m
( 0,5 ÷ 2 ) x 100 = 25 % slope
ATTENTION! When crossing slopes always drive up or down the slope, not sideways.
If you have to drive sideways on a slope, lower the downhill side outriggers so that
they are close to the ground. This prevents the machine from tipping over.
8.2. Crawler track chassis
General information and lifespan of rubber tracks
An access platform with skid steer chassis, equipped with crawler track chassis, offer many
advantages compared with a machine on wheels. However, certain things regarding working
and working environment must be taken into account with an access platform on tracks.
In order to secure the maximum life expectancy for the rubber tracks and crawler track
chassis follow the instructions below.
The lifespan of the track system of an access platform on rubber tracks is heavily dependent
on the working environment and the way of working. The operator can increase the lifespan
by following the below mentioned operating and maintenance instructions. If the access
platform is being used in terrains with stones or gravel, on demolition sites where there is
concrete, or in an environment with scrap metal, the lifespan of the track system can be
significantly reduced. Because of this damages on the tracks, track rollers or crawler track
chassis, caused by operation in such environments, are not covered by warranty.
Nuts of the rear sprocket
It is important to check tightening of nuts on the rear sprocket (bigger track wheel) about 2
days after putting the access platform into operation. When driving with a new machine the
parts in the track system adapt to each other and ”find their place” so to say. Because of this
it is possible that the nuts loosen during operation. Loose nuts can cause serious damage to
the crawler track chassis.
Tighten the nuts first to 120 Nm diagonally opposite
After that retighten immediately to 140 Nm final torque diagonally opposite
It is recommended to check tightness of nuts once a week
Table of contents
Other Leguan Lifting System manuals
Popular Lifting System manuals by other brands

Mcombo
Mcombo 6360-SEC212W Operating instruction

GEDA
GEDA AB 450 Assembly and operating manual

ARJO HUNTLEIGH
ARJO HUNTLEIGH MAXI LITE Instructions for use

STS
STS STP01-DRU01-EX operating instructions

Doka
Doka Staxo 40 Original operating instructions

JBM
JBM 50911 MANUAL OF INSTRUCTIONS FOR THE INSTALLATION

Palfinger
Palfinger ILU 40 INSTALLATION MANUAL & CHECK-OFF SHEET

HALDER
HALDER EH 2B353 Short instruction manual

WPG
WPG MT1010TDC operating instructions

Terex
Terex Genie S-40XC Service and repair manual

rav
rav KPS306HER Translation of the original instructions

ATH-Heinl
ATH-Heinl Frame Lift 30FZ operating instructions