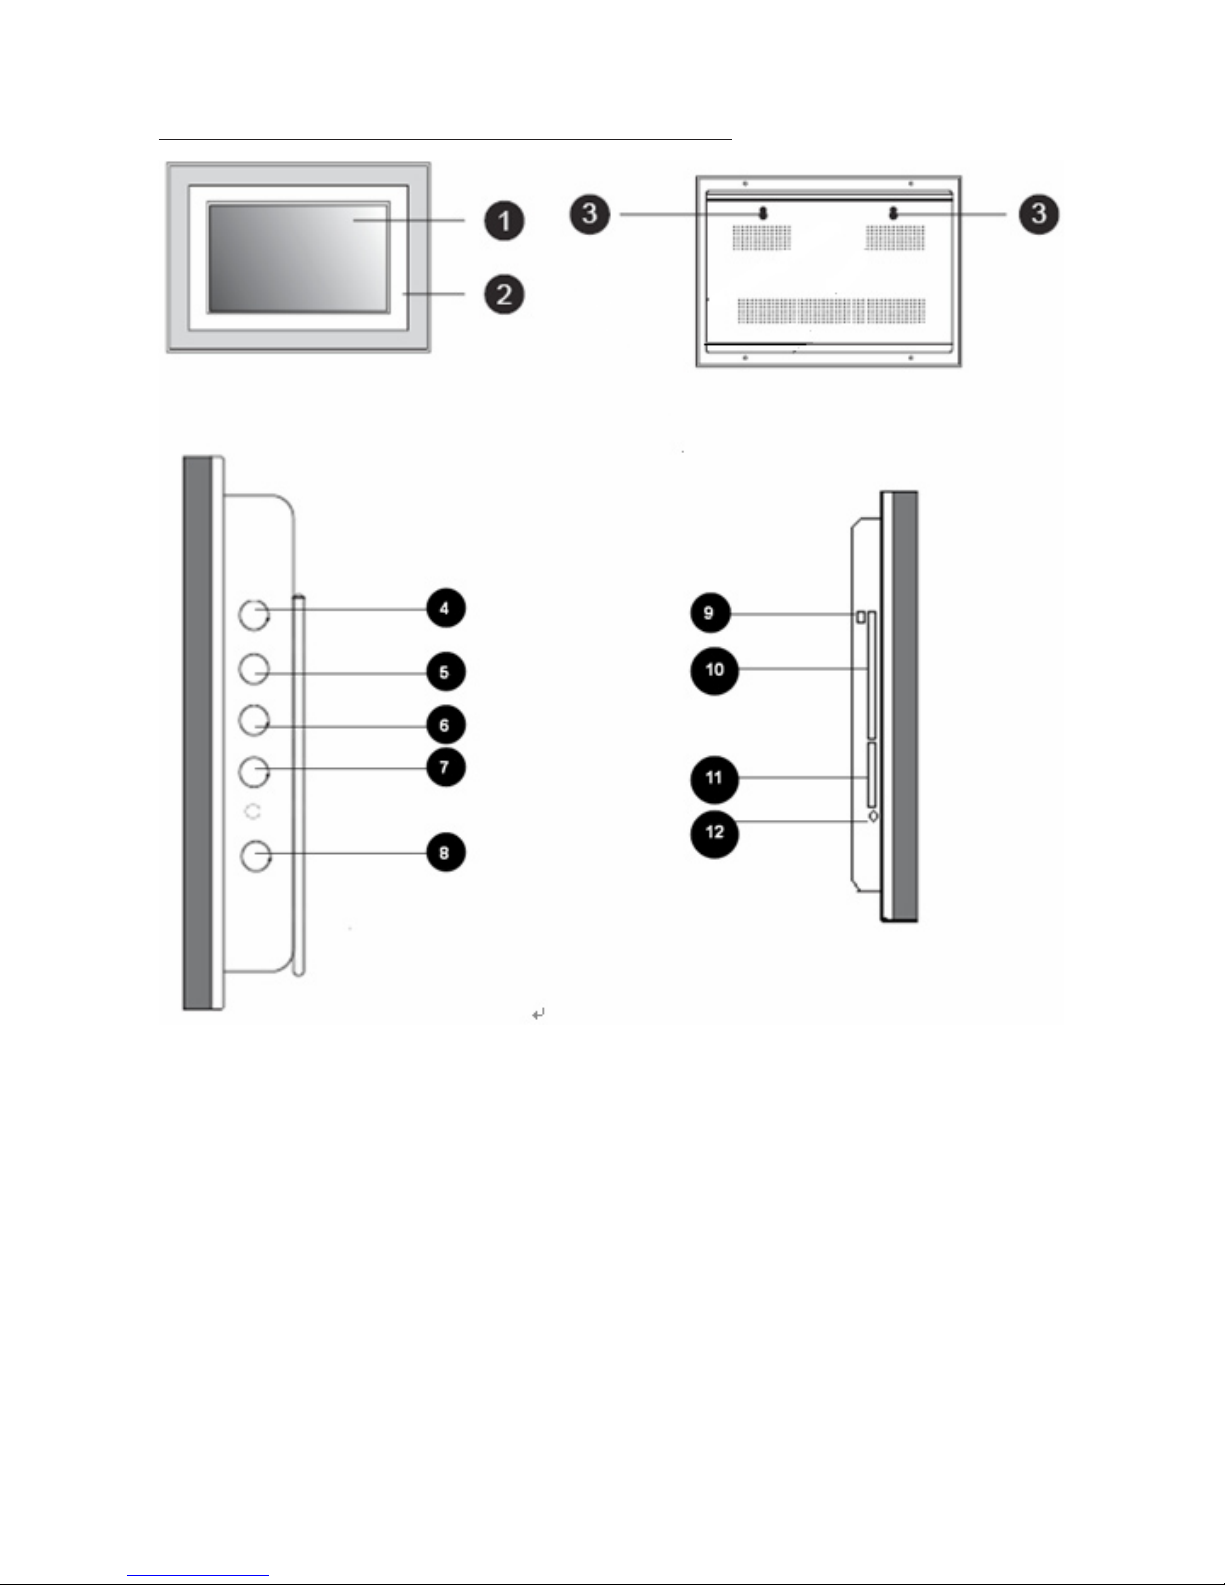
PRODUCT INTRODUCTION
Congratulations on your purchase of the TXDPF9 9 inch Digital
Picture Frame. Please read and follow all instructions in the manual
carefully before use. Failing to follow instructions could result in
personal injury or damage to the device. Also, remember to keep this
User’s Manual in a convenient location for future reference.
Important: Save the original box and all packing material for future
shipping needs.
PACKAGE CONTENTS
Before using the Digital Picture Frame, be sure to check all the
accessories contained in the package. The Digital Picture Frame
comes with the following items:
• DigitalPictureFrame x1
• Stand x1
• ACadapter x1
• RemoteControl x1
• USBminitoUSBadaptercable x1
• UserManual x1
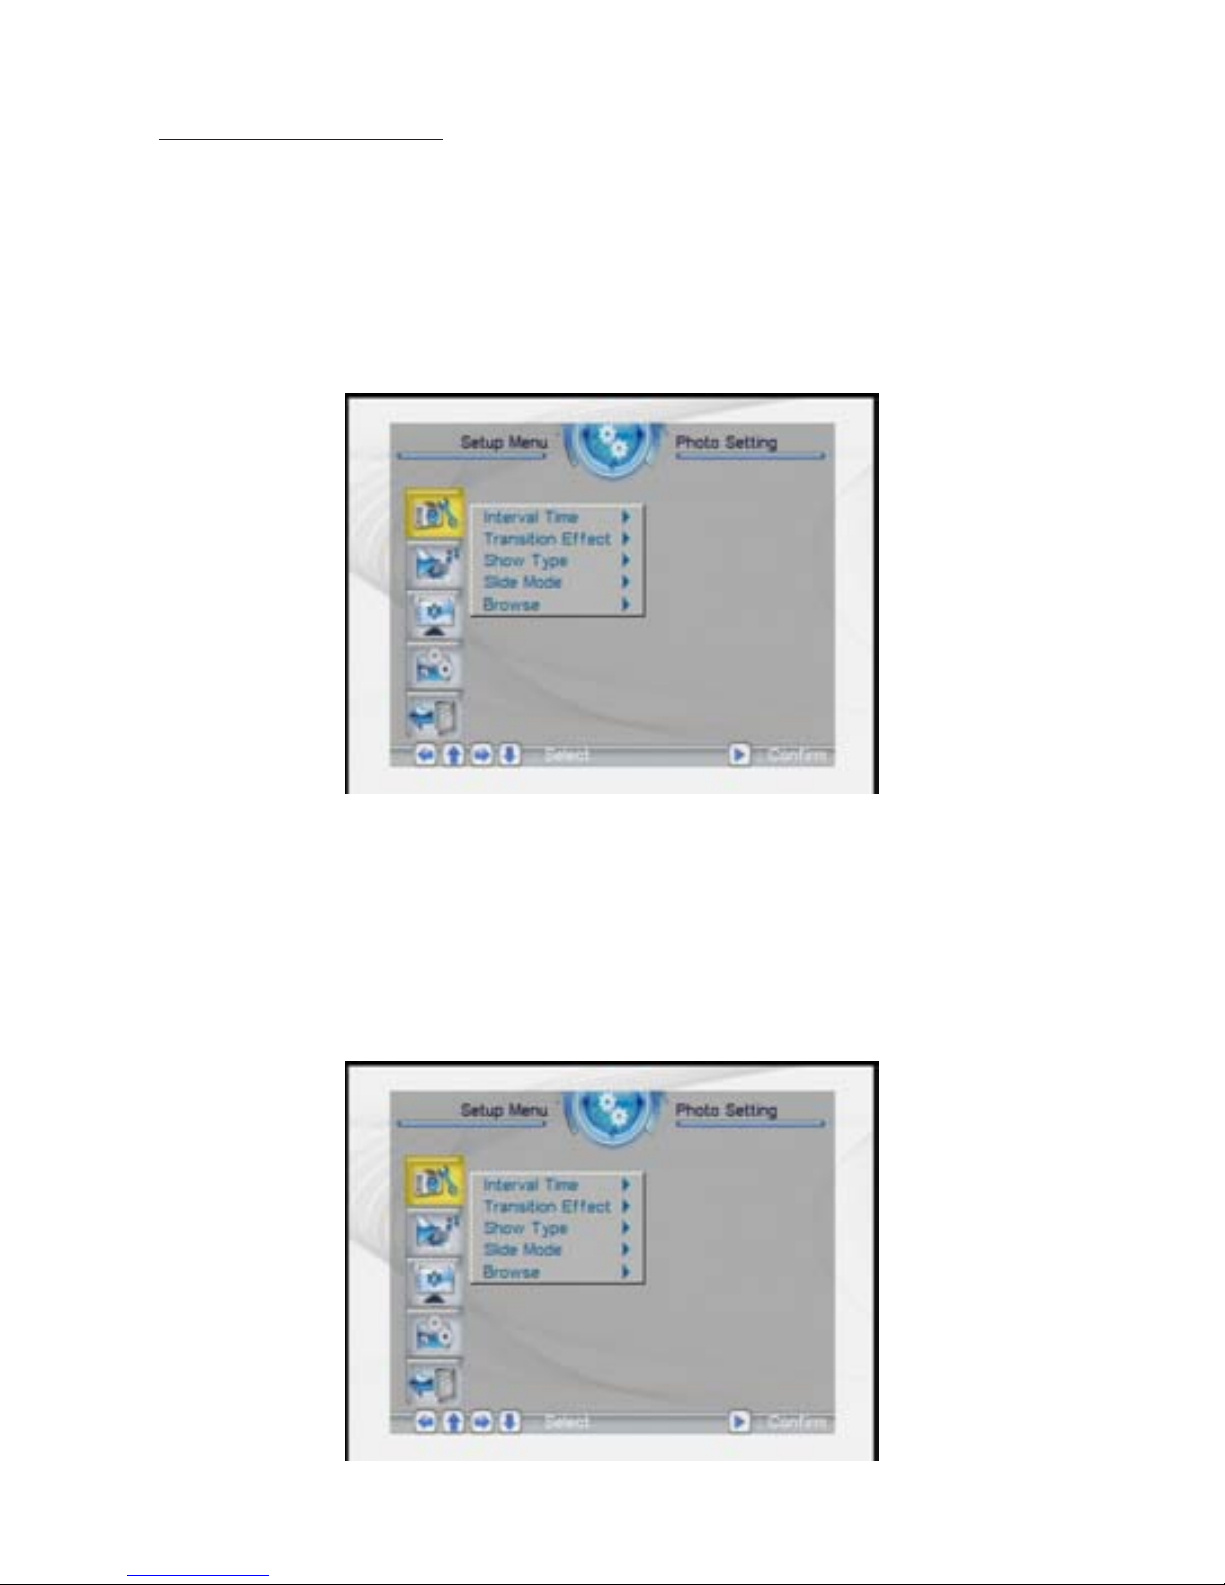
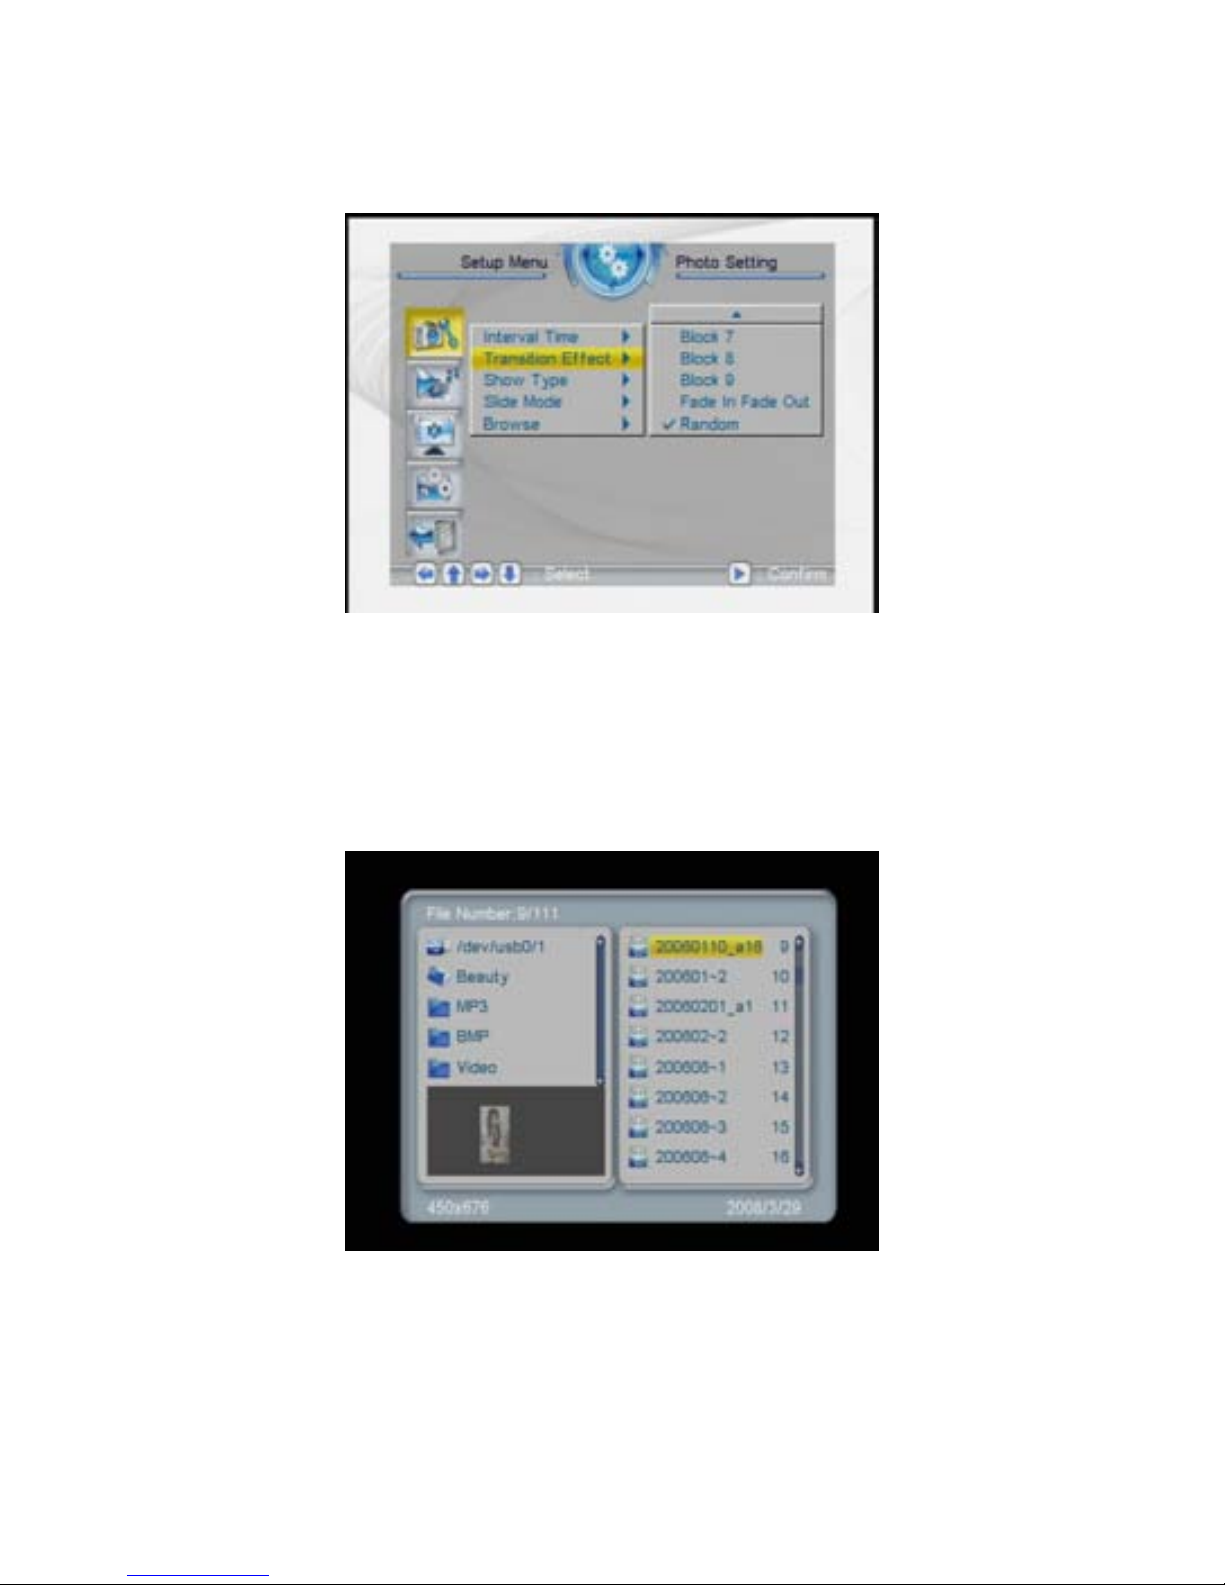
FEATURES
• Photoformat:JPEG,BMP
• Musicformat:MP3,WMA
• Videoformat:MPEG1/2/4,AVI
• Imageslideshowwithbackgroundmusic
• CardFormats:SD/MMC/MS/XD-CF-USB
• Calendar,Clock,alarmclock,AutoPower.
• Automaticslideshowwithmultipletransitioneectsanddisplay
times.
• Easytouseremotecontrolfordisplayingandmanagingyourles.
• SimplyinsertacompatiblememorycardintotheDigitalPhoto
Frametoshowphotos,playMP3musicorsupportedvideoles
(memory card not included).
2