LENCO AF-80a User manual

109215AB1X1XI · 2020-09
Digital Hot Air Fryer
en Instructions for use

2
Dear Customer
Deep-fry with hot air only – and almost no need for oil! With your new hot air
fryer you can create delicious, low-fat snacks in just a few minutes – and at
the same time save on energy costs as there is no need to switch on the oven.
Bon appétit!
3 About these instructions
4 Safety warnings
8 At a glance (delivery contents)
10 Prior to first use
10 Cleaning
11 Prior to first use
13 What is hot air frying and
which foods are suitable
for cooking in this way?
14 Cooking table
15 Use
15 Preheating
15 Cooking – manual start
16 During the cooking process
16 Ending the cooking process
17 Using a preset cooking program
18 Cleaning
18 Problems / solutions
20 Technical specifications
20 Disposal
Contents

3
About these instructions
This product is equipped with safety
features. Nevertheless, read the safety
warnings carefully and only use
the product as described in these
instructions to avoid accidental injury
or damage.
Keep these instructions for future
reference.
If you pass this product on to another
person, remember to give them these
instructions.
Symbols in these instructions:
This symbol warns you
of the danger of injury.
This symbol warns you
of the danger of injury
caused by electricity.
The term DANGER warns of potential
severe injury and danger to life.
The term WARNING warns of injury
and severe material damage.
The term CAUTION warns of minor
injury or damage.
This indicates additional
information.

4
Safety warnings
Intended use
The hot air fryer is suitable for cooking
food. It is designed for quantities usual
in a standard household and is not
intended for commercial use.
The appliance is not suitable for use
in the staff kitchens of shops, offices or
other areas of commerce, in agricultural
buildings, in bed and breakfast estab-
lishments or by customers in hotels,
motels or any other places offering
accommodation, as well as for general
commercial purposes.
DANGER to children and people
with restricted capabilities of
operating appliances
• Keep all packaging material out of
the reach of children.
There is a risk of suffocation!
• This appliance may be used by children
from the age of 8 and by people with
reduced physical, sensory or mental
capabilities or with a lack of sufficient
experience and/or knowledge, provid-
ed they are supervised or have been
trained in the safe use of the appliance
and understand the potential dangers.
Cleaning and maintenance must not
be carried out by children without
supervision. Children must not be
allowed to play with the appliance.
The appliance and its mains cord must
be kept out of the reach of children
that are younger than 8 years of age
from the moment it has been switched
on until it has completely cooled down.
• The appliance becomes very hot.
Use it only out of the reach of children.
• Do not leave the mains cord hanging
down from the work surface to prevent
children pulling the appliance down.
DANGER due to electricity
• Never immerse the appliance, mains
cord or mains plug in water as this
could cause an electric shock.
Also protect it from splashes and
drops of water.
• Do not touch the product with wet
hands and do not use it outdoors or
in rooms with high humidity.
• Only connect the appliance to a prop-
erly installed, earthed wall socket with
the same mains voltage as mentioned
in the “Technical specifications”.
• If an extension cord is necessary,
it must at least comply with the
“Technical specifications” of the
product.
Consult a specialist when
purchasing one.

5
• Unplug the mains plug from the
wall socket...
...if malfunctions occur during use,
...after use and
...before cleaning the appliance.
Always pull on the plug, never
on the mains cord.
• The wall socket must be easily
accessible so that the appliance can
be unplugged quickly if necessary.
• The mains cord must not be kinked
or squeezed. Keep it away from sharp
edges, oil, hot appliance parts or other
sources of heat.
• Check the appliance and mains cord
regularly for any damage. Do not use
the fryer if the appliance or its mains
cord shows any visible sign of damage
or if the appliance has been dropped.
• Do not make any modifications to the
product. Do not attempt to replace the
mains cord yourself. Only have repairs
to the appliance or mains cord carried
out by a specialist workshop, or
contact our customer care service.
Improper repairs can result in consid-
erable risk of injury to the user.
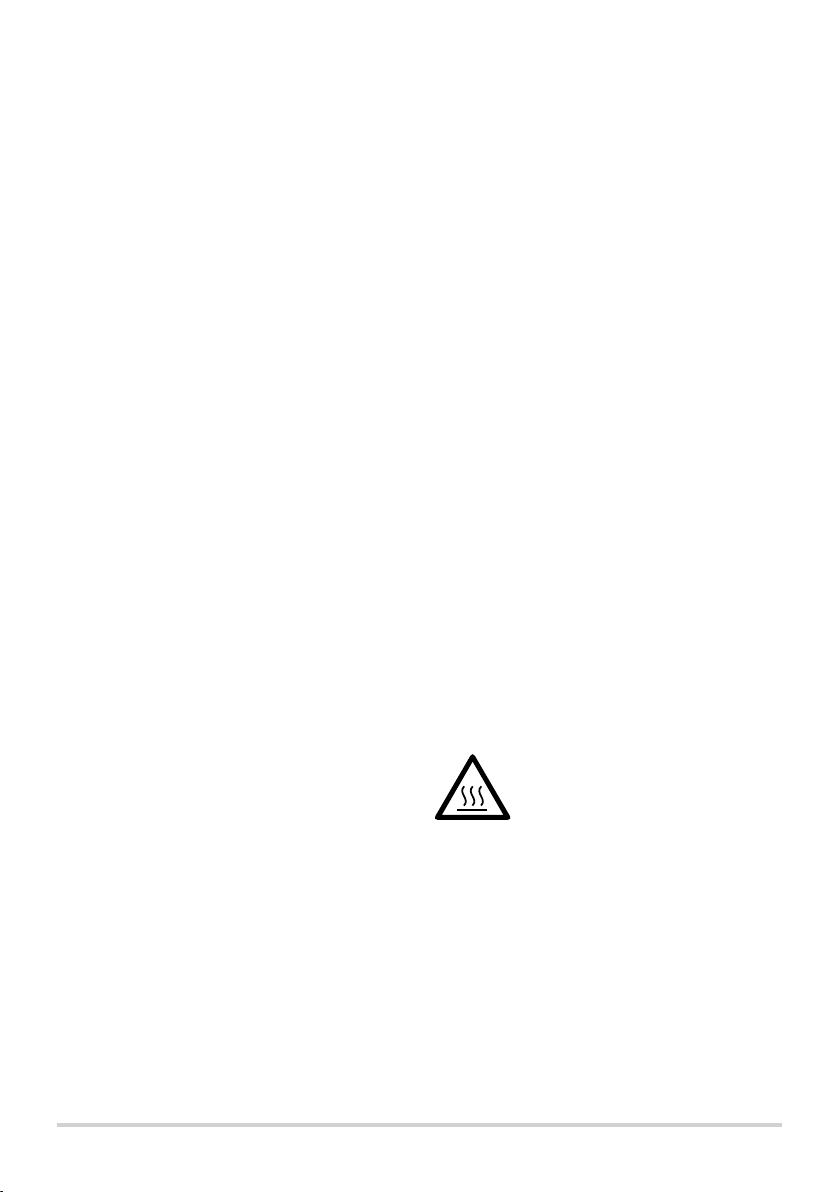
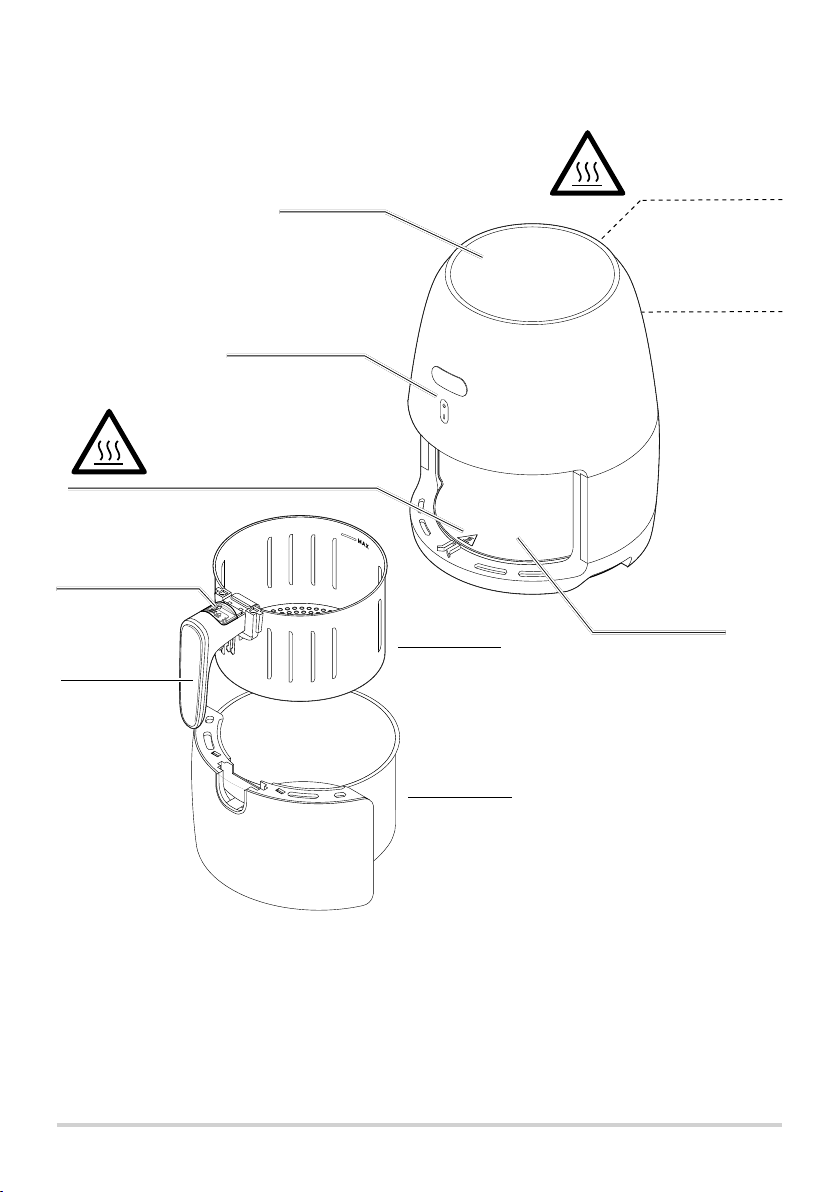
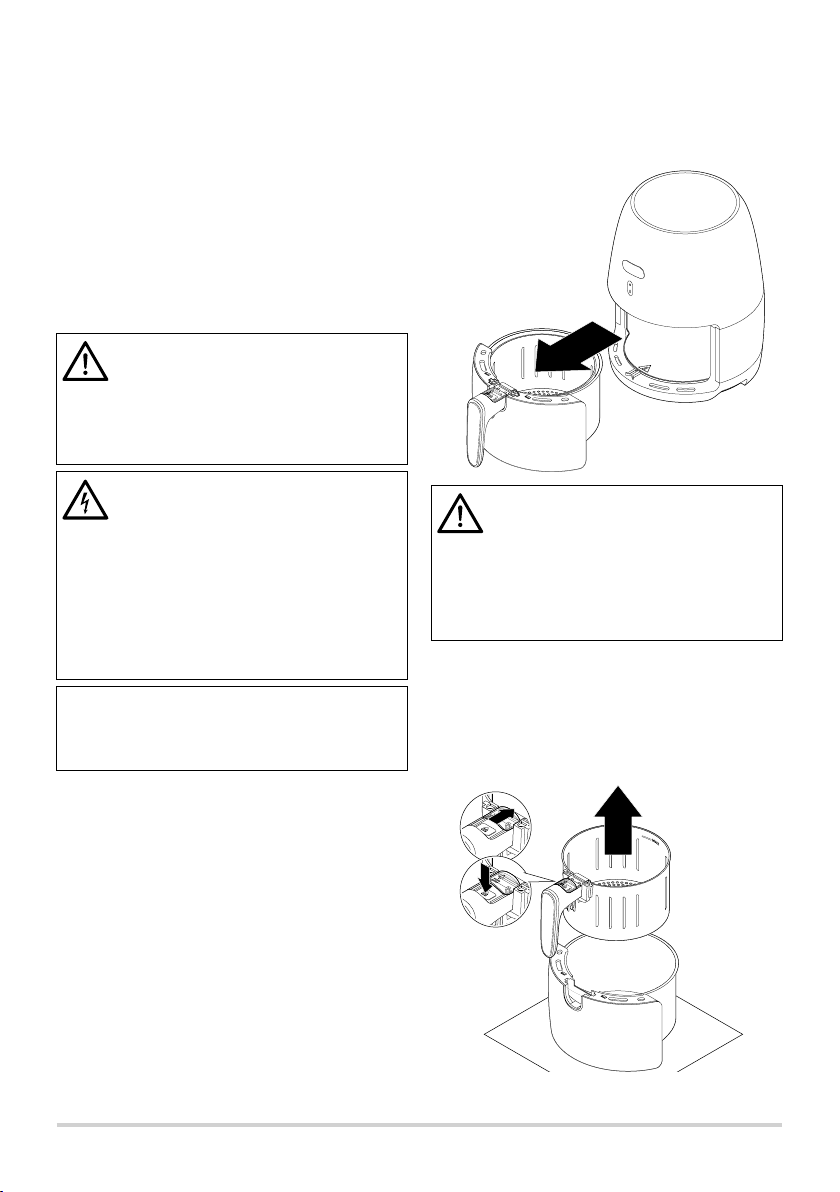
WARNING – risk of burns
• The outer parts of the appliance also
get very hot while it is being used.
Ensure that nobody touches the hot
surfaces while the appliance is on
or while it is cooling down (at least
30 minutes).
Leave the appliance to cool down
before you take out the pan and
basket to clean them and before
cleaning, transporting or storing it.
• The food that you cook in the
appliance also becomes very hot.
Be careful when taking it out.
• While food is cooking, steam is
emitted from the ventilation openings.
Keep your hands and face away from
these – there is a risk of scalding!
Also watch out when opening the
appliance for steam escaping.
• Do not pour water directly onto the
hot pan. The steam produced could
cause scalds.
WARNING – fire hazard
• Never leave the appliance
unsupervised while it is operating!
• The appliance must not be operated
with a timer or by means of any
separate remote control.
• Never cover the ventilation openings
while the appliance is being used
or cooling down after use.
• Avoid fire or scorching hazards: set the
appliance up away from walls, corners,
curtains, etc. There must be at least
10 cm space on all sides (and above)
to walls and furniture.
Keep flammable materials away from
the appliance and do not cover it.

6
•
Unwind the mains cord completely
before use. Be sure that the unwound
mains cord is entirely free of the
appliance.
• Never use the appliance without
the basket inserted.
• Always place the items to be cooked
into the basket and not directly in
the pan. There must not be any direct
contact with the heating elements.
• Never put any oil into the pan as this
can ignite.
• Never cook packaged food in the
appliance.
• If there is dark smoke coming out the
appliance, switch it off immediately
and pull the mains plug out of the
socket. Wait until there is no more
smoke coming out before removing
the pan from the appliance.
Please note: light-coloured smoke
is generally harmless.
CAUTION – material damage
• Only use a heat-resistant wooden
or plastic implement when removing
food. This prevents the basket's
non-stick coating from becoming
scratched.
• Never clean the appliance with
abrasive products, oven cleaner
or any materials that might scratch
the surface. This could damage
the non-stick coating.
• Always place the appliance on a stable,
level and heat-resistant surface or
mat.
• Some varnishes, synthetic substances
or types of furniture polish may react
adversely with the material of the
non-slip feet and soften them.
If necessary, place a non-slip mat
under the appliance.

7
Safety features
• The appliance has a contact switch
inside which automatically switches
off the heat when the pan is removed
and switches it back on when the pan
is inserted again. The appliance does
not heat up unless the pan has been
inserted.
• The appliance is protected from
overheating. It automatically switches
off when the built-in temperature
monitor malfunctions. The appliance
will no longer work. Disconnect the
mains plug, leave the appliance to
cool down and contact the customer
care service or a specialist workshop
to have the appliance repaired.
• The appliance is equipped with
a Cool-Touch surface, meaning that
its outside parts do not become hot
when in use.
About “acrylamide”
• Acrylamide is produced during
processes involving intense heat
(baking, frying, deep-frying, grilling,
toasting etc.), particularly in foods
containing starch.
At the present time, it is not possible
to say conclusively in what form
acrylamide is harmful to the human
organism.
To be on the safe side you should
not cook your food for too long,
as intense browning may also lead
to an increased risk.
A rule of thumb is: “Golden, not
charred”. As research is set to
continue beyond the issuing of these
operating instructions, keep an
eye on this subject in the press.
It is also well documented on the
Internet.
Symbols on the appliance
This symbol warns of hot
surfaces (on the inside)
and hot rising steam
(via the ventilation slits on the back).

8
At a glance (delivery contents)
Symbol inside the appliance
The inside of the appliance
becomes very hot when in use.
Do not touch the hot surfaces!
Display with
control buttons
Operation
indicator light
Basket release with
protective cover
Handle
Basket
Pan
Heating chamber
Ventilation slits
on the back.
Symbol on
the appliance
Hot rising steam!

9
Icons
Operating buttons
Operating buttons
Operating buttons
Display
Operating buttons
Start / pause
/ restart cooking
Selecting cooking program
Increase temperature
Decrease temperature
Increase cooking time
Decrease cooking time
Icons
Cooking program “Chips”
Cooking program “BBQ”
Cooking program
“Chicken legs/wings”
Cooking program “Seafood”
Cooking program “Steak”
Cooking program “Cake”
Cooking program “Vegetables”
Cooking program “Fish”
Fan on
Heating up
Temperature
Cooking time

10
Prior to first use
Before using it for the first time, the
appliance and, in particular, the basket
and the pan, must be cleaned and
“heat-treated” to remove any residue
from production.
Take this opportunity to learn how
the appliance is put together and
get used to handling it.
Cleaning
DANGER to children – danger
of death by suffocation/choking
• Keep the packing material out
of the reach of children.
Dispose of it immediately.
DANGER – risk of fatal electric
shock
• Always remove the mains plug from
the wall socket before cleaning the
appliance.
• The appliance itself must not be
exposed to moisture. Also protect it
from splashes and drops of water.
CAUTION – material damage
• Do not use any caustic, aggressive
or abrasive products for cleaning.
1. Remove all of the packaging
material.
2. Remove the protective film
from the display.
3. Pull the pan (with the basket inside)
out of the appliance by the handle
against slight resistance.
M
A
X
WARNING – risk of injury
• Never press the basket release
when you are holding the basket
with the pan in your hand. The
pan will fall down uncontrollably!
4. Put the basket and pan down.
Slide the protective cover forwards
over the basket release and press
on the basket release.
The pan comes loose and you
can take the basket out.

11
5. Wipe down the inside and outside
of the appliance with a slightly
dampened cloth. Then dry the
appliance thoroughly.
6. Wash the pan and basket
thoroughly with warm water,
a standard washing-up liquid and
a soft sponge. The basket and the
pan are not dishwasher-safe.
7. Dry all parts thoroughly before
using the appliance. There must
be no moisture on any part of the
appliance.
Prior to first use
This appliance is designed for
frying with hot air without the
addition of oil or fat. Do not put any oil,
fat or any other liquids into the pan.
WARNING – risk of fire
• Only plug the mains plug into the
wall socket when the appliance
has been fully assembled.
• Do not place the appliance under
wall cupboards, near flammable
objects or directly against a wall
or in a corner. Make sure that the
mains cord does not hang down
from the work surface.
• Keep the ventilation openings free.
• Never use the appliance without
the basket inserted into the pan.
A slight odour may be emitted
the first time the appliance heats
up. This is harmless. Make sure there
is sufficient ventilation.
1. Set the appliance on a heat-resist-
ant, non-slip, level and stable work
surface.
2. Place the basket into the pan.
You should hear and feel it click
into place.
Click!
3. Slide the protective cover forwards
over the basket release again.
4. Slide the pan into the appliance.
It must properly lock into place
on both sides.
M
A
X
The pan must be inserted all the
way into the appliance to activate
the contact switch. Otherwise the appli-
ance will not heat up.
5. Insert the mains plug into an easily
accessible, earthed wall socket.
You will hear an audio signal and
the indicator light at the front will
light up.

12
The display briefly lights up
completely then only the
Start/Pause button
remains illuminated.
The appliance is on stand-by.
The appliance makes a sound
whenever a button is pressed.
6. To activate the appliance, hold
down for approx. 3 seconds.
The appliance is set to 200 °C
and 15 minutes cooking time, as
a default. The minutes flash on
the display for a few seconds.
Then, the temperature and
cooking time are shown
alternately on the display.
7. Decrease the cooking time to
10 minutes by pressing or holding
down the button until 10 is
shown on the display.
8. To start the cooking process,
press .
The “Heating up” and
“Fan on” icons appear on the
display. The appliance is heating up.
As soon as the appliance has
reached the selected temperature,
the icon goes out.
The time display will now
always show the time remaining.
9. Once the time has elapsed,
you will hear 5 audio signals
and 00 minutes and flash
on the display 5 times.
The appliance automatically
switches back onto stand-by.
Only the icon remains
illuminated on the display.
10. Remove the mains plug from
the wall socket.
The operation indicator light
goes out.
11. Let the appliance cool down.
12. To cool it down more quickly,
you can take the pan and basket
out of the appliance and put them
on a heat-resistant surface or mat.
Use oven gloves or something
similar.
13. Once the appliance has cooled
down, wipe the inside of the
appliance with kitchen paper and
briefly rinse the pan and basket.
MIf you wish to briefly interrupt
the cooking process, press .
flashes and the other icons
remain lit up.
MTo continue the cooking process,
press again.
If no buttons are pressed for
approx. 60 seconds, the appliance
will automatically switch to stand-
by and you may need to start
the cooking process again from
the beginning.
MTo stop the cooking process early,
hold down for approx. 3 seconds.
The appliance is now on stand-by.

13
What is hot air frying and which foods
are suitable for cooking in this way?
Hot air frying cooks food – as its
name suggests – using only hot air;
no oil, fat or water are needed.
• Generally all food that can be
cooked in the oven is also suitable
for cooking in the hot air fryer.
• Do not use any foods which have a
high fat content, e.g. sausages, etc.
• If you want to cook dumplings
or pastry with a filling inside, it
is best to use ready-made pastry
sheets. These can be prepared
more quickly than homemade ones.
• Cut large food items into smaller
pieces to shorten the cooking
time and to achieve better
cooking results.
• A large amount of food only takes
slightly longer than a small amount.
But do not overfill the basket!
It must not be filled to the very top,
as otherwise the food will not cook
evenly. Follow the instructions in
the table further on in these
instructions.
• Small portions of food should
be shaken halfway through the
cooking time to achieve an even
cooking result (see table).
• To cook a quiche, for example,
or any other small, delicate or filled
pastry dish, place a small baking
or roasting tin (that is suitable for
use in the oven) into the basket.
• The appliance is also suitable
for heating up meals. For this,
set the temperature to 150 °C
for up to 10 minutes.
Example: cooking chips:
• It is best to use approx. 500 g
of potatoes.
• If you want to cook frozen chips,
ensure that they are suitable for
cooking in the oven and not just
for a deep fryer.
• Only use waxy fresh potatoes which
will remain firm and intact during
the cooking process. If you are
making chips from fresh potatoes,
proceed as follows:
1. Peel the potatoes and chop them
into thin sticks; the thinner the
sticks, the crispier the chips.
2. Wash the potato sticks thoroughly
to remove as much starch as
possible. Starch prevents the chips
from browning evenly. Then dry
them thoroughly with kitchen
paper. The potato sticks must not
be wet when you put them into the
appliance.
3. Pour 1/2 tsp vegetable oil, e.g.
sunflower oil, into a bowl. This will
make the chips lovely and crispy.
Do not use butter or margarine.
These fats are not suitable for
deep-frying.
4. Add the potato sticks to the bowl.
Carefully turn them in the bowl
until they are covered in oil on
all sides.

14
5. Take the potato sticks out the bowl
carefully, letting any excess oil drip
off. If necessary, use a piece of
kitchen paper to dab off any excess
oil. Place the potato sticks into the
basket.
Please note: Do not shake the
potato sticks straight from the
bowl into the basket, as this may
cause oil to drip into the pan.
Cook the chips as according
to the instructions in the table.
Cooking table
Please note that the information in the table is a guideline.
The cooking time may vary depending on size, shape, variety, etc.
Amount
min–max (g)
Time*
(minutes)
Temperature
(°C)
Shake halfway
through?
Additional
information
Potatoes
Frozen chips, thin 400–500 18–20 200 yes
Frozen chips, thick 400–500 20–25 200 yes
Fresh chips, Ø~8 mm 300–800 18–24 200 yes see previous section
Potato gratin 500 15–18 200 yes
Meat & poultry
Steak 100–600 10–15 180
Pork chops 100–600 10–15 180
Burger(s) 100–600 10–15 180
Pigs in blankets 100–600 13–15 200
Chicken drumsticks 100–600 25–30 180
Chicken breast 100–600 15–20 200
Snacks
Spring rolls 100–500 8–10 200 yes
ready-made food
Frozen chicken nuggets 100–600 6–10 200 yes
ready-made food
Fish fingers 100–500 6–10 200
ready-made food
Frozen breaded cheese 100–500 8–10 160
ready-made food
Stuffed vegetables 100–500 10 160
Baked goods
Cake 400 20–25 160 use a baking tray
Quiche 500 20–22 180 use a baking tray
Muffins 400 15–18 200 use a baking tray
Snacks 500 20 160 use a baking tray
* The times shown apply to a pre-heated appliance (see section “Preheating” in the chapter “Use”).
If the appliance is still cold, add an extra 3 minutes to the cooking time.

15
Use
WARNING – risk of fire
• Only plug the mains plug into
the wall socket when the appliance
has been fully assembled.
• Do not place the appliance under
wall cupboards, near flammable
objects or directly against a wall
or in a corner. Make sure that the
mains cord does not hang down
from the work surface.
• Keep the ventilation openings free.
• Never use the appliance without
the basket inserted into the pan.
• Never put any oil or other liquids
into the pan.
• Never place the items to be cooked
directly in the pan. The food must
always be put into the basket.
Preheating
The values in the cooking table are
applicable to a pre-heated appliance.
To time the cooking process perfectly,
we recommend preheating the
appliance. To do so, switch on the
appliance without any food inside but
with the pan and the basket placed
inside. Only fill the appliance with
food once the
“Heating up” icon
has gone out (after max. 3 minutes,
depending on the temperature).
Cooking – manual start
1. Set the appliance on a heat-
resistant, non-slip, level and
stable work surface.
2. Pull the pan (with the basket inside)
out of the appliance by the handle
against slight resistance.
M
A
X
WARNING – risk of injury
• Never press the basket release
when you are holding the pan
and the basket in your hand.
The pan will fall down
uncontrollably!
3. Place the food to be cooked into
the basket. Refer to the quantity
information in the table. The basket
must not be filled to the very top.
4. Slide the pan into the appliance.
It must properly lock into place
on both sides.
M
A
X

16
The pan must be inserted all
the way into the appliance to
activate the contact switch. Otherwise
the appliance will not heat up.
5. Insert the mains plug into an easily
accessible, earthed wall socket.
You will hear an audio signal and
the indicator light at the front will
light up.
The display briefly lights up com-
pletely then only the Start/Pause
button remains illuminated.
The appliance is on stand-by.
6. To activate the appliance, hold
down for approx. 3 seconds.
The appliance is set to 200 °C
and 15 minutes cooking time, as
a default. The minutes flash on
the display for a few seconds.
Then, the temperature and
cooking time are shown
alternately on the display.
You can set the temperature
from 80 °C to 200 °C (in incre-
ments of 5 °C) and the cooking time
from 0 to 60 minutes (in 1 minute
increments).
7. Set the temperature according to
the guidelines in the cooking table
by pressing or holding the and
buttons.
8. Set the cooking time according to
the guidelines in the cooking table
by pressing or holding the and
buttons.
If the appliance has not preheat-
ed, add 3 minutes to the cooking
time.
9. To start the cooking process, press
.
The “Heating up” and
“Fan on” icons appear on the
display.
The appliance is heating up.
As soon as the appliance has
reached the selected temperature,
the icon goes out.
The time display will now
always show the time remaining.
During the cooking process
MSome food should be shaken once
halfway through cooking (see
table). To do this, simply take the
pan out of the appliance and toss
it a little, so that the food is moved
and rearranged.
MIf you wish to briefly interrupt the
cooking process, press .
flashes.
MTo continue the cooking process,
press again.
If no buttons are pressed for ap-
prox. 60 seconds, the appliance will
automatically switch to stand-by
and you may need to start the
cooking process again from the
beginning.
MTo stop the cooking process early,
hold down for approx. 3 seconds.
The appliance is now on stand-by.
Ending the cooking process
1. Once the time has elapsed, you
will hear 5 audio signals and
00 minutes and flash on the
display 5 times.
The appliance automatically
switches back onto stand-by. Only
the icon remains illuminated on
the display.

17
WARNING – risk of injury
• Always use oven gloves or
something similar when handling
the hot pan and/or basket.
• When you take the pan out of the
appliance some steam may escape.
Keep your hands and face away
from it.
• Please note: never press the basket
release when you are holding the
pan with the basket in your hand.
The pan will fall down uncontrolla-
bly!
2. Remove the pan from the appliance
with the basket placed inside and
place it onto a heat-resistant,
non-slip, firm, even surface.
3. Check if the food is fully cooked.
If it is not fully cooked, put the
pan back into the appliance and
set it to cook for a further couple
of minutes.
4. To take out the cooked food…
… press the basket release. The pan
comes loose and you can take the
basket out. Tip the food into a bowl
or similar container.
… never tip the food into a bowl
straight from the pan with the
basket still inserted.
Fat or oil which has dripped down
and accumulated in the pan would
be poured out too.
… use tongs or something similar
when handling large or delicate
pieces of food. Do not use any uten-
sils made of metal to remove the
food. This could damage the non-
stick coating of the appliance. Use
utensils made of wood or silicone.
MYou can now cook another portion
of food, or...
... let the appliance cool down.
Remove the mains plug from
the wall socket. The operation
indicator light goes out.
Make sure that no one touches
the hot surfaces of the appliance
while it is cooling down.
5. After it has cooled down, clean
the appliance as described in the
section titled “Cleaning”.
Using a preset cooking program
Select one of the 8 preset cooking
programs for your food (see chapter
“At a glance” in the section “Operating
buttons”).
1. Press the program selection button
until the icon of the chosen
program is shown on the display.
2. To start the cooking process, press
.
3. If the appliance has not preheat-
ed, add 3 minutes to the cooking
time.
MIf you wish to change the cooking
time, press or hold the or
buttons.
MIf you wish to change the tempera-
ture, press or hold the or
buttons.

18
Cleaning
DANGER – risk of fatal electric
shock
• Always remove the mains plug from
the wall socket before cleaning the
appliance.
• The appliance itself must not be
exposed to moisture. Also protect it
from splashes and drops of water.
WARNING - risk of burns
• Allow the appliance and all
accessories to cool down
completely before cleaning it.
CAUTION – material damage
• Do not use any caustic, aggressive
or abrasive products for cleaning.
• Do not use any utensils made
of metal to clean the pan or the
basket. This could damage the
non-stick coating of the appliance.
1. Wipe down the inside and outside
of the appliance with a slightly
dampened cloth. Then dry the
appliance thoroughly.
2. Wash the basket and pan
thoroughly with warm water,
a standard washing-up liquid
and a soft sponge.
The basket and the pan are
not dishwasher-safe.
3. To remove stubborn, hardened
bits of food, leave the pan
to steep for a while in water.
4. Dry all parts thoroughly before
putting the appliance together
again and storing it away.
There must be no moisture
on any part of the appliance.
Problems / solutions
Not working • Is the appliance plugged in?
• Is the pan with the basket correctly
in place in the appliance?
The pan will not go into
the appliance correctly
• Is the basket too full?
• Is the basket properly positioned in the pan?
The food has not been
cooked through
• Is there too much food in the basket?
• The pieces of food are too large.
Cut them slightly smaller, if necessary.
• Is the cooking temperature set too low?
• Is the cooking time set too short?

19
The food has been cooked
unevenly
• Food such as chips, which lay on top of
each other in the basket, have to be shaken
halfway through cooking, so that they are
spread out differently.
Fresh potatoes have been
cooked unevenly
• Did you use the right kind of potatoes?
They must be a waxy potato variety.
• Did you wash the potatoes properly?
Too much starch prevents them from
cooking evenly.
The snacks did not become
crispy
• Were the snacks also suitable for cooking in
an oven? Snacks which are specially designed
to be deep-fried will not get crispy in the hot
air fryer.
• If necessary, put a small amount of oil onto
the food before you place it in the basket.
There should be as little oil dripping into
the pan as possible.
• Fresh chips must be thoroughly dried
before you toss them in oil.
• Cut the chips more thinly if necessary.
White smoke is coming out
of the appliance
• Oil or fat has dripped into the pan. This may
make the pan hotter. However, this is harm-
less and does not affect the cooking result.
• Use ingredients which have as little fat as
possible. Only use a very small amount of
oil for chips, etc.
• Marinade or meat juices can drip into oil or
fat that has already leaked into the pan.
If necessary, dab the food dry a little before
putting it into the basket. If the food is coated
with breadcrumbs, compact the breadcrumbs
a little.
• Clean the pan thoroughly after every use
to remove any fat or oil residue.

20
Technical specifications
Model: AF–80a
605 605
Mains voltage: 220–240 V ~ 50/60 Hz
Protection class: I
Power: approx. 1500 watts
Temperature range: 80–200 °C
Cooking time range: 0–60 minutes
Capacity: approx. 3.2 litres
Ambient temperature: +10 to +40°C
Manufactured by: Lenco Benelux BV,
Thermiekstraat 1a,
6361 HB Nuth, The Netherlands
In the course of product improvement, we reserve the right
to make technical and optical modifications to the product.
Disposal
The product and its packaging have been manufactured from valuable materials
that can be recycled. Recycling reduces the amount of refuse and helps to
preserve the environment.
Dispose of the packaging in the proper manner. Make use of the local facilities
provided for collecting paper, cardboard and lightweight packaging.
Appliances marked with this symbol must not be disposed of along
with normal household refuse!
You are legally bound to dispose of old appliances separately from
household waste. Electronic appliances contain hazardous substances. If stored
or disposed of improperly, these may cause harm to health and the environment.
Information about collection points where old appliances can be disposed of free
of charge is available from your local authorities.
Product number: 605 605
This manual suits for next models
1
Table of contents
Other LENCO Fryer manuals