LENCO DVL-2261 User manual

55cm (21.5”) FHD LED TV WITH H.265 DVB-T2/-C/-S2, CI+ & DVD-Player
Model No.: DVL-2261

1
Contents
Caution .......................................................................................3
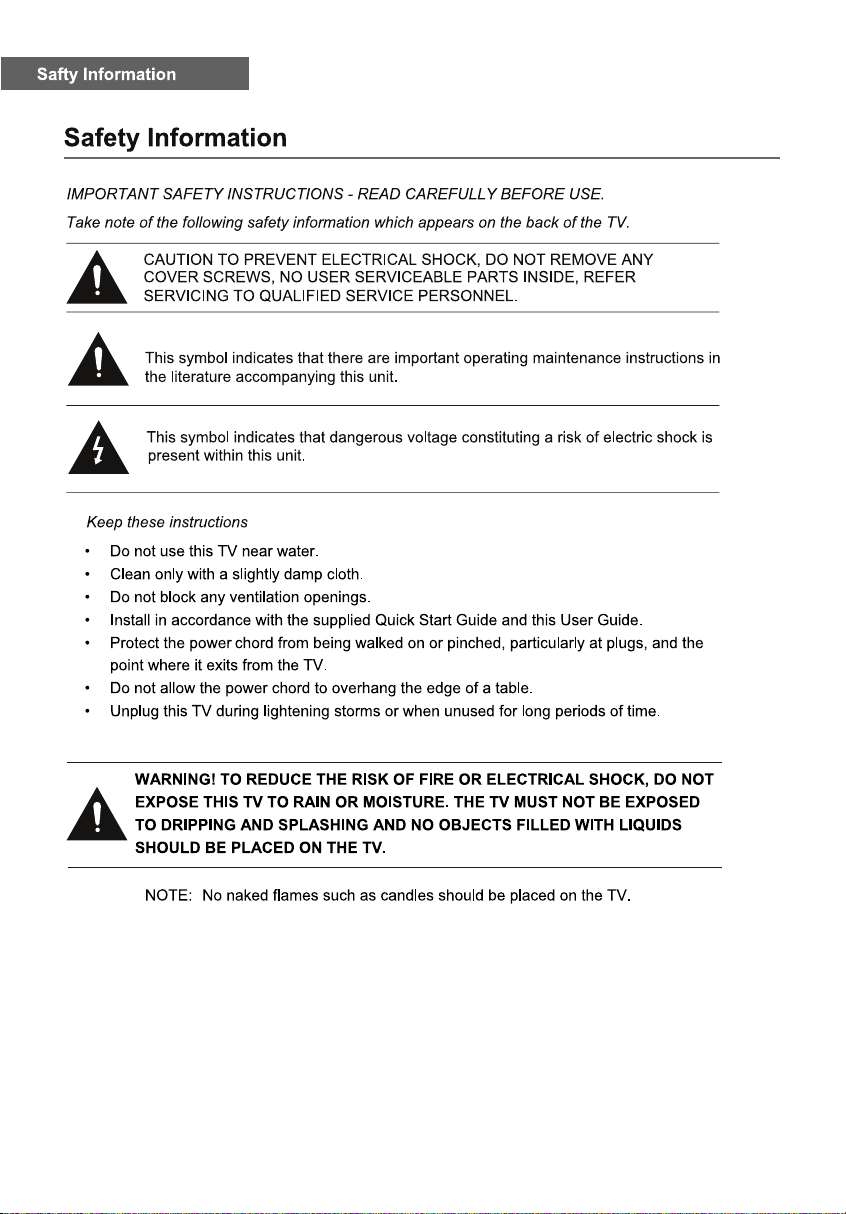
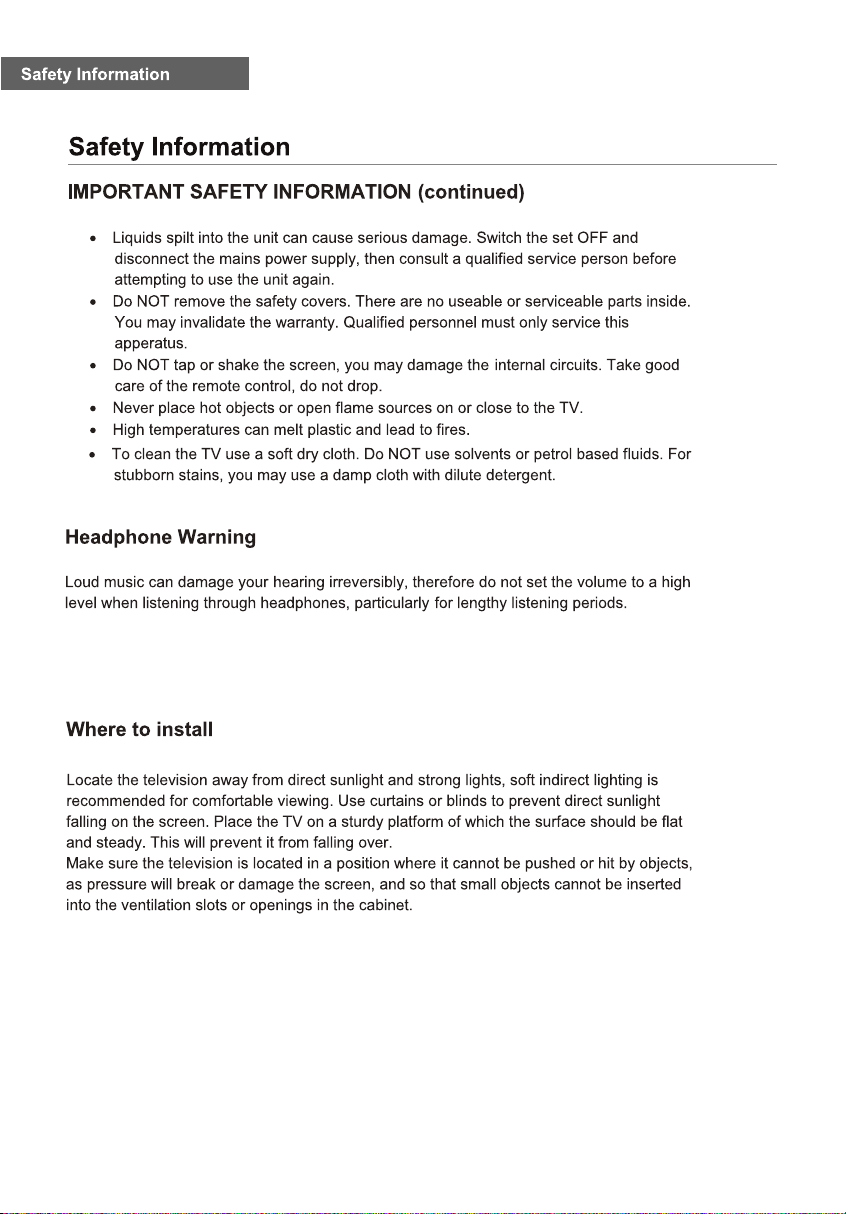
Safety Information .....................................................................3-5
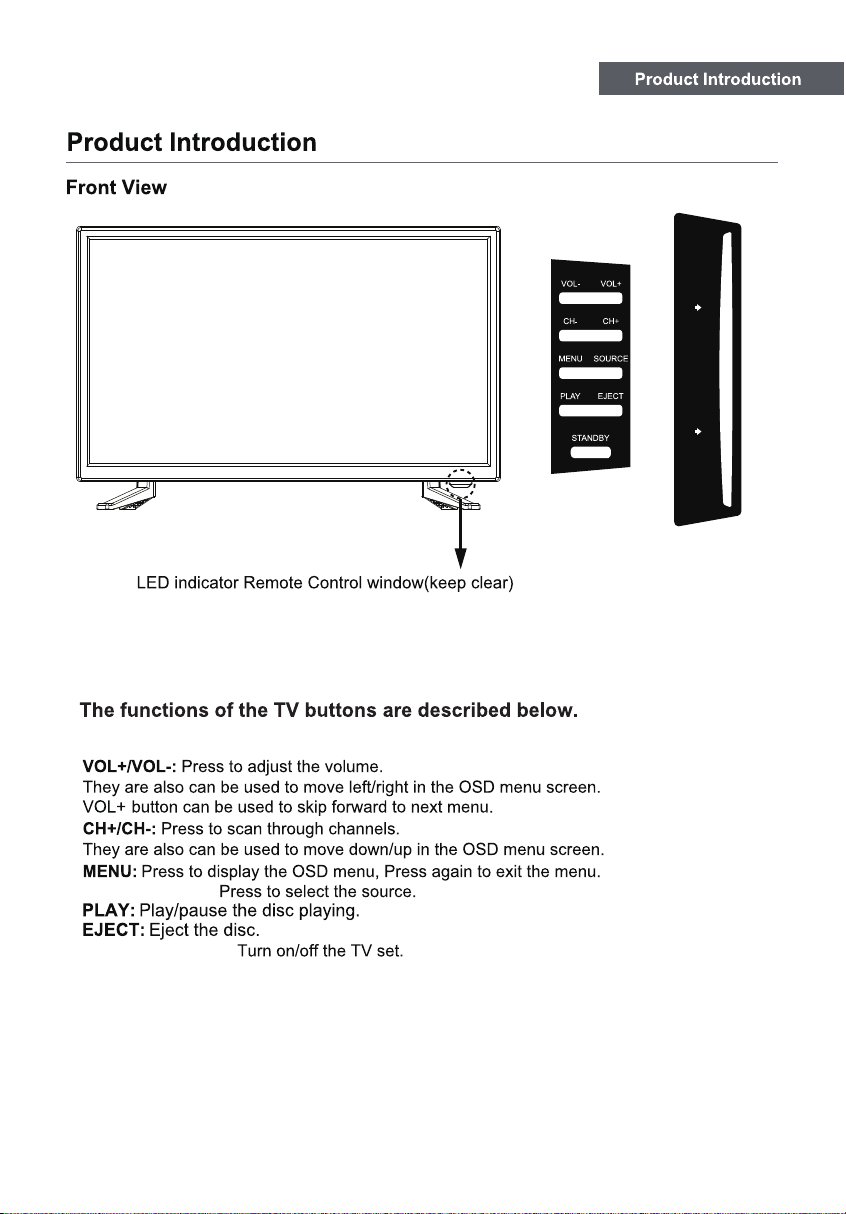
Product Introduction .................................................................6
Technical Specification............................................................................ 5
Simple Troubleshooting
Connections ...............................................................................7
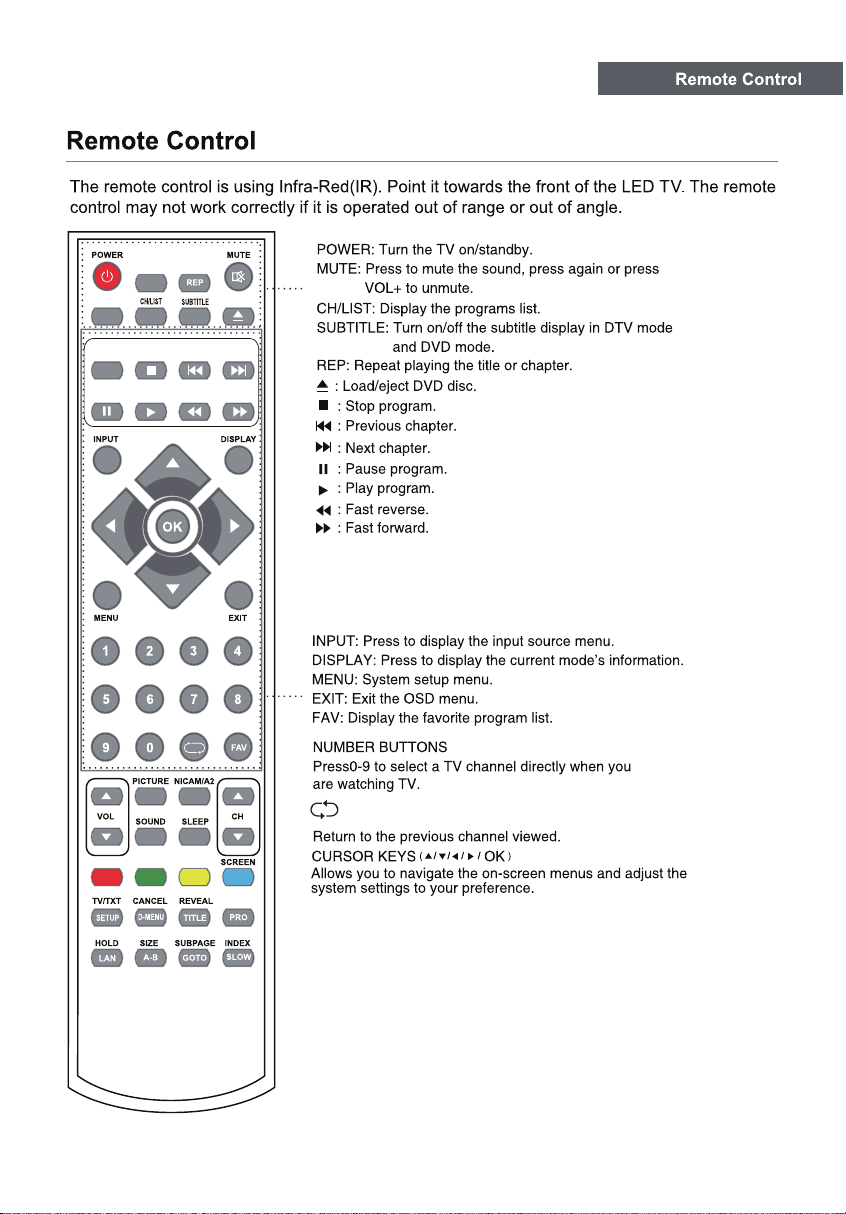
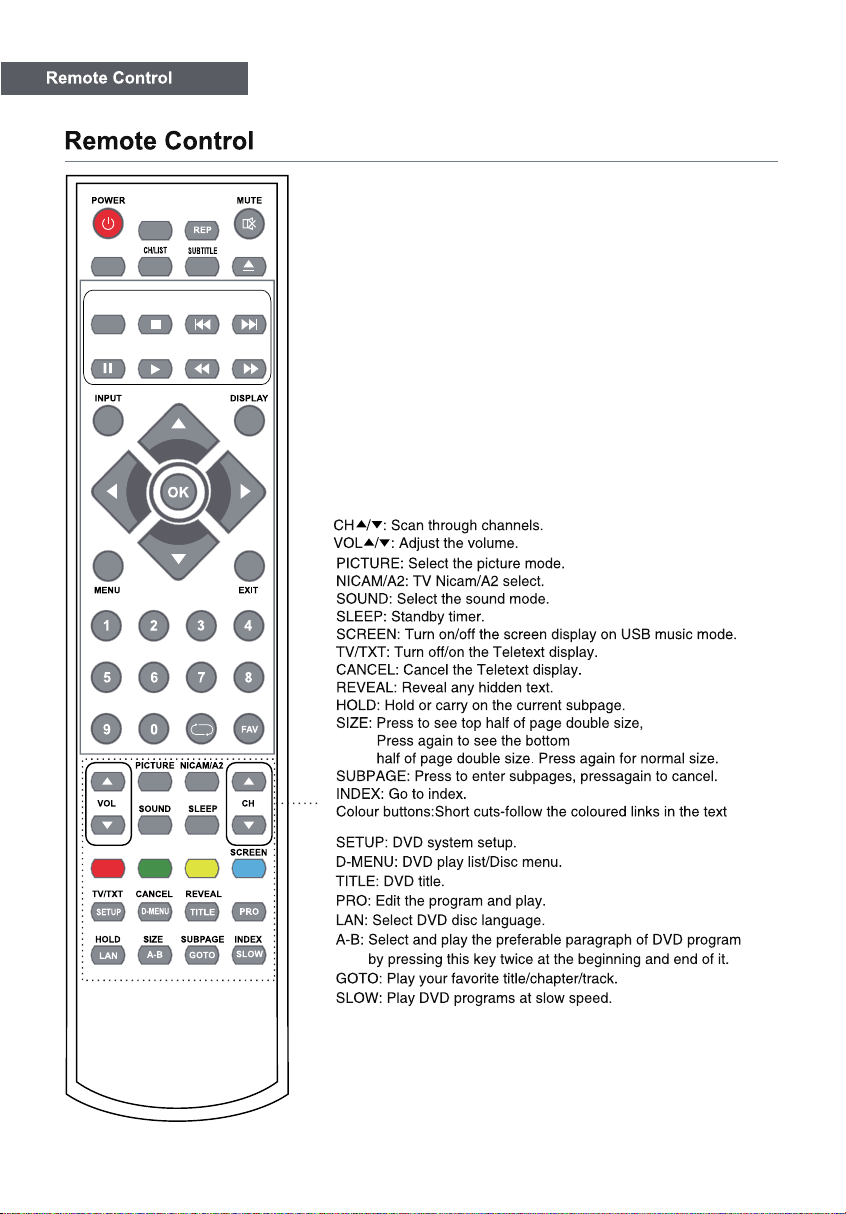
Remote Control..........................................................................8-9
Common Interface Slot ............................................................. 10
Auto installation setup ..............................................................10
Channel Setting ....................................................................... ..11-15
Menu Settings ........................................................................................15
Media Player............................................................................. ..18
..........................................................25
SOUND menu .............................................................................16
Time menu .................................................................................16
Setup menu ................................................................................16
Lock menu ..................................................................................17
2

3

4

5

6
INPUT/SOURCE:
POWER/STANDBY:
Insert disc with label side towards back

7
DVB-S2:
or DC 12V car adaptor.
RF:
COAX:
HDMI USB MINI
YPbPr
MINI
AV
Commo n Inte rface
SCARTPC AUDIOVGA DVB-S2 RF COAXDC

8

9

blue
Use the Left/Right/Down keys to select your Language,
Country and Energy Model.
First Time Installation
Language < English >
Country < Germany >
Energy Mode < Home Mode >
OK Auto Tuning
Tune Type < DTV+ATV >
Tuning Setup
MENU Back OK Start
Digital Type < DVB-C >
Scan Type <Network Scan >
Network ID < Auto >
Frequency < Auto >
Sysmbol Rate < Auto >
Sorting by LCN < Off >
10
1.Press the Menu button on the remote control on your
LED TV to select the Setup menu.
2.Press the buttons to select the First Time
Installation.

Channel Setting
1.Press the Menu button on the remote control on your LED TV
to select the Channel menu.
2.Press the buttons to select the Antenna menu.Press OK
to select it.
3.Press the buttons to select DVB-T or DVB-C.
Antenna
Auto Tuning
In the Auto Tuning menu there are 3 options for you to select
from:Country,Tune Type and Sorting by LCN.
Press to select Country,Tune Type and Sorting by LCN.
If you select DTV+ATV,the first 50% of the processing is for ATV
tuning,while the second 50% represent DTV tuning.When ATV tun-
ing,you can press MENU to Skip ATV tuning and start DTV tuning
or press EXIT to exit tuning.
During the channel search a preview of the already-found channels
is displayed.
Unlike QUICKSTART the satellite search will search the whole satellite
for channels and will not be instant.
Also the channels will appear in the order on the satellite and not the
pre-set order.
Auto search replaces any previous searched channels with those of the
new search.To add an extra satellite if you have a suitable Dish/LNB/
Switch you must use the Dish Installation menu.
ATV Manual Tuning
You can manually tune ATV Manual Tuning in the CHANNEL Menu.
1.Current CH:Dispaly the current channel number,press the buttons
to choose the channel you wish to modify.
2.Colour System:Select the Colour System using the buttons.
3.Sound System:Select the Sound System using the buttons.
4.Fine Tune:In case of bad reception,you can press the buttons
to make fine adjustments to the tuning.
5.AFC:Select the AFC using the buttons.
6.Search:Press the buttons to scan through the frequencies to
find new channels.
DTV Manual Tuning
DVB-C Tuning
You can manually tune DTV Manual Tuning in the CHANNEL Menu.
Press the Left/Right arrow buttons to select the channel you wish to
tune,then press OK button to scan for the channel.
When you choose “Cable” under TV connections, There are 2
options for Cable scan model:
1.Full Search: Choose FULL SEARCH and choose “OK” to start
Auto Search for the channels.
Auto Tuning Status
TV : 2 Programme
DTV : 0 Programme
Radio : 0 Programme
Dats : 0 Programme
DTV Manual Tuning
< - UHF CH 21 +>
ATV Manual Tuning
< - Current CH 1 +>
Colour System PAL
Sound System BG
Fine-Tune 48.25 MHz
AFC On
Search
11
Tuning Setup
Tuning Setup
Digital Type < DVB-C >
Scan Type <Network Scan >
Network ID < Auto >
Frequency < Auto >
Sysmbol Rate < Auto >
Sorting by LCN < Off >
Tune Type < DTV+ATV >
Country < Germany >
MENU Back
OK Start
Scan Type <Network Scan >
Network ID < Auto >
Frequency < Auto >
Symbol(ks/s) < Auto >
Sorting by LCN < Off >
Tuning Setup
Digital Type < DVB-C >
Scan Type <Network Scan >
Network ID < Auto >
Frequency < Auto >
Sysmbol Rate < Auto >
Sorting by LCN < Off >
Tune Type < DTV+ATV >
Country < Germany >
MENU Back
OK Start
Scan Type < full >
Network ID < Auto >
Frequency < Auto >
Symbol(ks/s) < Auto >
Sorting by LCN < Off >
2. Network Search: Input the number of the Network ID + input start
Frequency, Symbolrate and set “sorting by LCN” to ON. (please notice,
you need to know the network ID, start frequency & Symbolrate from
your TV provider)
Antenna >
Auto Tuning >
CHANNEL
ATV Manual Tuning >
DTV Manual Tuning >
Programme Edit >
DVB-T >
DVB-C >
Digital Type
MENU Back
OK Start
Tuning Setup
Digital Type < DVB-C >
Scan Type <Network Scan >
Network ID < Auto >
Frequency < Auto >
Sysmbol Rate < Auto >
Sorting by LCN < Off >
Tune Type < DTV+ATV >
Country < Germany >
MENU Back
OK Start
Scan Type <Network Scan >
Network ID < Auto >
Frequency < Auto >
Sysmbol Rate < Auto >
Sorting by LCN < Off >

Programme Edit
Use up/down keys to select program edit.Press OK or Rght button to
enter the menu.Use up/down buttons to navigate through the menu.
1.Delete:
Press the RED button to delete the highlighted channel,a red circle
will appear next to the channel name.
Press the RED button again to confirm delete.
Press the MENU to return to the main menu.
2.Move:
Press to select the channel,press yellow button to enter the move
mode,then press to move the channel location,press yellow button
again or press OK to confirm.
3.Skip:
Press to select the channel you wish to skip.
Press the BLUE button,a logo will appear next to the channel name
and the channel will be skipped when you scroll through the channels.
Press the BLUE button again on the highlighted channel to disable the
skip function.Press MENU to return to the main menu.
Signal Information
Only available in DTV mode,Signal Information includes:channel/
network/modulation/quality/strength.
CI Information
When insert CI Module,display CI Information.
Note:The following reception combinations are possible:ATV,DVB-C,
DVB-T channels is not possible.
5V antenna power
Press button to turn on or off.
Software Update{USB}
1.Download the software to the usb device,then insert the usb device
to the unit.
2.Press the Menu button to select the CHANNEL menu.
3.Press the buttons to select Software Update{USB} and then
press the OK button to update software.
4.when the updating is completed,the unit will be reset to standby mode.
Power-Off-No-Signal-Down
If no valid input signal is detected,the TV set will toggle to standby
mode automatically after approx.10 minutes.
Auto-Power-Down
4 hours maximum after the last user interaction and/or the last
channel switching,the TV set will automatically toggle from On
to standby mode.Prior to this autonatic toggling,a message will
be displayed allowing you to extend the delay time for another
4 hours.
Programme Edit
12

13
Satellite Tuning
Select “Dish Setup” item to enter the satellite
system setting menu and the user operation
interface as following:
Operations in Satellite List Menu are shown in the
following table:
Key
Stroke Action
KEY_UP use cursor to up
KEY_DOW
N use cursor to down
KEY_LEFT
switch operation to satellite system parameters setting
list
KEY_RIGH
T switch operation to Transponder list
KEY_MENU Back to Main Menu.
KEY_EXIT Exit Main Menu.
KEY_GREE
N Enter satellite edit menu
KEY_BLUE Enter satellite scan menu
Satellite edit menu
Operations in satellite edit menu are shown in the
following table :
Option
Value
Satellite Enter Satellite Rename edit menu
Longitude
Direction East ,West
Longitude
Angle Press num key to set the Angle
Band C,Ku band choose
satellite Seach menu
Operations in satellite scan menu are shown in the
following table :
Option
Value
Scan Mode Default,Network Search,Full Search
Channel Type All / FTA
Service Type All / DTV / Radio

14
Transponder List
Operations in Transponder List Menu are shown in
the following table:
Key
Stroke Action
KEY_UP use cursor to up
KEY_DOW
N use cursor to down
KEY_LEFT switch operation to Satellite list
KEY_RIGH
T
switch operation to satellite system parameters setting
list
KEY_ENTE
R Select/unselect cursor item Transponder.
KEY_MENU Back to Satellite list.
KEY_EXIT Exit Main Menu.
KEY_RED Enter Transponder Delete menu
KEY_GREE
N Enter Transponder Edit menu
KEY_YELLO Enter Transponder Add confirm menu
W
KEY_BLUE Enter Transponder scan menu
Transponder Add menu
Operations in Transponder Add menu are shown in
the following table:
Option Value
Transponder Can’t edit .Auto addition
Frequency Press num key to edit
Symbol(ks/s) Press num key to edit
Polarity H,V
Transponder Edit menu
Operations in Transponder Edit menu are shown in
the following table:
Option Value
Transponder Current edit item.Auto select
Frequency Press num key to edit
Symbol(ks/s) Press num key to edit
Polarity H,V
Setting
Operations in Setting Menu are shown in the
following table:
Key
Stroke Action
KEY_UP use cursor to up
KEY_DOW
N use cursor to down
KEY_MENU Back to Transponder list.
KEY_EXIT Exit Main Menu.

15
Operations in Setting item menu are shown in the
following table:
Option Value LNB Type 9750/10600,9750/10750,05150,05750,
5150/5750,09750,10600,10750,11300,1
1475,User Single,User Dual
LNB Power On,Off
22KHz Auto,off,on
DisEqC Mode Off,LNB1,LNB2,LNB3,LNB4,Burst A,Burst
B
Motor None,DisEqC1.2,DisEqC1.3
:Choose from Warm,Personal ,Cold and Normal
PICTURE
Noise Reduction Medium
SCREEN >
Dynamic CR < On >
Face Color < 0 >
PICTURE
Picture Mode < Standard >
Contrast 50
Brightness 50
Colour 50
Tint 50
Sharpness 50
Colour Temp < Normal >
>
>
Medium
SCREEN :(Only available in PC)Press the OK button to select main menu
to adjust the screen.
Dynamic CR: Availabl e options:On or Off.
Face Color: Controls the Face Color of the picture.
Personal
and Mild.

16
SPDIF Mode:Select the SPDIF Mode for theTV from off,PCM,
Auto.
Time
TIME
Clock 02/Jan 07:26 >
Time Zone < Berlin GMT+1 >
Sleep Timer < Off >
Off Timer >
On Timer >
Auto Standby < 4H >
OSD Timer < 5S >
Clock: Press the up/down buttons to select the clock menu,then
press the OK button to set date and time.
Time Zone: When you select a Time Zone city,the TV time is set
by the time offset information based on Time Zone and GMT(Greenwich
Mean Time) which is received with the broadcast signal and the time
is set automatically by a digital signal.
SOUND
Sound Mode < Standard >
Treble 50
Bass 50
Balance < 0 >
Auto Volume < On >
Surround Sound < Off >
SPDIF Mode Auto
SOUND
AD Switch >
AD Switch: Turn on / off the AD Switch function by
selecting “On” or “Off”.
Auto Standby:
The unit automatically switch to standby mode 4 hours
after the last time the remote control was used.A reminder screen will pop
up and count down before the unit switches to standby mode.If you want
to operate the TV for a long period of time,turn off auto standby function
by selecting Never.
OSD Time: Press up/down buttons to select the display time of the on-
screen menu:5s /10s / 15s / 20s / 25s / 30s / Never and then press the
OK button to confirm.
Setup
SETUP
First Time Installation >
Reset >
Software Update(USB) >
Blue Screen < Off >
Hearing Impaired:
Press up/down buttons to select Hearing Impaired
and then press the Ok button to select On/Off and return to the previous
menu.
Aspect Ratio:
Blue Screen: Turn on / off blue screen.
Press up/down buttons to cycle among aspect ratio:
4:3 / 16:9 / Zoom1 / Zoom2 and then press the OK button to confirm.
Reset: Restores all settings to the factory defaults.
Software Update(USB): 1.Download the software to the usb device,then
insert the usb device to the unit.
2.Press the menu button to select the CHANNEL menu.
3.Press the left/right buttons to select Software Update(USB) and then press
the OK button to update software.
4.When the updating is completed,the unit will be reset to standby mode.
SETUP
Language < English >
TT Language < West >
Audio Language >
Subtitle Language >
Hearing Impaired < Off >
Aspect Ratio Auto
Personal.

17
LOCK
System Lock < Off >
Set Password >
BackLight 45
Channel Lock
Parental Guidance Off
Key Lock Off
Hotel Mode
BackLight: Controls the BackLight.
Hotel Mode
Hotel Mode < On >
Source Lock >
Default Source < Off >
Default Prog 2 BBC TWO NI
Default Volume < 30 >
Max Volume < 100 >
Import Datebase >
Hotel Mode
Export Database >
Clear Lock >

18
Media Player
In the option of Media Player on MainMenu,Press
[OK] to enter the Media Player menu, see the picture
as follows:
Press [LEFT]/[RIGHT] to select Movie, Music or
Photo.
Take Movie function for example, when there is
focus point on Movie function,press [OK] button to
enter into File Selector menu
On FileSelector menu, select film source that
needs to be play according to the hint. Press
[PLAY/PAUSE] button to enter into the play
mode of full screen; press [PLAY/PAUSE] to
return to Media Player menu.
1. Movie
press [OK] button to enter into FileSelector
menu. Select the file you want to play, press
[PLAY/PAUSE] to enter into full screen play. Press
[LEFT]/[RIGHT] button to move cursor, and operate
according to different hint.
2. Music
In the same way, on Media Player menu, move
cursor to Music, press [OK] button to enter into
FileSelector menu. Select the file you want to play,
press [PLAY/PAUSE] to enter into full screen play.
Press [LEFT] /[ RIGHT] button to move cursor, and
operate according to different hint.
3. Photo
In the same way, on Media Player menu, move cursor
to Photo, press [OK] button to enter into FileSelector
menu. Select the file you want to play, press
[PLAY/PAUSE] to enter into full screen play. Press
[LEFT]/[RIGHT] button to move cursor, and operate
according to different hint.
MOVIE
Delete EXIT Exit

19

20
Table of contents
Other LENCO LED TV manuals

LENCO
LENCO DVL-2460 User manual

LENCO
LENCO LED-2215 User manual

LENCO
LENCO DVL-2010 User manual

LENCO
LENCO DVL-2461 User manual

LENCO
LENCO LED-2213 User manual

LENCO
LENCO DVL-1662BK User manual

LENCO
LENCO LED-3213 User manual

LENCO
LENCO LED-2250 User manual

LENCO
LENCO DVL-2458 BLACK User manual

LENCO
LENCO LED-3901-4K Manual