Lenovo B613 User manual

B613
•1•
Lenovo
Voice recorder Type B613
Operation Manual

B613
•2•
Contents
e
Display screen
Built-in speaker
Play/stop
Menu-model
/confirmatio
n
Recording/save
recording files

B613
•3•
start/turn off/key lock
Reset
Connects headphones
microphone sensitivity:H for high,L
for low
USB connector
Music menu/Recording menu
Volume up
Volume down
Reverse:skips and searches backward
Forward:skips and searches forward

B613
•4•
Microphone

B613
•5•
4.LCD Display

B613
•6•

B613
•7•

B613
•8•
二Recording
Reference: short- press means press the button ,then
loose it;long-press means press the button for 2-3
seconds and then loose it.
1.Power on
Tap the power switch
down for 3
seconds.
The interface appears as
shown on the right.
2.Power off
Tap the power switch up
for 3 seconds
turn
off the recorder.
3.Reset
If the recorder crashes, press "reset" to reset the system
and if it still cannot be boomed , please check if the
音乐模式
序
号
名称
1
当前播放曲目显示
2
总曲目数
3
播放模式显示
4
电池电量显示
5
音效显示
6
歌曲名显示
7
当前播放时间显示
8
音量显示
9
书签段落
10
歌曲格式及比特率显示
11
播放状态显示
12
歌曲总时间显示

B613
•9•
battery has run out or not.
4.Built-in Microphone Record
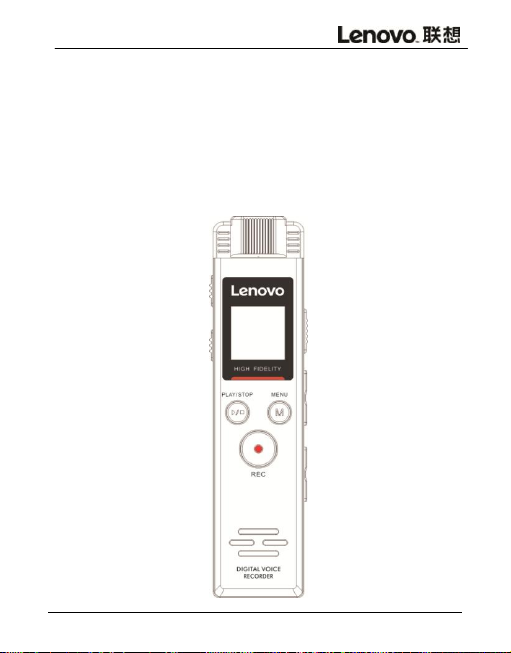
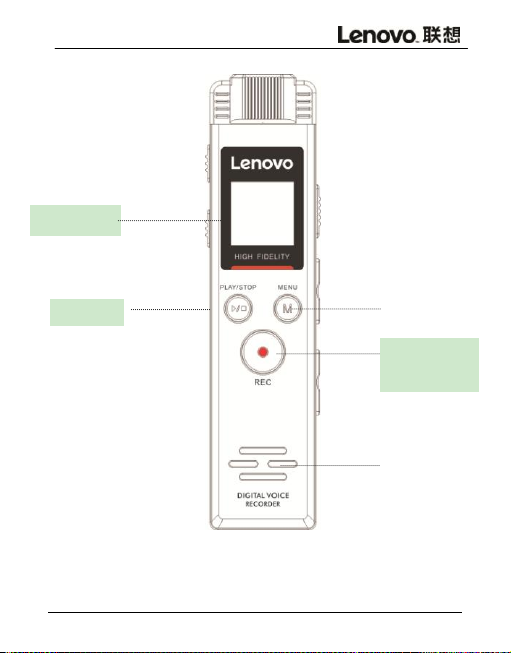
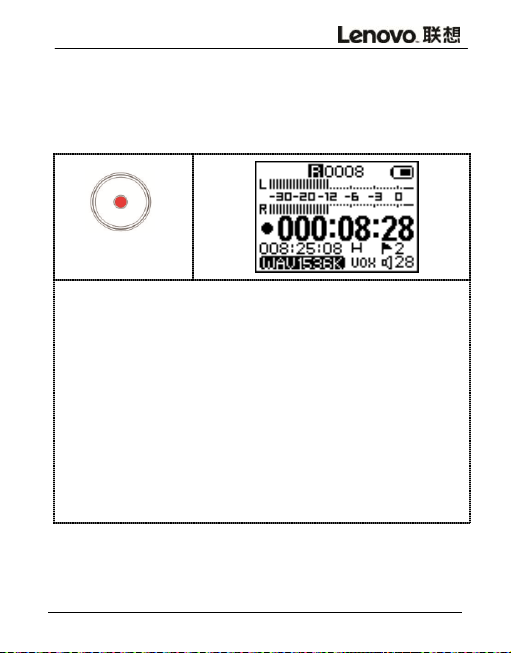
when power on,short press the recording key to start
recording .The recording indicator begins to move during
recording.Recording dynamic level moves with sound
volume.
1,One-switch Power-on recording: In the power-off
state, long press the recording button for 3 seconds
makes the machine automatically turn on directly into
recording state;
2,Recording file of B613 is named after
year,month,date,hour, minute and second
20150518141520.WAV .
5.Pause/Stop Recording
1) Pause

B613
•10•
PLAY/STOP
In recording state, short press the
Play/Stop button to pause the current
recording and repress the Play/Stop
button to continue the current
recording.
2) Stop
In recording state, short press the
Play/Stop button to sop current
recording and save recording files.
6.Microphone sensitivity
In recording state, tap the microphone
sensitivity switch RECLEVEL to the
position of H for microphone high
sensitivity mode.Tap microphone
sensitivity switch RECLEVEL to the
position of L for microphone low
sensitivity mode( H for high
sensitivity / L for low sensitivity)

B613
•11•
7.Music file/Recording file
In play or stop state, tap the directory
selection switch to the position of
MUSIC to switch to music mode; tap the
directory selection switch to the
position of REC FILES to switch to the
recording mode, and press the PLAY/STOP
button to play.
三File-management and File-play
1.Erasing files
Locate the file you want to erase in the state of PAUSE
or STOP,long-press MENU button to select the Delete File
menu and then press MENU button to enter Delete File
Model. There will be the option of Delete a single file
and Delete all files on the display screen.Press REW
or FF to switch .At this time,press MENU button to delete
the current song,or press PLAY/STOP to delete erasing

B613
•12•
files.(Note: Files cannot be recovered when they are
deleted. Please keep a backup of files.When files are
deleting ,the more files, the longer the time required.)
2.Play/Pause
Short-press PLAY/STOP to start playing recording
files or music files. Press PLAY/STOP to pause playing
files.Note: When headphone is plugged in, sound output
from the speaker will be muted;when unplugged,the
speaker makes sounds .
3.Volume Control
In the state of PLAY or STOP, press VOL+ to increase the

B613
•13•
volume and press VOL- to reduce the volume.
4.REW/FF
In the state of PLAY, short-press REW to play the last
song, short-press FF to play the next song, long-press
REW for reverse, and long-press FF for fast forward.
5.T-MARK
In the recording state, short-press MENU button to mark.
At this moment,there is a flag on the display screen ,
press MENU button to make a time bookmark in this
recording files, in which there can only be marked 10
recording tags at most.After saving this recording file,
you can press REW or FF to switch marking tags, and press
PLAY/STOP to play the key contents.
Note: Recording files with mp3 format do not support

B613
•14•
bookmarks!
6.Key Lock
In the state of PLAY or STOP, tap up
to HOLD position for the key lock function.A lock will
show on the screen ,and other buttons will not work.Tap
down to release key lock (Please
make sure the key lock is on during recording ,so to avoid
misoperation.)
7.A-B Repeat
When playing recording files or music files,
short-press MENU button for repeating mode. press MENU
button to set the repeating starting point A, then A
will show on the screen; press MENU button to set the
destination point B and A-B then shows on the display

B613
•15•
screen to realize the repeating function between A and
B.press MENU button again to exit the A-B repeating mode.
8. Cycle Model
In the state of playing recording files or music files,
press MENU button to enter the main menu, select Play
Mode in the play settings, press MENU button to enter
the repeat play menu which includes: Repeat, Repeat one,
Repeat all.press MENU button to select play mode.
Cycle mode: User can repeat a single or more files
through the existing settings in the recorder.
Repeat : Play from the current file to the last file to
the end without cycling.And all files in the current
folder are played when in the RECORD folder.
Repeat one: Repeat play the current file only .

B613
•16•
Repeat all: Repeat play all the files in all the folders.
Random play: Files selected by the system are played
randomly not in sequence.
9.EQ Model
In the state of playing recording files or music files,
press MENU button to enter the main menu to select the
sound settings. press MENU button to enter EQ menu, and
short-press MENU button to enter the EQ mode to choose
different sound effects to bring users different
auditory sensations and more enjoyment in audition and
music.EQ model includes the following 6 models: rock, pop,
soft, jazz, classical and electronic music.The default EQ
model is sound-off .
10.File-browsing
During PLAY /STOP,long-press MENU button to enter the
main menu, press REW or FF to select the File Browse
menu , press MENU button menu to browse files(both music
file list and RECORD file list), press REW or FF to select
the needed file, press MENU button to confirm the selected
file, and press PLAY/STOP to play the file.

B613
•17•
四System setting
Enter Menu Options
1、Under conditions of PLAY or STOP, long press MENU
to enter the menu option,press REW or FF to select menu
module,press MENU for conformation shown in the
interface above; press PLAY/STOP to exit option.
1.Record Setting
(1)Recording quality
You can select between two recording qualities:high

B613
•18•
quality sound recording WAV 1536Kbps with large memory
occupancy,high EQ effect,is suitable for high fidelity
recording;and high quality recording MP3 128Kbps and long
time recording MP3 64Kbps with small memory occupancy,low
EQ effect,is suitable for long time recording.
Note : In order to ensure a better recording effect , WAV
format is strongly suggested.
(2)Segmental Recording
The segmented recording can be set OFF or ON, which
includes 30 minutes 60 minutes and 120minutes. If the
segmented recording is on,the recording file can be saved
according to the time setting selected.
(3)Sound Control Model
1.Long-press MENU button to enter the menu option under
condition of PLAY or PAUSE, short press REW or FF to select

B613
•19•
the recording settings and press the MENU button to enter
the menu option, and then select the voice control mode,
and then click REW or FF to select on and off options,
and press MENU for confirmation.
2 .Sound Control Sensitivity
When the voice control switch is turned on, the voice
control sensitivity mode will work, and the VOX will
appear on the display screen. There are five lever to
select.The higher the level is, the higher the sensitivity
is.The higher the ambient noise is, the lower the setting
sensitivity should be.The sensibility needs to be set
according to different environment.If the sensitivity is
not the desired value, the sound control sensitivity
threshold level can be achieved by adjusting the
sensitivity level.

B613
•20•
(4)Recording monitoring
The monitor can be set OFF or ON. If it is on, you can
monitor the recording effect in real time by using
headphone.
(5)Recording Timing
Long press MENU to enter menu option under operation
condition , short press REW or FF button to select
recording settings and press MENU to enter menu option,
then select recording timing, and then press MENU to
confirm,short press REW or FF button to select Timing (on
/ off), Timing cycle, Start time, End time, Recording
Timing Cycle, press MENU to select, and press PLAY/STOP
to cancel.
2.System setting
(1)Shutdown Timing
Table of contents