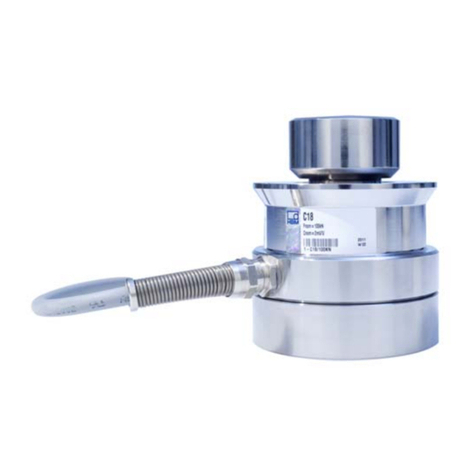
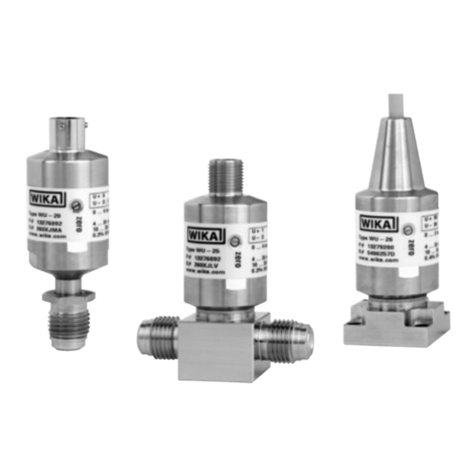
LEYBOLD DI2000 User manual

Vacuum Transducer
DI2000
DI2001
DU2000
DU2001
Operating Instructions 300360490_002_C0
Cat-No.: 15813V01 DI2000)
Cat-No.: 15815V01 DI2001)
Cat-No.: 230502V01 DU2000)
Cat-No.: 230503V01 DU2001)

2
300360490_002_C0 - 09/2016 - © Leybold
Content
1
Safety Instructions ......................................................................... 3
2
Vacuum Transducer DI2000 .......................................................... 4
2.1
For Orientation ........................................................................... 4
2.2
Delivery Content ......................................................................... 4
2.3
Product Description .................................................................... 5
3
Installation ...................................................................................... 6
3.1
Notes for Installation .................................................................. 6
3.2
acuum Connection ................................................................... 6
3.3
Electrical Connection ................................................................. 7
3.3.1
Operation with Display Unit ................................................. 7
3.3.2
Operation with Other Supply And Evaluation Units ............ 8
4
Operation ........................................................................................ 9
4.1
General ....................................................................................... 9
4.2
Adjustment ............................................................................... 10
4.2.1 Zero Adjustment ................................................................... 10
4.2.2 Zero Adjustment DU2000 / DU2001 With Display Unit ....... 11
4.2.3 Full Scale Adjustment .......................................................... 12
4.2.4 Full Scale Adjustment DU2000 / DU2001 With Display Unit12
Maintenance and Service ............................................................ 13
6
Technical Data .............................................................................. 14
Declaration of Conformity .................................................................... 15
Original operating instructions

300360490_002_C0 - 09/2016 - © Leybold
3
1 Safety Instructions
Read and follow the instru tions of this manual
Inform yourself regarding hazards, whi h an be aused by the produ t or arise in
your system
Comply with all safety instru tions and regulations for a ident prevention
Che k regularly that all safety requirements are being omplied with
Take a ount of the ambient onditions when installing your instrument. The
prote tion lass is IP 54, whi h means the unit is prote ted against penetration of
foreign bodies.
Adhere to the appli able regulations and take the ne essary pre autions for the
pro ess media used
Consider possible rea tions between materials and pro ess media
Consider possible rea tions of the pro ess media due to the heat generated by the
produ t
Do not arry out any unauthorized onversions or modifi ations on the unit
Before you start working, find out whether any of the va uum omponents are
ontaminated
Adhere to the relevant regulations and take the ne essary pre autions when handling
ontaminated parts
When returning the unit to us, please en lose a de laration of ontamination
Communi ate the safety instru tions to other users
Pictogram-Definition
Danger of an electric shock when touching
Danger of personal injury
Danger of damage to the unit or system
Important information about the product, it's handling or about
a particular part of the documentation, which requires special
attention

4
300360490_002_C0 - 09/2016 - © Leybold
2 Vacuum Transducer DI2000
2.1 For Orientation
These operating instructions describe installation and operation of products with
article numbers
1 813V01 (DI2000 with FPM sealing)
1 81 V01 (DI2001 with EPDM sealing)
230 02V01 (DU2000 with FPM sealing) and
230 03V01 (DU2001 with EPDM sealing)
The article number can be found on the product's type label. Technical
modifications are reserved without prior notification.
The product versions differ in the applied sealing material, the electrical
connector as well as the analog output signal. Unless these different features are
described explicitly only model DI2000 is exemplarily mentioned in the following.
2.2 Delivery Content
Included in the delivery consignment are:
- Transducer
- Protective cover
- Operating instructions
Available Accessories DI2000 / DI2001:
- Cable extension, 10m, 200 04 112
- Cable extension, 20m, 200 02 64
- Adapter f. CENTER-Series, 24 009V01
Available Accessories DU2000 / DU2001:
- Cable extension, 10m, 230 0 V01
- Cable extension, 20m, 230 06V01
- Display and control unit Display One, 230001
- Display and control unit Display Two, 230024
- Display and control unit Display Three, 23002
- Display and control unit Center One, 230002 / 23 002
- Display and control unit Center Two, 230004 / 23 004
- Display and control unit Center Three, 230003 / 23 003
300360490_002_C0 - 09/2016 - © Leybold
2.3 Product Description
The vacuum transducer is measuring total pressure in the range of
1 - 2000 mbar. It can be connected to display and control units or to customer
related power supply and evaluation units. The output signal has a linear
dependence on pressure over the whole range. DI series transducers have a
4 - 20 mA signal output, DU series transducers have a 2 - 10 V output.
The transducer is equipped with a piezoresistive ceramic sensor and compen-
sated for temperature drift. Sensors of DI2000 and DU2000 transducers are
equipped with a FPM o-ring sealing, sensors of DI2001 and DU2001 transducers
use EPDM as sealing material.
The transducer can be mounted to suitable flange connectors or by means of the
G1/4 female thread.
Proper Use
The DI2000 serves exclusively to provide total pressure measurements in the
range 1 - 2000 mbar. It may only be connected to components specifically
provided for such purpose.
The DI2000 is classified in electromagnetic interference class A and therefore
can cause radio interference in living quarters.
Improper Use
The use for purposes not covered above is regarded as improper, in particular:
- the connection to components not allowed for in their operating instructions
- the connection to components containing touchable, voltage carrying parts.
No liability or warranty will be accepted for claims arising from improper use.
The user bears the responsibility with respect to the used process media.

6
300360490_002_C0 - 09/2016 - © Leybold
3 Installation
3.1 Notes for Installation
Unauthorized modifications or conversions of the instrument are
not allowed!
Installation location: Indoor
For not fully air conditioned open buildings and operation rooms:
Temperature: + °C ... +60°C
Rel. Humidity: - 8 %, not condensing
Air pressure: 860 - 1060 hPa (mbar)
3.2 Vacuum Connection
Dirt and damage, especially at the vacuum flange, have an ad-
verse effect on the function of this vacuum component.
Please take account of the necessary instructions with regard to
cleanliness and damage prevention when using vacuum compo-
nents.
- Remove the protective cover (is required again during maintenance work!)
- Make vacuum connection via small flange DN16 ISO KF
- If you use a hose barb be sure to secure the hose connection, e.g. by a
suitable tensioning belt
- Use clamps, that can be opened and closed with appropriate tools only (e.g.
strap retainer-tension-ring)
- Use sealing rings with a centering ring.
The transducer may be mounted in any orientation. Mounting with the flange to
the top, however, can lead to early contamination. In order to keep particles and
condensates out of the sensor cell it is recommended to mount the sensor in an
upright position. The transducer is adjusted in this orientation ex works.

300360490_002_C0 - 09/2016 - © Leybold
7
When mounting the transducer avoid forced twisting or violent
opening. The housing can be mechanically damaged this way!
Overpressure in the vacuum system > 1 bar
Accidental or unintended opening of clamp elements under
stress can lead to injuries due to parts flying around!
Leaking process media can cause damage to your health.
Attend to the maximum pressure load of small flange connec-
tions (2, bar abs.). Use clamps that are suitable for overpres-
sure operation.
3.3 Electrical Connection
3.3.1 Operation with Display Unit
The transducer can be connected to suitable Leybold display units. For DU
series transducers display units of the DISPLAY and CENTER series are
available.
Do not connect or disconnect the transducer when the cable is
on circuit!
Connect the cable plug to the transducer and secure it. Connect the other end of
the cable to the display unit and secure the plug. Only now connect your display
unit to mains power or switch it on respectively.

8
300360490_002_C0 - 09/2016 - © Leybold
3.3.2 Operation with Other Supply And Evaluation Units
The transducer can be operated with other customer related display units or
voltage supplies.
Incorrect connection or inadmissible supply voltage can damage
the transducer.
The electrical connection is to be made in compliance with EMI requirements
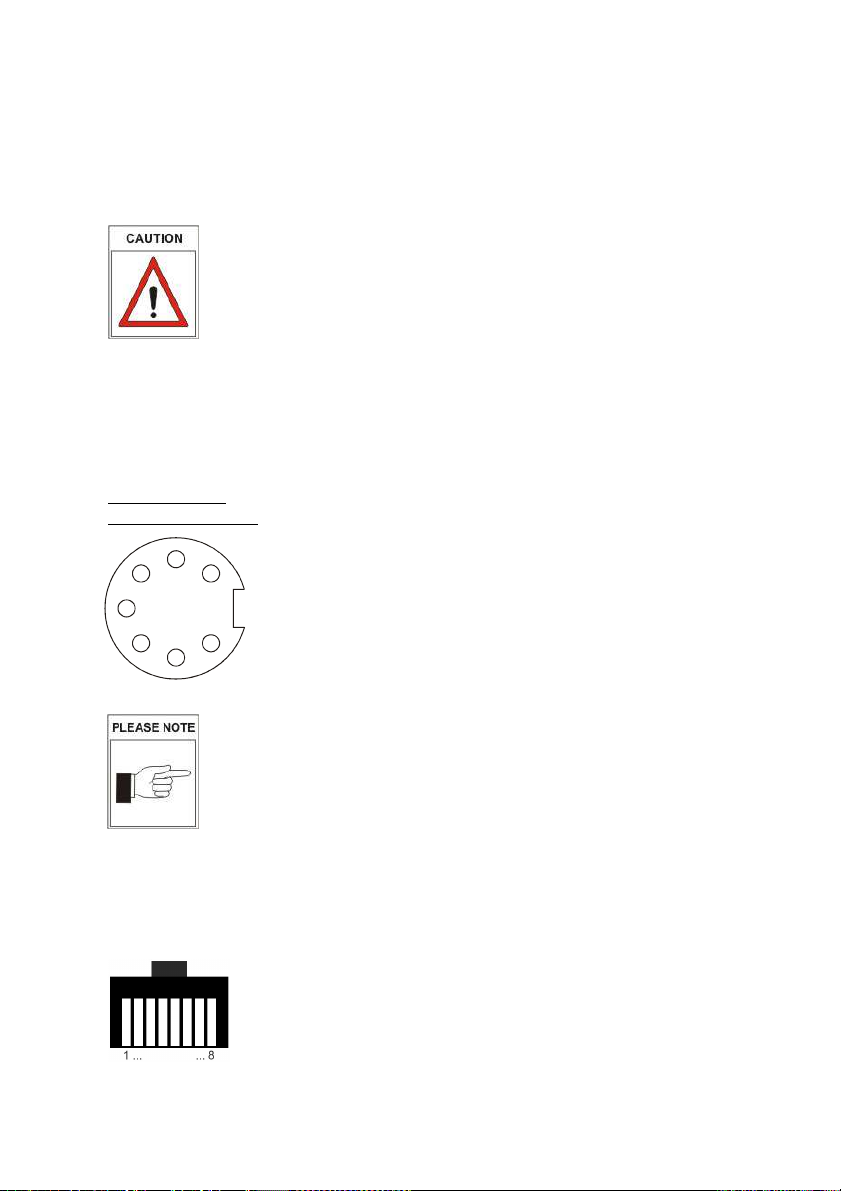
(double-shielded cable) and according to the pin description shown below:
DI2000 / DI2001
Pin description
connector topview:
Diode plug, 7-pin, male
Pin 1:
Pin 2 brown+white/brown:
Pin 3 blue+white/blue:
Pin 4:
Pin green+white/green:
Pin 6 orange+white/orange:
Pin 7 Schirm:
do not connect
Output 4 - 20 mA
1,91 MΩ to PIN 6
do not connect
4 3 kΩ to PIN 6
Voltage supply: +12 to +30 VDC
Shield
Maximum admissible load resistor in Ω:
( Supply Voltage(V) – 12V ) / 0,02A
DU2000 / DU2001
FCC68, 8-pin, male
Pin 1 white/orange:
Pin 2 orange:
Pin 3 white/green:
Pin 4 blue:
Pin white/bue:
Pin 6,7,8:
Voltage supply: +14, to +30 VDC
GND
Output 2 - 10 VDC
8,2 kΩ to Pin 2
Signal ground
do not connect
3
7
5
2
4
1
6

300360490_002_C0 - 09/2016 - © Leybold
9
4 Operation
4.1 General
Measurement Principle
The DI2000 vacuum transducer has an internal piezoresistive ceramic sensor.
Under the influence of pressure a thin diaphragm is bent, on it's back a resistor-
bridge is applied. The bending forces the measurement-bridge to come out of
tune, which is a measure for the applied pressure.
Output Signal
The analog output signal of the transducer is available immediately after the
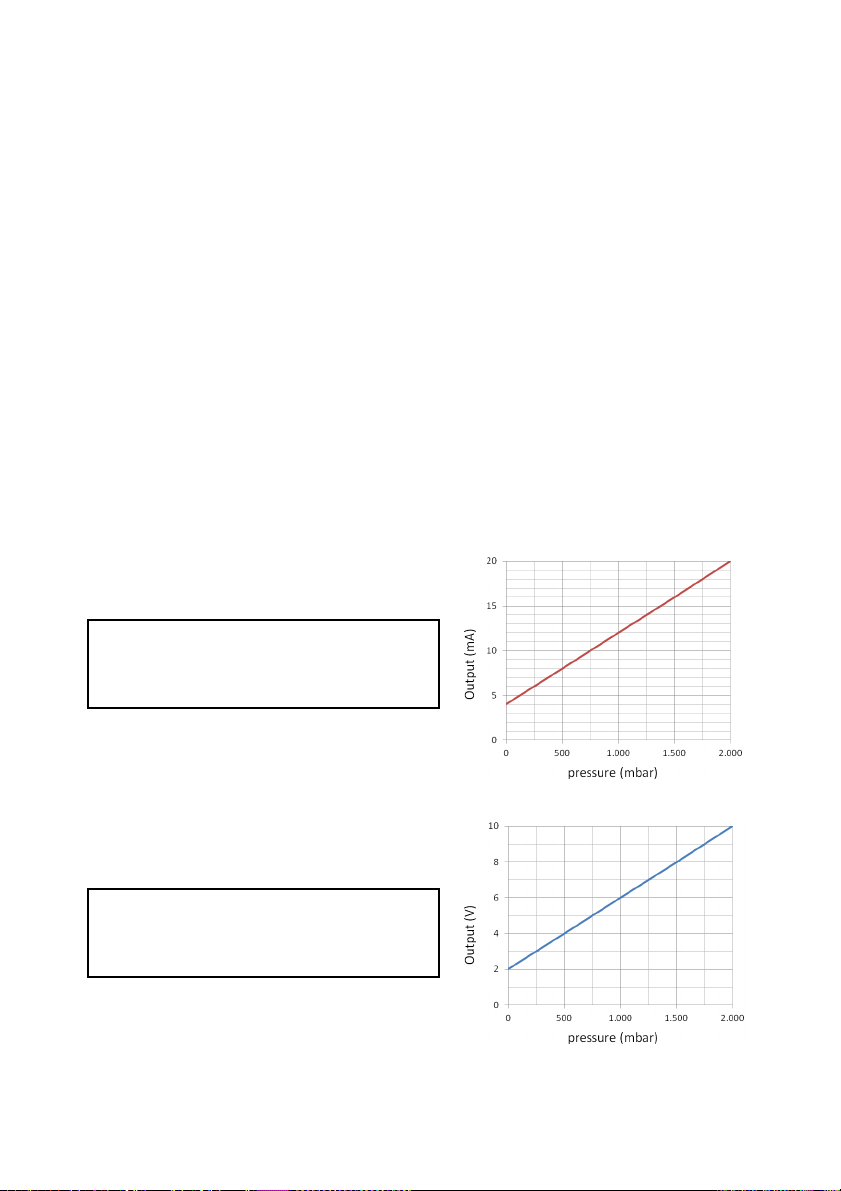
voltage supply has been connected. The output of 4.0 - 20 mA of a
DI2000 / DI2001 and 2 - 10 V of a DU2000 / DU2001 has a linear dependence
on pressure over the whole measurement range 1 - 2000 mbar.
Conversion of the output signal to pressure is done according to the following
formulas:
DI2000 / DI2001
DU2000 / DU2001
V
out
(V) =
0.004 x p(mbar)
+
2
.
0
p (mbar) = (Vout(V) - 2.0) x 2 0
I
out
(
mA
) =
0.008 x p(mbar)
+
4
.
0
p (mbar) = (I
out
(mA) - 4.0) x 12

10
300360490_002_C0 - 09/2016 - © Leybold
4.2 Adjustment
The transducer is adjusted ex works in upright position with 24V voltage supply.
Through contamination, ageing or extreme climatic conditions the need for
readjustment may arise.
Readjustment on atmosphere or zero pressure is done digitally by means of the
"up" and "down" buttons. The transducer will notice automatically which
adjustment point is relevant.
To achieve optimum results of the adjustment consider a
warm-up of at least 10 minutes at the appropriate calibration
pressure before any adjustment.
4.2.1 Zero Adjustment
The adjustment at zero pressure is an offset compensation of the measurement
signal.
For zero adjustment real pressure must be less than 0.1 mbar.
An adjustment at zero pressure is only possible, if the DI2000
pressure reading is below 100 mbar.
The output signal at zero pressure should equal 4.000 mA (DI2000 / DI2001) or
2,000 V (DU2000 / DU2001).
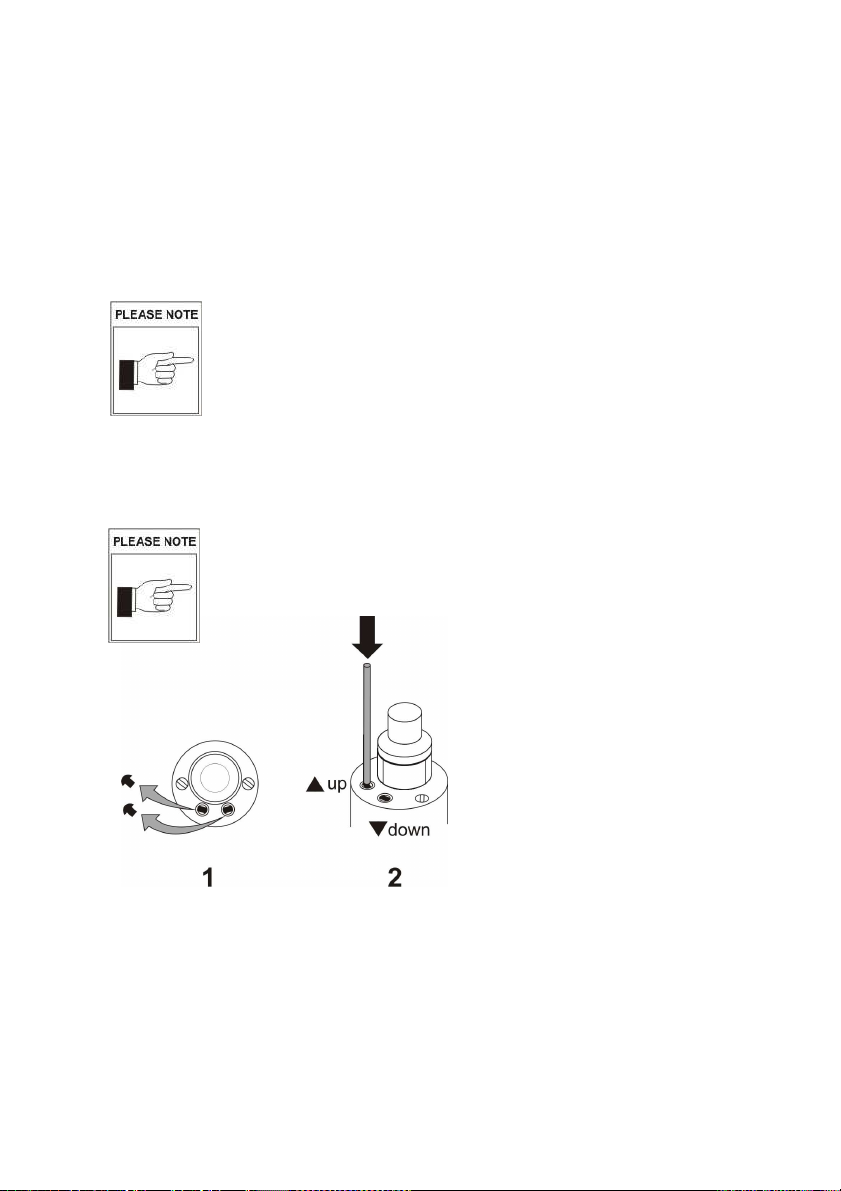
For adjustment first remove the rubber caps from both buttons (1), then -by
means of a screw driver or other suitable tool- push button "up" to increase the
output signal or button "down" to decrease the output signal (2). If a button is
permanently pressed the signal will change continuously in the respective
direction.
If no further button is pressed for an interval of s, the adjusted value is set.
Now insert the rubber cap again.

300360490_002_C0 - 09/2016 - © Leybold
11
4.2.2 Zero Adjustment DU2000 / DU2001 With Display Unit
The adjustment at zero pressure is an offset compensation of the measurement
signal.
For zero adjustment real pressure must be less than 0.1 mbar.
An adjustment at zero pressure is only possible, if the DI2000
pressure reading is below 100 mbar.
The DU2000 / DU2001 can be used in combination with display units of the
DISPLAY or CENTER series. After the adjustment the pressure reading at the
display unit at applied zero pressure should be 0 mbar.
For adjustment first remove the rubber caps from both buttons (1).
If the pressure reading is "0" in case of a DISPLAY unit or "ccc0", "cc0" or "c0" in
case of a CENTER unit, the output signal is too low. Then - by means of a screw
driver or other suitable tool - push the "up" button(2) to increase the output signal
until a pressure above zero is displayed.
Afterwards -or also if the displayed zero pressure is higher than "0"- push the
"down" button to decrease the pressure reading just to the point when "0" is
displayed.
If a button is permanently pressed the signal will change continuously in the
respective direction.
If no further button is pressed for an interval of s, the adjusted value is set.
Now insert the rubber cap again.

12
300360490_002_C0 - 09/2016 - © Leybold
4.2.3 Full Scale Adjustment
The full scale adjustment is a span-correction of the measure-
ment signal. Real pressure and pressure reading of the trans-
ducer must be above 800 mbar.
If applicable a zero adjustment should be carried out before
any full scale adjustment!
For full scale adjustment a calibrated pressure gauge is needed as standard.
According to the formula in chapter 4.1 the output signal of your DI2000 or
DU2000 should equal the pressure reading p(mbar) of the standard gauge.
For adjustment first remove the rubber caps from both buttons, then adjust the
signal output by means of the "up" and "down" buttons. If a button is permanently
pressed the signal will change continuously in the respective direction.
If no further button is pressed for an interval of s, the adjusted value is set.
Now insert the rubber cap again.
4.2.4 Full Scale Adjustment DU2000 / DU2001 With Display Unit
The full scale adjustment is a span-correction of the measure-
ment signal. Real pressure and pressure reading of the trans-
ducer must be above 800 mbar.
If applicable a zero adjustment should be carried out before
any full scale adjustment!
The DU2000 / DU2001 can be used in combination with display units of the
DISPLAY or CENTER series.
For full scale adjustment a calibrated pressure gauge is needed as standard. The
pressure reading of the display unit should equal the pressure reading of the
standard gauge.
For adjustment first remove the rubber caps from both buttons, then adjust the
signal output by means of the "up" and "down" buttons. If a button is permanently
pressed the signal will change continuously in the respective direction.
If no further button is pressed for an interval of s, the adjusted value is set.
Now insert the rubber cap again.

300360490_002_C0 - 09/2016 - © Leybold
13
5 Maintenance and Ser ice
Danger of possibly contaminated parts!
Contaminated parts can cause personal injuries. Inform your-
self regarding possible contamination before you start working.
Be sure to follow the relevant instructions and take care of
necessary protective measures.
The unit requires no maintenance. External dirt and soiling can be removed by a
damp cloth.
Should a defect or damage occur on your DI2000, please send the instrument to
us for repair and enclose a decontamination declaration.
The unit is not prepared for customer repair!
Malfunction of the unit, which is caused by contamination, wear
and tear or a broken sensor is not covered by warranty.
Error messages and malfunction
Problem
Possible
Cause
Correction
high measurement error ontamination, ageing,
extreme temperature,
maladjustment
readjustment
output signal <= 3,8 mA (DI)
output signal <= 1,5 V (DU)
defe tive sensor
return sensor for repair
output signal >= 21 mA (DI)
output signal >= 10,5 V (DU)
pressure overrange
or defe tive sensor
a tual pressure too high
or return sensor for repair
adjustment not possible measurement error ex eeds
possible range of
readjustment
return sensor for repair

14
300360490_002_C0 - 09/2016 - © Leybold
6 Technical Data
Measuring prin iple piezo-resistive
Measuring range 2000 - 1 mbar (1500 - 1 Torr)
Max. overload 5 bar abs.
Un ertainty
Reprodu ibility
0.25 % FS (linearity, hysteresis, reprodu ibility)
0.05 % FS
TC* Zero
TC* Sensitivity
0.1 % FS/10K
0.15 % FS/10K
Materials in onta t with
media
stainl. steel 1.4305, Al
2
O
3
erami , FPM (DI2000, DU2000),
EPDM (DI2001, DU2001)
Operating temperature 0 … +60
o
C
Storage temperature -40...+70
o
C
Response time < 20 ms
Voltage supply DI: 12 – 30 VDC (two-wire)
DU: 14,5 - 30 VDC (four-wire)
Ele tri al onne tion DI: 5m able with diode plug, 7pin, male
DU: 5m able with plug type FCC68, 8pin
Output signal DI: 4 - 20 mA, linear
max. load in Ω: (supply voltage – 12V) / 0.02A
DU: 2 - 10 VDC, linear
Dead volume 1.8 m
3
Va uum onne tion small flange DN16 ISO KF
with G1/4 female thread
Prote tion lass IP 54
Weight DI: 260 g
DU: 240 g
* Temperature oeffi ient

300360490_002_C0 - 09/2016 - © Leybold
1
Declaration of Conformity

Headquarter
Leybold GmbH
Bonner Strasse 498
D-50968 Cologne
T: +49-(0)221-347-0
F: +49-(0)221-347-1250
info@leybold. om
w w w . l e y b o l d . c o m
This manual suits for next models
6
Table of contents
Popular Transducer manuals by other brands

Rockford Fosgate
Rockford Fosgate IBeam IB-200 Installation and operation

HBM
HBM PW15iA Mounting instructions

Humminbird
Humminbird transducer manual

Aerospace Logic
Aerospace Logic FF200X Series Operation guide

Chauvin Arnoux
Chauvin Arnoux T82N-UAR1210B user manual

Thyracont
Thyracont VCP63MA4 operating instructions