manuals.online logo
Brands
  1. Home
  2. •
  3. Brands
  4. •
  5. LF
  6. •
  7. Outdoor Light
  8. •
  9. LF Portfolio 7404280383 User manual

LF Portfolio 7404280383 User manual

1
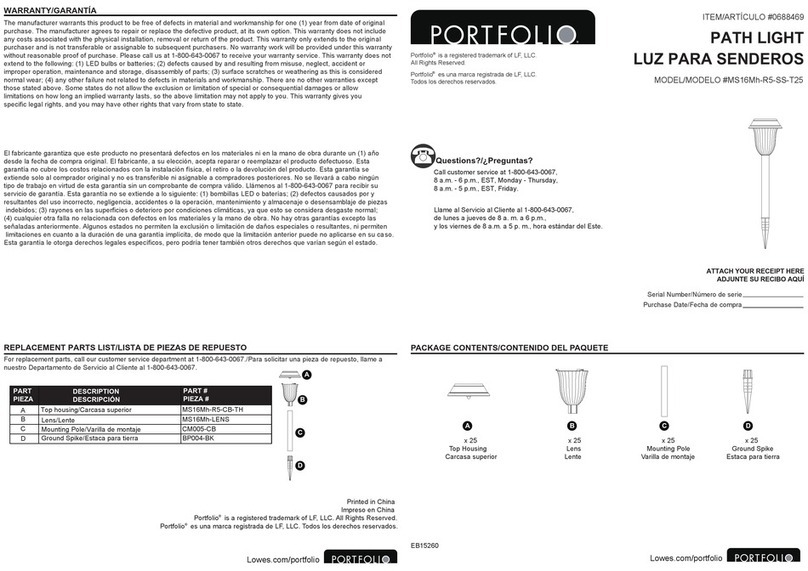
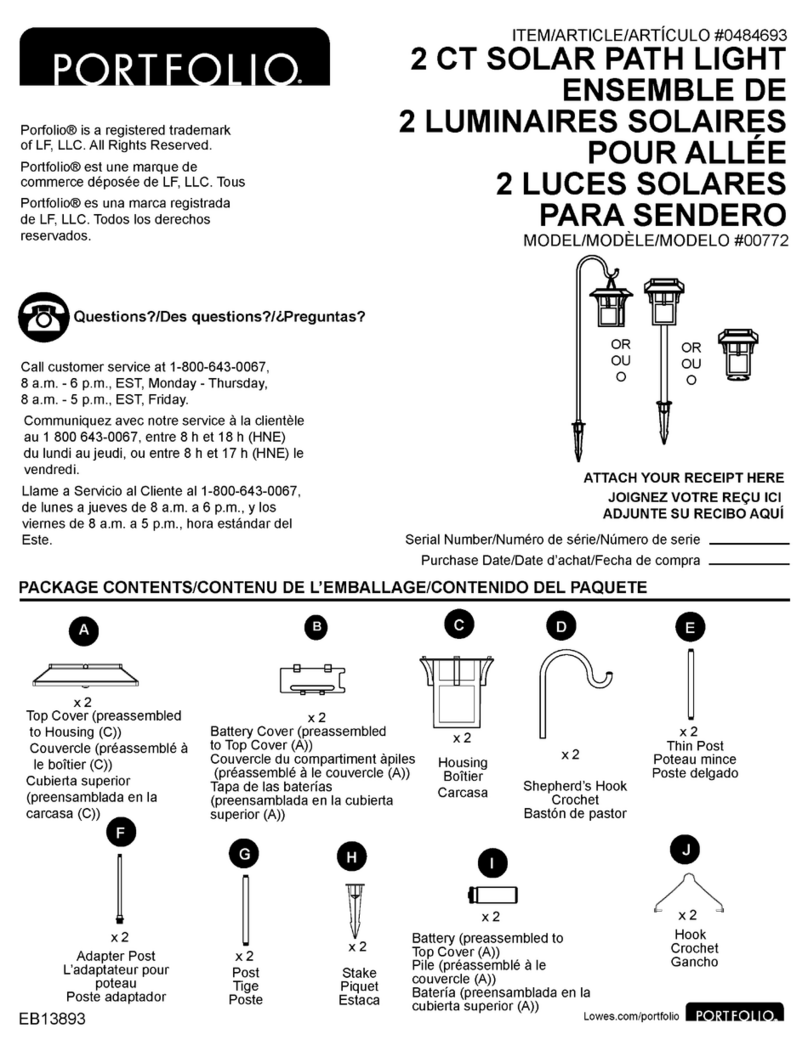
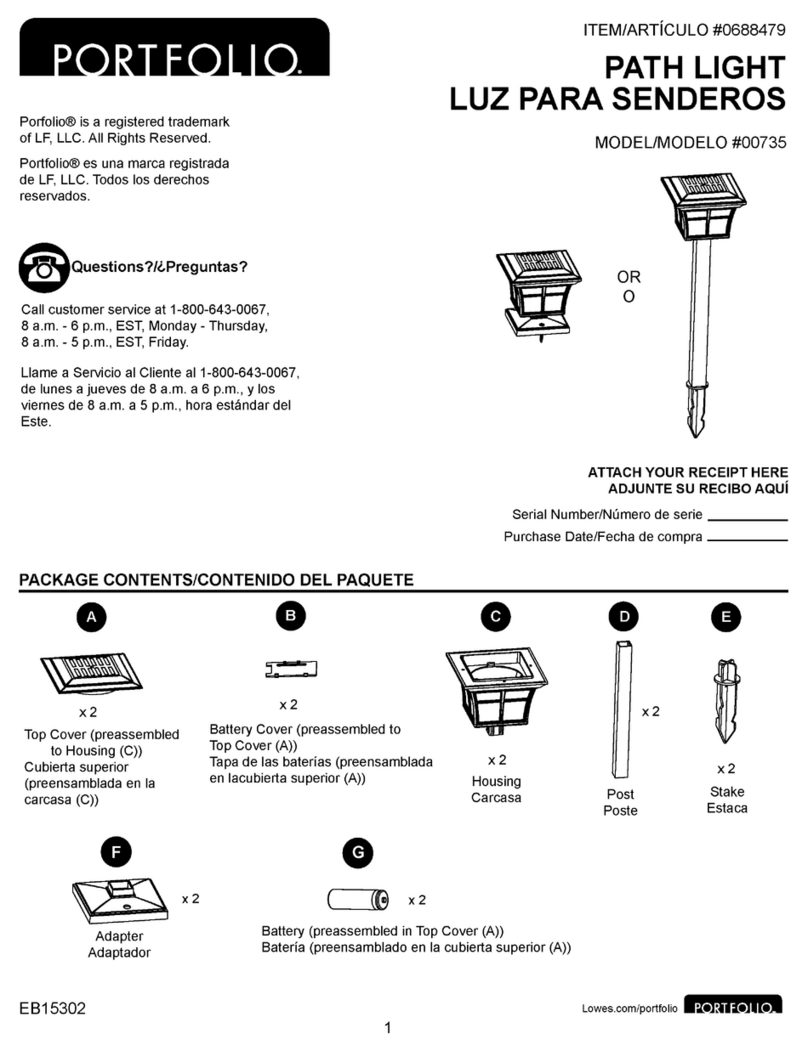
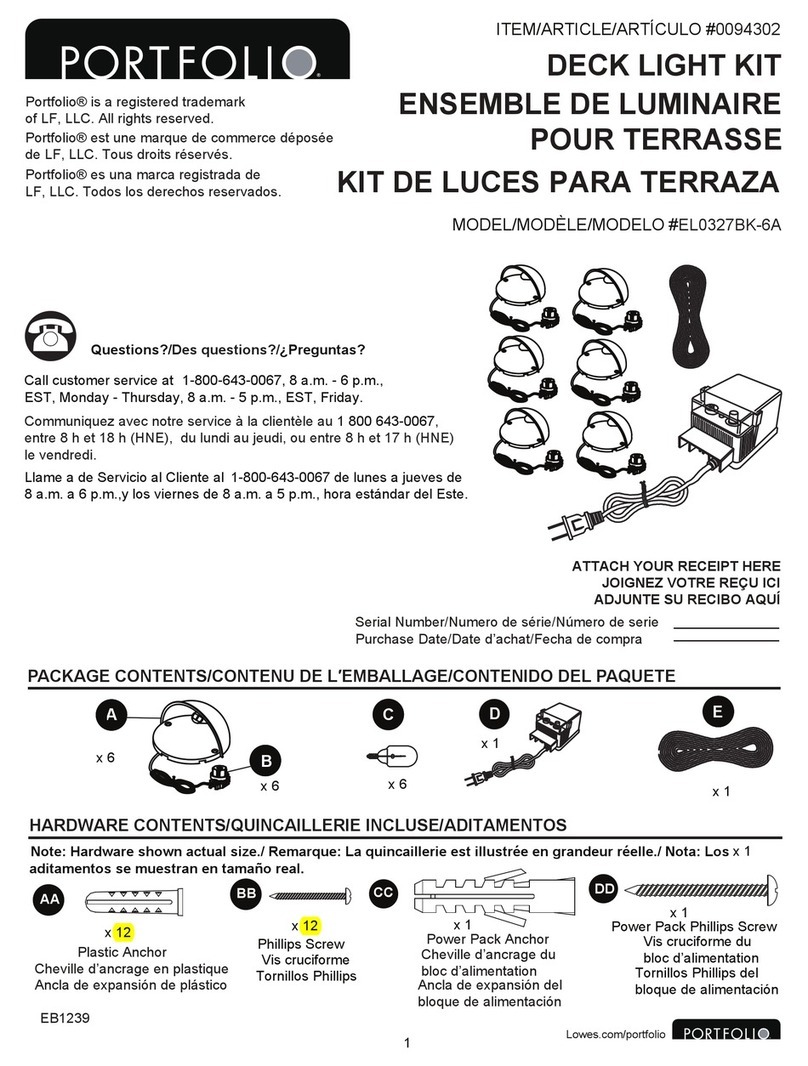
PACKAGE CONTENTS/CONTENIDO DEL PAQUETE
PATH LIGHT
ITEM/ARTÍCULO #0805215
MODEL/MODELO #7404280383
Serial Number/Número de serie
Purchase Date/Fecha de compra
ATTACH YOUR RECEIPT HERE
B
x 1
Post
Poste
x 1
Fixture Housing
Carcasa de la lámpara
A
x 1
Stake
Estaca
E
D
x 1
Connector
Conector
C
x 1
Fixture Wire
Cable de la lámpara
XXXXXXX
Questions?/¿Preguntas?
Call customer service at 1-800-643-0067, 8 a.m. - 6 p.m., EST,
Monday - Thursday, 8 a.m. - 5 p.m., EST, Friday.
ADJUNTE SU RECIBO AQUÍ
Llame al Servicio al Cliente al 1-800-643-0067, de lunes a jueves de
8 a.m. a 6 p.m. y los viernes, de 8 a.m. a 5 p.m., hora estándar del Este.
Portfolio® is a registered trademark
of LF, LLC. All rights reserved.
Portfolio® es una marca registrada de
LF, LLC. Todos los derechos reservados.
LUZ PARA SENDEROS
2
SAFETY INSTRUCTIONS/INSTRUCCIONES DE SEGURIDAD
Please read and understand this entire manual before attempting to assemble, operate or install the product.
WARNING
•Be sure the electricity to the wires you are working on are shut off by either removing the fuse or turning off the circuit
breaker.
•To reduce the risk of electric shock or injury to persons: do not touch hot lens, lampshade or enclosure.
•If you feel you do not have enough electrical wiring experience or are unsure what electrical codes are applicable to your
jurisdiction, please consult the services of a licensed electrician.
CAUTION
•Keep lamp away from combustible materials that may burn.
•The wire is intended for shallow burial, less than 6 inches deep.
•DO NOT install within 10 feet of a pool, spa or fountain.
•The LEDs in this product are not replaceable.
•This equipment has been tested and found to comply with the limits for a Class-B digital device, pursuant to Part 15 of
the FCC Rules. These limits are designed to provide reasonable protection against harmful interference in a residential
installation. This equipment generates, uses and can radiate radio frequency energy and, if not installed and used
in accordance with the instructions, may cause harmful interference to radio communications. However, there is no
guarantee that interference will not occur in a particular installation. If this equipment does cause harmful interference to
radio or television reception, which can be determined by turning the equipment off and on, the user is encouraged to try
to correct the interference by one or more of the following measures:
– Reorient or relocate the receiving antenna.
– Increase the separation between the equipment and receiver.
– Connect the equipment into an outlet on a circuit different from that to which the receiver is connected.
– Consult the dealer or an experienced radio/TV technician for help.
ADVERTENCIA
•Asegúrese de cortar la electricidad de los cables con los que está trabajando; ya sea retirando el fusible o apagando el
interruptor de circuito.
•Para reducir el riesgo de incendio, descargas eléctricas o lesiones a las personas: No toque la mica, la pantalla de la
lámpara ni el compartimiento.
•Si siente que no posee la experiencia en cableados eléctricos o no está seguro si los códigos eléctricos se
aplican a su jurisdicción, contrate a un electricista y con licencia
PRECAUCIÓN
•Mantenga la lámpara alejada de materiales inflamables.
•El cable está diseñado para uso subterráneo, a menos de 15,24 cm de profundidad.
•NO instale la lámpara a menos de 3,05 m de piscinas, spas o fuentes de agua..
•Las bombillas LED en este producto no son reemplazables.
•
- Reorientar o reubicar la antena de recepción.
- Aumentar la separación entre el equipo y el receptor.
- Conectar el equipo a un tomacorriente de un circuito distinto al que usa el receptor.
- Solicitar ayuda al concesionario o a un técnico con experiencia en radio/TV.
Lea y comprenda por completo este manual antes de intentar ensamblar, usar o instalar el producto.
Este equipo se probó y se ha verificado que cumple con los límites para un dispositivo digital clase B, conforme a la
sección 15 de las reglas de la FCC. Estos límites están diseñados para proporcionar una protección razonable contra las
interferencias perjudiciales en una instalación residencial. Este equipo genera, utiliza y puede irradiar energía de
radiofrecuencia y, si no se instala y se usa de acuerdo con las instrucciones, puede causar interferencia perjudicial para
las comunicaciones de radio. Sin embargo, no se garantiza que no se producirán interferencias en una instalación en
particular. Si este equipo genera una interferencia perjudicial para la recepción de radio o televisión, que se puede
determinar apagando y encendiendo el equipo, se recomienda al usuario que intente corregir la interferencia con una o
más de las siguientes medidas:
Please note that changes or modifications not expressly approved by the party responsible for compliance could void the
user’s authority to operate the equipment.
Tenga en cuenta que cualquier cambio o modificación que no haya sido aprobado especificamente por la parte
responsable de la conformidad con el reglamento podría anular la autorización del usuario de hacer funcionar este
aparato.
3
ASSEMBLY INSTRUCTIONS/INSTRUCCIONES DE ENSAMBLAJE
PREPARATION/PREPARACIÓN
Before beginning assembly of product, make sure all parts are present. Compare parts with package contents list. If any part is
missing or damaged, do not attempt to assemble the product.
Estimated Assembly Time: 10-15 minutes
Tools Required for Assembly (not included): Phillips Screwdriver, Trowel.
Tiempo estimado de ensamblaje:
B
1
1. Unscrew the set screws from
the post (B) and keep it for
later use.
A
B
2
2.
B
E
3
3.
1
Antes de comenzar a ensamblar el producto, asegúrese de tener todas las piezas. Compare las piezas con la lista del contenido
del paquete. No intente ensamblar el producto si falta alguna pieza o si estas están dañadas.
10 a 15 minutos.
Attach the fixture arm on the
fixture housing (A) to the post
(B) and tighten with the
pre-removed set screws.
Attach the stake (E) to the
bottom of the post (B).
Fije la estaca (E) a la parte
inferior del poste (B).
Herramientas necesarias para el ensamblaje (no se incluyen): Destornillador Phillips, Llana.
Retire los tornillos de fijación
del poste (B) y guárdelo para
después.
Fije el brazo de la lámpara
en la carcasa de la lámpara
(A) al poste (B) y apriete con
los tornillos de fijación
previamente retirados.
4
5
D
C
Top cover
Bottom base
Base inferior
5. Unscrew the top cover from
the connector (D) and keep
it for later use.
C
6
DTop cover
Bottom base
Base inferior
6. Insert wire from low-voltage
transformer (sold separately)
into the bottom base of
connector (D) and then
re-tighten the top cover
removed in step 3 until the
contact pins completely pierce
the plastic shield of the wire.
Assembly is complete.
Refer to the transformer’s
instructions for how to install additional lighting (sold
separately) to the same transformer.
Cubierta
superior
Cubierta
superior
Desenrosque la cubierta superior
del conector (D) y guárdela para
utilizarla posteriormente.
Coloque el cable del bloque de alimentación de bajo voltaje
(se vende por separado) en la base inferior del conector (D)
y luego vuelva a apretar la cubierta superior que retiró en el
paso 3 hasta que las dos clavijas de contacto atraviesen por
completo la protección de plástico del cable.
El ensamblaje está listo. Consulte las instrucciones del
bloque de alimentación para instalar luces adicionales (se
venden por separado) al mismo bloque de alimentación.
4. Push the assembled fixture
into the ground.
CAUTION:
• DO NOT use a hammer.
• NEVER push the fixture into
the ground by the head.
Empuje la lámpara ensamblada para enterrarla.
PRECAUCIÓN:
• NO use un martillo.
• NUNCA entierre la lámpara en el suelo empujándola
Instead hold the post and
push the fixture into the
ground. For ground with hard
soil, use a trowel (not included)
to loosen soil.
desde el cabezal.
En lugar de ello, sostenga el poste y
entierre la lámpara en el suelo. Para suelos con tierra
dura, use una llana (no se incluye) para aflojar la tierra.
Transformer wire
Cable para transformador
4
Printed in China
Impreso en China
CARE AND MAINTENANCE/CUIDADO Y MANTENIMIENTO
•Before attempting to clean the disconnect the power to the by unplugging the
•To clean the use a dry or slightly dampened clean cloth.
•DO NOT use any cleaners with chemicals, solvents or harsh abrasives as damage to the may occur.
•
•
Antes de intentar limpiar la lámpara, desconecte la alimentación desenchufando la lámpara.
•Para limpiar la lámpara, use un paño limpio seco o levemente húmedo.
•NO utilice limpiadores con químicos, solventes ni abrasivos fuertes ya que pueden dañar la lámpara.
Total fixture wattage is 4.8 watts; do not attempt to replace the LEDs.
•El vataje total de la lámpara es de 4,8 vatios. No intente reemplazar las bombillas LED.
WARRANTY/GARANTÍA
El fabricante garantiza que esta lámpara no presentará defectos en los materiales ni en la mano de obra por un período de
cinco año a partir de la fecha de compra. Si dentro de este período el producto presenta defectos en el material o la fabricación,
se debe devolver el producto, junto con una copia del recibo de venta como prueba de la adquisición, al lugar donde se compró.
El fabricante, a su elección, reparará, reemplazará o devolverá el monto de la compra al comprador original. Esta garantía no
cubre las bombillas ni daños en la lámpara debido al mal uso, al daño accidental, la manipulación o la instalación inadecuadas
y excluye específicamente toda responsabilidad por daños directos, accidentales o resultantes. Debido a que algunos estados
no permiten exclusiones o limitaciones en una garantía implícita, las exclusiones y limitaciones anteriores pueden no aplicarse.
Esta garantía le otorga derechos específicos pero podría tener también otros derechos que varían según el estado.
The manufacturer warrants this lighting fixture against defects in materials and workmanship for a period of five years from the
date of purchase. If within this period the product is found to be defective in material or workmanship, the product must be
returned, with a copy of the bill of sale as proof of purchase, to the original place of purchase. The manufacturer will, at its
option, repair, replace or refund the purchase price to the original purchaser consumer. This warranty does not cover light bulbs
or the fixture becoming damaged due to misuse, accidental damage, improper handling and/or installation and specifically
excludes liability for direct, incidental or consequential damages. As some states do not allow exclusions or limitations on an
implied warranty, the above exclusions and limitations may not apply. This warranty gives you specific rights and you may also
have other rights that vary from state to state.
TROUBLESHOOTING/SOLUCIÓN DE PROBLEMAS
PROBLEM
PROBLEMA
POSSIBLE CAUSE
CAUSA POSIBLE
CORRECTIVE ACTION
ACCIÓN CORRECTIVA
The light does not
turn on when
needed.
La luz no se
enciende
cuando es
necesario.
1. The wire of the connector doesn’t
contact pins.
El cable del conector no hace contacto
con las clavijas.
2. The wire and the transformer aren’t in
contact.
El cable y el bloque de alimentación
no hacen contacto.
3. No power to the transformer.
El bloque no recibe alimentación.
1. Check the wiring of connector. Make sure brass
contact pins pierce the plastic wire insulation and are
touching the copper wires
Revise el cableado del conector. Asegúrese
de que las clavijas de contacto de latón penetren el
aislamiento plástico del cable y estén en contacto con
los conductores de cobre en el interior.
2. Check the connection between the primary wire and the
transformer.
3. Check the power to the transformer
Revise la conexión entre el cable principal y el bloque
de alimentación.
Revise la alimentación que va hacia el bloque.

This manual suits for next models

1

Other LF Outdoor Light manuals

LF Portfolio TLC05BZ User manual

LF

LF Portfolio TLC05BZ User manual

LF Portfolio WL120MWWP User manual

LF

LF Portfolio WL120MWWP User manual

LF PORTFOLIO MS16Mh-R5-SS-T25 User manual

LF

LF PORTFOLIO MS16Mh-R5-SS-T25 User manual

LF HOLIDAY LIVING 066-141610035-0 User manual

LF

LF HOLIDAY LIVING 066-141610035-0 User manual

LF PORTFOLIO 00772 User manual

LF

LF PORTFOLIO 00772 User manual

LF allen+roth LB2885 Maintenance manual

LF

LF allen+roth LB2885 Maintenance manual

LF allen+roth PM21201-259 User manual

LF

LF allen+roth PM21201-259 User manual

LF PORTFOLIO Barada LBSHC01MTN User manual

LF

LF PORTFOLIO Barada LBSHC01MTN User manual

LF Portfolio EL0327BK-6A User manual

LF

LF Portfolio EL0327BK-6A User manual

LF allen + roth SLL100BR User manual

LF

LF allen + roth SLL100BR User manual

LF allen+roth LB2906 User manual

LF

LF allen+roth LB2906 User manual

LF allen+roth LB2975 User manual

LF

LF allen+roth LB2975 User manual

LF PORTFOLIO 6195-TL-1 User manual

LF

LF PORTFOLIO 6195-TL-1 User manual

LF Allen + Roth LB2905 User manual

LF

LF Allen + Roth LB2905 User manual

LF allen+roth LB2893 User manual

LF

LF allen+roth LB2893 User manual

LF PORTFOLIO 00735 User manual

LF

LF PORTFOLIO 00735 User manual

LF Portfolio EL0529BK-6 User manual

LF

LF Portfolio EL0529BK-6 User manual

Popular Outdoor Light manuals by other brands

Green Star AR Series installation instructions

Green Star

Green Star AR Series installation instructions

AFX AUW103643LAJD2 Series quick start guide

AFX

AFX AUW103643LAJD2 Series quick start guide

North Light 44-3788 quick start guide

North Light

North Light 44-3788 quick start guide

LIVARNO LUX HG02103 Assembly, operating and safety instructions

LIVARNO LUX

LIVARNO LUX HG02103 Assembly, operating and safety instructions

Stoane Lighting Toad X Installation and maintenance instructions

Stoane Lighting

Stoane Lighting Toad X Installation and maintenance instructions

Lumina ELLE LED instructions

Lumina

Lumina ELLE LED instructions

Gama Sonic GS-149F instruction manual

Gama Sonic

Gama Sonic GS-149F instruction manual

Hess NOVARA SL Installation and operating instructions

Hess

Hess NOVARA SL Installation and operating instructions

Maretti WOLTERINCK COSTA LATERNA PILAR quick start guide

Maretti

Maretti WOLTERINCK COSTA LATERNA PILAR quick start guide

LIGMAN ARIZONA 5 installation manual

LIGMAN

LIGMAN ARIZONA 5 installation manual

RH Newman quick start guide

RH

RH Newman quick start guide

LIGMAN HA-60296-A installation manual

LIGMAN

LIGMAN HA-60296-A installation manual

LIGMAN VEKTER 8 VK-30031 installation manual

LIGMAN

LIGMAN VEKTER 8 VK-30031 installation manual

Orion KENZO Mounting and safety instructions

Orion

Orion KENZO Mounting and safety instructions

LIGMAN LADOR 4 installation manual

LIGMAN

LIGMAN LADOR 4 installation manual

LightPro Oberon Lo user manual

LightPro

LightPro Oberon Lo user manual

urban ambiance UQL1153 installation instructions

urban ambiance

urban ambiance UQL1153 installation instructions

Tungsram SMBt T1-T2 installation guide

Tungsram

Tungsram SMBt T1-T2 installation guide

manuals.online logo
manuals.online logoBrands
  • About & Mission
  • Contact us
  • Privacy Policy
  • Terms and Conditions

Copyright 2025 Manuals.Online. All Rights Reserved.