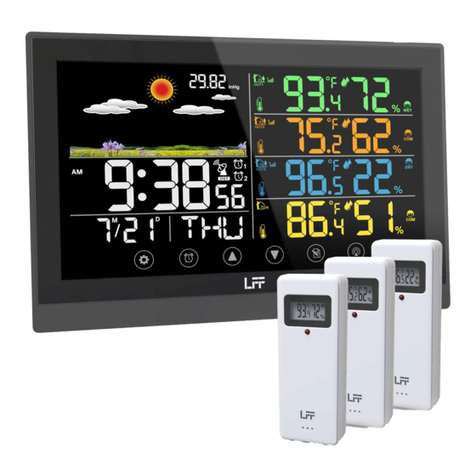
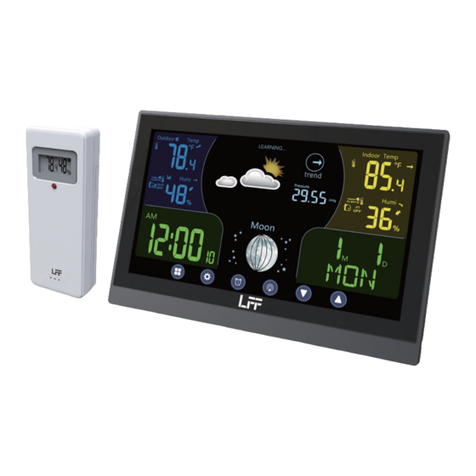
LFF LWS234 User manual

WIRELESS WEATHER STATION
-USER MANUAL-
Ref LWS234

● TIPS FOR SENSOR SITE SELECTION
● SAFETY PRECAUTIONS
This product is not a toy. Keep out of the reach of children.
This product is designed for use in the home only as indication of weather conditions.
This product is not to be used for medical purposes or for public information.
Do not clean the unit with abrasive or corrosive materials.
Do not place the appliance near open flames or heal sources. Fire, electric shock,
product damage, or injury might occur.
Only use fresh new batteries in the product. Do not mix new and old batteries together.
Do not disassemble, alter, or modify the product.
Only use attachments or accessories with this product specified by the manufacturer.
Do not submerge the unit in water. Dry the product with a soft cloth if liquid spills on it.
Do not subject the unit to excessive force, shock, duct, extreme temperature, or humidity.
Do not cover or block the ventilation holes with any objects.
This weather station of this product is intended to be used indoors only.
This product is only suitable for mounting at height less than 6.6 ft. (2 m).
Do not tamper with the unit’s internal components. Tampering with the product will void
the warranty.
Batteries are not included. When inserting batteries, make sure that the positive and
negative polarities match with the markings in the compartment.
Do not mix standard, alkaline, and rechargeable batteries together.
Leaving a battery exposed to extremely high temperature in the surrounding environ-
ment can result in an explosion or leakage of flammable liquid or gas.
Leaving a battery exposed to extremely low air pressure in the surrounding environment
can result in an explosion or leakage of flammable liquid or gas.
●
●
●
●
●
●
●
●
●
●
●
●
●
●
●
●
●
Rain collector must be cleaned every few months.
Sensor should be installed at least 5’ (1.5 m) away from any building or structure.
Choose a location in open space under direct sunlight with no obstructions.
The sensor should remain in line of sight and within 492’ (150 m) of the weather station
for consistent, steady transmission.
Keep your sensor and weather station away from household appliances that operate on
the same frequency. The console and sensor should be at least 3’ -7’ (1 - 2 m) away from
such interferences.
●
●
●
●
●
1
WARNING! Please read and understand all safety precautions, operating instructions, and
care/maintenance instructions before operating this appliance. Keep this manual for
future reference.

● PACKAGE CONTENTS
● PRODUCT FEATURES
Colorful and big digit display with super bright backlight.
9 functional buttons: SET, TEMP/ALARM, RAIN, WIND/+, BARO/-/ , ALERT, MAX/MIN,
CHANNEL, LIGHT/ SNOOZE
Time automatically sychronize to the internet.
Alarm with snooze function.
Daylight Saving Time (DST) function.
Time zone: GMT ±12.
Moon Phase.
Indoor & outdoor temperature (°C/°F) & humidity readings with trend.
Hourly, Daily, Weekly, Monthly, Total rainfall and Rainfall rate in past hour.
Average wind speed, gust wind speed and wind direction displays.
Absolute and relative Barometric pressure displays with trend.
Light intensity and UV index display.
Weather index display : Feel likes, Wind Chill, Heat index, Dew point.
Weather Forecasting.
Max/Min reading.
Weather alert settings.
Upload weather data to Weather Underground and/or Weathercloud via Wi-Fi router.
4-level brightness of backlight.
●
●
●
●
●
●
●
●
●
●
●
●
●
●
●
●
●
●
1 2 3
4 5
7 8
6
2

1 Weather station
2 Adapter
3 Wireless 7-in-1 outdoor sensor
4 Funnel
5 Wind direction vane with 1 screw
6 Wind speed cups with 1 screw
7 Mounting pole with 4 screws
8 Mounting brackets with 6 screws
9 Rubber pads X 2
10 Screwdriver
11 User guide
● PRODUCT OVERVIEW
WIRELESS 7-IN-1 OUTDOOR SENSOR
1
2
3
4
5
6
7
8
9
10
11
12
Solar panel
Wind direction vane
UV/light sensor
Bubble level gradienter
Rain collector
Wind speed cups
Mounting pole
Mounting brackets
Hygro-thermo sensor
LED: Flashes when the unit transmits a reading
RESET button
Battery door
5
7
8
10
11
9
12
4
1
3
2
6
3
9 10 11
NOTE: 4 extra screws for wind direction vane and wind speed cups.

WEATHER STATION
4
1 2 3
5
4
6
7
10 11 12 13 14 15 16 17
9
8
18
19
Model: LWS234
Made in China

1
2
3
4
5
6
7
8
9
10
11
12
13
14
15
16
17
18
19
Outdoor temperature/humidity reading, weather index
Wind direction & speed
Indoor temperature/humidity reading
Weather forecast
Time & date, moon phase, Weekday
Light intensity
UV index
Rain
Barometer
SET button
TEMP/ (ALARM) button
RAIN button
WIND/+ button
BARO/-/ (Wi-Fi) button
ALERT button
MAX/MIN button
CHANNEL button
LIGHT/ SNOOZE button
Battery compartment (3.6 V Ni-MH rechargeable battery pack)
5
● SETTING UP THE WIRELESS 7-IN-1 OUTDOOR SENSOR
The wireless 7-in-1 outdoor sensor measures wind speed, wind direction, rainfall, UV, light
intensity, temperature, and humidity.
INSTALLING THE MOUNTING POLE AND BRACKET
Secure the sensor onto a mounting pole and bracket (included) using the screws
(included).
●

6
INSTALLING WIND SPEED CUPS AND WIND DIRECTION VANE
Align the screw holes in the wind speed cups with the flat, vertical side of the metal rod.
Insert the wind speed cups in the metal rod and screw on tight to lock it in place.
Align the screw holes in the wind direction vane with the flat, vertical side of the metal
rod.
Insert the wind direction vane in the metal rod and screw on tight to lock it in place.
●
●
●
●
Wind Direction Vane Installation
Wind Speed Cups Installation

7
INSTALLING THE BATTERIES
Slide the switch to unlock the battery compartment at the bottom of the solar panel.
Insert three AA batteries (not included) according to the +/- polarity labeled in the
compartment.
Lock the battery compartment back onto the compartment.
●
●
●
SETTING UP RAIN COLLECTOR
Align the notches on the funnel with the lock grooves inside the rain collector.
Insert the funnel in the rain collector and screw on tight to lock it in place.
●
●
Lock
Align
Slide the switch to unlock
Insert three AA batteries
Open the battery compartment
Close the battery compartment and
slide the switch to lock

8
MOUNTING THE WIRELESS 7-IN-1 OUTDOOR SENSOR
Pick a location for the 7-in-1 outdoor sensor that is open with no obstructions.
Tighten the mounting brackets to a surface/wall using four tapping screws (included), or
tighten the mount pole to your existing mounting pole with four φ5 Bolts and M5 Nuts
assembly.
Add rubber pads onto the mounting bracket before fastening the mounting bracket on
the sensor.
Make sure the rain collector faces north and the solar panel faces south before fastening
the screws (included).
Please ensure that the sensor is fixed particularly tightly, otherwise windy conditions
cause the transmitter to shake and thus misread the rainfall data.
●
●
●
●
●
Stick
Stick
Point to
NORTH
Point to
NORTH
Point to
NORTH
Point to
SOUTH
Point to
SOUTH
Point to
SOUTH

9
The bubble
POINTING THE WIRELESS 7-IN-1 OUTDOOR SENSOR TO SOUTH (OPTIONAL)
The outdoor wireless weather sensor is calibrated to be pointed north for maximum
accuracy. However, for your convenience, if you are a user located in the Southern Hemi-
sphere, you can use the sensor with the rain collector pointing south.
NOTE: Changing the hemisphere setting will automatically switch the direction of the
moon phases on the display.
Pointing the wireless weather sensor toward the south will allow maximum sunlight on
the solar panel, especially during the winter season in the Southern Hemisphere.
Mount and install the wireless weather sensor with the rain collector pointing South,
instead of North. (Please refer to MOUNTING THE WIRELESS 7-IN-1 OUTDOOR SENSOR.)
Select "STH" for south hemisphere in the clock setting mode. (Please refer to "setting the
clock")
1.)
2.)
ADJUSTING THE 7-IN-1 WIRELESS SENSOR LEVEL
Use the bubble level indicator to make sure the wireless outdoor sensor is completely
level. If the sensor is not level, the gain gauge, UV and Light intensity will not measure
properly.
To adjust the level of wireless outdoor sensor, loose the screws of the mounting pole.
Adjust the level of the wireless outdoor sensor in order make sure the bubble is in the
center of the bubble level indicator.
Tighten the screw of the mounting pole again.
●
●
●

10
● SETTING UP THE WEATHER STATION
POWERING UP THE WEATHER STATION
Plug the power adapter into the power jack located in the back of the weather station.
Insert 3 new AAA alkaline batteries (not included) for backup.
Once the weather station is turned on, it will automatically enter pairing mode.
●
●
PAIRING THE WIRELESS 7-IN-1 SENSOR
Once your weather station powers on, it should automatically search for and connect to
the wireless sensors. If the weather station does not connect within the first 5 minutes,
refer to the following section, “RE-PAIRING SENSOR”.
You will see the icon of an antenna scrolling in the temperature and humidity
(outdoor) section of the display.
Once the pairing process completes, the antenna icon will appear solid (not flashing),
and the readings for outdoor temperature and humidity, wind speed, wind direction, UV,
light intensity, and rainfall will appear in their designated sections of the LCD display.
●
●
●
NORMAL TIME DISPLAY
● SETUP INSTRUCTION
SETTING UP WI-FI CONNECTION AND WEATHER SERVER CONNECTION
Press and hold 【BARO/-/ 】 button over 3 seconds, the weather station LCD display
will show the letter “AP” that it has entered Access Point (AP) mode. At this time it will be
ready for the Wi-Fi settings to be adjusted.
●
RE-PAIRING SENSOR
If the connection fails or the weather station is reset, then press and hold the
【CHANNEL】button over 2 seconds to enter pairing mode, and the weather station
will re-register all the sensors that have already been registered to it before, (i.e. the
weather station will not lose the connection of the sensors that you’d paired up before.)
17
14

11
Use your smartphone, tablet, or computer to connect to the weather station via
Wi-Fi by following these steps:
1.)
2.)
3.)
4.)
On PC, open your Wi-Fi network settings. On Android™ or iOS devices, go to settings
menu and then select Connections/WI-FI to open the network settings.
Locate the weather station SSID from the list. It should appear as WWS-XXXXXX (where
all the X’s are integers) in the list. Tap on the SSID to connect. This step will take several
seconds.
Once you are connected to the weather station, open up your internet or mobile web
browser, and enter the following address into the address bar: http://192.168.1.1 to
access the weather station web interface. (Make sure to include the http:// or else the
web browser may interpret the address as a search query). We recommend using the
latest version of reputable web browsers.
Enter the following information into the web-interface (Figure 1). Make sure all of the
information is entered prior to selecting Save. If you choose not to upload Wunder-
ground.com, or upload weathercloud.net, leave the check boxes unchecked.
SETTINGS
Wi-Fi Router Setup
Time Zone Setup
Weather Server Setup
WeatherUnderground
Language:
SETUP ADVANCED
Router
English
Time Zone
Station ID KCACANTI9
Upload wunderground.com
Password
Station Key
WeatherCloud
Station ID
Upload weatherCloud.net
Station Key
Select the menu and choose your 2.4GHz WIFI Router
Time Server Setup
Apply
Server URL
Firmware Version: 1.0.1
+0.00
time.windows.com
Router 12345
**********
**********
a7d9d2a279fbbafa
**********
NOTE :
Time zone Setup (default : 0h). To automatically set the time display to your time-zone,
change the time zone in Time server setup section of the SETUP page from ‘0:00’ (default)
to your time zone (e.g.+1:00 for Germany).
5.) If all of the information you entered is correct, press “Apply” to confirm
(Figure 1). If it does not, check your web interface information again.
Select setup UI display language
Select your Wi-Fi Router (SSID) from the list
Router Password
Enter your station ID
Enter your station key/password
check to confirm upload to
WeatherUnderground server
Enter your station ID
Enter your station key/password
check to confirm upload to
Weathercloud.net
Time zone setting
Internet time server setting
Press Apply to confirm the setting
Figure 1

12
NOTES:
When the Wi-Fi setup is complete, your computer or mobile device will return to the
default Wi-Fi connection. If it does not, simply open your device’s wireless network
settings and manually reconnect.
While in AP mode, you can press and hold the 【BARO/-/ 】 button over 3 seconds to
exit AP mode. The weather station will simply restore the previous AP settings.
NOTE:
We do not recommend calibration of most values with the exception of Relative Pressure,
which must be correctly calibrated to reflect your distance above sea level to account for
altitude effects.
CALIBRATION
Once you are connected via Wi-Fi to the weather station and have opened the setting page
at http://192.168.1.1, clicking “ADVANCED” will open the following page (Figure 2).
1.)
2.)
3.)
You may enter or change the offset and gain values for different measurement parame-
ters.
Once you have completed your calibrations, press the “APPLY” button.
The current offset value will update to show the value that you entered (instead of the
default value). If you want to change the value, you can enter a new value in the box
beside the number (as in step 1). To update the value again, press “APPLY” button .
Figure 2
SETTINGS
Humidity %
SETUP ADVANCED
Temperature
Current offset:Indoor
Current offset:
Current offset:
Current offset:
Current offset:
Current offset:
Current offset:
Current offset:
Current offset:
Outdoor
CH 1
CH 2
CH 3
CH 4
CH 5
CH 6
CH 7
Current offset:
Current offset:
Current offset:
Current offset:
Current offset:
Current offset:
Current offset:
Current offset:
-5.0~5.0°C/ -9.0~9.0°F
(Default: 0)
Range: -9~9%
(Default: 0)
Current offset:
Setting Range: -100~100hpa/ -2.95~2.95inHg/ -75~75mmHg
Pressure:
Absolute Pressure Offset: (Default: 0)
*Rain gain: Range: 0.5~1.5 (Default: 1.0)
*Wind speed gain: Range: 0.5~1.5 (Default: 1.0)
*Wind direction: Range: -10~10 (Default: 0°)
*UV gain: Range: 0.5~1.5 (Default: 1.0)
*Light gain: Range: 0.5~1.5 (Default: 1.0)
* Depend on the model
℃
hPa
0.0
0.0
0.0
0.0
0.0
0.0
0.0
0.0
0.0
0
0
0
0
0
0
0
0
0
0
0
1
1
1
1
Apply
Firmware Version: 1.0.1
Outdoor temperature and humidity calibration section
Rain, wind speed, wind direction,
UV and light calibration use gain method
Indoor temperature and humidity calibration section
Select setting unit
Pressure calibration section
Select setting unit
14

13
NOTE:
If you own a dual band router (2.4GHz and 5.0GHz), make sure you connect to the 2.4GHz
band, otherwise it will fail to connect the weather station to Wi-Fi.
NOTE:
The time will automatically synchronize to the internet per an hour.
WI-FI CONNECTION STATUS
When the weather station successfully connects to your Wi-Fi router, the Wi-Fi signal will
appear on the LCD display. If the Wi-Fi signal is not stable or the weather station is trying to
connect to the router, the icon will flash. If the icon disappeared, it means the weather
station is not connected to the Wi-Fi router.
TIME SERVER CONNECTION STATUS
CREATE YOUR WEATHERUNDERGROUND ACCOUNT
After the weather station has connected to the internet, it will attempt to connect to the
internet time server to obtain the UTC time. Once the connection succeeds and the weather
station’s time has updated. The icon “SYNC” will appear on the LCD.
To display the correct time for your specific time zone, you will need to change the time zone
in the CLOCK setting mode from 00 (default) to your time zone (eg. -5 for EST). If you don’t
know your time zone, you can look it up online.
1.) Visit: https://Wunderground.com, and select the “Join” in the upper right and corner
and create a Free Account.
Flashing: the weather station is attempting
to connect to your wireless router
Solid: the weather station has been
connected to your wireless router.
● CREATE AND SYNC YOUR WEATHER SERVER ACCOUNT

14
2.) Enter a Username, Email and Password (It is your Login password of the websiteIt, not
your email password.So no privacy will be exposed). Click Sign up for free.
3.) After registration is done successfully, it will shown below message.
4.) Click “Login” and enter the email address and password you just registered.

15
5.) Click “My profile” and enter Member settings.
6.) Click “Update home location”.
7.) Click “My Devices”, and click “Add New Device”.

16
8.) Select address by inputting an address or select Manual to position your address
automatically. Then click “Next”.

17
9.) Enter the weather information. Blanks with red (required) must be filled in.
10.)
11.)
Once complete this session, click “I Accept” and “Next”.
After registering successfully, please record your WeatherUnderground ID and Key
information for later setup use.
NOTE:
You can select “other” of the Device Hardware.

18
12.) As shown below, registration is done successfully.
1.) Visit Weathercloud website at https://weathercloud.net/, and enter a Username, Email
and Password and click “Sign up”. Following the instructions to create an account.
CREAT YOUR WEATHERCLOUD ACCOUNT
NOTE: This is best done on a computer desktop or laptop.
(It is your Login password of the websiteIt, not your email password. So no privacy will be
exposed).
2.)
3.)
When it is successful, an email will be received in your registered mailbox.
Open your mail and log in to the web address in the mail. Click “Activate your
Weathercloud account”.

19
4.)
5.)
Click “here” to enter the homepage of the weathercloud website.
Enter the email address and password you just registered to enter the weathercloud
website.
6.) Click “Create device” to add a weather station device.
7.) Enter all the requested information into the Create New Device page. Blanks with red *
must be filled in.
Table of contents
Other LFF Weather Station manuals
Popular Weather Station manuals by other brands

Bresser
Bresser Thermo Hydro Quadro NLX instruction manual

Auriol
Auriol 291528 Operation and safety notes

La Crosse Technology
La Crosse Technology WS-7220U-IT Instruction manua

Ansen Electronics
Ansen Electronics EC-WS115 Instruction manual and warranty information

SOMFY
SOMFY animeo Connect Weather Station M10 installation guide

Bresser
Bresser WoW200 instruction manual