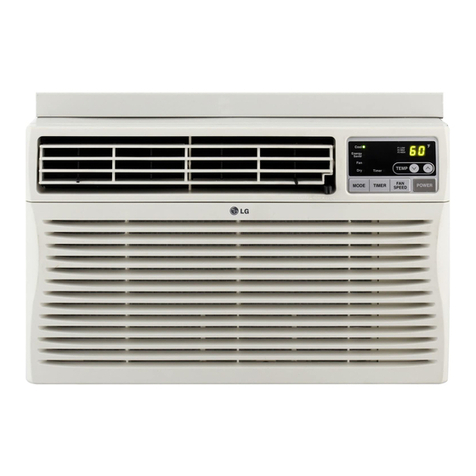
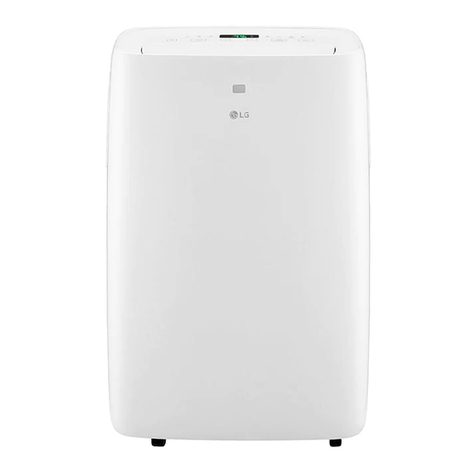
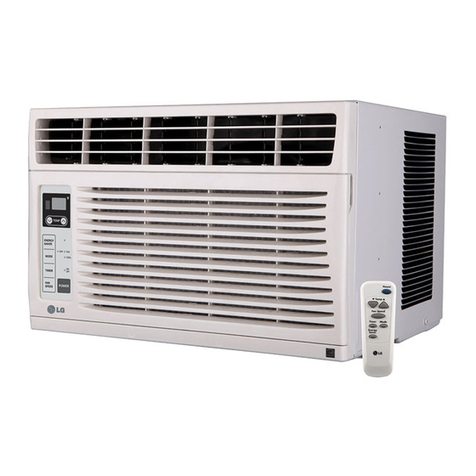
LG LB8000ER User manual

'S L
i i_ ¸
MODELS, LB8OOOER ,LW8OOOER

FOR YOUR RECORDS
Wr_e the m,od_ and _ria] nur_rs here:
Mode| #
_rial #
You can find them on a label on the side of each unit.
_aler's Name
Date Purc_sed
[] Stap,_eyou_ |eceipt to this pa_ i_°_the e_e_t you need
it to prove date of purcha_ or for waffan|y issue.
READ THIS MANUAL
_nside 'you wilJ fir_ many helipfui hints on how to use
and maintain your air coi_t_oi_r Ip,rof_r[y. Just a Ifflie
preventive care on your part can save you a great dea_
of tim and money over the lile of your air oo,nditioner,
You'H find many answers to common prob]e_ in the
cha_ of troub,lest_ling tips. ifyou review our chart ,of
Troub_esh_tJng Tips first, you may not need to calil
for _rv_e at al_
• Contact the a_hori_d _vice technician_or repair o_
_|nt_,an_ .ofth|s unit,
.,Contact the insta|_r for instal_tion of this unit.
•_e al_ cond|tio.ner is not in|enid for u_ by young
chi_ren or invalidsw_hout su_rv_m
=Young children should be su_rvi_d to ensure that
t_y _ _ot p|ay with the _i_conditioner,
•When t_ power cord is to. i_ replaY, replacement
wo_ sh_ll _ _rfot_ by _thorized petsonne_ on_
_ng only _nuir_, mp,la_ part_
•_ns_l_tion work mu_ _ perto_d in accordance with
•e Na|io_l El_ric C:o_ b,yqua|it,d _d _hori_
_onne_ o_|yo

To prevent iniu _ to tihe user or other people ar_ pr_erty damage, the following inst_ctions, must
be fo,l!owe&
i incorrect c_,erati,on due to ignoring instruction wi_ cause harm or _mage. The senousness, is,
classified by the fo!lowing i_iications,
[] Meanings dsymbols u_d in this manual are, as shown below.
I ..o oot,ooo.rl!
Be sure to follow' the instruction.,
[] Installation
° No installation may cause fire and electric
sh_k accident:, • _tmay cau_ fire and electric shock
° It may _u_ expl_,ion or fire, • it may cau_, failure and electric s,h_k,.

mOperation
° _herwi_, it wi]] muse
ele_fic s.hock or fire due to,
heat _nerat[,on or electric
_ock
• It will cause electdc shock or
fire due to heat generation,
° Otherwise [tmay cau_ fire
_d e]e_ric shock a_ident,.
• Itwil!lcause citric shock or
fire due to heat ,germrat[on.
• It will cause e!_ric shock or
fire due to heat germrat[on,
° It may _u_ fire and ,electric
sheik..
° I!twill! cau_ electric shock or
fire.
° No ground[_ may cause
e]e_ric sh_k (_e
installation Manual).
° litwill cause electric s_ck,

• It will cau_ failure of machine
or elect_ficsP#ck.,
I Installation
• They are sharp ,andmay
cause iinju_.
• It may _use inju%
• It is not deigned to,_l Me
entire ho,u_.
i'i'iiiiiiiiii¸
_iiii,i_iillii ii!ii!ii!ii!ii!ii!ii_ii!iiiiiiiii!!_:
° it may cause failure of
applian_, or a_ident,,
i
>/
/
° It may cau_. explosi,on,fire,
.andburn.
• ff _eaving appliance damaged,
there is concern of damage
due to,the f_ling of product,
I Operation
Sharp
es
° it may cause ele_ric shock
a_ diamage. ° Prevent acciden_l sta_up
,andthe possibility of injury,.

,_ere is d_ger of fire or
eleddc shock,
,, It will cause e_e_ric shock
or failure of machiae. •Water may enter the unit and
degrade the insulation. _tmay
_u_ an e_e_ric shock
IN
• Sin_ tr_ fan rotates at high
_,eed during operation, it:
may cause injury_
........ _.............._ ....... .........
•Jtis _ _ir conditioner, not a
precision refrigeration system.
!ii_¸_!i _;::;; _;! ,;_ _;;_ _;;; _ _::_ '_ _ ! _ _ ;iiill¸¸
,, OperNion without filters wHII
_use failure_

_ C_ct an instalillati_ s_cialist for installation.
PI_ in the p_ser piug pretty.
_Do notshare the same outlierwith other applianc_
_Do not we an extension _rd.
Do netstaWstop operation _ _uggin_unpluggin,g the pow_ cad.
_ cord/_ug is ,_mag_, replace only with an authorized _rt.
Being ex_sed to direct _fflow for an exter_i_ _ri_ of time could _ hazardous 'to your health, IDono€
expose,occupant, _ts, or plan_ to di_t aiff!_ fo_"ext:end,_ _d_s of time,,
Due to the _ssibil_y of oxygen defic_ncy,, ventJlia_ethe room when usi_ t_ether with st_Jes or other
heating devices°
Do not:_e this air conditioner for non-specked Sl_Cial purpo_ (e,g, prese_ing precision de.vice,
food, pets_pla_s., .andart objects), Usage in such a manner _uld harm such pro_y,
Do not we water to cle.aninsMe the .airco_itioner, Exp_ure to water can des.troy_e insu_flon, leading
possible _ectric sh_k,
When cleaning the unit, fir_ make sure that the power and b_eakerareturned off. The fan rotates at a
ve_ high sp_ during o_ration. There is a p_siibili_ _ injury ift:l_ un_°s_w_ isaccidentally
#iggered on while clleaning inner [pa_sof the unit.
F_ repair _d maintenance, con_ct your authorized _tvice dealer

The _mote control and control _nel will look like those rep_sented in the following plctur"es.
®®

POWER
,O_ration s_rts when this button is pre_ a_ sto_ when you pll3_ssthe b_on again
TEMPERATURE CON_OL
The thermostat m_ors room temperature to maintain _e desir_ tem_ratureo
The rheostat: c_ be set be._een 60_"F~_°F (16'_C~_°C).
The unitt_es an average _ 30 minutes toadjust the r_m tem_rature by i_'F.
OPERATION MODE SELECTOR
Select coo,llingm_e to _o_ _e _im..
Sei_t energy _ver mode f_ energy saving o_r_bn.
Select _anmode fo.rb_.ic ventilating fan operation_
Sei_: dry mode for d_ o_ration
FAN SPEED SELECTOR
For inc_ea_ _wer whilec_l!i_, s_ect ahigher fan sp_.d_
3 ste_: High -) Lcw 4, M_
_ O_OFF T|MER
The timer _n _ _t to _tart and _top _e un_ in houdy i_rements, (up to 12 hours,),
REMOTE CON_OL SENSOR
Push ,o_ the cov_ on t_ back of tlheremo_ co,ntro]with your _Ulmb
Pay attention to polarity a_ ir_serttwo newAA.Ai .5V batter,s.
'_ R_tLach the cm_er.
"_ not use rechargeable batlefes. Make sure that both batteries are new.
• In order toprevent _harge, remove the batteries fromthe remote control ff theair
conditioner is not going to.be used for an extended period of time
Ke_, _e remote control away from extm,melyhot or humid p¢aces,
Tomaintain optimal operation of _e remote control, the remote sensor should notbe
exposed to direct sur_igh't.
°The remote co,ntro_can be mounted on a watl using the moun_ble holder.

Formaximum_ling efficiency,CLOSEthev_t,,Thiswillallowinternalaircirculatio,n_
OPENtheventtodisch_gestale_r
CLOSE,L VENT.-LOPEN
Before using _e ventfla#onfea_'re, posifon
_e vent tever straight by pulling Pa_ A _'t
and snapping it intop,lace.
Aiff[_ _n be adjust_ by char_ing the diiirectionof the air conditiioneCs IIo_m_. This can also increasethe
_o_ing eff_iency of the air cond_ion_.
•Adjusting Horizon_ll Air Flow Diction
Aejus_tJ_th_ v'erticallouvers I_ _d right will
change hori_on_[ aifflo,w,
•Adjusting Vetica| Air Flow Direction
Adjusting the h_zont_ vane up and d_m wiU
change ve_i_l airflow The vane _n _ adj_ted
by nudging the vane backward or forward,
Adjusting hotlzonta_air flow Adjuring 'vertical air flow
• Recomm=endl_ otien_tiion of louvers
Adiu_ louvers to,face upwards when _oling to m_imize _ling e_ciency.

Turnt_ powerof andunplugt_ po,wetplug_,_m c,_antngtheaircondmone_
The air f[ff,er_hind t_ iNet grille sL_,u_ _ checked a_ c_ean,ed _ [easton_ eve_ 2 w_ks (oras
nece_a_) to ma[n_in optimal peffoirm_ce _ the air _n_i_oner.
How to remove the air filter
The gri!]e may be o_ned fr_ _e top for easy
maint_ance after instail_bn.
Open the inlietgdlle by pu]Uingoff _e exposed d_r
on the t_ of the unit (b_ed on ins_lllati_).
PuI_the tab s]igbt!yto re_ase the filter, Pul_tl_ filler
inthe same direction as the opening.
Clean the filter with wa_, sc_3pyw_er. The w_er
should _ _ _°C (I_°F}.
Rinse offand gently shake off excess water fromthe
fi_. Let it dry before rep_aceng it.
The base _n may o,veffbw due to high humidly. To,drain _e excess
water, remove _e drain cap from _,e back _ the unit and _cure t_
When p,ress.[ngthe drainpipe intoplace, apply force inthe.direction
away from _,e fins to avoid injuring yourse_.

CA_ON: Dis appliance should be ins_|_ in accordance with national wiring
r_ulations, The followlng information serves acts as aguide to help to explain product
feature;,
@
®
Y_ can cho_e be._n two meth_s below a,ccordli_ to your wi_o,w stool shape and preference.
*Fastenthe stopper using 2 screw _les, and I!ead
o_ the _wer cord through slit °A".
Power _rd
*Fasten the stopper using left scr_ holie,and route
properliyto lead the power cord o,_through s,_it"B°.

To prevent vibration a_ r_ise, make sure the unit
is [nst_l_ s_urely and firmly.
hstatl the unitwhere the sunlig_ d_s not shine
dkecUy o,nthe unit,
There should _ no _acl_, such as a fete and
wall, w_hin 20'_'from the back of the _n_
be_u_ it wil! prevent heat radiation of the
cond_ser,
Res_ictJ,onof outs_e air will greatfy reduce the
cooling effici_cy of the air conditbner.
Fence
CAIL_|ON; All side Iouvers ofthecabine_must remain expo_d totheoutsi_oifthe
structure.
In,s,ta_lthe unit a little slanted _ the _ck is slightly locaterthan t_ front (about 1/2°)_
This will force cond -e_ water toifl!o_vto the outs_e,,
InstaU the.unitw_h the i_o,m a_ut 30"~_ °ab,_e the ft_r leve!
Ai! supporting parts should be s_u'md to firm wood, masons, oil meta!,
•This unit isdesoned for ins'_llatio,n instandard _ub_e
hung win_ws with act_l o_nir_ wiOhs from 23"
to 36"
•The top and bosom window sash must open sufficiently
to alllowa clear vertica_opting _ 15" fr_ the _om
the upper sash tot_ widow stoo_
Y
23i_to 36,"_
15" mini.

NO.
4
5
6
7
8
9
10
11
NAME _ PARTS Q_
NUT
scnEWL 'Z@o 6
SCREW_TYPEB 3
_,,,,,,,ooo__ ,,[,YPEC 5
FOAM-STRIP 1
UPPERGUIDE: 1
FOAM-PE 1
FRAMEGUIDE 2
12 . W!NDO_u'LOCKINGBRACKET i
13 FOAMPE 1
SCREWDRIVER(Phillips and Ra'tead), RULER_ KHIFE,_ HAMMER, PENC|L_ LEVEL
PREPARATION OF CHASSIS
Remove timescrews whichfasten the canner at _th
sides ard at tLe _ck.
Slide the unit from the _b,[r_t by gripping the base pan
handle and ipu]lingfo_ard while _acing the cabinet,
Cut the wi_slowsash seat to the Foper leith.
P,ee]off fl_e backing and a_ch the F,o_-PE @to, the,
underside, of the 'window sa_l.
Remove timebacking from the top u_r guide Foam-PE
@a_ attach it to the _ttom of the U_er Guide ®,.
Attach tt_e,u_r guide onto the top of fl_ecabinet with 3
1
;_ ]_ert tk_ Frame Guides @ i_,o the bottom o,fthe
]r_ert tL-eFrame Curtain @ into the U_er Guide, @and
Frame Guides @
Fasten the ,curtains to the unit with 4 T_e
A screws Q
(Type A) (

Openthe window Mark a line on center of the
window sto,oll,
Carefully place the cabinet on _e window stool and
alignthe center mark on the _om fror_with the
center _inemarked in the window stool,
Pul!the bottom window sash down behind the Upper
Guide ® until itmeets
_TE; Donot pall the window _sh down tighdy that'the
_v_nt of Frame Cu#ain 0is restrictS:
Window Sash
F_m=
Cabinet
Frame Cudain Q
Front Angle
stool
Fig. 1
Fig. 2
Loosely assemble the Sill Sup_ @ usingthe ps_s
in Fig,,3, OUTDOOR
Nut_ Fig. 3
Select the position t_at:willplacethe Sil_Suppo_ (_
near the o_er most point on sill (See Fg 4)
NOTE: B'eca'refu/whenyeu instal! thiecabinet (Fra_
,Guides@ are broken easity).
A_ach _e Sill Suppo_ Qto the cabinet:track hole in
_lation to the sellected#_sition using 2 Ty_ A
screws in each suppo_ (See Fig. 4)
Frame Guide
_NIDOOR
Screw(Ty_ A)@
\
/
/
Cabinet
DUTDOOR
Fig. 4

The cabinet should be installed with ave_ sl!ighttilt
(abo_ 1/2") downward toward the outside
(See Fig, 5},
Adju_ the bolt and the n_ of Sill Su_rt ®for
ballancir_ fl_ecalbinel,
A_ach the cabinet to tl°_ window stool by drivir_9
the screws ® (Type B: Leng#_ 16ram (518 inch)
and _bw.) through the fron_angle into window
stool
Pul_each,Frame Curtain0 fullyto,each window
sash track and re_a,t step 2,
Attac[heach Frame CuRain (#the window sash using
screws O (Type C), (See Fig, 61)
Screw(Type B!@
Front Angle
Screw(Type B!@
Sill Sup_O
Sash track
Fig. 5
CA,UTION:Do no{ drill ahole in the _,#om _n,
The un# is desig_ to operate with
approximat#y I/2" oilwater in _ttom pan,,
There is no _to a_ water ff thepan' is dry,
c©
Fig. 6
Sli_ the unffi_o _e cabinet (See Fig, 7)
CAUTION: ,Forsecurity purpose, reinstall _rews (Type A)'
at cabi_t's sides,,
Cutthe Foam-Strip @to the proper _engthand inseR
be_n the uppe wndow _a_h and the lower
window sash, (See Fig, 8)
Screw(Type A)
Power Cor'c Screw
(Type A) Fig. 7
Fig. 8

Attach the Window Locking Bracket _, with a Type
C screw _. (See Fig. 9) ___ indow locking
bracket: @
Fig_ 9
Attach the front grille to the cabir_t by insertingthe
tab,s on the gdlle into the tabs on t_ fro_ of the
cabinet. Push the grillle in until it _a_ into pliace,.
(See, Fig. 10)
Fig. 10
Pul! down the inlet grille and _cure it with a Ty_
A screw _)through thiefront grille. (S_ Fig_11)
'_ndow installa_on of r_m air conditioner is
now completed. S_ ELECTRICAL DATA for
a_ching _wer cord to e|ec_ical out|et.
Fig, ! 1
Use Wall Receptacle Power SupplyUne Cord Plug
/) circumstances cut
_--__'_""1 or remove the
I groundingpror_g
Power supply cord with
3oprong grounding plug Standard 125V, 3-wiire grounding
rece_.acl!e rat_ 15A, 125,V AC
Use 1:5AMP, time
delay fuse or circuit
breaker,
Use of extension cords
•Because of _tenti_ sa_.etyhazards_'wes_ongly discou_ge _e use of an extension co_d,H_ever_ i_you wish
to use alnextension cord, use a CSA certified/UL-iisted 3-wire(g_unding) e_ension cord, i_ted at 15A, 125V,

(PLEASE READ CAREFULL Y)
FOR THE USER3 PERSONAL SAFETY,,THIS
APPLIANCE MUST BE YGROUNDED
The _wer cord of this app#ance is eq_Jippedw_h
three-prong (grounding) p_ug Use this with a stand_d
three-s_,ot(grounding) wall power outlet (Fig 12} to
mi#imizethe h_ard of eleot_c shock The customer
shouid have the wali receptacle and circuit che,ck_ by
a qualified electrician to make sure the receptacie is
properlyground_o
PREFERRED METNO,D
Because of _ten_al safety hazards, we strongly
discourage the use of an adapter plug However, if you
wish to use an adapter° a TEMPORARY
C:ONNECT_ONmay be ma_. Use UU.listed adapter,
available from mo_ local hardware stores (Fig. 13)
The iarge s_otin _e adapter must be aligned with the
large slot in #_ereceptacle to assure a proof po!arity
connection.
CAUTION: Attaching theadapter ground terminal _
the wa#receptacle cover screw does not
ground the applian_ unless the cover
screw is metal, and not insulatedl and the
waltrec_tacte is grou_ed Lhroughthe
house wiring. Thecusto_r st'_uld have
thecircuitcheckedbyaqualified n
to make sure the receptacle _sproperly
Dis_nn_ the power cord from _e adapter using one
hand on each O_e_ise, the adapter ground terminal
might break, DO NOT USEthe appliance with a
broken adapter plug.
existsbetereuse
Fig. i 2
NOT CUT OR REMOVE THE THIRD (GROUND)
PRONG FROM _E POWER PLUG
A. SITUATIONS WHEN THE APPLIANCE WILL BE
DIISCO,NNIECTEDOCCASIONALLY:
B, SITUATIONS WHEN THE APPLIANCE WILL BE
DISCONNECTED OFTEN,
Do not use sq adapter plu9 in #'_esesituations.
Unplugging thiepower cord frequently can lead to sn
eventual breakage of the ground terminal. _e wall
[powerouSetshould _ replaced by a three-slot
,(grounding)outlet instead
TEMPORARYMETED
Adapterplug-_
Receptac_ecover
screw
Fig. 13
USEOF EXTENSION CORDS
Because of _tenf_al safe_ hazards, we strongly
discourage the use of an extension _rd However, if
you wish to use an extension cord, use a CSA
certifie_'UL4ist_ 3_wire(grounding) extension cord,
rated at 15A,,125V

Before calh_ngfor service, please review the following list of common'problems and solutions.
The air ,conditioner is operating normally when:
• You heara pinging noise. This iscaus_ bywater _ing Dcked up by the condenser on rainy days _ in highly
humid conditions. This feature is design_l to,help remove moisture in the _r and improve c_[in,g efficiency.
•You h_r the thermostat dick. This is caused bythe c_pres_r cyc# st_ing and stopping.
°You s_ water ddppi_ from the rear dthe un&, Water may _ co!l!ectedin the _ pan in highly humid
conditior_ or on rainy days, This water ovedl_,ws anddrip_ from the rear of the un_,
•You hear the fan _nning while the c_pres_r is silent, This isa normal operational feature,
The air conditioner may be operating abnormally when:
The air conditioner
d_s not operate
at aft
Air conditioner
does not coot
Ice appears on the
air conditioner.
• Make suret_ p,liugis comp_tel[y plugged into,
the o_let
• Check the fuse!circu_ breaker box _d replace
the fuse or res_ the breaker
• _nthe event of a power f_[ure, set _e p_er
control!to OFF W_n the power is restored,
wait 3 minutes to,resta_ the air cond[itJonerto
prevent the compressor fr_ _ed_ding
•Make sure t_re are r# curtains, b,[in_,
furn_ure or other obstacles in front of t_ air
condi_oner
•Turn the kn_, to ahigher setting The highest
setting provid_ maximum c_ling
• Clieanthe fi_ter_ I_st _ery 2 weeks. Ref_ to
•e°Careand Maintenance"'_n (pl 1)
•emanual.
• After the _r conditio_r isturned _, you need
to give the air conditioner some time to c_l the
room.
• Ch_k for open fumase floor resiste_ and c_d
air returns.
•CLOSE _e air _nd_ion_ vent
• See ice appears o# the air ¢onditioner _[_
• Ice may block the air flow and obstruct the air
conditioner from pro_dy co_ing the room. S_
•efan at MED or HIGH while setting the
thereat at 1 or 2 un_l the ice melts,

Other manuals for LB8000ER
1
This manual suits for next models
1
Table of contents
Languages:
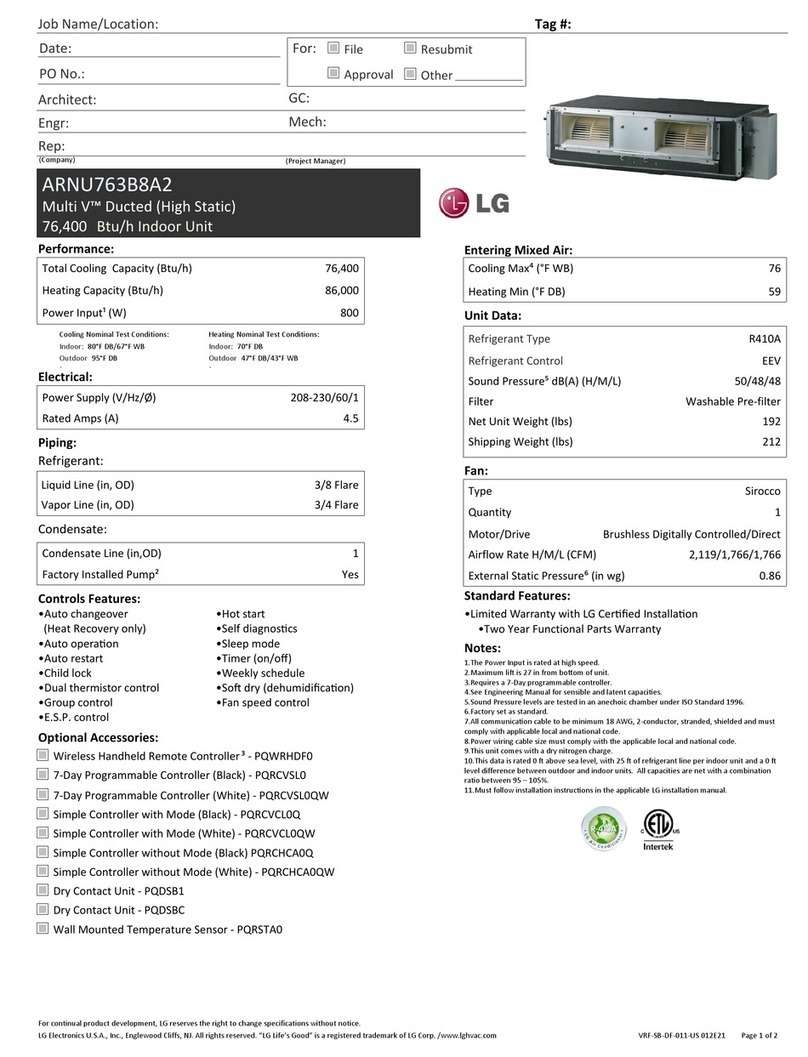
Other LG Air Conditioner manuals
Popular Air Conditioner manuals by other brands

AHRI
AHRI SUPERIOR Series Installation, operation & service manual

AirStage
AirStage ASUA7RLAV installation manual

Carrier
Carrier RAV180 installation instructions

EIC Solutions
EIC Solutions AAC-145A-4XT Series Installation and operation manual

Daikin
Daikin Comfort Flex CLIV Series Installation, operation and maintenance manual

Ocean Breeze
Ocean Breeze OBZ-10ESN owner's manual