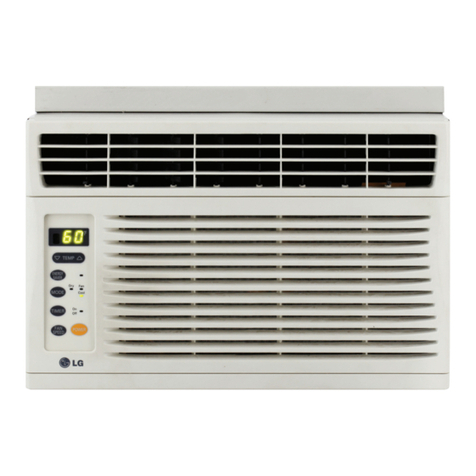
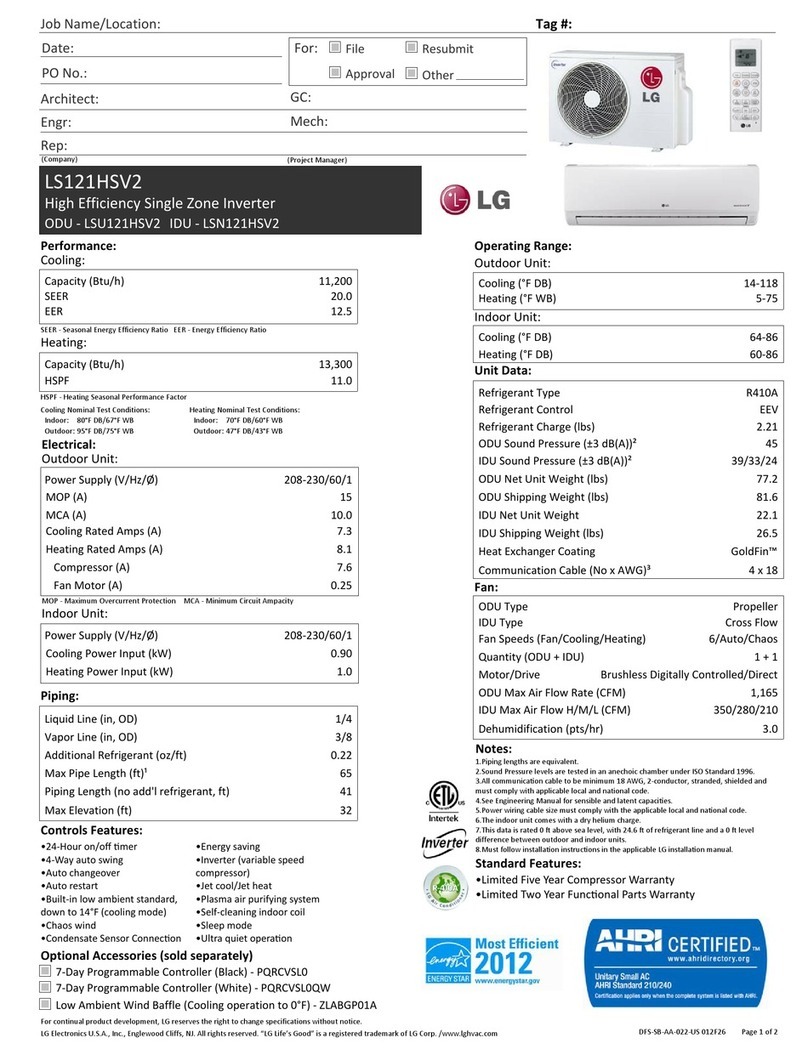
LG LP6000ER User manual

w,_.Igapp_ces.com_
MODELS: LP6OOOER

Your Records
Write the _! and serial numbershere:
Mode! #
Serial #
You can find them on a,label on the,sideof each ulnit,
_ale¢s Name
Date Purcha_d
This Manual
Inside you wiL!find many hetpfui hints on _w _ use
_d mdn_in your air o_nditior_rproperly: Just a little
preventive care on >'our part can save you a great
deal oil time and money over the fife of your air
conditioner,
You'll find many answers to common problems m the
chart of troubleshooti_ tips. ff you review our chart o,f
Troubleshooting _ps firsL you may not n_ to call
for se_ice at all,,
CA UTIO'N
•Contact the authorized' se_ice technicianfor repair
or maintenance of this un#.
,,Contact the installer for installation oil this unit.
•Th.eair ,con,dition'_is not intended for use by young
chi_re,n or inva'fidswithoutsupe_'ision.
• You_ chi_ren should _ su_is_ to,ensure that
theydo notplay with the air _nditioner.

Topreventinjuryandprope_ydamage,followthe_ i_truc_ions,
Incorrectoperationdue to ignoring instructions miglht cause h_m or damage, the _rious_ss, of which is
indicated by the following symbol&
[................................,,,everOo ,li
Always Do This j!i
[] The foHowin9 items are classified bythese symbols,
* Doing so may cause elect_fic
shock or fire,due to heat
generation or e_ectricshock,
• _ing somaycameelectricshockor
firedueto he_ generation
•No grounding may cau_ e/ectdc
shock (See installation Manual)
• Such a unit may pose a dsk of
fire or eie_ic shock a_ident
• _ing so may cause e_ectric
shock or fi#edue to heat
.,_ing so may cause e_ectric
shock,
• _ing so may cause f_ilure of
machine ,orelectric shock,
*Doing_ _y c_ e_ic sh_ o_i_e,.
.ff1hes_l/c_ is_ma_, itrnu__ _e#_
bylhema_r_., _emara_&Jr_'ss_e
_e_ ora_mi_ q_ _s® ino_e
•This could damage your hea_th.
• Failure to install fnese m_y'cause
fire ,orelectric shock accident,
• _ing so may cause fire or
eiectric sh_k • It may cause electric sh_k,,
.,_ing so may cause fire or' • Doing so may lead 'toan

•Operating the air conditioner in the presence of gas
, They are sharp and may cause
.,_3ing so may cause failure or elect_c shock,
J J
oWater may enter the unit and
degrade the insuiation, It a!so
may cause :anelectric sh_k
• Sincethef_ rotate_,_thigh speed
duringo_ration, it may_use
injuryif=activatedwhilecleaning,
•Ope_tion with 'windows open_
may cause we_ing of indoor and
soaking dhousehold furniture
, Doing so may c_se failure of
appliance or accident.
• Thiscould injurethe pet or pl&r_t
•_mproperh_d_ing may cause
electjficshock or damage,
• if the previous air conditioner
damaged _e console, _ere is a
risk ofthe new unit failing
,_he,rw_ethepr_uc__pea_ancemay
bedamag_du,etochan_ed p_u,_
col,0rer_Jatchingof_ _#aceo
• Treating the power cord
c_elessly poses a danger of fire
or e_ectricsh_k
•An oxygen sho_age may
otherwise occur.
• It may cause damage of animus
or veg_ables or loss of prope_y
• Doingso can prolong _e _if,eof
the produ_,
•Operation without filters will
cause failure.
• Itcontains contaminants that
would make you sick

_ ContactaninstallationspecialistforinstaHa_on,
Piugin_e powerplugproperly.
_Do notsharet_esameoutletwitho_erappliances
Donotuseanextensioncord,
Donots4a_'stopoperationbyplugging!unpluggingthe_wercord
Ifcordp/ugisdamaged,replaceonlywithanauthorizedpa_,
Beingex_sedtodirect_#lowforanextendedperiodoftimecouidbehazardoustoyourhealth_ not
exposeoccupants_peR,orplantstodirectairflowforextendedperiodsoftime.
Duetothe_ssibiiityofoxygendeficiency,ventilatetheroomwhenusingtog_herwithstovesorother
hea_ngdevices.
Donotusethisairconditionerfornon-specifiedsp_ialpu_oses(eg.presewn£precisondevices,
food,pets,Ipl_ts,and_: obiects),Usagein,suchamanner_ui,dharmsuchproperty,
Donot:touchthemetalpartsoftheun_whenremovingthefilter°Injuriescanoccurwhenhandlingsharp
metaledges
DonotusewatertocleaninsidetheairconditionerExposuretowatercandestroytheinsu_a_on,leading
topossibleelectricsh_k
Whencieaningtheunit,fir_makesurethatthepowerandbreakeraretum_off,Thefanrot_esata
ve_highspeedduringoper_ionThereisapossibili_ofiniuryiftheun_'spowerisaccidentally
triggeredonwhilec_eaninginnerIpa_softheunit,
For repair and maintenance, contact your authoriz_ sewice dealer..

The remote control and contro/ _l wilt took like those repm_t_ in the following pictures.
POWER
. To _Jrn_e air conditioner ON, push this button,
To turn the air conditioner OFF, push _e bu_on
• This button takes priority over any ,o_er button
• When you first #Jrnit on, _e unit is in cool mode,
high fan speed, temperat_Jreset_ng at 72_F
TEMPERATURE S_IING
•Use _is button to automatica!_lycontro! the
temperature of _e room,
Thetemperature can be set within a range of
60_ to 86_ by increments of 1_,
MODE
- Every time you push _is bu'_on,,itwill cycle
_rough _e b!lowin 9 modes: COOL, ENERGY
SAVER, FAN and DRY,
°ENERGY SAVER
* The fan stops whenthe _mpressor stops
cooli% Approximately ,eve_ 3 minutes:_e fan
wiil #Jrnon and the un_ wilicheck _e room airto
determir_eif coo_ingis needed
FAN SPEED
,,Eve_ time you push _hisbu_on_it advances the
setting as follows: {High(F3) Low(F1}
Ned(F2} High(F3)}
TIMER
-SHUT-OFF TIME
.iYou wiil usually use shutoff time whiie you
'i With un_ running, use Timerto set number of
hours until shutoff
. Foryour sleeping _mfoR, once Time is set, the
Tempera_Jrese_ng will raise 2_ after 30 rain,
and 2_ after'an¢_er 30 rain,
.i Eve_ time you push Timer b_on, it _dvances
_e Timer se_ing as bilows: 1 Hour......2 Hours _-.
etc, _ 12 Hours maximum,
- START TIME
, With unit not running, use timer to set number of
hours before unit sta_s
• Every time you push T_merb_on, it advances
t_e Timer setting as bllows: i Hour_ 2 Hours _
etc _. 12 Hours maximum,
REMOTE CONTROL SENSOR

Pushoutthe coveron theback of1:heremoteGgntrolwith yourlhumb,
Pay attentior_to poladty and insed:two rsewAAA 1,SVbatl:erieso
Reat_ch the cover,
NOTE: Do not use rec#_rge_le batteries, M_e sure that both bakeries are new.
*ff_order toprevent e, remove the baffef_es from the remote _ntrd ff the
aft _nditioner Jsnot 9dr_g to be us_ for _exte_ period of t_me
K_p the remote control away from extteme_ hot or humM #_ceso
To mainta)n _timal o_ration of the remote _;mtrof, t,hererr_ote ser}_r s_uld not
be ez_sed to direr sun#2hL
.The re_te contrd can be mount_ on ,awaif using the mountabb ho_er,

Airflow can be adiusted by changing the direction of the air conditioneCs louvers, This can also increase the
cooling efficiency of _e air _nditioner,
Adjusting H,o,rizonta_Air F!ow Dir_tion
Adjusting the ve_cal louvers left and _ght will
change horizontal _rflow,
Adjusting Vertical Air Flow Oir_tion
Adiustn 9 the hodzont_ vane up and dowL_wili
change ve_ica_airflow, The v_qe can be adjusted
by nudging _e vane backward or forw_do
Adjusting horizonta! air flow Adjusling vertical air flow
•R_ornmendi_ orientation of louvers
Adjust louvers to face upwards when _ling to maximize cool,in9 efficiency,

Turnthepower offand u_iug t_ power plug _fom ci_af_lRg _e air conditioner;
The Air Fiiter wiilbecome di_ _ ff removes dust from the inside air, It should be washedat least every 2 weeks,
If the Air Filter remains full of dust, the air flow will decrease and the cooling capacity will be reduce, _ssibly
damaging Me unit,
How to remove the,air filter
Pul_the iniet grille forward, grasping bothtabs, Men
pull out Me air filter,
Wash the Air Filter under the faucet with ws_ water
Besure to shake off a_lMe water before replacing the
filter,
NOTE : In,humid weather, excess water may cause the
BASE PANto overflow arid be splashed on Me iouver.

z_ CAUTION
This appliance should be inst_led in accordance with na_onal wi_ng regula_ons _e, follo_ng
information sewes ads _ a guide to help to ,explainproduct features,

Topreventvibrationandnoise,makesuretheun_
i ii_ x
is instal/_ securely and firmly.
Installthe unit where the sunligN does not shine
directly on the unit
The outside of the cabinet must extend o_ard
and there should be no obstacles, such as a fence
or wali, wi_in 20" from the backof Me cabm_
b_ause _ will prevent heat radiation of the
condenser.
Restriction of outside air will greasy reduce the
coo_ingefficiency of the air conditioner.
Heat
radiation
Se_c@
%
I
I
%,
CAUT_ONi,: All side iouve_ of t_ cabi_t must reJmaln ,expo$_ to_e o_s_e of the strum
Instalithe unit a li_e sl_ted so the back is slig_ly lower tha/nthe front {about:1/4"}.
This wili force condensed water to flow to the outside
Installthe unit wi_ the bottom about 30"_60'' above 'thefloor I,evel.
NOTE: All suppofli_ parts should _, secured tofirm wood, mason,O/,o,rmetal.
• This unit s design_ for installation in standard double
hung windows with actuai opening widths from 26'_
to 39 fs,
. The top and bosom window sash mu_ open sufficientiy
to allow a clear veRical opening of 12" from the bosom
of _e upper sash to the window stool. I2"(305mm)min,
Innersil!!
interior wall
Sash
Window
Offset
Sill
Exterior

iTEM NAME OF PARTS Qi'Ty
A SUPPORT, BRACKET !
B LEVEUNG BOLT 1
'C LEVEUNG BOLT 1
D SCREW: 5/8" 2
E SCREW: 5/8" 5
F FOAM SEAL 1
G FOAM STRIP 1
H L BRACKET 1
SCREWDRIVER(Philli_ and Rathead), RULER, KNIFE, HAMMER, PENCIL: LEVEL ]I
To avoid the _ssibility of persona! inju_, unplug
power to unit [beforeinst_ling or se_icingi
Carefully remove _r conditioner from carton, check
for possible shipping damage Pick a location which
will albw you to biow the cold air into the area you
w_nt. Windows used for install_ion must be strong
enough to sup_rt the weight ofthe air conditioner
Go_ installation with speci_ attention to _e proper
_siton of _e unit will lessen the chance that sewice
will be needed.
When coo_ingmore than one room, install_ion
location is very important. To cool your rooms, _d air
mustbe blown from the air _ndi_oner in a straight
path
If air conditioner is blocked by a storm window frame,
see Step'7and 8 on Page 14 before beginning to
insta&
How to,Instal
Cut the FOAM STRIP (_TEM G) to fit the
underside of'thewindow sash Open the window, peel
off the backing and a_ach _e FOAM STR_Pas shown
in FIG, 1
(ITB,_ G}
FIG, 1
M_k center line with penci_on _e center dthe
inner sill, as shown in FIG, 2,
_ND_R_"
CENTER LINE INNER S_LL FIG, 2

Installsupport bracket on window, See FiG. 3,
Install_evelingbo_tup through _ttom side of support
bracket, You c&nchoose a short bolt (_TEMC} or a
bng one (_TEMB} according to window type, Also,
you should select he position of hole on bracket,
Posi_on bracket on sill I inch (25.4mm) to left of
center !ine of win®w (See FIG,3}
Fasten bracket iooseiy to siliwith screws (ITEM D)
Adjust leve_ingbolt so hat the air condiSonerwill be
installed w_h a veT slight _l't,{about1/4") downwald
toward _e outside for proper drainage. Tighten
bracket screws,
SIL,L
FIG. 3
_iREW SUPPORT
iNNERS_LL | BRACKET ABOUT 1,4°
/;t- f ........
FIG.4
Faiiure to securely instali support bracket may
result in unit failing from win_w ifwindow sash is
raised after unit is installed This could result in
personal injury',
INSTALL THE AIR CONDITIONER IN
THE WIN DOW
•Carefully lift the air cond_ioner and slide it into_e
open window Be c_efui not:to hurt:waist:in this
• Use fhe _o hand grips on top sides of unit to lift
unit.
, Make surethat suppo_ bracket is inse_ed in the
Ip_ke't underbase fan, and _at curtain frame guide
is stopped by stopper on the support bracket as
shown in FIG6.
NOTE: When unit is properly centered and pushed
ou_ard to correct bracket _ocation,you will feel _Jnit
drop se;ure!y in p_aceon the support bracket. Ho!d
unit firmly during _is procedure,.
, Lower top window sash all the way down sothat
sash sits fi_ly in top channel of unit and
expandaNe curtain frames
During the b!iowing step, hold unit firmiy unti!
'windowsash is lowered to top channe_behind
cu_ain frames Personal iniu_ or property damage
may result if unit falls from win_w
RGi, 5
T_ _4N_EL ...............
_JRTAN
14ANOGRIIP
__i;i _¸ i_
:::::::::::::::::::::::::::::::::::::::::::::
SU_R_
_K_'T
RG, 6

SECURE THE CURTAIN FRAMES
Expandthe cu_ain frames and secure _em using5
screws (iTEM E) as sho_ in FIG 7,
When cu_ain frame opens or closes, you may feel a
sliglN resistance, This is norma_
FOAM SEAL AND WINDOW LOCK
• Cutthe foamseai (ITEM F}to the windowwid_o
Stuff the foam seal be_een the glass and _e
window b prevent air and insects from geeing into
the room, as shown in F_G,,7,
.,Inst_l _e L bracket # prevent window from being
raised which may result:in unitfa_ling,
IF AIR CONDITIONER IS BLOCKED
BY STORM WINDOW FRAME
•ff storm window presents intefferencm fasten a
2"(51ram} wide _od stripto the inner window sill
across _e _J!!wi_h of the si!! _e woodstrip shou!d
be thick enough to raise _e height of the window sil_
so that unit can be instai_edwithout interference
from the the storm window frame See FIG, 8
Top of wood strip should be approximately
3/4"(19ram) higher than the _orm window frame to
he_pcondensation to drain propedy to the o_side,
•Install a second woodstrip (approximately
6"'{152ram)long by 11/2"(38mm) wide andsame
thickness as first st_.ip)in the center of the outer sill
flush against _e back of the inner sill (FIG 8}
II_M
FIG. 7
ilZ'mi_.
W_O Sm!P MOUNTED
Or T OF!!!! ERSILL-'- r-
.............LY.................................
_...........................................STORM
,NNE41
SILL /:
/:; :::FOR:SUP£ORT:::: !
[ SlLIo
W_n storm window
frame is i;ocated on ouier siii[
FIG. 8
Failure to securely install suppo_ bracket may
result in unitf_ling from window ifwindow sash is
raised a_er unit is insta/ied, This _uid result in
persona_iniu_,
NOTE: Ifwindow sash has a metal surface use sheet
metal screws inslead of the provided wood screws
Obtainslheet rect!! acres at local hardware store,
INSTALLATION FOR OTHER TYPE
•Dimensions_d geomet_ ofwindowsaredifferent
ac_rding to manufacturers, Check your windowand
refer to FIG,9to instail the suppo_ bracket firmly,

(a} When window frame is _a_ed on inner sill.
• I_s,tal_a weed s_rip(windowwi_h long _d
windowframe h_ght high)on 1theinnersill
SASH WINDOW --_
W!NDOW FRAME
WOOD S] R_IP_,_o_ ................................................-"
INNER _
SILL,
;;,: :: =
(b) When the win,dew frame is higher than
19/32"{15mm)
theoutdoo_silltoraisesup_rt brack_
INNER
SIL_
OUTER
SILL RG, 9
REMOVAL FROM WINDOW
*Turn off and unplug the air _ndi_oner
.Unscrew the side screws _at you inst_led in Step 5,
6
* ,Cbsethe cu_ain fr_e and remove foam se_ and L
bracket from the windows,
. Keep a firm grip on _e air ss you the sash,
. Lift the air conditioner from the window and remove,
_e barn sthp _m ibe_een _e windows.
Remove the suPlPO_bracket from window frame,
NOTE: When c_/ing season is over, unit is removed
from win_w br c_e_qin9and stooge, There may still
be some condensation water in the basepa,n,Remove
the unit carefully to avoidw_er being spilled out on
floor, Aiways store unitflat on its base. Do not stand it
on its end Be sure to remove suppor_b_cket, L
bracket, and fo_m sea_from window _qd save
Window wili not close if supper bracket remains
ins_lled
•Air conditioners covered in this manual pose
excessive weighthazard, Twoor more people are
ne_ed to move and inst_l the unit,
To preve_ iniury or strain, use ppoperlifting _qd
car_ing techniques when moving unit
• When handling the air conditioner, be carefui to
avoid cuts from sharp metal fins on front and rear
coils
Make sure _r conditioner does not fall dudng
removal,

OBSERVE ALLLOCALCODESAND ORDINANCES.
DO NOT, UNDER ANY CIRCUMSTANCe, REMOVE THE POWER SUPPLY CORD GROUND PRONG.
ELECTRICAL GROUND IS REQUIRED ON THIS APPLIANCE..
A 115-volt 60 Hz, AC only, 15A fused and properly grounded electrical supply is required. A time
delay fuse or time delay circuit breaker is recommended. Use a dedicated circuit, serving only this
appliance.
DO NOT USE AN EXTENSION CORD.
RECOMMENDED GROUNDING METHOD
For your personal safety, this appliance must be grounded. This appliance has a power supply
cord with a 3-prong grounding plug, To minimize possible shock hazard, the cord must: be plugged
into a mating grounding type wall receptacle and grounded in accordance with the National
Electrical Code (ANSI!NFPA 70) latest edition and all local codes and ordinances. If a mating wall
receptacle is not available, it is the personal responsibility and obligation of the customer to have
a properly grounded 3oprong wall re_ptacle installed by a qualified electrician.
115V~ 230W Powercord mayinclu,dea current interrupter
device.A testand re_t buttonis providodon tt-_
p_ugcasesThedevice shouldbe testedon a
_riodic _s. by first pressingthe TEST button
andthen the RESETbutton, ffthe TEST button
doesnottrip or iftb_ RESETbuttonwill not stay
engaged,discontinueuseof the air conditionerand
con_ct a qualifiedservicetechnician.
NOTE: T_ sha_ may be differentaccordingto its m_el.
Use Wall Receptacle Power Supply
Standard125V,
3-wiregrounding
receptaclerated
15A,125V AC
S_ndard 250V,
3-wire grounding
receptacle rated
15A, 250V AC
Standard 250V,
3-wire grounding
receptacle raled
20A, 250V AC
Use 15 AMP. time
deiay fuse or 15 AMP
circuit breaker.
Use 20 AMP, time
de_ayfuse or 20 AMP
circuit breaker,
Electrical Shock Hazard
Plug into a grounded 3 prong outlet.
Do not remove ground prong.
Do not use an adapter.
Do not use an extension cord.
Failure to follow these instructions can result
in death, fire, or electrical shock,

(PLEASE READ CAREFULL Y)
FOR THE USER'S PERSONAL SAFETY, THIS
APPLIANCE MUST iBEPROPERLY GROUNDED
The _wer cord of this _p_iance is equipped with a
three-prong (grounding} plug. Use this wi_ a st_dard
three°siot (grounding} wa_ipower outlet:(FIG.,10}to
minimize the hazard of electric shock, The customer
should have the wall r_eptacle and circuit check_ by
a qualified e_ectricianto make sure the r',eceptac_eis
properly ground_,
PREFERRED M_HOD
Because of _tential safe_ hazards, we strongly
discourage the use of an adapter plfug.However, if you
wish to use an adorer, a TEMPORARY
CONNECTION may be made. Use ULqisted adapter,
available from most Ioca_hardware stores ,(FIG.11).
The iarge siot in the adapter must be aligned w_th_e
_arges_otin _e receptacle to assure a proper polarity
connection.
CAUTION: Attaching theadapter ground tem_inalto
the wa#receptacle _ver screw does not
ground the appfia_ uniess thecover
screw is metal, and not insulated, and the
wall recep_cfe is grounded through the
hou_ winng, Thecustomer sho,u_ have
the circuit checked _¢ a quafified n
tomake sure _e ret'_ptac_ is properly
Disoonn_t the power cord from _e adapter, using one
hand on each. Otherwise, the adapter ground terminal
might break..DO NOT USEthe appliance wi_ a
broken ad_ter plug,
exiss _fere use
FIG. 10
NOT CUTORiREMOVE THE THIRD (GROUND)
PRO_ FROM THE _WER PLY.
AoSITUATIONS WHEN THE APPLIANCE WILL BE
DISCONNECTED OCCASIONALLY:
B, SITUATIONS WHEN THE APPLIANCE WILL BE
DISCONNECTED OFEN,
Do not use _'_adapter p_ugin _ese situations.
Unplugging the power _rd frequently can !,eadto an
eventual breakage of the ground termin_. The wa_l
power ou_et should be replaced by a three-s_ot
(grounding) outlet instead
Me_alscrew
USE OF EXTENSION CORDS
Because of _ten_al safety hazards, we s_ngly
discourage the use of an extension _rd. However, if
you wish to use an extension cord use a CSA
ce_fied/UL4ist_ 3owire,(grounding)extension cord,
rated at 15A, 125V,
Receptacle cover
FIG. 11

Before calling .forserv_e, please review the following list o.fcommon problems and solutions.
Theair condttlo_r is operating normally w_n:
,'"Youhear a pinging noise_ This is caused by water being pick_ up by_e _ndenser on rainy day'sor in highly
humidconditions,,Ths feature is designed to help remove moi_ure in the air and improve _oling efficiency,,
,,You hear the thermostat c)ick, This iscaus_ bythe compressor cycle sta_ng and stopping.
. You see water ddpping from the rear of 'the unit, Water may be _llFected inthe base pan in higNy humid
conditions or on rainy days, This water ove_ows and drips from the rear of the unit,
,,You hear the f_ running whilethe compressor issilent or fan mode, This is a normal operationa) feature,
The air co_,l_ may be op_ting abnonnal_ when:
[] The air _ditio_ is Makesure theair conditio_r plug
p_ complet_ into the o_t.
_t
_nd_er
_ not
start
[]_ fuseis b_owrJci_it
[] _r _ilure,.
Check the _use fus_/d_ff
breaker _ and re_a_ _e fiJ_
or reset _ b_a!_t,
If power failure _J_, rum t;%
m_e _) to _ ( M_hani_l
Ty_).
Air
cond_-ler
not
c_! as
s_JM
Air
_ndit_er
freezing up
[] The _rtent )_ I_r _e ztrip_ng _ _ _re_
Press_e REa._ burn located
the power
_ug. if the RESET burn _ll not
[] ict .
die, hue use of _ ,air
,_dit_ner and _nt_. aq_al_
_ techn_ian,
Make sure thereare no cu_ns,
blinds, er _mi_m blo_i_ the
front of the air condt_er.
[]_e th_m_at m_ _ Turn the knob _ ahig_ num_
The highesi setting _ides.
m_imum cooling..
C!_n the fi!_lr a_lea_ _ 2
wee_.
thee _ and Mainte_en_
s_o_.
[]The _ may havebeen _en the air _i_ner isfirst
tur_ on, you ine_ _. _ll_ time
_r _e r_ to _ down.
[]_[d air is_ping. Check _r open fu!mace floo,r
mgis$_ a_ _ld air _ms.
[] =i=s have i_ up, See Air Condi_nor Freezi_ Up
below.
[]I_ b)_ _e air ) and Set th_ mode _nt_tol at High Fan
or H_h Cool with thermostat at 1
or 2.
Y_ ,_ refer_the Er_ S_ _, in _il a_,wv#w,e_rgys_.gov.


Other manuals for LP6000ER
3
Table of contents
Languages:
Other LG Air Conditioner manuals

LG
LG AS-W1865SH0(S18AWN) User manual

LG
LG LP-E5020CL User manual

LG
LG WK Series User manual

LG
LG ATNQ54GMLE5 User manual

LG
LG Multi Type Air Conditioner User manual

LG
LG LSN120HSV4 User manual

LG
LG AMNH05GD4L0 User manual

LG
LG A8UW54GFA0 User manual

LG
LG I38TKF User manual

LG
LG LAU090HYV Installation and operation manual