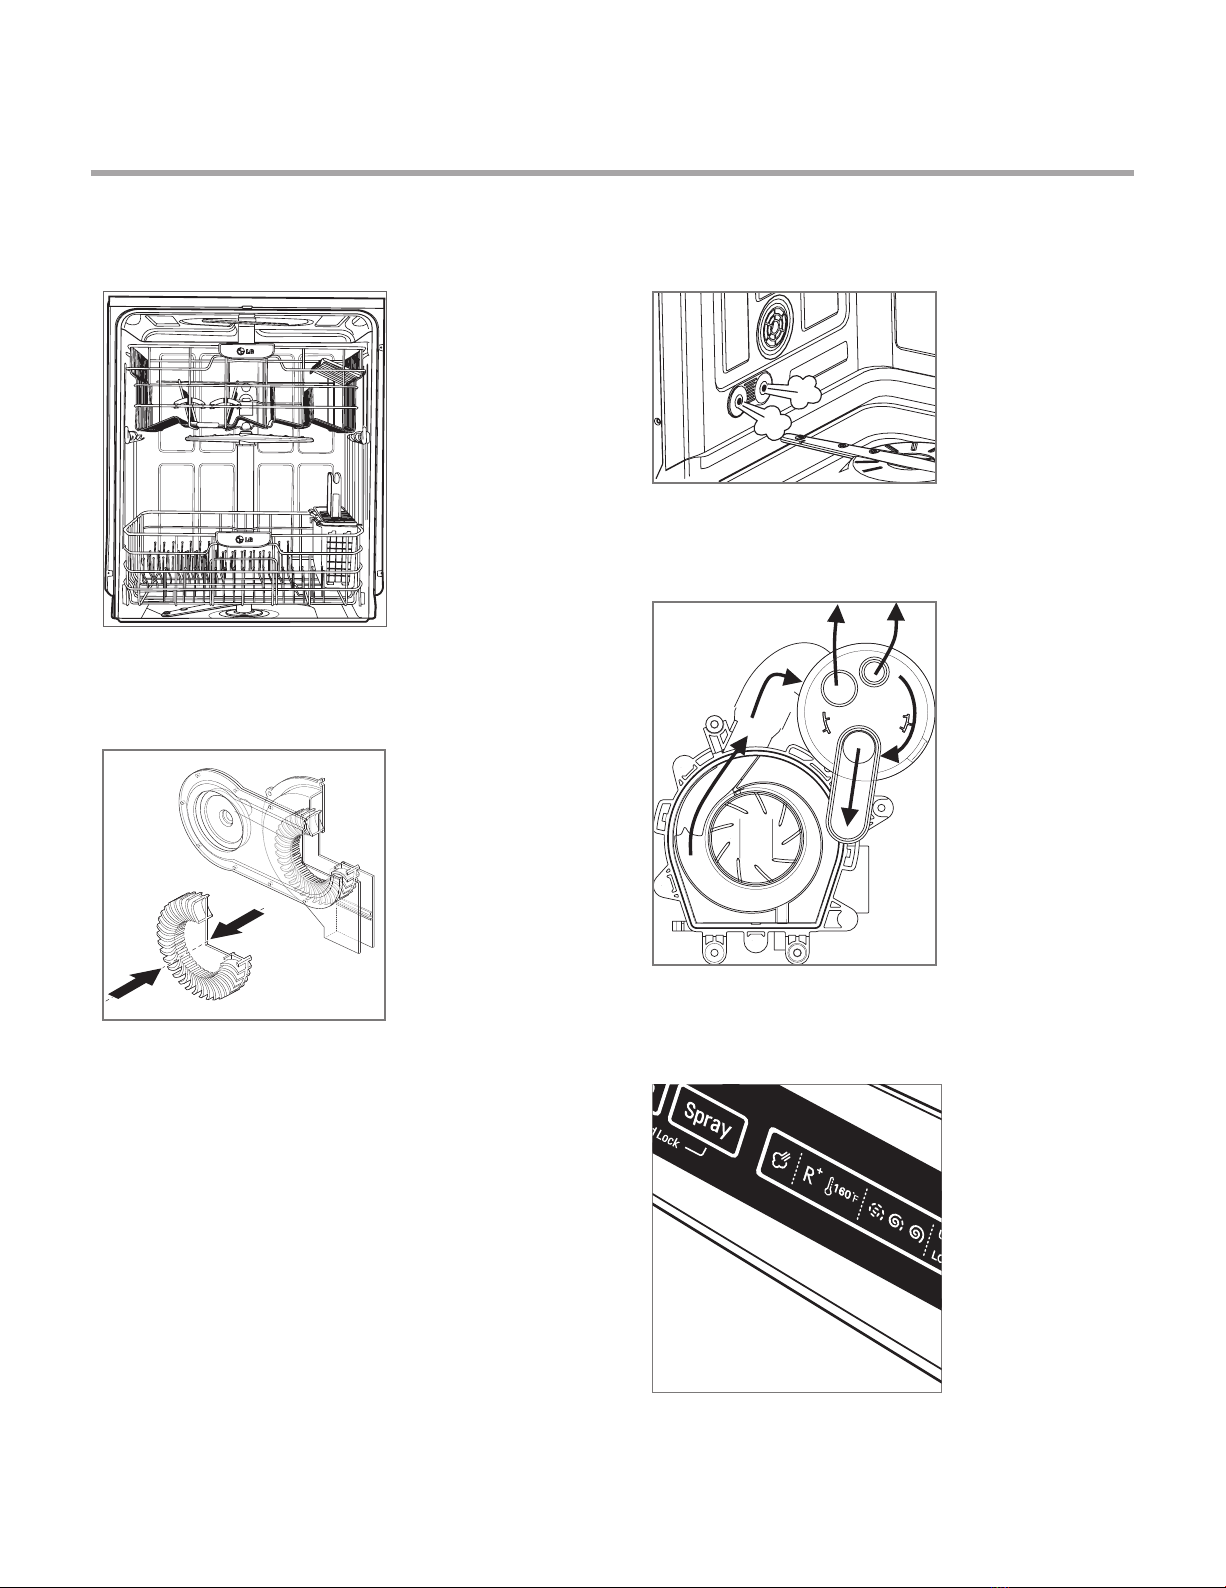
For Authorized Service TechnicianFor Authorized Service Technician
- 7 -
3. FEATURES & TECHNICAL EXPLANATION
LDF8874 / LDF8764
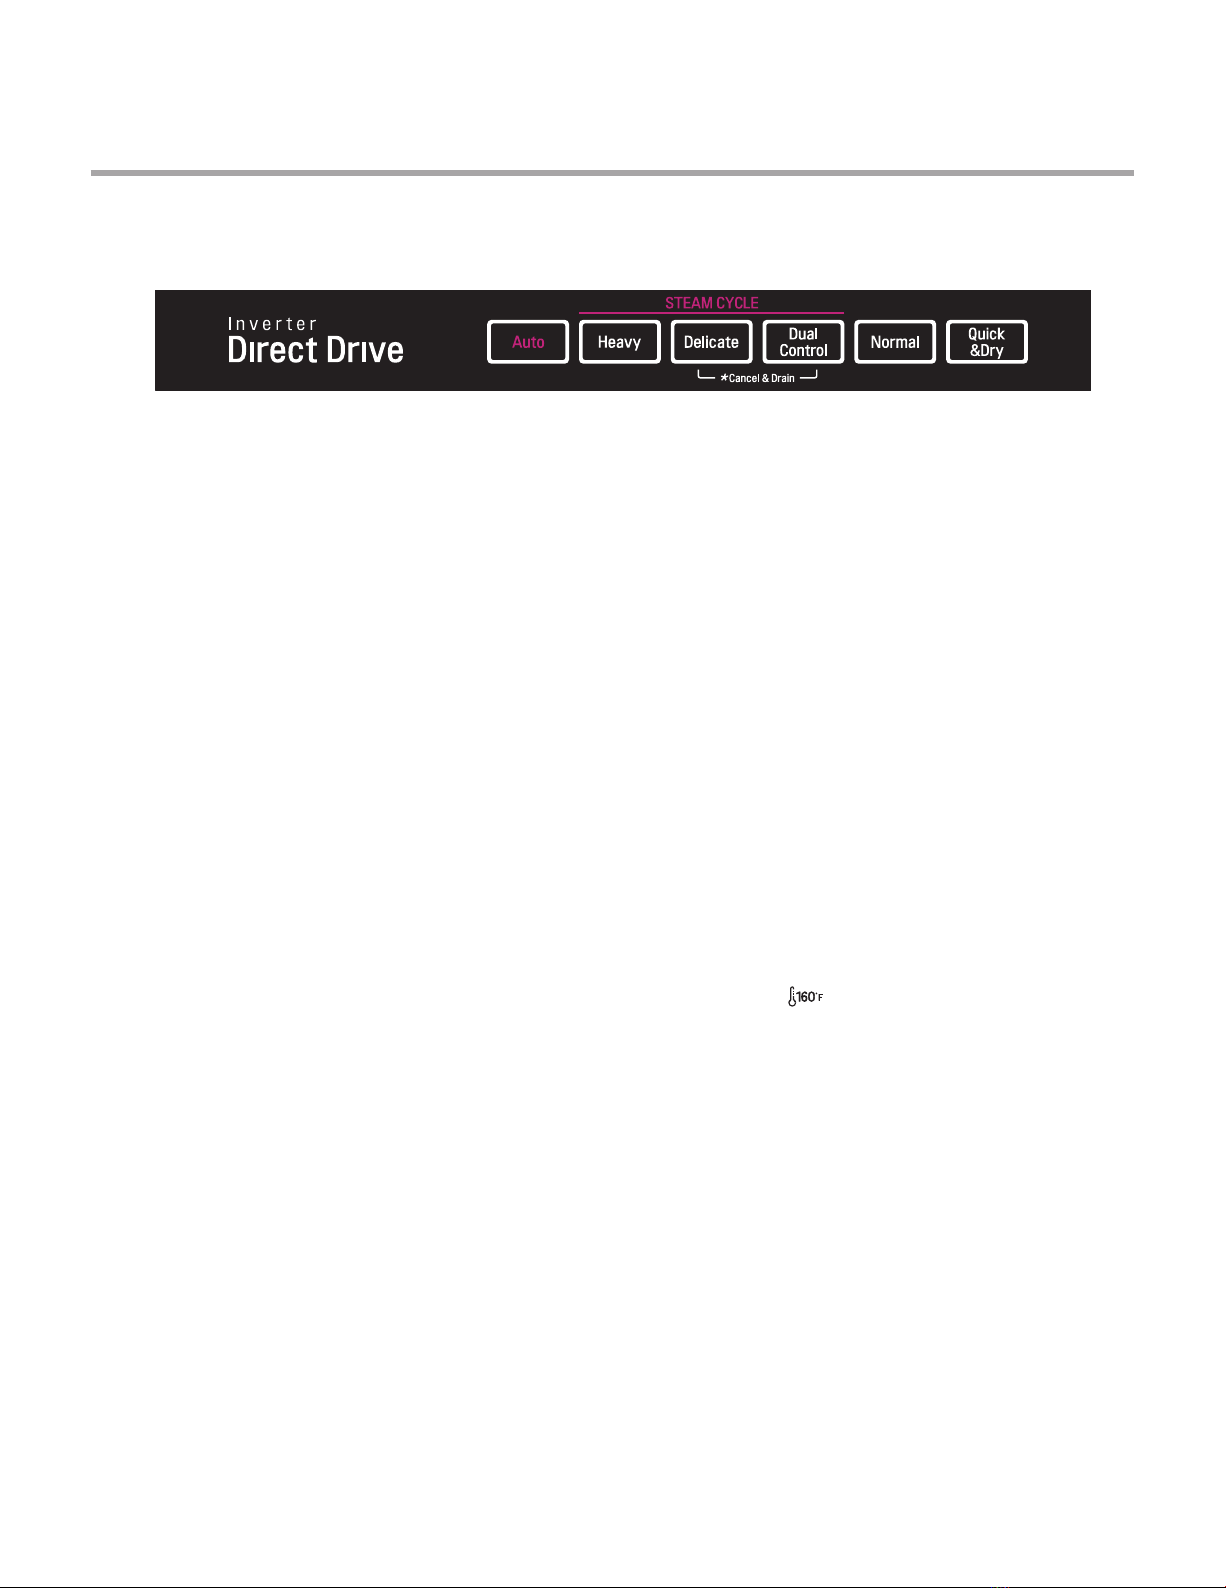
3-2. Display Panel
CONTROL PANEL (steam models)
Cycles
Select your desired cycle.
Auto
This cycle senses the load size, soil amount and soil tough-
ness. This cycle is optimized to achieve the best cleaning.
Heavy
This cycle is for heavily and hard soiled dishes. Heavy defaults
to the highest spray intensity and uses the power of steam to
wash heavily soiled dishes.
Delicate
This cycle adds the gentle power of steam to boost the clean-
ing power of the delicate cycle. The cycle is intended for ef-
fectively cleaning delicate items such as ne china and stem-
ware.
Dual Control
This cycle washes the upper and lower racks at dierent spray
intensities. The default setting for this cycle washes the low-
er rack with strong spray intensity and the upper rack with
soft spray intensity. This provides optimum cleaning perfor-
mance for mixed loads, including ne china and stemware. If
other combinations are desired, use the steps listed below to
change the intensities or to use the Half Load feature.
How To Use Dual Control:
1. Select Dual Control.
2. Press the Spray button to toggle between Soft, Medium
and Strong for the upper spray arm.
3. After making your selection for the upper spray arm, press
the Half Load button.
4. Press the Spray button to toggle between Soft, Medium
and Strong for the lower spray arm.
5. Close the door to start the cycle.
Normal
This cycle is for normally soiled, everyday loads.
Quick & Dry
This is a shortened cycle that is intended for washing and dry-
ing recently used dishes or lightly soiled loads. During this
cycle, both spray arms will run at the same time.
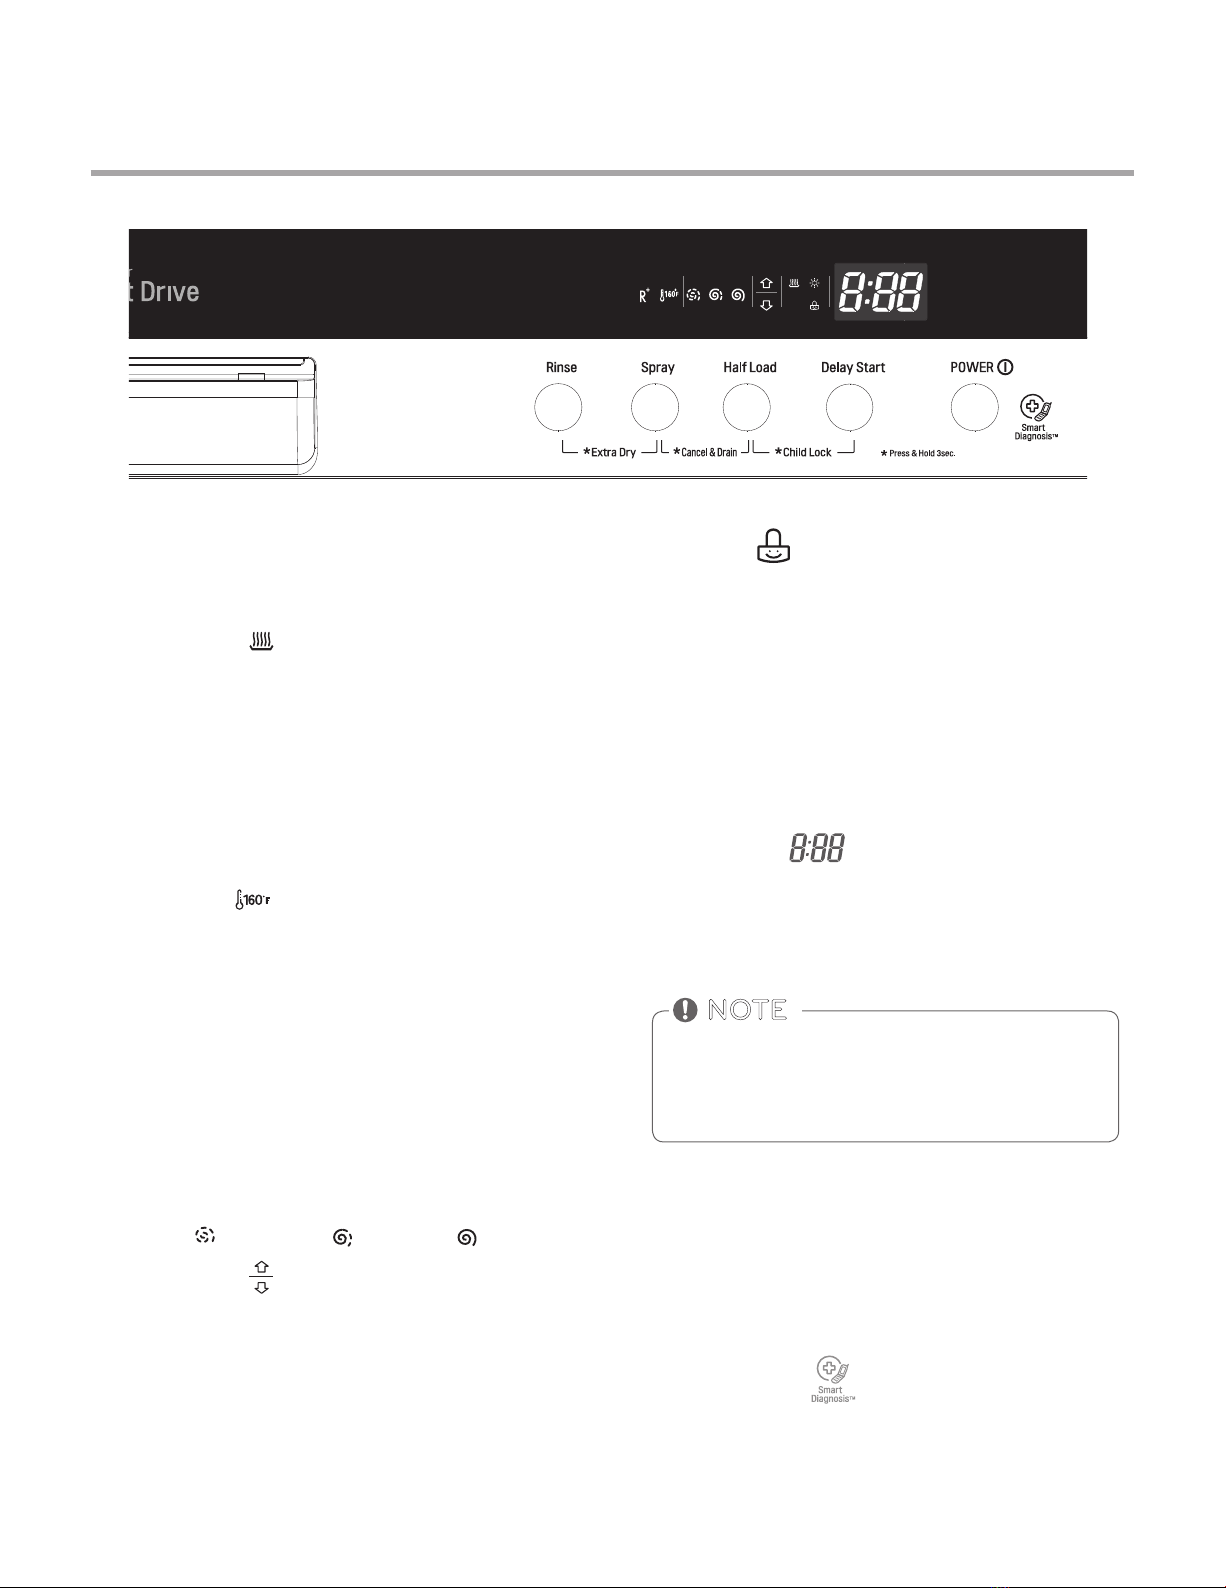
CHIME ON/OFF
To enable or disable the chime, rst, turn on the dishwasher.
Press and hold the Delicate and Quick&Dry Buttons simulta-
neously for approximately three seconds.
TO CANCEL A CYCLE
To cancel a cycle, open the door and then press and hold the
Delicate and Dual Control Buttons together for approximate-
ly three seconds. The drain pump will activate and the cycle
will cancel. The display will show “dr” and the dishwasher will
drain the water. After the dishwasher is drained, the power
will turn o.
If the power is turned on and no cycle has been selected, the
dishwasher will power o within four minutes.
Cycle Options
(Refer to the control panel on the next page)
Press the desired cycle and then select the options for that
cycle.
Extra Dry
Select the Extra Dry option for better drying performance.
This option adds 60 minutes of extra drying time to the cycle.
The Extra Dry button will illuminate when the option has
been selected.
Rinse
Repeated pressing of the Rinse button will select the desired
Rinse option. The Sanitary, Extra Rinse, or Sanitary and Extra
Rinse lights will show in the bottom left portion of the dis-
play.
Sanitary ( )
This high-temperature rinse sanitizes dishes and glassware in
accordance with NSF/ANSI Standard 184 for residential dish-
washers. Certied dishwashers are not intended for licensed
food establishments.
Extra Rinse ( R+ )
The Extra Rinse symbol indicates that an extra rinse has been
added to the cycle. An extra rinse can help reduce hard water
spotting on dishes. To add an extra rinse, press the Rinse but-
ton repeatedly until the Extra Rinse symbol appears in the
display.
Rinse Only (LDF****)
This cycle is a quick rinse for dishes that will not be washed
immediately. This cycle will rinse dishes that have excess soil
to soften dried on residue. Rinsing the dishes will help pre-
vent odors in the dishwasher. No detergent should be used.
To select the Rinse Only cycle, turn the dishwasher on, and
press the Rinse button once without pressing any other cycle
buttons. The Rinse Only cycle is not available with any other
cycles.
<ZI][M:MNZM[P;\MIUၦხཅ૬ᅰ
<ZI][M:MNZM[P6WV[\MIUၦხཅ૬ᅰ
Steam Models (LDF8874, LDF8764)