7
INSTALLATION
INSTRUCTION
6
INSTALLATION
INSTRUCTION
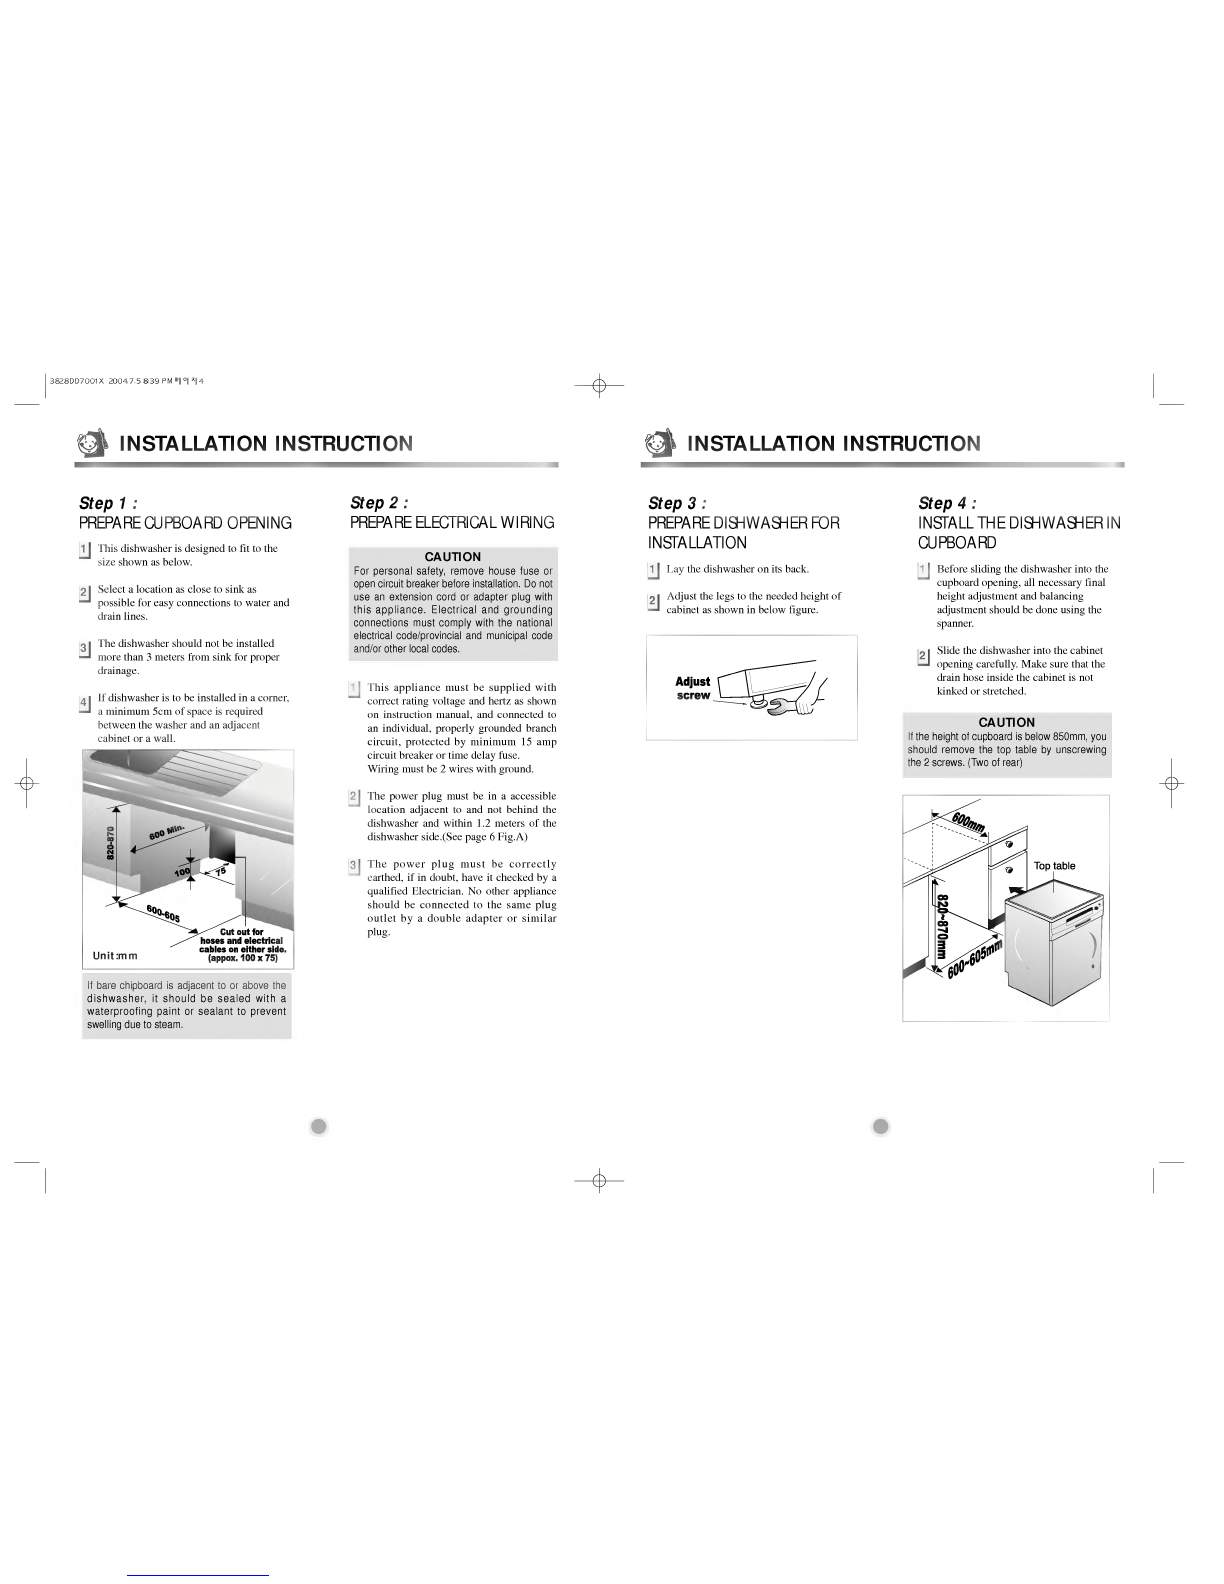
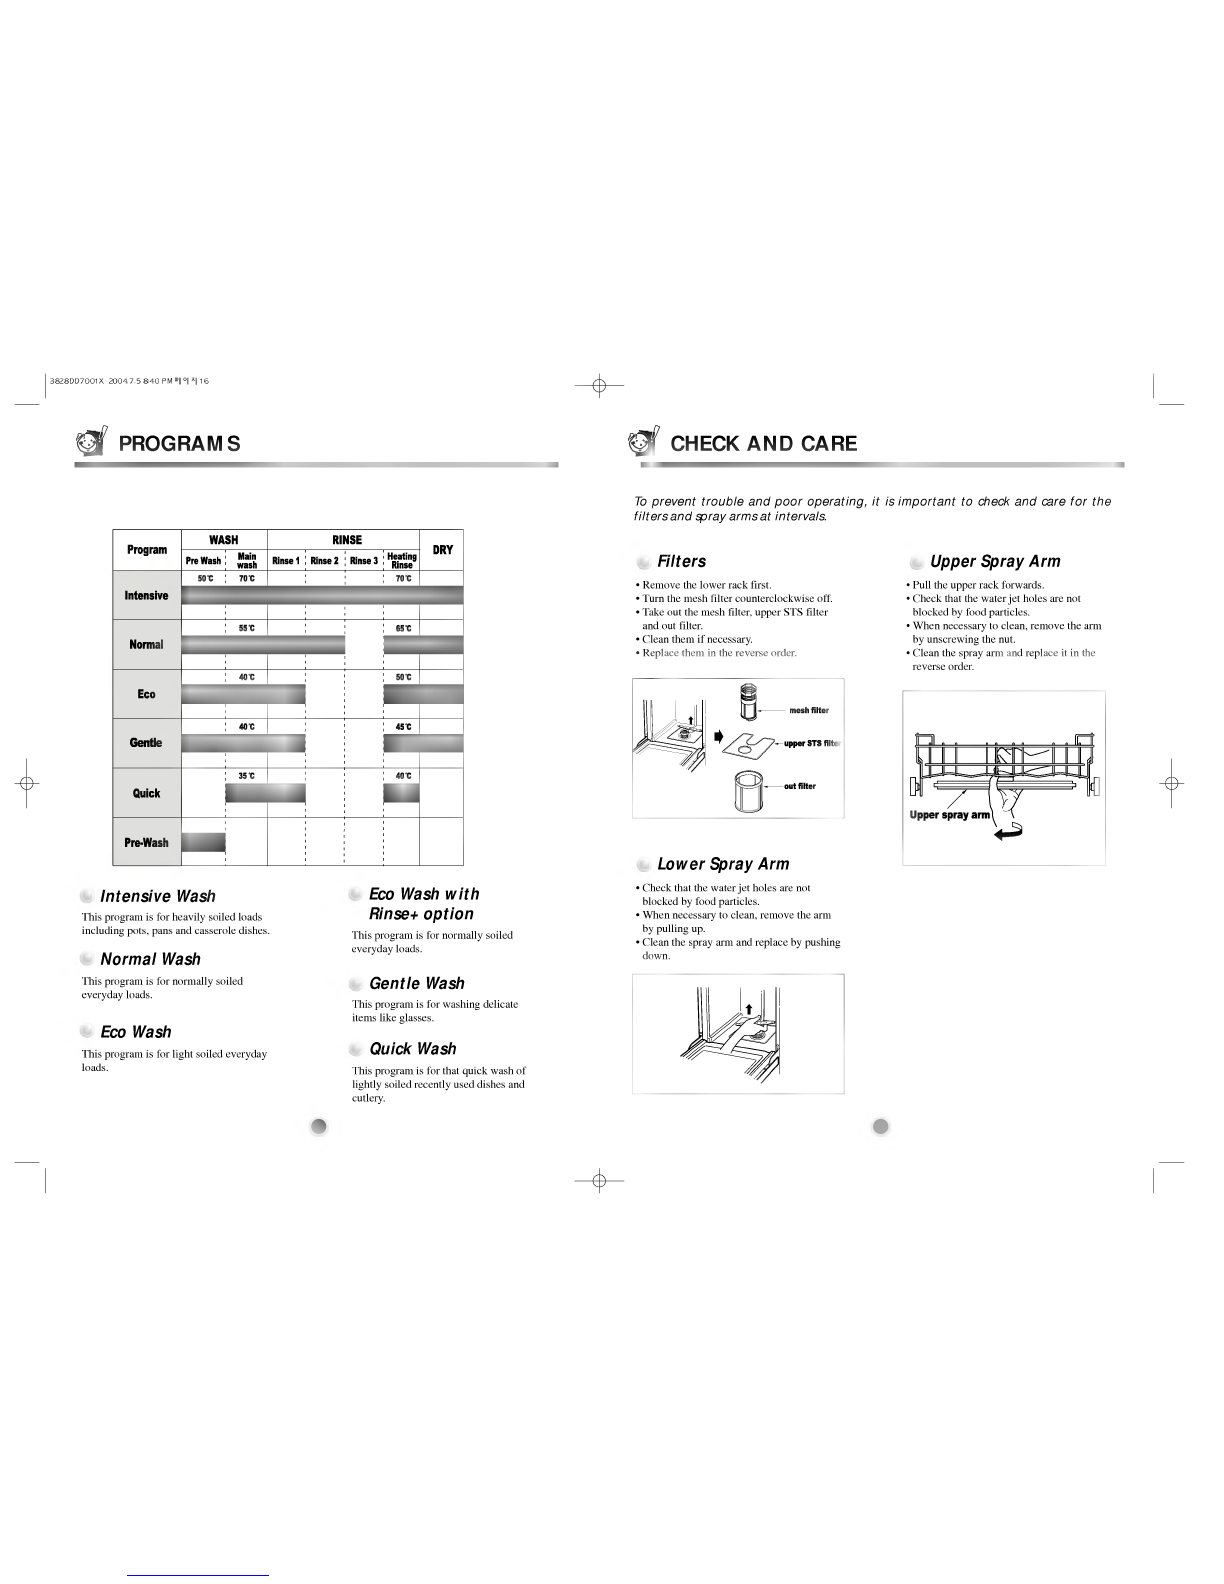
Step5:
DRAIN
LINE
CONNECTION
1
2
If
the
end
of
drain
hose
does
not
fit
to
the
drain
line,
use
a
piece
of
rubber
connector(not
supplied)
that
must
be
resistant
to
heat
and
detergent
and
may
be
obtained
from
a
plumbing
shop.
There
are
2
typical
connections
as
shown
in
Figure
A,
B.
The
"S"
trap
spigot
must
be
drilled
out
cleanly
and
free
of
obstruction
to
its
maximum
internal
diameter,
if
used
for
drainage.
To
prevent
siphoning,
one
of
the
following
instruction
methods
must
be
followed:
When
the
drain
hose
is
connected
to
a
sink
"s"
trap
or
waste
disposal
unit,
the
hose
must
be
looped
up
to
the
underside
of
the
bench
top
and
secured.
When
the
drain
hose
is
connected
to
a
separate
stand
pipe,
it
is
essential
that
an
air
tight
connection
is
made.
Refer
to
Fig.B
Drain
Hose
Extension
Extend
Drain
Hose
as
shown
below.
Fig.
A
Fig.
B
:
Drainage
connection
-
stand
pipe.
CAUTION
When
you
connect
or
extend
Drain
Hose,
make
sure
that
drain
hose
is
not
kinked.
(Bends
should
have
40
mm
radius.)
SW
1
2
Step7:
FINAL
CHECK
AND
ASSEMBLING
1
2
Securely
hand
tighten
supply
hose
to
water
supply.
Plug
power
supply
cord
into
an
earthed
the
power
plug
and
switch
on.
Operate
the
dishwasher
through
one
cycle
(Quick
cycle
is
recommended)
to
check
for
water
leak
and
operating
conditions.
Step8:
HOW
TO
LEVEL
THE
PRODUCT
After
installing
the
product,
if
you
feel
some
sticky
or
hear
a
frictional
sound
between
the
side
portion
of
door
and
tub
when
you
open
or
close
the
door,
you
have
to
adjust
the
level
of
product.
?
If
the
door
is
slanted
to
the
right
as
shown
in
figure
C,
repeat
the
procedure
shown
as
below
until
the
door
is
operated
normally.
1)
Unscrew(counter-clockwise)
the
left
leg
of
back
side
and
high
the
level.
2)
Check
the
opening
of
door
if
there
still
remains
sticky
or
friction
sound.
?
When
the
product
is
correctly
leveled,
there
do
not
remain
slant,
stickiness
or
a
friction
sound.
?
If
the
door
is
slanted
to
the
left
as
shown
in
figure
D,
repeat
the
procedure
shown
as
below
until
the
door
is
operated
normally.
1)
Unscrew(counter-clockwise)
the
right
leg
of
back
side
and
high
the
level.
2)
Check
the
opening
of
door
if
there
still
remains
sticky
or
friction
sound.
?
When
the
product
is
correctly
leveled,
there
do
not
remain
slant,
stickiness
or
a
friction
sound.
S
Fig.
C
Fig.
D
Case
1.
In
case
the
door
is
slanted
to
the
right
Case
2. In
case
the
door
is
slanted
to
the
left
Step6:
WATER
SUPPLY
CONNECTION
1
2
Connect
the
water
supply
hose
to
the
valve
behind
dishwasher
and
the
water
tap
as
shown
in
figure.
This
dishwasher
may
be
fed
with
either
hot
or
cold
water.
If
the
water
can
not
be
maintained
below
65ºC,
the
dishwasher
must
be
connected
to
cold
water.
When
connecting,
the
sealing
tape
or
sealing
compound
should
be
used
to
avoid
water
leaks.
Make
sure
that
the
line
is
not
kinked
or
sharply
bent.
Water
tap
Water
supply
hose
Valve