For Authorized Service TechniciansFor Authorized Service Technicians
- 7 -
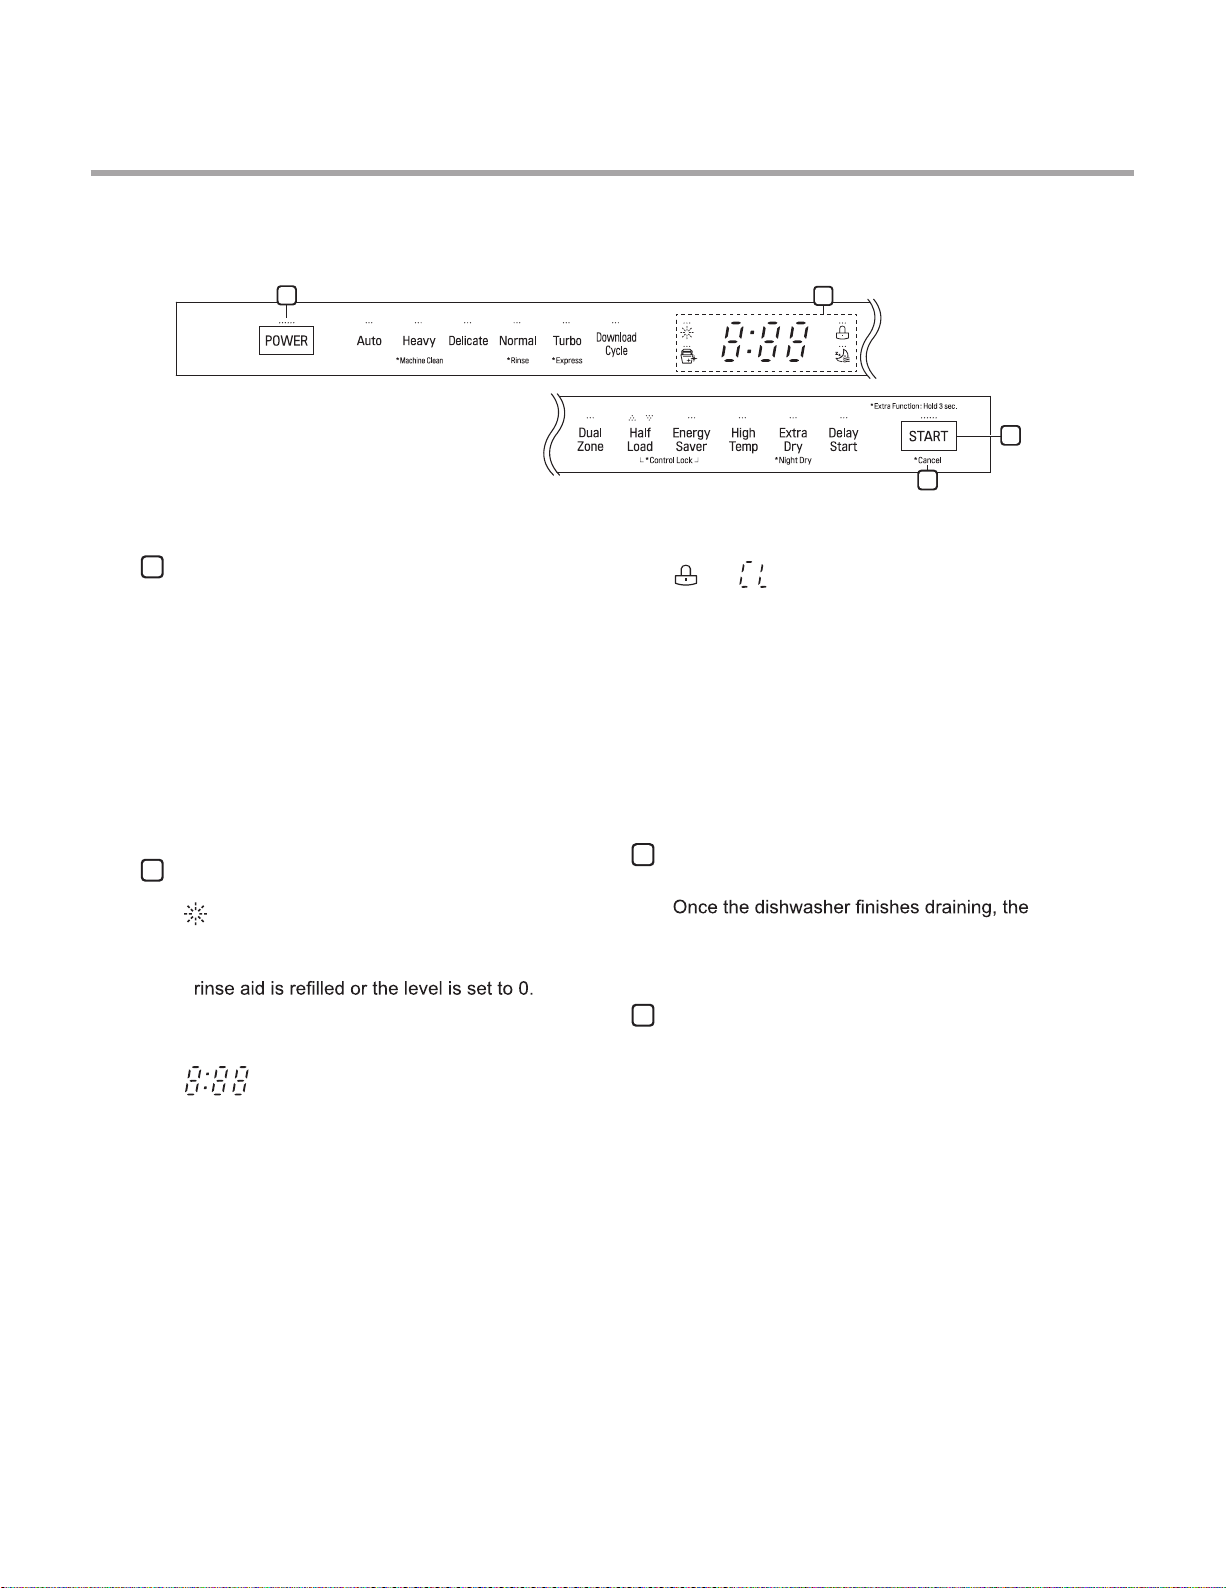
3. FEATURES AND OPERATION
12
4
3
1
Power
•Press the Power button to turn power on and
off.
•After the cycle is complete, the power
automatically turns off for purposes of safety and
economy.
•If there is a power surge, power outage, or
disruption of any kind, power is automatically
turned off for safety.
•When power is connected again, it will turn on
automatically and resume the cycle.
2
Display
•: Rinse Aid Icon
- This icon illuminates when the rinse aid level is
low. The LED automatically shuts off when the
- Refer to the Rinse Aid Dispenser Adjustment
section.
•: Digital Display
- The digital display on the control panel shows
the ESTIMATED cycle time. When the cycle
and options are selected, the display shows
the total estimated time to complete those
selections. During operation, the display shows
the remaining estimated operating time.
NOTE
•The estimated time shown on the display does
not include delay times for heating water, etc.
•If Delay Start is selected, the display shows the
delay time in hours.
•Cycle time may vary depending on the soil level
of your load.
•, : Control Lock
- The Control Lock feature helps prevent
settings from being changed during a cycle.
Selecting this feature locks all of the buttons,
except for the Power button, on the control
panel. This feature does not lock the door.
- While a cycle is running, press and hold Half
Load and Energy Saver simultaneously for
three seconds to activate or deactivate Control
Lock.
- To start a new cycle, deactivate Control Lock.
•: Wi-Fi
- When the appliance is connected to the
internet through a home Wi-Fi network, this
icon illuminates.
- Press and hold Delay Start for approximately
three seconds to connect to the network.
3
Cancel
•The drain pump activates and the cycle cancels.
power turns off.
•Press and hold Start for three seconds to
activate.
4
Start
•To operate the machine, either press Start and
close the door within four seconds or close the
door and press Start.
•If Start button is not pressed to start the cycle,
an alert will sound.
Chime On/Off
•To activate or deactivate the button sounds,
press and hold Dual Zone and Energy Saver
simultaneously for three seconds. The error alert
sound cannot be turned off.