23 5/8" - 24"
(600 - 610 mm)
Min. 23 5/8"
(600mm)
32 1/4 " - 34 1/2 "
(820 - 876 mm)
23 5/8" - 24"
(600 -610mm)
Min. 23 5/8"
(600mm)
32¼"-34½"
(820 - 876 mm)
32¼"-34½"
(820 - 876 mm)
PREPARING WATER AND ELECTRICAL CONNECTIONS
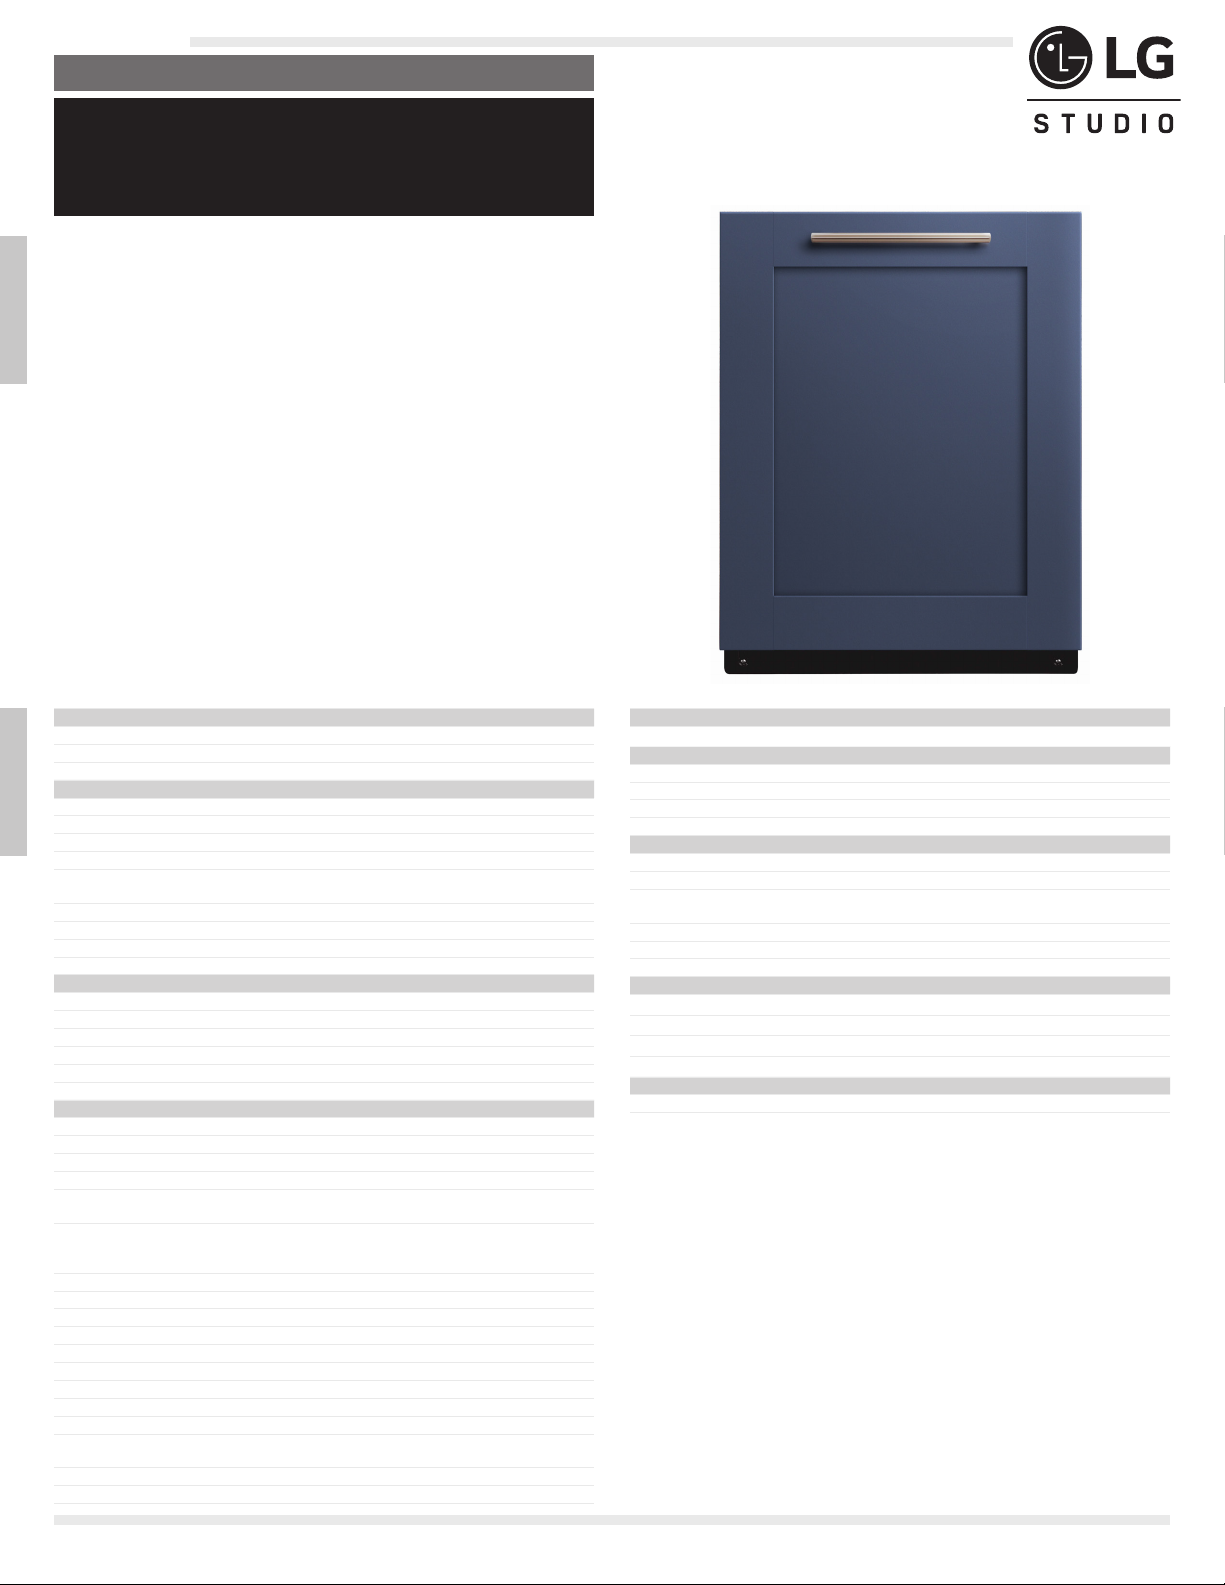
SDWD24P3
Top Control Wi-Fi Enabled Panel Ready
Dishwasher
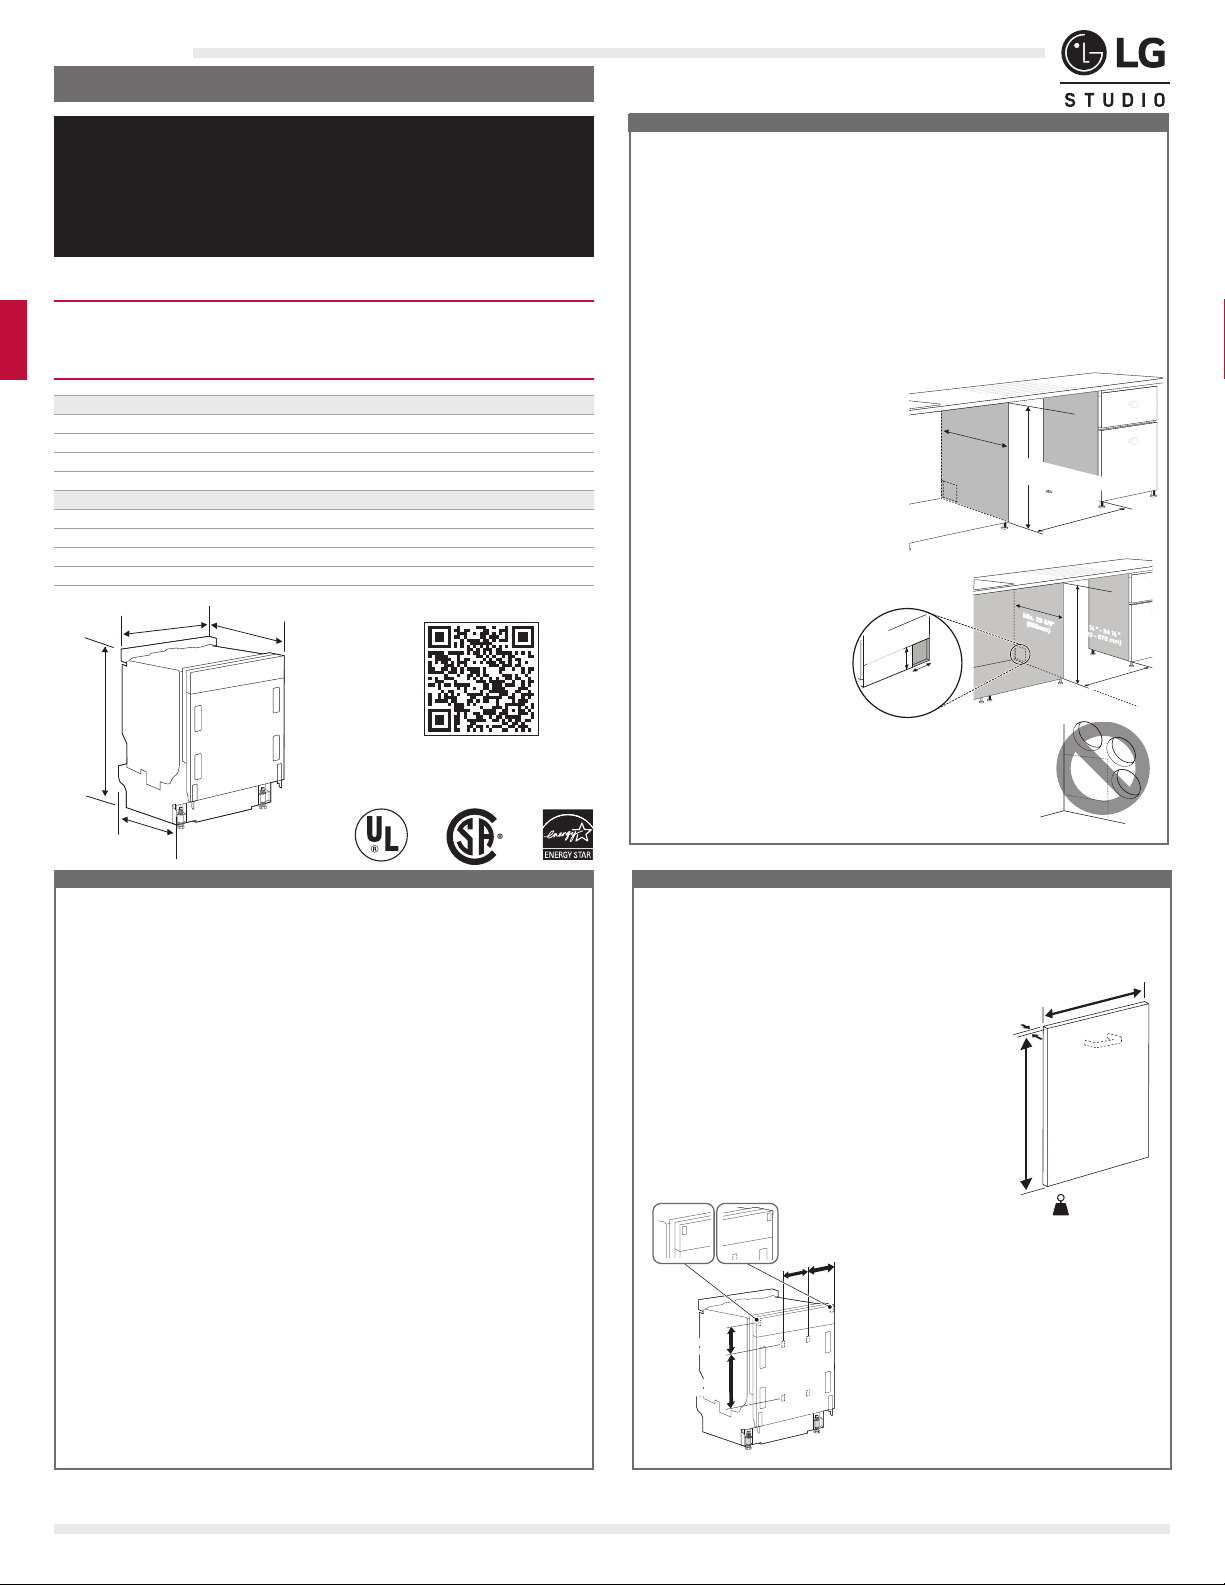
QUICK INSTALL & CLEARANCES
For full installation directions/clearances please refer to
the corresponding User Manual and Installation Guide.
IMPORTANT
DIMENSIONS / CLEARANCES / WEIGHT
Product Dimensions (in) (W x H x D) 23 1/2’’ x 32 1/16’’ x 21 7/8’’
Depth with Door Closed (except wooden panel) (in) 21 7/8’’
Depth with Door Open (in) 48’’
Carton Dimensions (in) (W x H x D) 27 3/4’’ x 33 7/8’’ x 27 3/4’’
POWER RATINGS
ENERGY STAR® Qualified Yes
CEE Tier 1
Energy Use (kWh/Year) 238 kWh/ Year
Water Factor (WF) 2.9
•This dishwasher is designed to work with a cabinet front panel (not
provided) which slides up as the door is opened. Before installing the
dishwasher, check the weight and dimensions of the cabinet front
panel you have selected.
•The dishwasher can support panels
weighing 5.5 – 24.2 lb (2.5 –11 kg).
•If the cabinet panel weighs between 17.6
lb (8 kg) and 24.2 lb (11 kg), adjust the
door spring tension to make the door easier
to open. See the Adjusting Door Spring
Tension topic in the Owners Manual.
•For best results, the width of the wood
panel should be 1/4” (6 mm) less than
the width of the cabinet.
▲
!WARNING
•Installation damage is not
covered by the warranty,
and leaks caused by
improper installation may
result in property damage.
•Do not use existing holes unless they are in the target area.
•Failure to properly locate the hole for the water and drain lines
may prevent the dishwasher from installing ush with the
cabinets and could result in kinked, pinched, crushed, stressed
or damaged lines.
CHECKING THE CABINET PANEL
PREPARING CABINET OPENING
▲
!WARNING
Water Connection
•Do not reuse an old hose. Use only a new hose when installing the dishwasher. The
old hose could leak or burst causing ooding and property damage. Contact an LG
Customer Information Center for assistance in buying a new hose.
Electrical Connection
•Use a time-delay fuse or circuit breaker.
•Operate this appliance with the correct voltage as shown in this manual and on the
rating plate.
•The wiring must be grounded properly. If in doubt, have it checked by a qualied
electrician.
•The appliance and outlet must be positioned so that the plug is easily accessible.
•Do not use an extension cable or adapter with this dishwasher.
•Do not overload the outlet with more than oneappliance.
•It is the personal responsibility and obligation of the product owner to have a
proper outlet installed by a qualied electrician.
▲
!CAUTION
•When connecting the dishwasher water supply line to the house water supply,
sealing tape or compound should be used on pipe threads to avoid leaks. Tape or
compound should not be used on compression ttings.
•Connect the dishwasher to a hot water supply with a temperature range between
120 °F (49 °C) and 149 °F (65 °C). This temperature range provides the best
washing results and shortest cycle time. To prevent damage to dishes, the
temperature should not exceed 149 °F (65 °C).
•Water supply pressure must be between 20 psi and 80 psi (140–550 kPa). If the
water supply pressure exceeds 80 psi, a pressure reducing valve must be installed.
Otherwise premature failure of the inlet valve may occur.
© 2022 LG Electronics USA, Inc. All rights reserved. "LG Life’s Good" is a registered trademark of LG Corp. All other product and brand names are trademarks or registered trademarks of their respective owners. Design, features and specifications are subject to change
without notice. Non-metric weights and measurements are approximate. Some features may require Internet access. Content and services may vary by product and are subject to change without notice. 11/21/22
Scan to see the online manual.
23 1/2”
(598 mm)
18”
(455 mm)
32 1/16"
(815 mm)
21 7/8”
(554 mm)
23 1/4 " - 23 3/4 " (590 - 603 mm)
5/8 - 7/8 "
(16 - 22 mm)
28 3/8 " - 30 11/16"
(720 - 780 mm)
5.5 lb (2.5 kg) ≤ ≤ 24.2 lb (11 kg)
•This dishwasher is designed to t a standard dishwasher opening.
An opening may be needed on both sides to route plumbing and
electrical connections.
•To ensure proper drainage, install the dishwasher no more than 12 ft. (3.65 m)
from the sink.
•The location must have sufcient space for the dishwasher door to open easily
and provide at least 0.1” (2 mm) between the dishwasher and the cabinet sides.
•If installing the dishwasher in a corner, leave a minimum of 2” (50 mm) between
the dishwasher and the adjacent wall.
•The adjacent wall must be free of obstructions.
•For ush installations only, you may remove the cabinet brace inside the cabinet.
Choosing the Proper Location
•Select a location as close to the sink as
possible for easy connections to water
supply line, drain hose and electrical
connection.
•To allow for proper clearance of
plumbing and electrical, use the
template included with the literature to
determine the clearance on the side of
the cabinet where the cabinet meets
the back wall. Using a 2 1/2” diameter
hole saw, drill a hole in the target area
as shown on the template.
23 5/8" - 24"
(600 - 610 mm)
Min. 23 5/8"
(600mm)
32 1/4 " - 34 1/2 "
(820 - 876 mm)
Min. 23 5/8"
(600mm)
32¼"-34½"
(820 - 876 mm)
32¼"-34½"
(820 - 876 mm)
23 5/8" - 24"
(600 - 610 mm)
Min. 23 5/8"
(600mm)
32 1/4 " - 34 1/2 "
(820 - 876 mm)
Min. 23 5/8"
(600mm)
32¼"-34½"
(820 - 876 mm)
32¼"-34½"
(820 - 876 mm)
8 1/8"
(207 mm)
6 11/16 "
(170 mm)
5 15/16"
(150 mm)
13 9/16"
(345 mm)
Installing Fleece Tape
•Attaching eece tape between the dishwasher
door and the cabinet panel will reduce the
friction when the door slides up and down.
•Install the eece tape close to the bracket
openings to make sure the door slides smoothly.
•Peel the eece tape strips off the carrier and
attach them to the door.
23 1/4 " - 23 3/4 " (590 - 603 mm)
5/8 - 7/8"
(16 - 22 mm)
28 3/8 " - 30 11/16"
(720 - 780 mm)
5.5 lb (2.5 kg) ≤ ≤ 24.2 lb (11 kg)
Notes: This dishwasher is designed to be installed flush with a field-installed, 3/4" (20 mm) custom door panel. The dishwasher depth is European-style, designed to sit completely flush in 24" deep cabinets, within a standard dishwasher opening. An opening may be
needed on both sides to route plumbing and electrical connections. See marked areas above for water and electrical clearances in base of dishwasher. To ensure proper drainage, install the dishwasher no more than 12 ft. (3.65 m) from the sink. Electrical connection
should be in an accessible location adjacent to and not behind the dishwasher and within 4 ft. (1.2 m) of the dishwasher's side.