LG BH5320F User manual

Please read this manual carefully before operating
your set and retain it for future reference.
P/NO : SAC35376702
BH5320F (BH5320F, S52F1-S/ W)
OWNER’S MANUAL
3D Blu-ray™/ DVD
Home Cinema

1 Getting Started
Getting Started2
Getting Started
1
Safety Information
CAUTION
RISK OF ELECTRIC SHOCK
DO NOT OPEN
CAUTION: TO REDUCE THE RISK OF ELECTRIC
SHOCK DO NOT REMOVE COVER (OR BACK) NO
USER-SERVICEABLE PARTS INSIDE REFER SERVICING
TO QUALIFIED SERVICE PERSONNEL.
This lightning ash with arrowhead
symbol within an equilateral triangle
is intended to alert the user to the
presence of uninsulated dangerous
voltage within the product’s
enclosure that may be of sucient magnitude to
constitute a risk of electric shock to persons.
The exclamation point within an
equilateral triangle is intended
to alert the user to the presence
of important operating and
maintenance (servicing)
instructions in the literature accompanying the
product.
WARNING: TO PREVENT FIRE OR ELECTRIC SHOCK
HAZARD, DO NOT EXPOSE THIS PRODUCT TO RAIN
OR MOISTURE.
WARNING: Do not install this equipment in a
conned space such as a book case or similar unit.
CAUTION: Do not block any ventilation openings.
Install in accordance with the manufacturer’s
instructions.
Slots and openings in the cabinet are provided for
ventilation and to ensure reliable operation of the
product and to protect it from over heating. The
openings shall be never be blocked by placing
the product on a bed, sofa, rug or other similar
surface. This product shall not be placed in a built-
in installation such as a bookcase or rack unless
proper ventilation is provided or the manufacturer’s
instruction has been adhered to.
CAUTION : CLASS 1M VISIBLE AND INVISIBLE LASER
RADIATION WHEN OPEN. DO NOT VIEW DIRECTLY
WITH OPTICAL INSTRUMENTS
Use of controls, adjustments or the performance of
procedures other than those specied herein may
result in hazardous radiation exposure.
CAUTION concerning the Power Cord
Most appliances recommend they be placed upon
a dedicated circuit;
That is, a single outlet circuit which powers only
that appliance and has no additional outlets or
branch circuits. Check the specication page of this
owner’s manual to be certain. Do not overload wall
outlets. Overloaded wall outlets, loose or damaged
wall outlets, extension cords, frayed power cords, or
damaged or cracked wire insulation are dangerous.
Any of these conditions could result in electric
shock or re. Periodically examine the cord of your
appliance, and if its appearance indicates damage
or deterioration, unplug it, discontinue use of the
appliance, and have the cord replaced with an
exact replacement part by an authorized service
center. Protect the power cord from physical or
mechanical abuse, such as being twisted, kinked,
pinched, closed in a door, or walked upon. Pay
particular attention to plugs, wall outlets, and
the point where the cord exits the appliance. To
disconnect power from the mains, pull out the
mains cord plug. When installing the product,
ensure that the plug is easily accessible.

Getting Started 3
Getting Started
1
This device is equipped with a portable battery or
accumulator.
Safety way to remove the battery or the
battery from the equipment: Remove the
old battery or battery pack, follow the steps
in reverse order than the assembly. To prevent
contamination of the environment and bring on
possible threat to human and animal health, the
old battery or the battery put it in the appropriate
container at designated collection points. Do
not dispose of batteries or battery together with
other waste. It is recommended that you use
local, free reimbursement systems batteries and
accumulators. The battery shall not be exposed to
excessive heat such as sunshine, re or the like.
CAUTION: The apparatus shall not be exposed to
water (dripping or splashing) and no objects lled
with liquids, such as vases, shall be placed on the
apparatus.
Disposal of your old appliance
1. When this crossed-out wheeled bin
symbol is attached to a product it
means the product is covered by the
European Directive 2002/96/EC.
2. All electrical and electronic products
should be disposed of separately
from the municipal waste stream
via designated collection facilities
appointed by the government or the
local authorities.
3. The correct disposal of your old
appliance will help prevent potential
negative consequences for the
environment and human health.
4. For more detailed information about
disposal of your old appliance, please
contact your city office, waste disposal
service or the shop where you
purchased the product.
Disposal of waste batteries/accumulators
1.When this crossed-out wheeled
bin symbol is attached to batteries/
accumulators of Your product it means
they are covered by European Directive
2006/66/EC.
2. This symbol may be combined with
chemical symbols for mercury(Hg),
cadmium(Cd) or lead(Pb) if the battery
Contains more that 0.0005% of
mercury,0.002% of cadmium or 0.004%
of lead.
3. All batteries/accumulators should be
disposed separately from the municipal
waste stream via designated collection
facilities appointed by the government
or the local authorities.
4. The correct disposal of Your old
batteries/accumulators will help
to prevent potential negative
consequences for the environment,
animal and human health.
5. For more detailed information
about disposal of Your old batteries/
accumulators, please contact Your
city office, waste disposal service or
the shop where You purchased the
product.

Getting Started4
Getting Started
1
For Wireless product European Union Notice
LG Electronics hereby
declares that this/
these product(s) is/are
in compliance with the essential requirements and
other relevant provisions of Directive 1999/5/EC,
2004/108/EC, 2006/95/EC and 2009/125/EC.
Please contact to the following address for
obtaining a copy of the DoC (Declaration of
Conformity).
European Standards Centre:
Krijgsman 1, 1186 DM Amstelveen, The Netherlands
yPlease note that this is NOT a Customer Service
contact point. For Customer Service Information,
see Warranty Card or contact the dealer that you
purchased this product.
Indoor use only.
RF Radiation Exposure Statement
This equipment should be installed and operated
with minimum distance 20cm between the radiator
and your body.
Notes on Copyrights
yBecause AACS (Advanced Access Content
System) is approved as content protection
system for Blu-ray Disc format, similar to use of
CSS (Content Scramble System) for DVD format,
certain restrictions are imposed on playback,
analog signal output, etc., of AACS protected
contents. The operation of this product and
restrictions on this product may vary depending
on your time of purchase as those restrictions
may be adopted and/or changed by AACS after
the production of this product.
yFurthermore, BD-ROM Mark and BD+ are
additionally used as content protection systems
for Blu-ray Disc format, which imposes certain
restrictions including playback restrictions for
BD-ROM Mark and/or BD+ protected contents.
To obtain additional information on AACS, BD-
ROM Mark, BD+, or this product, please contact
an authorized Customer Service Centre.
yMany BD-ROM/DVD discs are encoded with
copy protection. Because of this, you should only
connect your player directly to your TV, not to a
VCR. Connecting to a VCR results in a distorted
picture from copy-protected discs.
yThis product incorporates copyright protection
technology that is protected by U.S. patents
and other intellectual property rights. Use of
this copyright protection technology must be
authorized by Rovi, and is intended for home and
other limited viewing uses only unless otherwise
authorized by Rovi. Reverse engineering or
disassembly is prohibited.
yUnder the U.S. Copyright laws and Copyright
laws of other countries, unauthorized recording,
use, display, distribution, or revision of television
programs, videotapes, BD-ROM discs, DVDs, CDs
and other materials may subject you to civil and/
or criminal liability.

Getting Started 5
Getting Started
1
Important Notice for TV colour
system
The colour system of this player diers according to
currently playing discs.
For example, when the player plays the disc
recorded in the NTSC colour system, the image is
output as an NTSC signal.
Only the multi system colour TV can receive all
signals output from the player.
yIf you have a PAL colour system TV, you will see
just distorted images when using discs or video
contents recorded in NTSC.
yThe multi system colour TV changes the colour
system automatically according to input signals.
In case that the colour system is not changed
automatically, turn it o and then on to see
normal images on screen.
yEven if the disc recorded in NTSC colour system
are well displayed on your TV, these may not be
recorded correctly on your recorder.
yWatching a 3D content for a long period
time may cause dizziness or tiredness.
yIt is not recommended to watch a movie
in 3D mode for inrm, child and pregnant
woman.
yIf you are experiencing headache, tiredness
or dizziness while viewing contents in 3D,
it is strongly recommended to stop the
playback and rest until you feel normal.
>Caution

Table of Contents6
Table of Contents
1 Getting Started
2 Safety Information
8 Introduction
8 – Playable Discs and symbols used in
this manual
9 – About the “7” Symbol Display
9 – Compatibility Notes
10 – File requirement
11 – AVCHD (Advanced Video Codec High
Definition)
12 – About DLNA
12 – Certain System Requirements
12 – Regional Code
12 – System Select
13 Remote control
14 Front panel
15 Rear panel
2 Connecting
16 Speaker Connection
16 – Attaching the speakers to the player
17 Connecting to Your TV
17 – HDMI Connection
18 – What is SIMPLINK?
18 – ARC (Audio Return Channel) function
19 – Video Connection
19 – Resolution Setting
20 Antenna connection
21 Connections with external device
21 – PORT. IN connection
21 – OPTICAL IN connection
22 Connecting to your Home Network
22 – Wired network connection
23 – Wired Network Setup
24 – Wireless Network Connection
24 – Wireless Network Setup
27 USB device connection
27 – Playback content in the USB device
3 System Setting
28 Settings
28 – Initial Setup
29 – Adjust the Setup Settings
30 – [DISPLAY] Menu
31 – [LANGUAGE] Menu
32 – [AUDIO] Menu
34 – [LOCK] Menu
35 – [NETWORK] Menu
36 – [OTHERS] Menu
37 Sound Effect
37 3D Sound Effect
4 Operating
38 General Playback
38 – Using [HOME] menu
38 – Playing a Disc
38 – Playing a file on a disc/USB device
39 – Playing Blu-ray 3D disc
39 – Enjoying BD-Live™
40 – Playing a file on a network server
40 – Wi-Fi Direct™ Connection
42 – Basic operations for video and audio
content
43 – Basic operations for photo content
43 – Using the disc menu
43 – Resume playback
43 – Last Scene Memory
44 Advanced Playback
44 – Repeat Playback
44 – Repeating a specific portion
44 – Viewing content information
45 – Changing content list view
45 – Selecting a subtitle file
46 – Options while viewing a photo
46 – Listening to music while slide show
47 On-Screen display
47 – Displaying content information on-
screen
48 – Playing from selected time
48 – Selecting a subtitle language
48 – Hearing a different audio
48 – Watching from a different angle
49 – Changing the TV Aspect Ratio
49 – Changing subtitle code page
49 – Changing the Picture Mode
50 Audio CD Recording

Table of Contents 7
1
2
3
4
5
6
51 Viewing information from Gracenote
Media Database
52 Playing the iPod
52 – Enjoying iPod on the screen
52 – Enjoying the iPod IN mode
54 Radio Operations
54 – Listening to the radio
54 – Presetting the Radio Stations
54 – Deleting a saved station
54 – Deleting all the saved stations
54 – Improving poor FM reception
54 – See information about a radio station
55 Using the Premium
55 Using the LG Apps
56 – Signing in
56 – Managing my Apps
5 Troubleshooting
57 Troubleshooting
57 – General
58 – Network
59 – Picture
59 – Sound
59 – Customer Support
59 – Open source software notice
6 Appendix
60 Controlling a TV with the Supplied
Remote Control
60 – Setting up the remote to control your
TV
61 Network Software Update
61 – Network update notification
61 – Software Update
63 About Nero MediaHome 4 Essentials
63 – System Requirements
64 – Installing Nero MediaHome 4
Essentials
64 – Sharing files and folders
65 Area Code List
66 Language code List
67 Trademarks and Licenses
70 Audio Output Specifications
71 Specifications
73 Maintenance
73 – Handling the Unit
73 – Notes on Discs
74 Important Information Relating to
Network Services

Getting Started8
Getting Started
1
Introduction
Playable Discs and symbols used in this manual
Media/Term Logo Symbol Description
Blu-Ray
e
yDiscs such as movies that can be purchased or
rented.
y“Blu-ray 3D” discs and“Blu-ray 3D ONLY” discs.
yBD-R/RE discs that are recorded in BDAV format.
y
u
i
yBD-R/RE discs that contain Movie, Music or
Photo les.
yISO 9660+JOLIET, UDF and UDF Bridge format
DVD-ROM
DVD-R
DVD-RW
DVD+R
DVD+RW
(12 cm)
r
yDiscs such as movies that can be purchased or
rented.
yMovie mode and nalized only
ySupports the dual layer disc also
oFinalized AVCHD format
y
u
i
yDVD±R/RW discs that contain Movie, Music or
Photo les.
yISO 9660+JOLIET, UDF and UDF Bridge format
DVD-RW
(VR)
(12 cm)
rVR mode and nalized only
Audio CD
(12 cm) tAudio CD
CD-R/RW
(12 cm)
y
u
i
yCD-R/RW discs that contain Movie, Music or
Photo les.
yISO 9660+JOLIET, UDF and UDF Bridge format
Note –,Indicates special notes and operating features.
Caution –>Indicates cautions for preventing possible
damages from abuse.

Getting Started 9
Getting Started
1
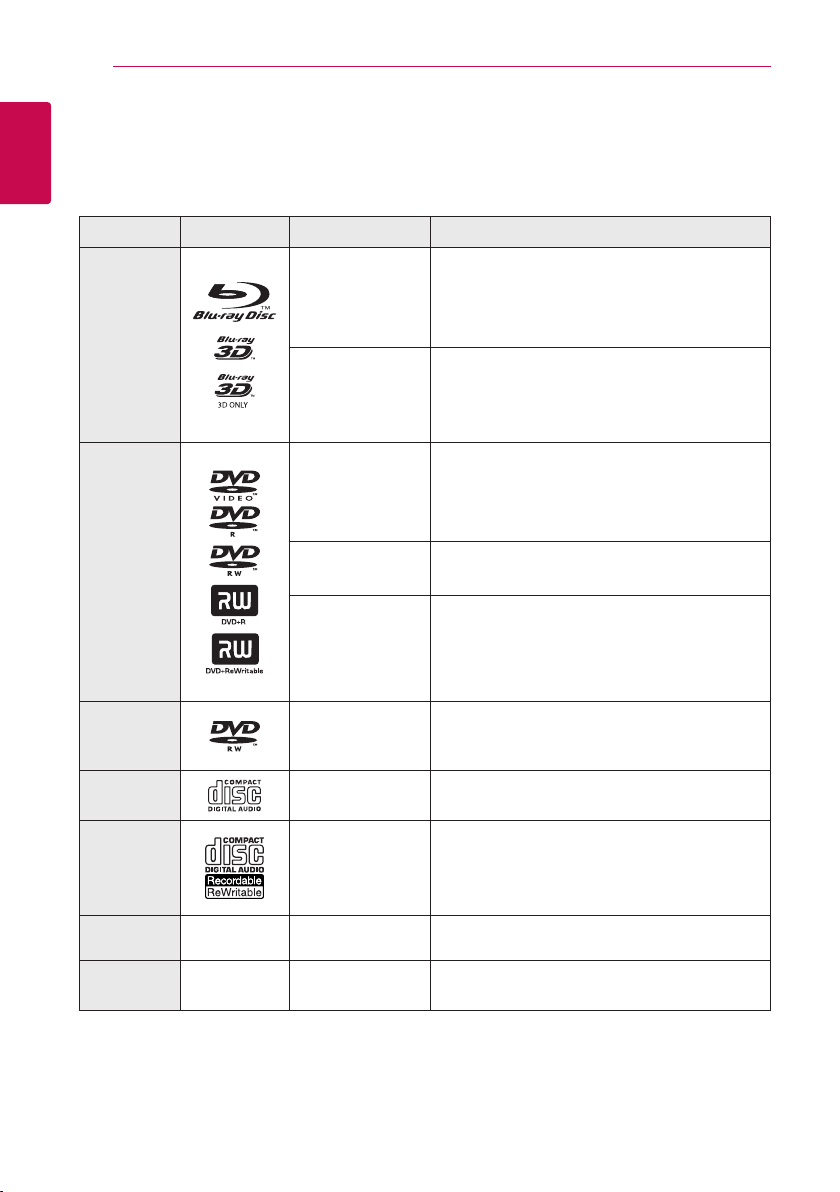
yDepending on the conditions of the
recording equipment or the CD-R/RW (or
DVD±R/RW) disc itself, some CD-R/RW (or
DVD±R/RW) discs cannot be played on the
unit.
yDepending on the recording software & the
nalization, some recorded discs (CD-R/RW,
DVD±R/RW, BD-R/RE) may not be playable.
yBD-R/RE, DVD±R/RW and CD-R/RW discs
recorded using a personal computer or a
DVD or CD Recorder may not play if the
disc is damaged or dirty, or if there is dirt or
condensation on the player’s lens.
yIf you record a disc using a personal
computer, even if it is recorded in a
compatible format, there are cases in which
it may not play because of the settings of
the application software used to create the
disc. (Check with the software publisher for
more detailed information.)
yThis player requires discs and recordings to
meet certain technical standards in order to
achieve optimal playback quality.
yPre-recorded DVDs are automatically set to
these standards. There are many dierent
types of recordable disc formats (including
CD-R containing MP3 or WMA les) and
these require certain pre-existing conditions
to ensure compatible playback.
yCustomers should note that permission
is required in order to download MP3 /
WMA les and music from the Internet.
Our company has no right to grant such
permission. Permission should always be
sought from the copyright owner.
yYou have to set the disc format option
to [Mastered] in order to make the discs
compatible with the LG players when
formatting rewritable discs. When setting
the option to Live System, you cannot use
it on LG player. (Mastered/Live File System :
Disc format system for windows Vista)
, Note About the “7” Symbol Display
“7”may appear on your TV display during
operation and indicates that the function explained
in this owner’s manual is not available on that
specic media.
Compatibility Notes
yBecause BD-ROM is a new format, certain disc,
digital connection and other compatibility issues
are possible. If you experience compatibility
problems, please contact an authorized
Customer Service Center.
yThis unit allows you to enjoy functions such
as picture-in-picture, secondary audio and
Virtual packages, etc., with BD-ROM supporting
BONUSVIEW (BD-ROM version 2 Prole 1 version
1.1). Secondary video and audio can be played
from a disc compatible with the picture-in-
picture function. For the playback method, refer
to the instructions in the disc.
yViewing high-denition content and up-
converting standard DVD content may require a
HDMI-capable input or HDCP-capable DVI input
on your display device.
ySome BD-ROM and DVD discs may restrict the
use of some operation commands or features.
yYou can use a USB device to store some disc
related information, including downloaded on-
line content. The disc you are using will control
how long this information is retained.

Getting Started10
Getting Started
1
File requirement
Movie files
File
Location
File
Extension Codec Format Audio Format Subtitle
Disc,
USB
“.avi”, “.divx”,
“.mpg”, “.mpeg”,
“.mkv”, “.mp4”,
“.asf”, “.wmv”,
“.m4v” (DRM
free), “.vob”,
“.3gp”
DIVX3.xx, DIVX4.xx,
DIVX5.xx, DIVX6.xx
(Standard playback
only), XVID, MPEG1 SS,
H.264/MPEG-4 AVC,
MPEG2 PS, MPEG2 TS,
VC-1 SM (WMV3)
Dolby Digital,
DTS, MP3,
WMA, AAC,
AC3
SubRip (.srt / .txt), SAMI (.smi),
SubStation Alpha (.ssa/.txt),
MicroDVD (.sub/.txt), VobSub
(.sub), SubViewer 1.0 (.sub),
SubViewer 2.0 (.sub/.txt), TMPlayer
(.txt), DVD Subtitle System (.txt)
DLNA
“.avi”, “.divx”,
“.mpg”, “.mpeg”,
“.mkv”, “.mp4”,
“.asf”, “.wmv”,
".m4v" (DRM
free)
DIVX3.xx, DIVX4.xx,
DIVX5.xx, DIVX6.xx,
XVID, MPEG1 SS,
H.264/MPEG-4 AVC,
MPEG2 PS, MPEG2 TS,
VC-1 SM (WMV3)
Dolby Digital,
DTS, MP3,
WMA, AAC,
AC3
SubRip (.srt / .txt), SAMI (.smi),
SubStation Alpha (.ssa/.txt),
MicroDVD (.sub/.txt), SubViewer
1.0 (.sub), SubViewer 2.0 (.sub/.
txt), TMPlayer (.txt), DVD Subtitle
System (.txt)
Music files
File
Location
File
Extension Sampling Frequency Bitrate Note
Disc,
USB
“mp3”, “.wma”,
“.wav”, “.m4a”
(DRM free),
“.ac”
within 32 - 48 kHz
(WMA), within 16 - 48
kHz (MP3)
within 32 - 192
kbps (WMA), within
32 - 320 kbps (MP3)
Some wav les are
not supported on this
player.
DLNA
“mp3”, “.wma”,
“.wav”, “.m4a”
(DRM free)
within 32 - 48 kHz
(WMA), within 16 - 48
kHz (MP3)
within 32 - 192
kbps (WMA), within
32 - 320 kbps (MP3)
Some wav les are
not supported on this
player.
Photo files
File
Location
File
Extension
Recommended
Size
Note
Disc,
USB,
DLNA
“.jpg”, “.jpeg”,
“.png”, “.gif”
Less than 4,000 x 3,000 x 24 bit/pixel
Less than 3,000 x 3,000 x 32 bit/pixel
Progressive and lossless
compression photo image les
are not supported.
Supplied bundle DLNA server for Macintosh edition has limitations in file compatibility, such as ASF, WMA
and WMV.

Getting Started 11
Getting Started
1
yThe le name is limited to 180 characters.
yMaximum les/folder: Less than 2 000
(total number of les and folders)
yDepending on the size and number of the
les, it may take several minutes to read the
contents on the media.
yFile compatibility may dier depending on
the server.
yBecause the compatibility on DLNA server
are tested on the bundle DLNA server
(Nero MediaHome 4 Essentials Windows
edition) environment, le requirements and
playback functions may dier depending on
media servers.
yThe le requirements on page 10 are
not always compatible. There may have
some restrictions by le features and media
server’s ability.
yPlaying a movie subtitle les are only
available on share folder of a PC or DLNA
media server created by supplied Nero
MediaHome 4 Essentials software on this
player package.
yThe les from removable media such as USB
drive, DVD-drive etc. on your media server
may not be shared properly.
yThis unit cannot support the ID3 Tag
embedded MP3 le.
yThe total playback time of audio le
indicated on the screen may not correct for
VBR les.
yHD movie les contained on the CD, DVD or
USB 1.0/1.1 may not played properly. Blu-ray
Disc or USB 2.0 are recommended to play
back HD movie les.
yThis player supports H.264/MPEG-4 AVC
prole Main, High at Level 4.1. For a le
with higher level, the warning message will
appear on the screen.
yThis player does not support les that are
recorded with GMC*1or Qpel*2.
*1 GMC – Global Motion Compensation
*2 Qpel – Quarter pixel
, Note
yA “avi” le which is encoded“WMV 9 codec”
is not supported.
yThis player supports UTF-8 les even it
contains Unicode subtitle contents. This
player can not support the pure Unicode
subtitle les.
yDepending on the types of le or ways of
recording, it may not play back.
yA disc which was recorded by multi-session
on normal PC is not supported on this
player.
yTo be playback a movie le, movie le name
and Subtitle le name must be the same.
yIf video codec is MPEG2 TS or MPEG2 PS,
subtitle does not play back.
yThe total playback time of music le
indicated on the screen may not correct for
VBR les.
, Note
AVCHD (Advanced Video
Codec High Definition)
yThis player can playback AVCHD format discs.
These discs are normally recorded and used in
camcorders.
yThe AVCHD format is a high denition digital
video camera format.
yThe MPEG-4 AVC/H.264 format is capable of
compressing images at higher eciency than
that of the conventional image compressing
format.
yThis player can playback AVCHD discs using
“x.v.Color” format.
ySome AVCHD format discs may not play
depending on the recording condition.
yAVCHD format discs need to be nalized.
y“x.v.Color” oers a wider color range than normal
DVD camcorder discs.

Getting Started12
Getting Started
1
About DLNA
This Player is a DLNA Certied digital media player
that can display and play movie, photo and music
content from your DLNA-compatible digital media
server (PC and Consumer Electronics).
The Digital Living Network Alliance (DLNA) is a
cross-industry organization of consumer electronics,
computing industry and mobile device companies.
Digital Living provides consumers with easy sharing
of digital media through your home network.
The DLNA certication logo makes it easy
to nd products that comply with the DLNA
Interoperability Guidelines. This unit complies with
DLNA Interoperability Guidelines v1.5.
When a PC running DLNA server software or
other DLNA compatible device is connected to
this player, some setting changes of software or
other devices may be required. Please refer to the
operating instructions for the software or device for
more information.
Certain System Requirements
For high denition video playback:
yBD-ROM disc with high denition content.
yHDMI or HDCP capable DVI input on your display
device is required for some content (as specied
by disc authors).
Regional Code
This unit has a regional code printed on the rear of
the unit. This unit can play only BD-ROM or DVD
discs labeled same as the rear of the unit or“ALL”.
System Select
Press B(OPEN/CLOSE) when a disc is inserted,
and do not remove the disc. Press and hold M
(PAUSE) for more than ve seconds while [OPEN] is
displayed in the display window.

Getting Started 13
Getting Started
1
Remote control
Battery Installation
Remove the battery cover on the
rear of the Remote Control, and
insert two R03 (size AAA) batteries
with 4and 5matched correctly.
• • • • • • a • • • • • •
1(POWER): Switches the player
ON or OFF.
B(OPEN/CLOSE): Ejects a disc.
FUNCTION: Changes input mode.
0-9 numerical buttons: Selects
numbered options in a menu.
CLEAR: Removes a mark on the
search menu or a number when
setting the password.
REPEAT (h): Repeats a desired
section or sequence.
• • • • • • b • • • • •
c/v (SCAN): Searches
backward or forward.
C/V (SKIP): Goes to the
next or previous chapter / track /
le.
Z(STOP): Stops playback.
z(PLAY): Starts playback.
M(PAUSE/STEP): Pauses
playback.
SPEAKER LEVEL: Sets the sound
level of desired speaker.
SOUND EFFECT: Selects a sound
eect mode.
VOL +/-: Adjusts speaker volume.
OPTICAL: Changes input mode to
optical directly.
MUTE: Mute the unit.
• • • • • • c • • • • •
HOME ( ): Displays or exits the
[Home Menu].
3D SOUND: Selects a 3D sound
eect mode.
INFO/MENU (m): Displays or
exits On-Screen Display.
Direction buttons: Selects an
option in the menu.
PRESET +/-: Selects programme
of Radio.
TUNING +/-: Tunes in the desired
radio station.
ENTER (b): Acknowledges menu
selection.
BACK ( ): Exits the menu or
returns to the previous screen.
TITLE/POPUP: Displays the DVD
title menu or BD-ROM’s pop-up
menu, if available.
DISC MENU: Accesses menu on a
disc.
• • • • • • d • • • • •
Colored (R, G, Y, B) buttons:
- Use to navigate BD-ROM menus.
They are also used for [MOVIE],
[PHOTO], [MUSIC], [Premium] and
[LG Apps] menu.
- B button: Selects mono/ stereo
in FM mode.
RDS: Radio Data System.
PTY: Views the programme type
of the RDS.
PTY SEARCH:
Searches programme type.
SUBTITLE: Selects a subtitle
language.
AUDIO: Selects an audio language
or audio channel.
SLEEP: Sets a certain period of
time after which the unit will
switch to o.
MUSIC ID: When connected
to the network, can provide
information about the current
song while movie playback.
?: This button is not available.
X(REC): Records an audio CD.
TV Control Buttons: See page
60.

Getting Started14
Getting Started
1
Front panel
aOperation buttons
1/!(Power)
T(Play/Pause)
(Open/Close)
WS (Volume)
F (Function)
Changes the input source or function.
I(Stop)
@(Mute)
bDisplay Window
cDisc Slot
Precautions in using the touch buttons
yUse the touch buttons with clean and dry
hands.
- In a humid environment, wipe out any
moisture on the touch buttons before
using.
yDo not press the touch buttons hard to
make it work.
- If you apply too much strength, it can
damage the sensor of the touch buttons.
yTouch the button that you want to work in
order to operate the function correctly.
yBe careful not to have any conductive
material such as metallic object on the
touch buttons. It can cause malfunctions.
>Caution

Getting Started 15
Getting Started
1
Rear panel
j
(TV)
aAC power cord
bAntenna Connector
cVIDEO OUT
dLAN port
eHDMI OUT TO TV
fOPTICAL IN 1/2
gCooling Fan
hSpeakers connectors
iPORT. IN
jUSB Port (iPod/ iPhone/ iPad)
Arrange the cable with cable holder as shown below.
1. Remove the protective vinyl of
the adhesive tape.
2. Attach the cable holder rear of
unit.
3. Insert cables to cable holder and
close the cable holder.
4. Assemble the rear cover.
, Note

Connecting16
Connecting
2
Speaker Connection
Attaching the speakers to the
player
1. Connect speaker wires to the player.
Each speaker wire is color-coded. Use matching
color wires for corresponding speakers.
Color Speaker Position
Orange Sub woofer Any front position
Red Front Front right
White Front Front left
2. Connect the speaker wire to the terminal on the
speaker.
Make sure the wire marked black goes in to the
terminal marked “–” (minus) and the other wire
goes in to the terminal marked “+”(plus).
How to attach the ferrite core (for
EMI only)
You must ax the cores (supplied with the model
you purchased) in order to reduce or eliminate
electrical interference.
Affixing the ferrite core to the
speaker cables and AC power cord.
1. Arrange the cable with cable holder (see page
15).
2. Pull the stopper [a] of the ferrite core to open.
3. Wind the power cord and speaker cables on the
unit once on the ferrite core.
4. Close the ferrite core until it clicks.
2 Connecting

Connecting 17
Connecting
2
Connecting to Your TV
Make one of the following connections, depending
on the capabilities of your existing equipment.
yHDMI connection (page 17)
yVideo connection (page 19)
yDepending on your TV and other
equipment you wish to connect, there are
various ways you could connect the player.
Use only one of the connections described
in this manual.
yPlease refer to the manuals of your TV,
stereo system or other devices as necessary
to make the best connections.
yMake sure the player is connected directly
to the TV. Tune the TV to the correct video
input channel.
yDo not connect your player via your VCR.
The image could be distorted by the copy
protection system.
, Note
HDMI Connection
If you have a HDMI TV or monitor, you can connect
it to this player using a HDMI cable (Type A, High
speed HDMI™ cable with Ethernet). Connect the
HDMI jack on the player to the HDMI jack on a
HDMI compatible TV or monitor.
Rear of the unit
TV
HDMI cable
Set the TV’s source to HDMI (refer to TV’s Owner’s
manual).
Additional Information for HDMI
yWhen you connect a HDMI or DVI compatible
device make sure of the following:
-Try switching o the HDMI/DVI device and
this player. Next, switch on the HDMI/DVI
device and leave it for around 30 seconds,
then switch on this player.
-The connected device’s video input is set
correctly for this unit.
-The connected device is compatible with
720x576p, 1280x720p, 1920x1080i or
1920x1080p video input.
yNot all HDCP-compatible HDMI or DVI devices
will work with this player.
-The picture will not be displayed properly
with non-HDCP device.

Connecting18
Connecting
2
yIf a connected HDMI device does not accept
the audio output of the player, the HDMI
device’s audio sound may be distorted or
may not output.
yWhen you use HDMI connection, you can
change the resolution for the HDMI output.
(Refer to“Resolution Setting” on page 19.)
ySelect the type of video output from the
HDMI OUT jack using [HDMI Color Setting]
option on the [Setup] menu (see page
31).
yChanging the resolution when the
connection has already been established
may result in malfunctions. To solve the
problem, turn o the player and then turn it
on again.
yWhen the HDMI connection with HDCP
is not veried, TV screen is changed to
black screen. In this case, check the HDMI
connection, or disconnect the HDMI cable.
yIf there are noises or lines on the screen,
please check the HDMI cable (length is
generally limited to 4.5 m(15 ft.)).
, Note What is SIMPLINK?
Some functions of this unit are controlled by the
TV’s remote control when this unit and LG TV’s with
SIMPLINK are connected through HDMI connection.
Controllable functions by LG TV’s remote control;
Play, Pause, Scan, Skip, Stop, Power O, etc.
Refer to the TV owner’s manual for the details of
SIMPLINK function.
LG TV’s with SIMPLINK function has the logo as
shown above.
Depending on the disc type or playing status,
some SIMPLINK operation may dier from your
purpose or not work.
, Note
ARC (Audio Return Channel)
function
The ARC function enables an HDMI capable TV to
send the audio stream to HDMI OUT of this player.
To use this function:
-Your TV must support the HDMI-CEC and ARC
function and the HDMI-CEC and ARC must be
set to On.
-The setting method of HDMI-CEC and ARC may
dier depending on the TV. For details about
ARC function, refer to your TV manual.
-You must use the HDMI cable (Type A, High
Speed HDMI™ cable with Ethernet).
-You must connect with the HDMI IN that
supports the ARC function using the HDMI OUT
on this player.
-You can connect only one Home Theater to TV
compatible with ARC.

Connecting 19
Connecting
2
Video Connection
Connect the VIDEO OUT jack on the player to the
video in jack on the TV using a video cable. You can
hear the sound through the system’s speakers.
Rear of the unit
TV
Video cable
Resolution Setting
The player provides several output resolutions for
HDMI OUT jack. You can change the resolution
using [Setup] menu.
1. Press HOME ( ).
2. Use A/D to select the [Setup] and press ENTER
(b). The [Setup] menu appears.
3. Use W/S to select [DISPLAY] option then
press Dto move to the second level.
4. Use W/S to select the [Resolution] option
then press ENTER (b) to move to the third level.
5. Use
W/S to select the desired resolution then
press ENTER (b) to confirm your selection.

20
Connecting
2
Connecting
yIf your TV does not accept the resolution
you have set on the player, you can set
resolution to 576p as follows:
1. Press HOME( ) to disappear the HOME
menu.
2 Press
Z(STOP) for more than 5 seconds.
yWhen you set the resolution to 576i with
HDMI connection, actual resolution is
outputted to 576p.
yIf you select a resolution manually and then
connect the HDMI jack to TV and your TV
does not accept it, the resolution setting is
set to [Auto].
yIf you select a resolution that your TV
does not accept, the warning message
will appear. After resolution change,
if you cannot see the screen, please
wait 20 seconds and the resolution will
automatically revert back to the previous
resolution.
yThe 1080p video output frame rate may
be automatically set to either 24 Hz or
50 Hz depending both on the capability
and preference of the connected TV and
based on the native video frame rate of the
content on the BD-ROM disc.
yThe resolution of the VIDEO OUT jack is
always outputted at 576i resolution.
, Note Antenna connection
Connect the supplied antenna for listening to the
radio.
Rear of the unit
After connecting the FM wire antenna, keep
it as horizontal as possible. Be sure to fully
extend the FM wire antenna.
, Note
This manual suits for next models
2
Table of contents
Other LG Home Theater System manuals