LG 23LX1R User manual

L
Col
MODEL: 23LX1R

Warning
arnIng
WARNING"
TO REDUCE THE RISK OF ELECTRIC SHOCK DO NOT REMOVE COVER (OR BACK). NO USER
SERVICEABLE PARTS 1NS[DE REFER TO QUALIFIED SERVICE PERSONNEL
,_ The lightning flash w_h arrowhead sym_, within _ equilateral triangle, is intended to alert the user to
the presen_ of uninsu[at_ "c_angerous volta_" within the pr_uct's enclosure that may be of suffi-
cient magnitu_ to _nstitute a risk of electric shock to persons.
The exclamation point within an _uilatera[ triangle is inten_d to alert the user to the presence of
im_rtant operating _d maintenance (servicing} instructions in the literature accompanying the appli-
an_.
NOTE TO CABLE/TV INSTALLER:
This reminder is provi_d to call the CATV system instaBer_s attention to Article 820_40 of the N-_t_onal Electric
Code (U,S,A), The code provides guidelines for proper grounding and, in _cular, s_cffies that the cable
ground shall be connected to the grounding system of the building as close to the point of the cabie entry as prac-
tical
REGULATORY INFORMATION
This equip_nt has been reded and found to comply with the limits for a Class B digital device, pursuant to Part
15 of the FCC Rules. Them limits are designed to provi_ reasonable protecfJon against harmful interference in
a resi_ntia[ initiation. This equipment _nerates, uses and can radiate radio frequency energy and, if not
in_[_ and u_d in accordan_ with the instructions, may cause harmfu_interferen_ to radio communications.
However, there is no guarantee that interference wiB net occur in a particular installation If this equipment d_s
cause harmful interference to radio or television reception, which can _ determined by turning the equipment off
and on, the user is encouraged to try to correct the interference by one or more of the foilowing measures:
-Reorient or relocate the receiving antenna
-hcrease the sep_aration between the equipment _d receiver.
Connect the equipment into an outlet on a circ4Jit different from that to which the reviver is connected.
-Consult the _er or an expeden_ radio/TV technician for help.
Any changes or modifica_ons not expressly approved by the pa_y res_nsible for compliance could void the
usePs at_rthor_tyto operate the equipment
CAUTION:
Do not attempt to modify this product in any way without written authorization from LG Electronics Corporation,
Unauthoriz_ modification could void the user's authority to operate this product.
U.S.A. only
COMPLIANCE:
The responsible party for this product's compliance is:
LG FJ_ren_s U.S.A., hc.
1000 Sy[v_ Avenue, Eng[ev_-_ C_iffs,NJ 07632
Phone: 1-201 o816-2000
http:/iwww,[gusa com
2

Safelyinstructions
f
WARNING:
To r_u_ the risk of fire or e_ric sh_k, _ NOT expose this apparatus to rain or moLs___re.
_paralus shall not _ expo_ to dripping or splashing and no objects filled w_th Iiquide, such as vases, shaJl _ placed on the
apparatus
CAUTION .'
These sepTidng instructionsare for use by qu_ified servi_ _rsonnem only. To redu_ the risk of electric shock, _ not perform
any sePTidng other th_ that contained in the o_rating instru_ons unless you are quamifiedto do so.
IMPORTA_ SAFETY INSTRUCTIONS
1_Read these instructions_
2 Keep these instructions_
& Heed all warning&
4. Follow all instructions.
5. Do not use this apparatus near water.
6. Clean only with a dry cloth.
7, Do not block any of the ventilation openings lnstall in accordance with the manufacturer's instructions,
& Do not instaJl near any heat sources such as radiators heat registers, steves, or other apparatus (including amplifiers) that
produce heat
9, Do not defeat the safety purpose of the polarized or grounding type plug A _larized plug has two blades w_th one wi_r
th_ the other. A grounding type plug has two Mades and a third grounding prong. The wide blade or the third prong is
provid_ for your safety. When the provid_ plug does not fit into your outmet,consult an em_tddan for replacement of the
obsolete outlet.
10. Protect the _wer cord from being walked on or pinched particularmy at plugs, convenien_ receptacles, and the point
where they exit from the apparatus.
11, Only use the attachments /accessories specified by the manufacturer_

Safety instructions
Instructions continued
12 Use only with a cart_ stand_ tripod_ bracket, or table specified by the man_acturer, or sold wffh the apparatus, When a
cart is used_ use cau_on when moving the cart/apporatus combin_ion to avoid injury from tip-over,
_125A
13 Unplug this apporatus dudng Bgh_ing storms or when unucod for long periods of time
14 Refer all corvicing to quaBfied corvice personnel Servicing is r_uired when the apparatus has been damaged in any
way, such as power supply cord or plug is damaged, liquid has b_n spilled or objects have fatlen into the apparatus, the
apporatus has been exposed to rain or moisture, does net operate normally, or has been drepped_
fCAUTION concerning the Po_r Cord
Most _pliances re_mmend _ey be placed upon a dedicated circuit; that is, a single outlet drcuit which powers only that
appliance _d has no addition_ outlets or branch drcuits. Check the sp_ific_ion page of this owner's manual to be certain.
Do not overload wall outlets. Overloaded wall outlets, loose or c_3maged vvaBoutlets, extension cords, frayed _wer cords,
or d_aged or cracked wire insulation are dangerous. Any of these conditions could result in e[ec4ric shock or fire.
Periodically examine the _rd of your _p[iance, _d if its _pear_co indicates damage or deterioration, unplug it, disc_no
_nue use of the appliance, at_d have the cord replaced with an e_ct replacement part by an authorized servicer.
Protect the power cord from physical or mechanical abuco, such as being twisted, kinked_ pinched, closed in a door, or
walked upon, Pay particular attention to plugs, waB outlets and the point where the cord exits the appliance,

Con_n_
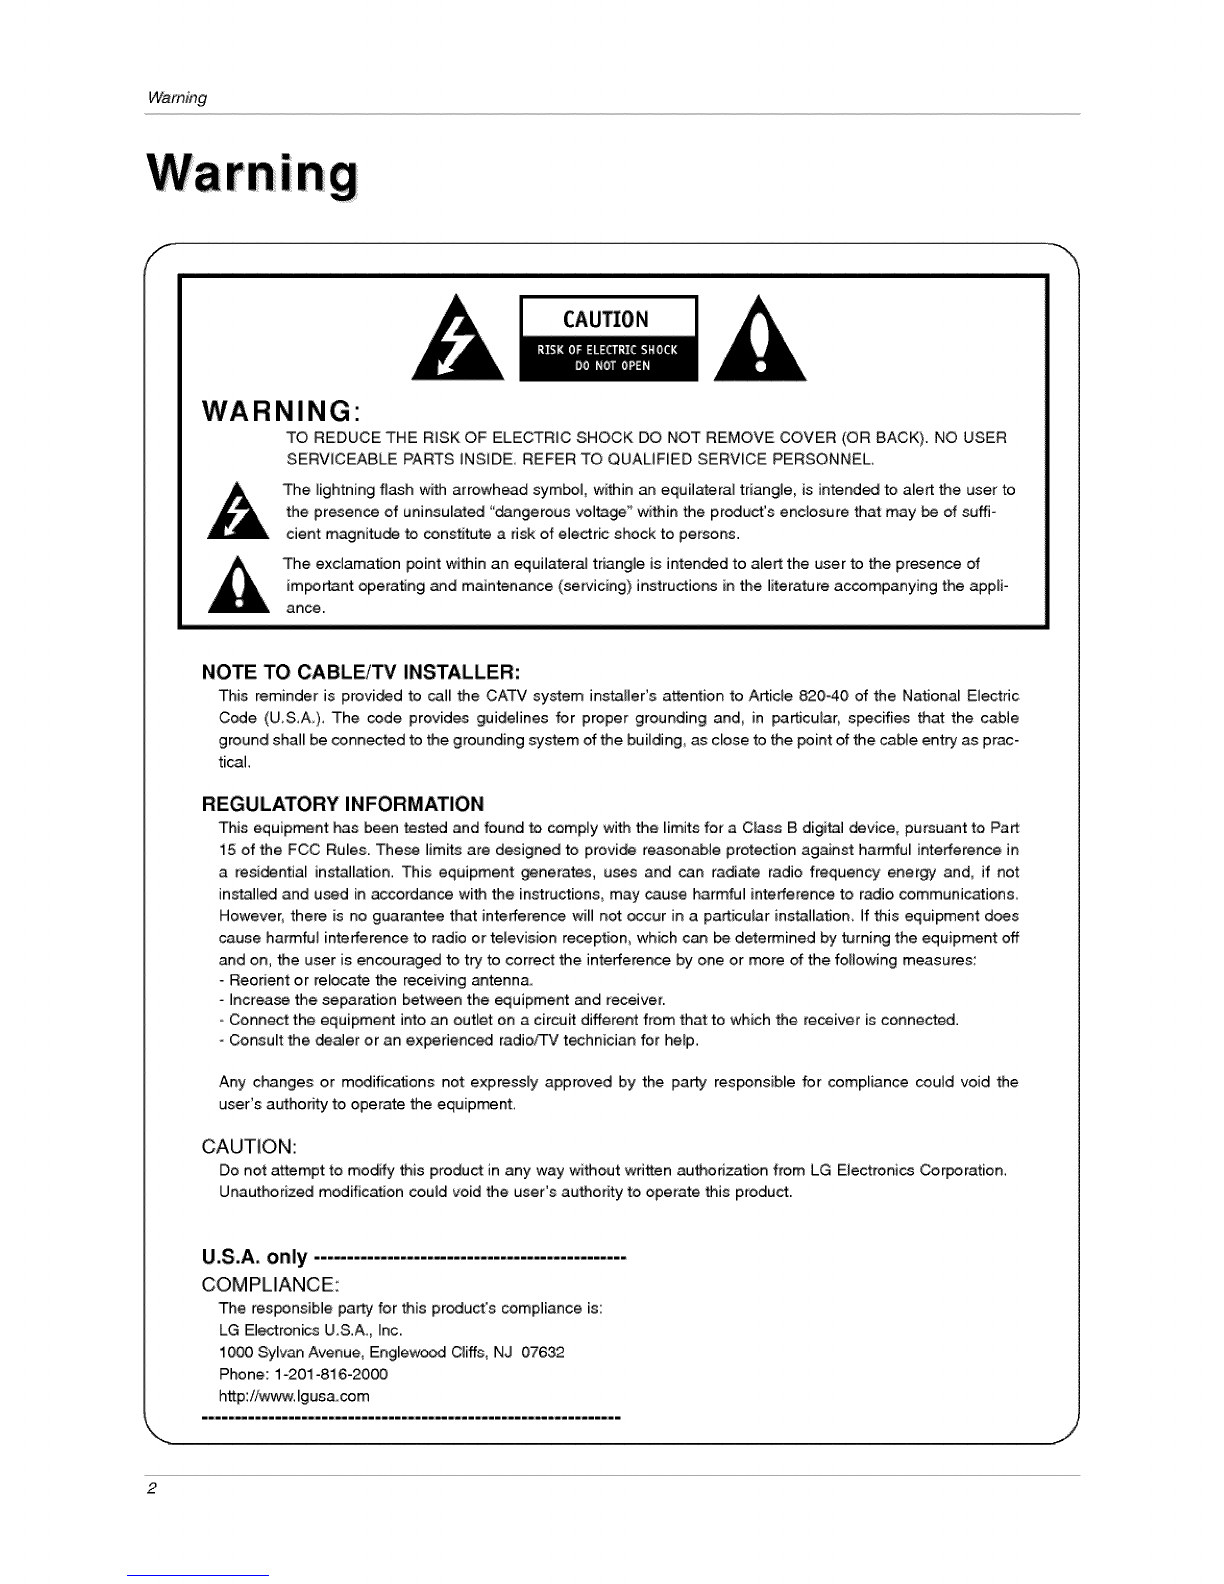
Warnings ..................................... 2
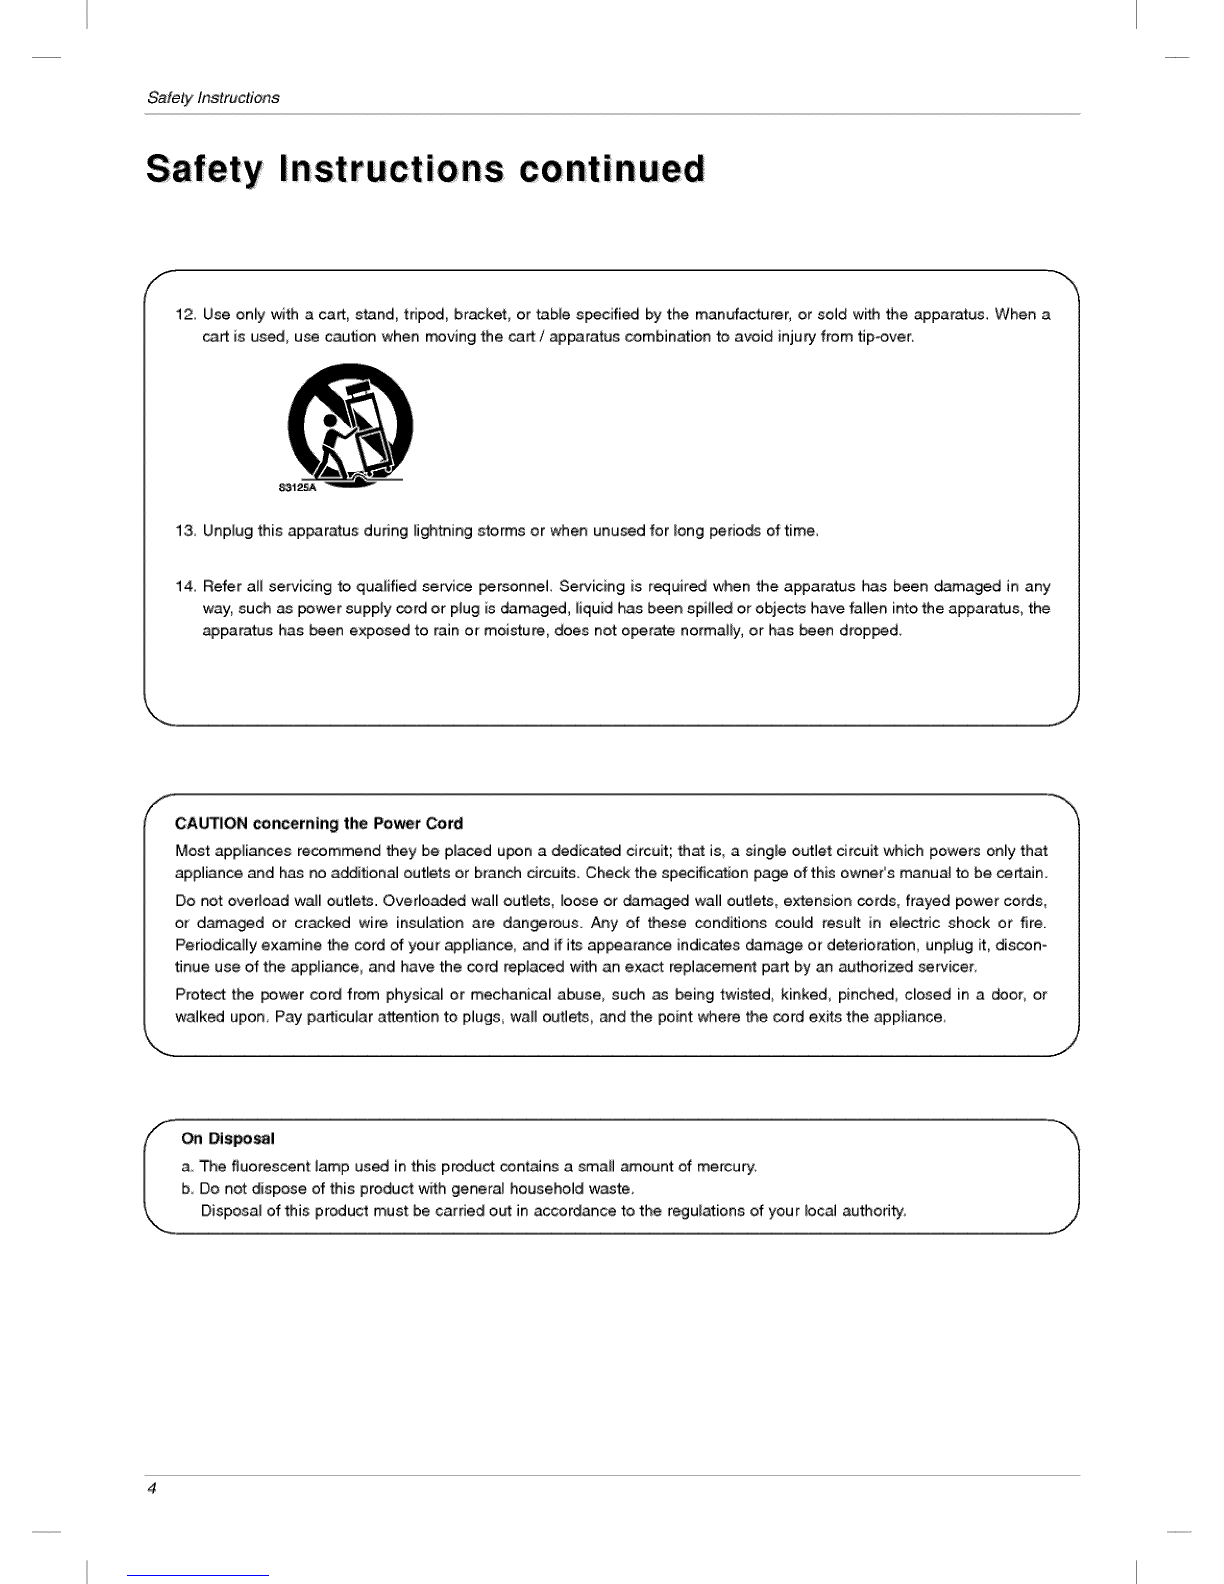
Safety lnstruc_ons 3_4
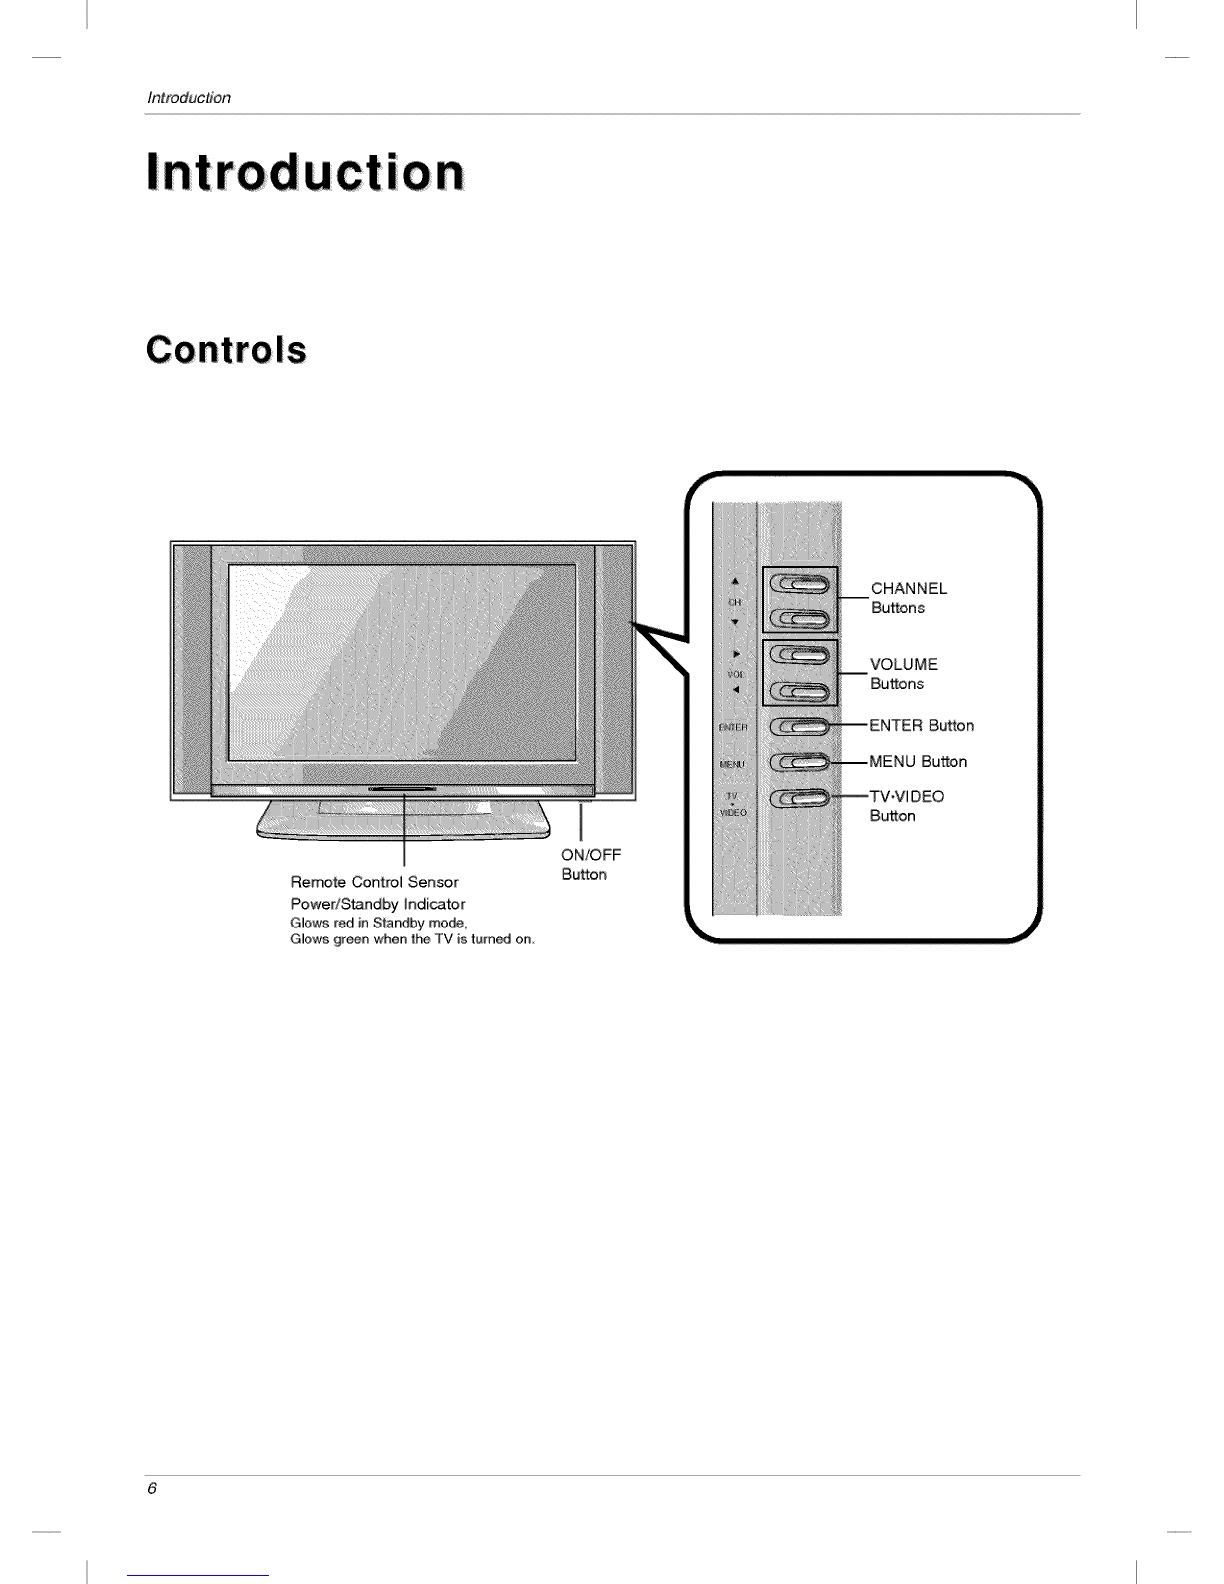
Intr_ uction
Controls ............................... 6
Connection Options ...................... 7
Remote Control Key Functions .............. 8
InstallationAccessories 9
Kensin_on Se_dty System ................ 9
InstaBation In.ruction
Connection of TV ....................... 10
Cable Holders 10
AdiustJng the TV Viewing Angle ...... 10
External Equipment Connections
Antenna Connection ..................... 11
VCR Setup ............................ 12
C_e TV Setup ........................ 12
External AN Source Setup ......... 13
DVD Setup 13
DTV Setup 14
PC Setup ............................. 14
TV Operation Over¢iew 15
Menu _nguage Selection ......... 15
Channel Menu Options
Memorizing the Channels with EZ Scan ...... 16
AddfDelete Ch_nels with Manual Program ...16
Favorite Channels Setup .................. 16
Picture Menu Options
EZ Video 17
Manual Picture Control (User option) ..... 17
Cinema Mode Setup ..................... 17
Picture Format (ARC) .................... 17
Sound Menu Options
EZ Audio .......................... 18
Equalizer Adjustments ................... 18
AVL (Auto Volum_ Leveler) ................ 18
Sound Bamance ......................... 19
Stereo/SAP Broadcasts Setup ............. 19
Time Menu Options
Auto Clock Setup ....................... 20
Manual Clock Setup ..................... 20
On/Off _mer Setup ..................... 21
Sleep Timer Setup ...................... 21
Auto Off .............................. 21
Sp_ial Menu Options
Closed Captions ........................ 22
Caption/Text ........................... 23
Captions .............................. 23
Key Lock ............................. 23
Logo ................................. 23
Lock Menu Options ....................... 24
Lock Menu Setup ....................... 25
PC Menu Options ......................... 26
_intenance ................................. 27
Product Specifications ......................... 27
Troubleshooting Checklist ...................... 28
After reading this manual, keep it handy for future reference,

Introducdc_
ControIs
Rerr#te Control Sensor
Power/Standby hdicator
GIo_ red in Star¢tby mode,,
GIo_ grin when _ "rv is turned on,
1
ON/OFF
Button
CHANNEL
B_ons
VOLUME
Bu_ons
Button
Bu_on
Button

introduction
Connection Opt ions
0 o oo o oo o
PC _UND INPUT
DVI INPUT
(RGB INPUT)
UPGRADE PORT
JACK
REMOTE CONTROL
JACK
AC INPUT
AUDmO/VmDEO
INPUT
COMPONENT1 DVD/DTV IN)
((480i/480p/720pt1080i), Audio)
ANTENNA
_NPUT

introduction
Remote Control Functions
When using Me remote control, aim it at the remote _ntrol sensor on the TV.
or _ mo_.
FOR __
(Refer to p,16)
NUMBER buttons
iiiiiiiiiiii
AUDIO .................................................................................................................................
(Refer to p.18)
(Refer to p.22)
ARC ..... -
(Refer to p,17)
MULTiMEDiA
_l_ts: '_#, Component 1_
Component 2 or PC mode.
.... --- ........ POWER
-MTS
(Refer to p,19)
MENU
E_ER
CH A /V (Channel button)
VOL "< /1_ (Volume button)
VIDEO
(Refer to p,17)
SLEEP
(Refer to p.21)
FLASHBK
Press the FLASHBK button to
return to the last channel you were
watching
•Open the battery compartment cover on the back side and
insert the batteries with correct polarity,
•U_ two 1,5V batteries of AAA type Don't mix used batteries
with new b_eries,

Installation
Owner's Mat_ual AAA Batteries Remote Control Power Cord
DVFD cable (PC) DVI to D-Sub cable (PC) Audio cable (PC) Tie Holder
- Ari-angethe wires wffh
#'_ t_ Holder.
Polishing cieth
- The TV is equipped with a Kensington Secudty System connector
on the back panel Connect the Kensington _urity System
cable as shown betow
- For the detailed installa_on and use of the Kensington Secur_y
System, refer to the user's guide provi_d with the Kensington
Secur_ System
For further infom-_tion, contact http:/f_,kensington,com, the
intemet homepege of the Kensington company, Kensington sells
secudty systems for expensive electronic equipment such as note-
_ok PCs and LCD proiector&
NOTE
-The Kensington Secur_y System is an optional accessory
NOTES
a. If the "IV feels cold to the touch, there may be a small "flicker" when when it isturned on.
This is nom'lal_ there is nothing wrong with TV+
b, Some minute dot defects may _ visible on the _reen appearing as tiny red, green, or blue spots, However, they have no
adverse effect on the monitor's performance,
c, Avoid touching the LCD screen or holding your finer(s) a_inst it for long periods of time
Doing so may pfodu_ some temperary distortion effects on the screen.

InstaIla#on
Installation Instruction
O Pull the back cover backside while pushing the two tabs and then lift it up
Conn_ the antenna cable to the socket marked 75 _;&on the back For the best reception an
oLrtdoor antenna should be used_
To conn_ an additional equipment, see the External Equipment Connections section
O Conn_ the power cord
Close the back cover,
_ _ 0 ¸
Thread_ then pu[[ the cables (except the antenna cable) through the hole on the TV stand Arrange the antenna cable through the
si_ hole as shown below,
..........................................Antenna _b[e
You can adjust the verticaJ at_g[e of the TV,
/
10

Installation
Equipment Connections
°For optimum picture quality, adjust antenna direction.
Connecting to an Inside Antenna Setup
off you have a 75_. round cabJe, insert the bronze wire and then tighten the connection nut. If you have a 300£2 flat wire, connect
the twisted wire to the antenna _nverter and then _nnect the converter to the antenna jack on the TV.
off using 75£:_round cable, do not bend the bronze wire. It rr_3ycause poor picture qua[i_.
Connecting to an Outdoor Antenna Setup
- In poor signal areas, to get better picture quaJffy, instaJ[ a
signal ampl_er to the antenna as shown to the right
- If signal needs to _ split for two TVs, use an antenna
signal splffter for conn_on
11

Insta Ila#on
External Equipment Connections Continued
- In Video mode TV automatically reverts to TV mode ff the
FOR button or FLASHBK buttons are pressed,
_nn_tion 1
Set VCR switch to 3 or 4 and then tune TV to the same
channel number
Connection 2
1. Connect the audio/video output jacks on VCR to the _rre
spending input jacks on the TV. When connecting the TV
to a VCR, match the jack colors (Vid_ = yeBow; Audio
Left =white, and Audio Right =red).
2. [nserl a vid_ tape into the VCR _d press PLAY on the
VCR. (Refer to the VCR owner's manuaL)
3. Use the TV/VlDF_O button on the re,re _ntro[ to select
Video. (ff connected to S-VIDEO on side pane[, select the
S-Video external input _urce.)
Direct
Connection
[]
[]
VCR
S|de Panel
g
VCR
- After subscribing to a Ioc._[cable TV service and instaJlinga converter, you can watch cable TV programming
- For further cable TV information, contact a local cable service provide_
Connection 1
1. Select 3 or 4 with channel switch on cable box.
2. Tune the TV channel to the same selected output channel
of _b[e box.
3. Select ch_nels at the cable box or with the cable box
remote _ntroL
Connection 2
1. Connect the audio/video output jacks on Cable Box to the
_rresponding input jacks on the TV. When connecting
the TV to Cable Box, match the jack colors
(_deo = yellow; Audio Left = white, _d Audio Right =
red).
2. Use the TV/VIDEO button on the re,re _ntro[ to select
Video.
3. Select ch_nels with the cable box remote _ntrol.
[]
Cable Box
12

Installation
_nnections
Connect the audio/vid_ output jacks on the external AN
equipment to the corresponding input jacks on the TV.
'When conne_ng the TV to external AAJ equipment,
match the jack colors (Vi_o = yellow, Audio Left = white,
and Audio Right = red).
Viewing Setup
1. Turn on the externa_ AN equipment.
2. Use the TV/VIDEO button on the remote control to
select Video.
3. Operate the corresponding external equipment. Refer
to extema_ equipment oporating guide. External
Equipment
Camcorder
Video Game set
_nnections
1_Connect the DVD video outputs to the COMPONENT (Y, P&
PR)iacks and connect the DVD audio oLrtpLrts to the AUDIO
jacks
2 If your DVD only has an S-Video oLrtput jack_ connect this to
the S-VIDEO input on the TV and connect the DVD audio
outputs to the AUDIO INPUT iacks on the TV, as shown in
the figure
NOTE: If your DVD player does not have component video
output, use S-Video
Viewing Setup
1. Turn on the DVD player, insert a DVD.
2. Use the TV/MIDEO or MULTIMEDIA button on the remote
control to select Component 1 or Component 2(If connect-
ed to S-V_DEO, select the S-Video input source.}
3. Refer to the DVD playe¢s manual for operating instructions.
Component Input _rts
To get better picture quality, connect a DVD player to
the component inpLrt ports as shown below.
Component ports
of the TV
Vi_o outpLrt ports
of DVD player
Side Pane|
DVD
DVD
13

fnstallation
-To watch dig_311ybroadcast programs, purchase _d
connect a digital set-top _x.
Connections
Connect the dig_ set4op box video outputs to the
COMPONENT (Y, PB, PR) jacks and connect the digital
set4op box audio outputs to the AUDIO iacks.
Viewing _tup
1. Turn on the digital set-top box. (Refer to the owner's
m.3nual for the digital set4op box.)
2. Use the TV/VIDEO or MULTIMEDIA button on the
remote control to select Com_nent 1.
DTV Receiver (Set4op Box)
- After setup, _ sure to select PC source on TV.
Connections
1. Set the monitor output resolution on the PC before
connecting to the TV.
2. Connect the TV to the PC with the PC cable.
3. Connect the PC audio output to the TV's PC SOUND
input.
Viewing _tup
1, Turn on the PC,
2+ Use the TViVIDEO or MULTIMEDIA button on the
remote control to select _,
Monitor Display Specifications
MODE Re_lut_ H_ontal Vert_l
VGA 640x480 31.4 60
SVGA 8_x600 37.8 60
XGA 1024x768 48.3 60
1280X768 47.6 60
WXGA
13_x768 476 60
IH
NOTE
Connect the signal cable (DVIoD cable, Not DVI to DoSub cable)
from the DVI output socket of the PC to the DW input socket of
the set when using a PC with DW output. In some video cards,
DVFAn_og output may not be sup_rted.
NOTES
a. For optimum picture qual_y_ use standard WXGA 1_0x768 computer output at a 60Hz refresh rate. Using other formats
(VGA, SVGA, etc,) or refresh rates may result in reduced picture quality. (To change the computer video output format,
please refer to the operating manual for the computer you are using)
b If the message °Ou| ot r_ge" appears on the screen, adiust the PC output to a format listed in the 'Monitor Display
Specifications' _arl _ove.
c. The syn_ronization input form for Horizontal and Verlical frequencies is separate.
DPM (Display Power Management) mode
If the PC goes to power saving mode, the monitor automatically switches to DPM mode
If you _n't use the PC cable provided_ DPM mode may not work
14

Operation
ion
1_ First, make alWequipment conn_ions Plug the AC Adapter into the TV, then plug the AC Adapter into a _wer
outlet At this _me_ the TV is switched to standby mode
• In standby mode, press the PO_ CH (AT), 'rvP_/H)EO, MULT_EDL& or number button on the remote
control or ON,O_ CH (A_T) TVF'_/_EO I_ated on the TV to turn the _ on
2 Select the viewing source by pressing 'rvF'_/_EO or M_L_, repeatedly.
• Note: _ page 16 if you have not auto programn-_d the TV to receive channels in your local broadcast area
3. After viewing, press the _W_ button on the remote controm or ON_O_ mocatedon the TV. The _ reverts to
_dby mode.
NOTE
• If you want to turn the TV off, press the on/off button I_ated on the TV. ff you intend to _ away on vacation,
dis_nnect the power plug from the wall _wer out_et.
Menu Language Selection
-The n-_mJs can be shown on the screen in the selected language, Firstselect your language,
1, Press the MENU button and then use A /T bL_on to select the _ memJ,
2; Press the I_ _on and then _ A /T button to _ _e
3 Press the I_ _on and then _ A /T button to select your desired language
From this point on, the on-screen menus will be shown in the mangt_ageof your
_oice.
4. Press the ENTER button to save.
15

Operation
Channe! Menu 0 ptions
- For Auto program to work, the programming source must be connected to the TV and the TV must be receiving programming sig-
naJseither over4he-air or from a cable-type service provider,
1. Pre_the MENU b_n _then u_ A T button to _ Cl-_m._l menu.
2. Press the I_ button and then use A /T button to select _ _.
3 Press the I_ button to begin the channeWsearch,
• Wait for auto program to _mplete the ch_nel search cycle before
choosing a channeJ The TV scans for over4he-aJr channeJs and then
channels provided by a cable sewice
NOTES
• When the channe[ _arch is complete, use the A ;T buttons to review the memorized channels
•ff you press the _ER button in auto programming, the fun_on wiB stop and only channeMs programming up to that time will remain.
•Auto program fun_on c_ memodze only the ch_neis which are being re_ived at that time.
You can manually include or erase individual channels,
1Pre_the MENU but¢_ _d then u_ A/T bum to seethe Chem.nel menu
2, Press the I_ button and then use A _T button to select Manual prog,
3. Press the I_ button _d then use 41/ P,button to _lect a channe[ you want
to add to memory or erase.
4. Press the V button and then use < I_ button to select Memory (add) or
_ase (delete)
5. Press the ENTER button to save. The current c4_anne[is added to Memo_
or Erased from the channel list.
The current c_nne_ numberisdismayed,
I
Favorite Channel lets you quickly tune in up to 8 channels of your choice w_hout having to wait for the TV to scan through
aJlthe in-between channets,
1. Press the MENU button and then use A ;V button to _lect the Channel menu.
2. Press the P, button and then use A _T button to select Favorite ch..
3. Press the I_ button and then use A V button to select the first favorite channel position.
4, Use the < _I_ button to set the _sired channel number for first favorite channel
5. Re,at steps 3 to 4 to memorize other channels.
6. Press the ENTER button to save.
*To tune to a favorite ch_nel, press the FCR (Favorite Channel Review) button repeatedmy: The 8 favorite channels appear on
the screen one-by-one.
16

Operation
Picture Options
- This function adiusts the TV for the best picture appearance
1, Press the video button repeatedly to se[e_ the picture appearance setup option as shown _low,
•You can also adiust _ Video in the Picture menu
•Clear, Optimum and _lt are preset for good picture quality atthe faclo_ and cannot _ changed.
You can adjust picture contrast, brightness, color, sharpness and tint to the levels you p_fer.
1. Press the MENU button and then u_ A/T button 1O_the Pi_e _nu.
2. Press the I_ button and then use A /T button to _lect User.
3, Press the I_ button and then use A / T button to select the desired picture
option(Contr_ _.ghtness Color, S_h_.s _"_t).
4, Use the </I_ button to rr_ke appropriate adiustments,
• Contrast, Brightness, Color, and Sharpsess are adj_able from Olo 100.
•Tint is adjustable from -50 to + 50.
5. Press the ENTER button to save.
Sets up the TV for the best picture _pearanse for viewing movies.
1, Press the MENU bLr[lon _d then u_ A _T bL_on to sete_ tt'_ _ rr_nu
2. Press the i_ button and then use A / T button to select _e_.
3, Press the i_ button and then use A /T bL_on to to se[e_ On or Off
4. Press the E_ER button to save.
You can watch TV in various picture forma_; l&9, _ta, @3,
Repeatedly press the ARC button to select your desired picture format.
•l&9
You c_ enjoy the cinema (the picture format of 16:9) or genera[ TV programme through the 16:9 mode.
The screen 16:9 is viewed just like that but the screen 4:3 is magnified to the [eft and right so that the screen 16:9 is full.
You can enjoy the cinema in a vast screen through the Zoom mode
The screen 4:3 is magnified to the upper /lower and [eft /right sides so that the screen 16:9 is full, The bottom and top of the pic-
ture may be lost
This picture format is 4 to 3 of general TV.
NOTES
l&9 and 463 are available in PC mo_ only,
17

Operation
Sound Menu 0ptions
-This function lets you enjoy the best sound without any s_cia[ adiu_ment because the TV selects the appropriate
sound option based on the program content.
1, Use the audio button to seJect the appropriate sound setup as shown below
• You can also adjust EZ AUdiO in the _und menu
1 Press the MENU button and then use A /•button to select the Sound menu
2, Press the _ button and then use A /T button to select EZA_
3, Press the _ button and then use _ / T button to select User
4, Press the I_ button and then use _ _I_button to select the band you want to adjust Then, use • /T button to adjust
the band level
5, Press the ENTER bL_en to save
AVL _in_ins an equal volume levi automa_icaBy e_n ff the channel is changed,
1. Press the MENU b_ton and then use _ _!' b_ton to sel_ the Sound menu.
2. Press the I_ b_tton and then _se _ / T b_tton to select A_
3, Press the I_ b_tton and then _se A / T button to to select On or Off.
4. Press the ENTER button to save.
18

Operation
Sound Menu Options continued
1. Press the MENU button _d then u_ & /T button to sel_ the Sound menu.
2. Press the _ button and then use A /T button to _lect ]B_..l_ce.
3. Press the I_ button _d then use <1/_ button to adjust the sound bamance.
• Bal_ is adjustable from Left 50 to Right 50.
4_ Press the ENTER button to save_
The TV can receive MTS _ereo programs _d any SAP (_ondary Audio Program) that accompanies the
stereo program, if the broadcaster transmits an a_itional sound signa_ as v_emmas the original one.
Mono: The prima_ language is heard from left and right s_akers. Signal _de is mono.
Stereo: The pci_ language is heard from left and right speakers. Signammo_ is stereo.
SAP: The se_nda_ language is heard from left and right s_akers.
1. Press the &_'S button repeatedly:
• Select mono sound mode if the signal is not c_ear or in poor signamre_ption areas.
• Stezeo SAP n-_de are available only if included on the broadcast signal
19

Operatio_
Menu Options
The time is set aLrtomaticaJly through from a PBS broadcast signal
The PBS channel signal inclu_s information for _e correct time and dayJight saving time
1. Press the MENU button and then use A ;Vbutton to select the _met menu.
2. Press the _ button and then use A / T button to select _!l_.
3. Press the _ button and then use A / T button to select Auto.
4. Press the _ button and then use A / T button to select the time zone for your viewing area. Your choices are:
&_.e_ ]_$1"_ (Eastern Standard T_me), CST (CentraJ Standard Time) MST (Mountain Stan_rd Time), P_$_'I'_
(Pacific Stanc_ard Time), _ke, and Hawaii.
5. Press the _ button and then use A /T button to set _ _e_L,"_e[
6. Press the I_ button and then use A /T button to set D_T. (Daylight Savings Time} Aute, _ or On, depending
on whether or not your viewing area observes Daylight Savings Time.
7 Press the ENTER button to _ve,
Ifthe time on _e dock is incorrect, reset the clock manually,
1. Press the MENU button and then use A T button to _lect the TIa÷r
menu.
2_ Press _e i_ button and _en use A /T button to setect _
3, Press _e i_ button and _en use A /T button to select _u_
4 Press the i_ button and then use &/T button to set the hour.
5, Press the i_ button and then use A /T button to set the minL_es,
6. Press the ENTER button to save.
20
Table of contents
Other LG LCD TV manuals