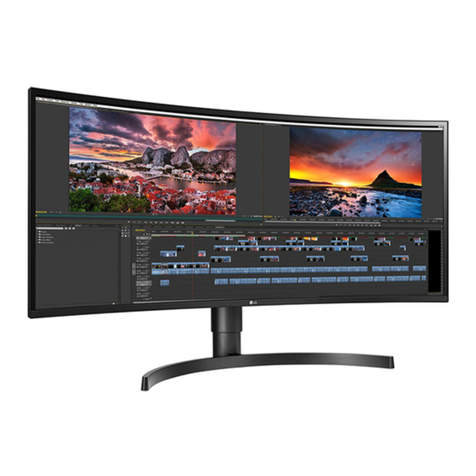
LG M3703CG User manual

Order Number : GETEC-C1-09-151 FCC Class B Certification
Test Report Number : GETEC-E3-09-081 Page 1 / 1
EUT Type: LCD Monitor
FCC ID.: BEJM3703CG
APPENDIX G
: USER’S MANUAL

M
ake sure to read the
Safety Precautions
before using the product.
Keep the User's Guide(CD) in an accessible place for future reference.
S
ee the label attached on the product and give the information to your dealer when you ask
for service.
M3203C
M3703C
User's Guide
Sellers or users should understand that this device is for public use, not
home use.

1
1
- Only on some models.
Connecting the stand
First, check if the following parts are all present.
Stand (2)
Screws (4)
Parts
1. Take the parts for the stand out of the box and assemble them as
shown in the picture.
2. Place a soft cloth on the table and put the product with the screen
facing downward. Connectthestandasshowninthefollowingpicture.
3. Use the screws to secure the stand on the rear side of the product as shown
in the diagram.

22
Connecting the Speakers
Mount the product onto the speaker by using a screw as shown in the following
connect the speaker cable.
- Only on some models.
When the speaker is installed.
*Connect the input terminal with a proper color match.
Remove the paper.
Cable holder
After installing your speakers, use holders and cable ties to organize the speaker cables.
* This feature is not available in all model.
Cable tie
* This feature is not available in all model.

3
3
To install Portrait
- Only M3203C
"When installing Portrait, rotate it clockwise based on its front."

44
Using the Remote Control
Name of the Remote Control Buttons
•
AV Button
•
Sleep Button
When watchingAV, RGB PC,HDMI/DVI,
Component
The product will be automatically turned
off after a certain period of time.
Press this button repetitively to
select an appropriate time duration
•
PSM Button
- Toggles through preset video
settings.
•
Menu Button
•
Check Button
•
Volume Button
Volume up and down
•
Mute button
There is not a function
which is supported
•
UP and Down buttons
Bring up and down direction
adjustment.
•
ARC button
Aspect Ratio Correction. Toggles
through aspect ratio options.
•
Auto Button
Automatic adjustment function
(Operational for the analog signal only)
•
Exit Button
There is not a function
which is supported
There is not a function
which is supported
There is not a function
which is supported
•
Power On/Off Button
•
Input Select Button
(See next page)

66
Name and Function of the Parts
Rear View
*LINE OUT
Aterminal used to connect to the speaker including a built-in amplifier (Amp). Make sure that
the connecting terminal of the PC sound card is checked before connecting. If theAudio Out of
PC sound card has only Speaker Out, reduce the PC volume.
If the Audio Out of the PC sound card supports both Speaker Out and Line Out, convert to Line Out
using the card jumper of the program (Refer to the Sound Card Manual).
* The product image in the user's guide could be different from the actual image.
Power Connector : Connect the power cord
RS-232C Serial Ports
RGB PC, HDMI/DVI Ports
-HDMI Supports High Denition input and HDCP (High-bandwidth Digital Content
Protection). Some devices require HDCP in order to display HD signals.
PC Sound Jack
: Connect the audio cable to the *LINE OUT jack of the PC sound card.
Wired Remote Control Port
AV Ports
LAN Port
Speaker Ports

1111
The Set is equipped with a kensington Security System
connector on the back panel. The cable and lock are
available separate and are not sold by LG. For more info,
visit http://www.kensington.com, the internet home page
of the Kensington company.
VESA FDMI wall Mounting
This product supports a VESA FDMI compliant mounting interface. These mounts are purchased
separately and not available from LG. Refer to the instructions included with wall mount for more info.
Connecting to External Devices

35
• See if the power cord is properly connected to the
outlet.
• See if the power switch is turned on.
• May need service.
• Adjust brightness and contrast again.
• Backlight may need repair.
• If the product is in power saving mode, move the
mouse or press any key.
• Turn both devices off and then back on.
• The signal from the PC (video card) is out of the
vertical or horizontal frequency range of the
product.Adjust the frequency range by referring
to the Specifications in this manual.
* Maximum resolution
RGB : 1600 x 1200 @60Hz
HDMI/DVI : 1920 x 1080 @60Hz
• The signal cable between PC and product is not
connected. Check the signal cable.
• Press the 'INPUT' menu in the remote Control to
check the input signal.
No image is displayed
• The control locking function prevents unintentional
OSD setting change due to careless usage. To unlock
the controls, simultaneously press the Menu button
and button for several seconds. (You cannot set
this function using the remote control buttons. You can
set this function in the product only.)
●
The 'Key Lock On' message
appears when pressing the Menu
button.
' Key Lock On' message appears.
• Install the product driver, which is provided with
the product, or download it from the web site.
(http://www.lge.com)
• See if the plug&play function is supported by
referring to the video card user manual.
●
Did you install the driver?
'Unknown Product' message appears when the product is connected.
Note
* Vertical frequency: To enable the user to watch the product display, screen image should be changed tens of times
every second like a fluorescent lamp. The vertical frequency or refresh rate is the times of image display per second.
The unit is Hz.
* Horizontal frequency: The horizontal interval is the time to display one vertical line. When 1 is divided by the
horizontal interval, the number of horizontal lines displayed every second can be tabulated as the horizontal
frequency. The unit is kHz.
●
Is the product power cord connected?
●
Is the power indicator light on?
●
Power is on, power
indicator
is Green
but the screen appears extremely dark.
●
The power indicator amber?
●
Does the 'Out of range' message
appear?
●
Does the 'Check signal cable' message
appear?
Troubleshooting
36
●
Is the screen position wrong?
●
Do thin lines appear on the
background screen?
●
Horizontal noise appears or the
characters look blurred.
●
The screen is displayed abnormally.
The screen image looks abnormal.
• D-Sub analog signal - Press the "AUTO" button in
the remote control to automatically select the
optimal screen status that fits into the current
mode. If adjustment is not satisfactory, use the
Position OSD menu.
• See if the video card resolution and frequency are
supported by the product. If the frequency is out
of range, set to the recommended resolution in
the Control Panel "Display" Setting menu.
• D-Sub analog signal - Press the "AUTO" button
in the remote control to automatically select an
optimal screen status that fits into the current
mode. If adjustment is not satisfactory, use the
Clock OSD menu.
• D-Sub analog signal - Press the "AUTO" button
in the remote control to automatically select an
optimal screen status that fits into the current
mode. If adjustment is not satisfactory, use the
Phase OSD menu.
• The proper input signal is not connected to the
signal port. Connect the signal cable that matches
with the source input signal.
• If you use a fixed image for a long time, the pixels
may be damaged quickly. Use the screen-saver
function.
●
After-image appears when the
product is turned off.
After-image appears on the product.
Troubleshooting

37
• Set the number of colors to more than 24 bits
(true color)
Select Control Panel - Display - Settings - Color
Table menu in Windows.
• Check the connection status of the signal cable.
Or, re-insert the PC video card.
• Several pixels (red, green, white or black color)
may appear on the screen, which can be
attributable to the unique characteristics of the
LCD panel. It is not a malfunction of the LCD.
●
Screen has poor color resolution
(16 colors).
●
Screen color is unstable or mono-
colored.
●
Do black spots appear on the screen?
Screen color is abnormal.
• See if the audio cable is connected properly.
• Adjust the volume.
• See if the sound is set properly.
• Select the appropriate equalize sound.
• Adjust the volume.
●
No sound?
●
Sound is too dull.
●
Sound is too low.
The audio function does not work.
• Is the sleep timer set?
• Check the power control settings.
Power interrupted.
•
"CAUTION! FAN STOP!"
If the power is turned off after this message
appears, it means that the fan is out of order.
In this case, contact your local service center.
●
The power suddenly turned off.
The operation does not work normally.
Troubleshooting

38
LCD Panel
Power
Dimensions
&Weight
NOTE
Information in this document is subject to change without notice.
31.51 inches (80.0 cm) TFT (Thin Film Transistor)
LCD (Liquid Crystal Display) Panel
Visible diagonal size: 80.0 cm
0.17025 mm x 0.51075 mm (Pixel Pitch)
Rated Voltage AC 100-240V~ 50/60Hz 1.5A
Power Consumption On Mode : 145W Typ.
Sleep Mode : ≤ 1W (RGB) / 4W(HDMI/DVI)
(If LAN OFF is selected)
Off Mode : ≤ 1W
The product specifications can change without prior notice for product improvement.
Width x Height x Depth
[1] 80.29 cm (31.61 inches) x 54.00 cm (21.26 inches) x 19.25 cm (7.58 inches)
[2] 80.29 cm (31.61 inches) x 49.30 cm (19.41 inches) x 9.98 cm (3.93 inches)
[3] 80.29 cm (31.61 inches) x 54.00 cm (21.26 inches) x 19.25 cm (7.58 inches)
[4] 80.29 cm (31.61 inches) x 49.30 cm (19.41 inches) x 9.98 cm (3.93 inches)
Net
[1] 16.82 kg (37.08 lbs) [2] 14.38 kg (31.70 lbs)
[3] 17.6 kg (38.80 lbs) [4] 15.16 kg (33.42 lbs)
[1]
W
H
[2]
W
H
DD
[3]
W
H
DD
[4]
W
H
Specications
M3203C

39
Specications
LCD Panel
Power
Dimensions
&Weight
NOTE
Information in this document is subject to change without notice.
37 inches (94.0 cm) TFT (Thin Film Transistor)
LCD (Liquid Crystal Display) Panel
Visible diagonal size: 94.0 cm
0.200 mm X 0.600 mm X RGB (Pixel Pitch)
Rated Voltage AC 100-240V~ 50/60Hz 1.8A
Power Consumption On Mode : 180W Typ.
Sleep Mode : ≤ 1W (RGB) / 4W(HDMI/DVI)
(If LAN OFF is selected)
Off Mode : ≤ 1W
The product specifications can change without prior notice for product improvement.
Width x Height x Depth
[1] 92.81 cm (36.54 inches) x 62.10 cm (24.45 inches) x 22.76 cm (8.96 inches)
[2] 92.81 cm (36.54 inches) x 57.12 cm (22.49 inches) x 11.25 cm (4.43 inches)
[3] 92.81 cm (36.54 inches) x 62.10 cm (24.45 inches) x 22.76 cm (8.96 inches)
[4] 92.81 cm (36.54 inches) x 57.12 cm (22.49 inches) x 11.25 cm (4.43 inches)
Net
[1] 23.98 kg (52.87 lbs) [2] 20.76 kg (45.77 lbs)
[3] 24.76 kg (54.59 lbs) [4] 21.54 kg (47.49 lbs)
[1]
W
H
[2]
W
H
DD
[3]
W
H
DD
[4]
W
H
M3703C

40
NOTE
Information in this document is subject to change without notice.
Max. Resolution RGB : 1600 X 1200 @60Hz
HDMI/DVI :
1920 X 1080
@60Hz
- It may not be supported
depending on the OS or video card type.
Recommended Resolution
RGB : WSXGA1360 X 768@60Hz
HDMI/DVI : WSXGA1360 X 768 @60Hz - It may not be
supported depending on the OS or video card type.
Horizontal Frequency RGB : 30 - 83 kHz
HDMI/DVI : 30 - 83 kHz
Vertical Frequency RGB : 56 - 75 Hz
HDMI/DVI : 56 - 60 Hz
Synchronization Type Composite/Separate/Digital
15-pin D-Sub type, HDMI (digital), S-Video,
Composite Video, Component, RS-232C, LAN
Operational Condition Temperature: 0°C~ 40°C , Humidity: 10% ~ 80%
Storage Condition Temperature: -20°C ~ 60°C , Humidity: 5% ~ 90%
Video Signal
Input Connector
Environmental
Conditions
The product specifications can change without prior notice for product improvement.
RMS Audio Output 10W+10W(R+L)
Input Sensitivity 0.7Vrms
Speaker Impedance 8Ω
Audio
* Applicable only for models that support the speakers
Specications

41
Preset mode
Horizontal
Frequency
(kHz)
Vertical
Frequency
(Hz)
PC Mode - Preset Mode
Preset mode
Horizontal
Frequency
(kHz)
Vertical
Frequency
(Hz)
1
2
*3
4
*5
6
7
*8
9
*10
640 x 350
720 x 400
640 x 480
640 x 480
800 x 600
800 x 600
832 x 624
1024 x 768
1024 x 768
1280 x 720
31.469
31.468
31.469
37.5
37.879
46.875
49.725
48.363
60.123
44.772
70.8
70.8
59.94
75
60.317
75
74.55
60
75.029
59.855
*11
*12
*13
*14
15
*16
17
*18
1280 x 768
1360 x 768
1366 x 768
1280 x 1024
1280 x 1024
1680 x 1050
1600 x 1200
1920 x 1080
47.7
47.72
47.7
63.981
79.98
65.290
75.0
67.5
60
59.799
60
60.02
75.02
59.954
60
60
Power
Indicator
Mode Product
On Mode
Sleep Mode
Off Mode
Green
Amber
-
1~18: RGB Mode
* : HDMI/DVI mode
DTV Mode
Component
480i o x
576i o x
480p o o
576p o o
720p o o
1080i o o
1080p o o
HDMI/DVI(DTV)
NOTE
DTV/PC selection on RGB and HDMI/DVI inputs is available for PC resolutions :
640 X 480/60Hz, 1280 X 720/60Hz, 1920 X 1080/60Hz and DTV resolutions : 480p, 720p, 1080p.
Specications

Controlling the Multiple Product
RS-232C
A1
Connecting the cable
Connect the RS-232C cable
as shown in the picture.
* The RS-232C protocol is used for communication between the PC and product. You can
turn the product on/off, select an input source or adjust the OSD menu from your PC.
Use this method to connect several products to a single PC.
You can control several products at a time by connecting them to a single PC.
RS-232C Cable
(not included)
monitor 1
PC
monitor 2 monitor 3 monitor 4
7-Wire Configurations (Standard RS-232C cable)
RXD
TXD
GND
DTR
DSR
RTS
CTS
TXD
RXD
GND
DSR
DTR
CTS
RTS
PC Monitor
2
3
5
4
6
7
8
3
2
5
6
4
8
7
D-Sub 9 D-Sub 9
(Female) (Female)
3-Wire Configurations (Not Standard)
RXD
TXD
GND
DTR
DSR
RTS
CTS
TXD
RXD
GND
DTR
DSR
RTS
CTS
PC Monitor
2
3
5
4
6
7
8
3
2
5
6
4
7
8
D-Sub 9 D-Sub 9
(Female) (Female)
Baud Rate : 9600buad Rate (UART)
Data Length : 8bits
Parity Bit : None
Stop Bit : 1bit
Flow Control : None
Communication Code : ASCII code
Use a crossed (reverse) cable
Communication Parameter
▲▲▲▲▲▲▲
RS-232C Configurations

IR Codes
RS-232C
A33
How to connect
Remote Control IR Code
Connect your wired remote control to Remote Control port on the Product.
Output waveform
single pulse, modulated with 37.917KHz signal at 455KHz
Carrier frequency
FCAR = 1/Tc = fosc/12
Duty ratio = T1/Tc = 1/3
Configuration of frame
•
1st frame
T1
Lead
code
Low
custom code High
custom code Data code Data code
C0 C1 C2 C3 C4 C5 C6 C7 C0 C1 C2 C3 C4 C5 C6 C7 D0 D1 D2 D3 D4 D5 D6 D7 D0 D1 D2 D3 D4 D5 D6 D7
Tc
Tf
•
Repeat frame
Repeat code
Lead code
Repeat code
9ms
Bit description
•
Bit "0"
•
Bit "1"
2.25ms
9ms
0.55ms
0.56ms
1.12ms
0.56ms
2.24ms
Frame interval : Tf
•
The waveform is transmitted as long as a key is depressed.
Tf Tf
Tf=108ms@455KHz
4.5ms
▲▲▲▲▲▲
▲

RS-232C
A34
▲
▲
00
01
02
03
08
C4
C5
09
98
0B
0E
43
5B
6E
44
10
11
12
13
14
15
16
17
18
19
5A
BF
D5
C6
79
76
77
AF
99
▲
▼
VOL( )
VOL( )
POWER ON/OFF
POWER ON
POWER OFF
MUTE
AV
INPUT
SLEEP
MENU
EXIT
PSM
SET
Number Key 0
Number Key 1
Number Key 2
Number Key 3
Number Key 4
Number Key 5
Number Key 6
Number Key 7
Number Key 8
Number Key 9
AV
COMPONENT
RGB PC
HDMI/DVI
ARC
ARC (4:3)
ARC (16:9)
ARC (ZOOM)
AUTO CONFIG
R/C Button
R/C Button
R/C Button
R/C Button
R/C Button (Power On/Off)
Discrete IR Code(Only Power On)
Discrete IR Code(Only Power Off)
R/C Button
R/C Button
R/C Button
R/C Button
R/C Button
R/C Button
R/C Button
R/C Button
R/C Button
R/C Button
R/C Button
R/C Button
R/C Button
R/C Button
R/C Button
R/C Button
R/C Button
R/C Button
Discrete IR Code(Input AV Selection)
Discrete IR Code(Input COMPONENT Selection)
Discrete IR Code(Input RGB PC Selection)
Discrete IR Code(Input HDMI/DVI Selection)
R/C Button
Discrete IR Code(Only 4:3 mode)
Discrete IR Code(Only 16:9 mode)
Discrete IR Code(Only ZOOM1, ZOOM2 mode)
Discrete IR Code
Code(Hex) Function Note
IR Codes

Regulatory Information cont.
FCC Compliance Statement
This equipment has been tested and found to comply
within the limits of a Class B digital device pursuant to Part
15 of the FCC Rules. These limits are designed to provide
reasonable protection against harmful interference in a
residential installation.
This equipment generates, uses, and can radiate radio
frequency energy and if not installed and used in
accordance with the instructions, may cause harmful
interference to radio communications. However, there is
no guarantee that interference will not occur in a particular
installation.
If this equipment does cause harmful interference to radio
or television reception (which can be determined by
turning the equipment on and off), the user is encouraged
to try to correct the interference by using one or more of
the following measures:
Reorient or relocate the receiving antenna.
Increase the separation between the equipment and
the receiver.
Connect the equipment into an outlet on a circuit
different from that to which the receiver is connected.
Consult the dealer or an experienced radio/TV
technician for help.
Caution: Changes or modifications not expressly approved
by the party responsible for compliance could void the
user's (or your) authority to operate the equipment. Only
peripherals (digital input/output devices, terminals, printers,
etc.) certified to comply with the Class B limits may be
attached to this monitor. Operation with non-certified
peripherals is likely to result in interference to radio and TV
reception. Only shielded signal cables may be used with
this System.
Canadian DOC Notice
This Class B digital apparatus meets all requirements of
the Canadian Interference-Causing Equipment
Regulations. Cet appareil numérique de la classe B
respecte toutes les exigences du Règlement sur le
matériel brouilleur du Canada.
CE Conformity Notice
(for Europe)
Products with the “CE” Marking comply with the EMC
Directive(89/336/EEC) and LOW VOLTAGE Directive
(73/23/EEC) issued by the Commission of the European
Community.
Compiance with these directives implies conformity to the
following European Norms :
• EN 55022 ; Radio Frequency Interference
• EN 55024 ; Electromagnetic Immunity
• EN 61000-3-2 ; Power Line Harmonics
• EN 61000-3-3 ; Voltage Fluctuations
• EN 60950-1 ; Product Safety
Low Radiation Compliance (MPR II)
This monitor meets one of the strictest guidelines available
today for low radiation emissions, offering the user extra
shielding and an antistatic screen coating. These
guidelines, set forth by a government agency in Sweden,
limit the amount of emission allowed in the Extremely Low
Frequency (ELF) and Very Low Frequency (VLF)
electromagnetic range.
01
NOTICE
The regulations are applied only to the products with the
ID LABEL indicating specific requirements.
NOTICE
The regulations are applied only to the products with the
ID LABEL indicating specific requirements.
NOTICE
The regulations are applied only to the products with the
ID LABEL indicating specific requirements.
TCO'99 (TCO'99 applied model only)
Congratulations!
You have just purchased a TCO’99 approved and labelled
product! Your choice has provided you with a product
developed for professional use. Your purchase has also
contributed to reducing the burden on the environment and
also to the further development of environmentally
adapted electronics products.

Regulatory Information cont.
02
Why do we have environmentally labelled computers?
In many countries, environmental labelling has become an
established method for encouraging the adaptation of
goods and services to the environment. With the growing
manufacture and usage of electronic equipment
throughout the world, there is a recognized concern for the
materials and substances used by electronic products
with regards to their eventual recycling and disposal. By
proper selection of these materials and substances, the
impact on the environment can be minimized.
There are also other characteristics of a computer, such as
energy consumption levels, that are important from the
viewpoints of both the work (internal) and natural (external)
environments. Electronic equipment in offices is often left
running continuously, resulting in unnecessary
consumption of large amounts of energy and additional
power generation. From the standpoint of carbon dioxide
emissions alone, it is vital to save energy.
What does labelling involve?
The product meets the requirements for the TCO’99
scheme which provides for international and environmental
labelling of personal computers and/or displays.
The labelling scheme was developed as a joint effort by the
TCO (The Swedish Confederation of Professional
Employees), Svenska Naturskyddsforeningen
(The Swedish Society for Nature Conservation) and
Statens Energimyndighet (The Swedish National
Energy Administration).
Approval requirements cover a wide range of issues:
ecology, ergonomics, emission of electrical and magnetical
fields, energy consumption and electrical safety.
Ecological criteria impose restrictions on the presence and
use of heavy metals, brominated and chlorinated flame
retardants, and other substances. The product must be
prepared for recycling and the manufacturing site(s) shall
be certified according to ISO14001 or EMAS registered.
Energy requirements include a demand that the system
unit and/or display, after a certain period of inactivity,
shall reduce its power consumption to a lower level in one
or more stages. The length of time to reactivate the system
unit shall be reasonable for the user.
Labelled products must meet strict environmental
demands, for example, in respect of the reduction of
electrical and magnetical fields as well as work load and
visual ergonomics.
Below you will find a brief summary of the ecological
requirements met by this product. The complete
ecological criteria document can be found at TCO
Development’s website http://www.tcodevelopment.com
or may be ordered from:
TCO Development
SE-114 94 STOCKHOLM, Sweden
Fax: +46 8 782 92 07
Information regarding TCO’99 approved and labelled
products may also be obtained at
http://www.tcodevelopment.com
Ecological requirements
Flame retardants
Flame retardants may be present in printed wiring board
laminates, cables, and housings. Their purpose is to
prevent, or at least to delay the spread of fire. Up to 30%
by weight of the plastic in a computer casing can consist of
flame retardant substances. Many flame retardants
contain bromine or chlorine, and these flame retardants
are chemically related to PCBs (polychlorinated
biphenyls). Both the flame retardants containing bromine
or chlorine and the PCBs are suspected of giving rise to
health effects, including reproductive damage in fish-
eating birds and mammals, due to the bio-accumulative*
processes when not disposed of in accordance with strict
standards for disposal.
TCO’99 requires that plastic components weighing more
than 25 grams shall not contain flame retardants with
organically bound bromine or chlorine. Flame retardants
are allowed in the printed wiring board laminates due to
the lack of commercially available alternatives.
Cadmium**
Cadmium is present in rechargeable batteries and in the
colour-generating layers of certain computer displays.
TCO’99 requires that batteries, the colour-generating
layers of display screens, and the electrical or electronics
components shall not contain any cadmium.
Mercury**
Mercury is sometimes found in batteries, relays and
switches. TCO’99 requires that batteries shall not contain
any mercury. It also demands that mercury is not present
in any of the electrical or electronics components
associated with the labelled unit. There is however one
This manual suits for next models
2
Table of contents
Other LG Monitor manuals