-2-
CONTENTS
SAFETY PRECAUTIONS .........................................................................................................................................2
1. SPECIFICATIONS ................................................................................................................................................3
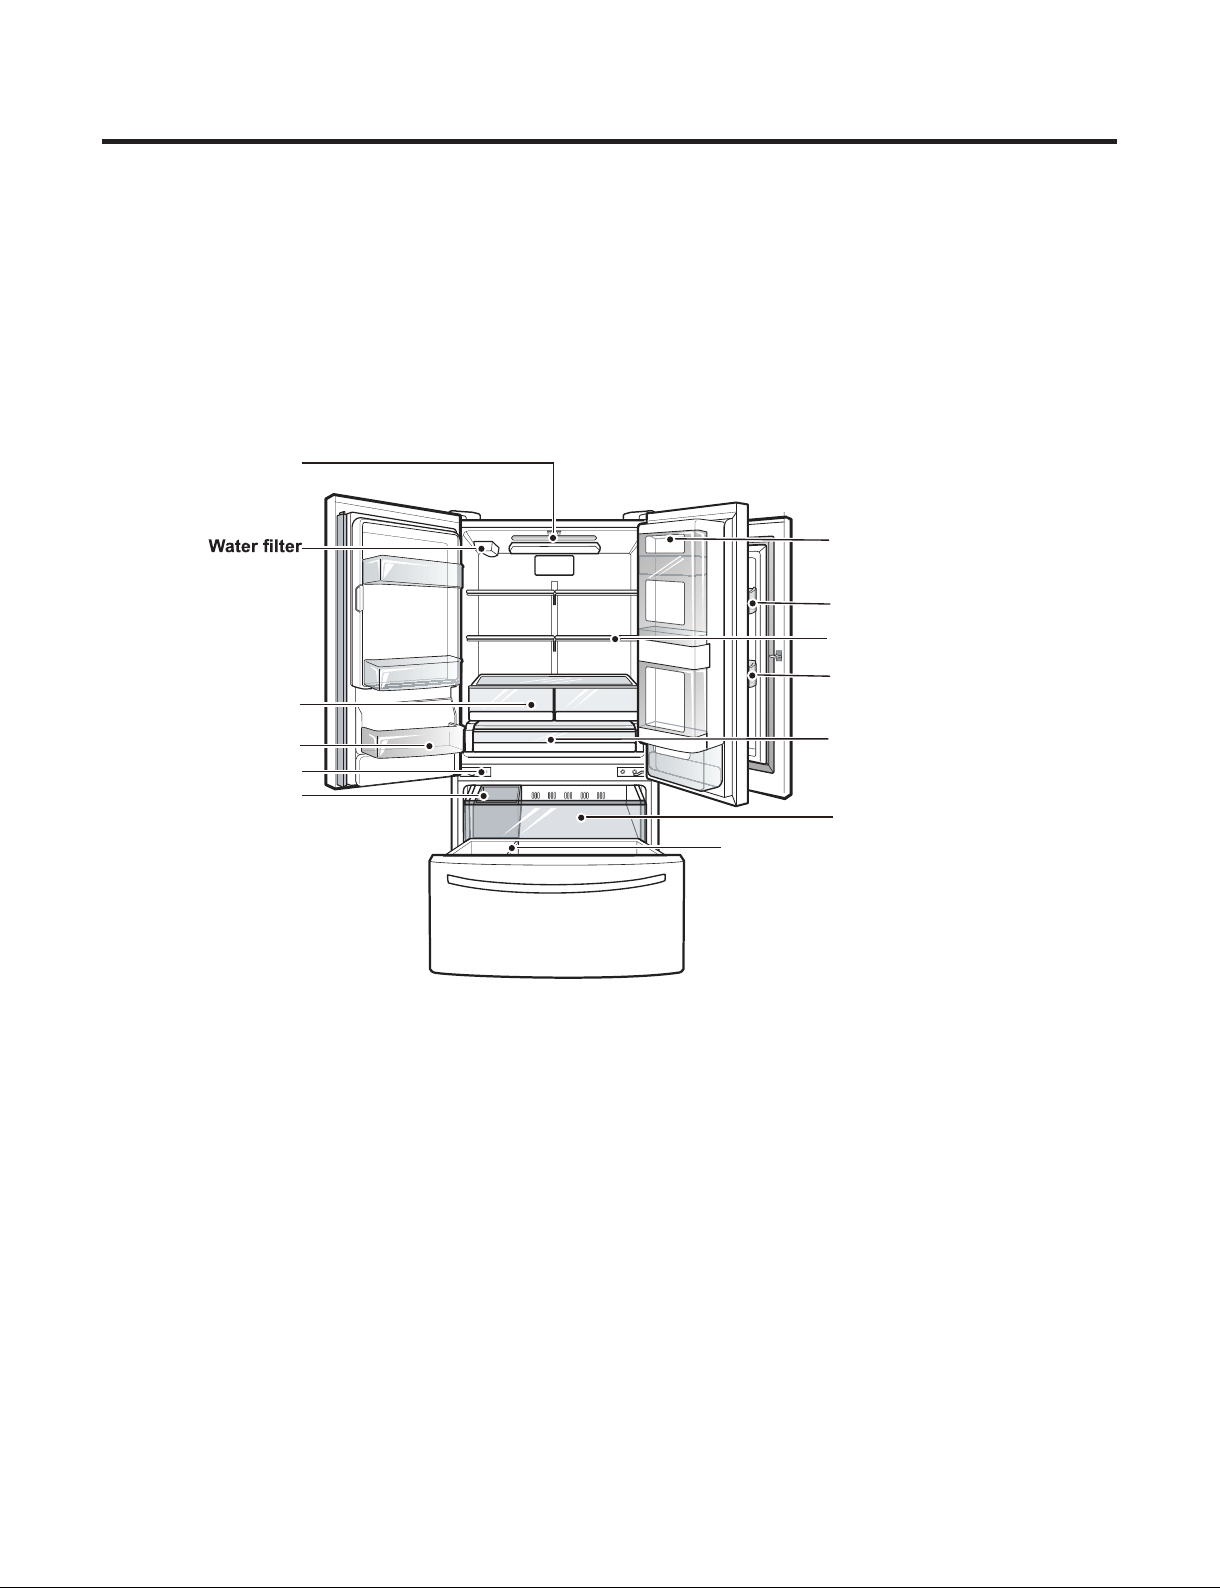
2. PARTS IDENTIFICATION.....................................................................................................................................4
3. DISASSEMBLY................................................................................................................................................5-18
REMOVING AND REPLACING REFRIGERATOR DOORS ................................................................................................. 5
DOOR ..................................................................................................................................................................................... 6
DOOR ALIGNMENT .............................................................................................................................................................. 7
FAN AND FAN MOTOR(EVAPORATOR) .............................................................................................................................. 7
DEFROST CONTROL ASSEMBLY ....................................................................................................................................... 7
LAMP ....................................................................................................................................................................................... 8
MULTI DUCT ......................................................................................................................................................................... 8
MAIN PWB .............................................................................................................................................................................. 9
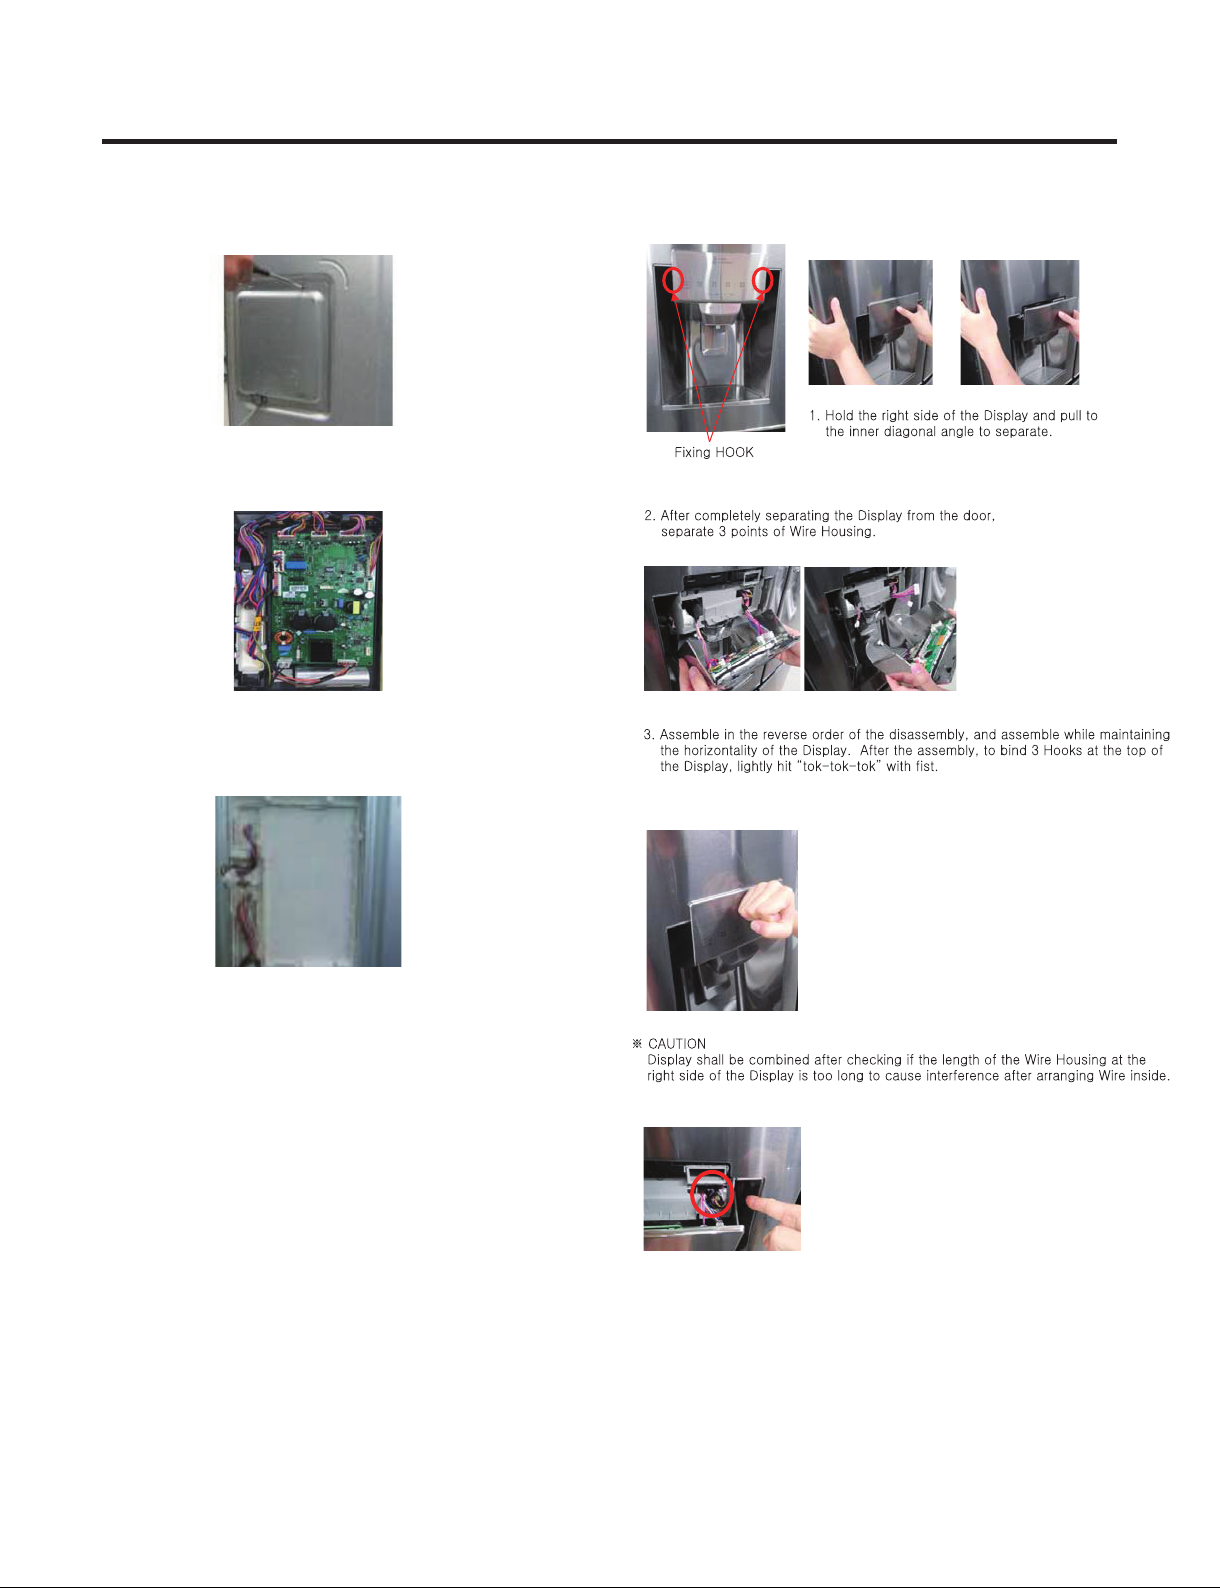
DISPENSER .......................................................................................................................................................................... 9
DISPLAY PCB ....................................................................................................................................................................... 9
ICE BUTTON ASSEMBLY ..................................................................................................................................................... 9
WATER BUTTON ASSEMBLY.............................................................................................................................................. 10
ICE CORNER DOOR REPLACEMENT .............................................................................................................................. 10
ICEMAKER REPLACEMENT ......................................................................................................................................... 10-11
SUB PWB FOR WORKING DISPENSER ............................................................................................................................. 11
CAP DUCT MOTOR REPLACEMENT ................................................................................................................................ 11
HOW TO REMOVE A ICE BIN ............................................................................................................................................ 12
HOW TO INSERT A ICE BIN .............................................................................................................................................. 12
HOW TO REMOVE AND REINSTALL THE PULLOUT DRAWER ................................................................................ 13-14
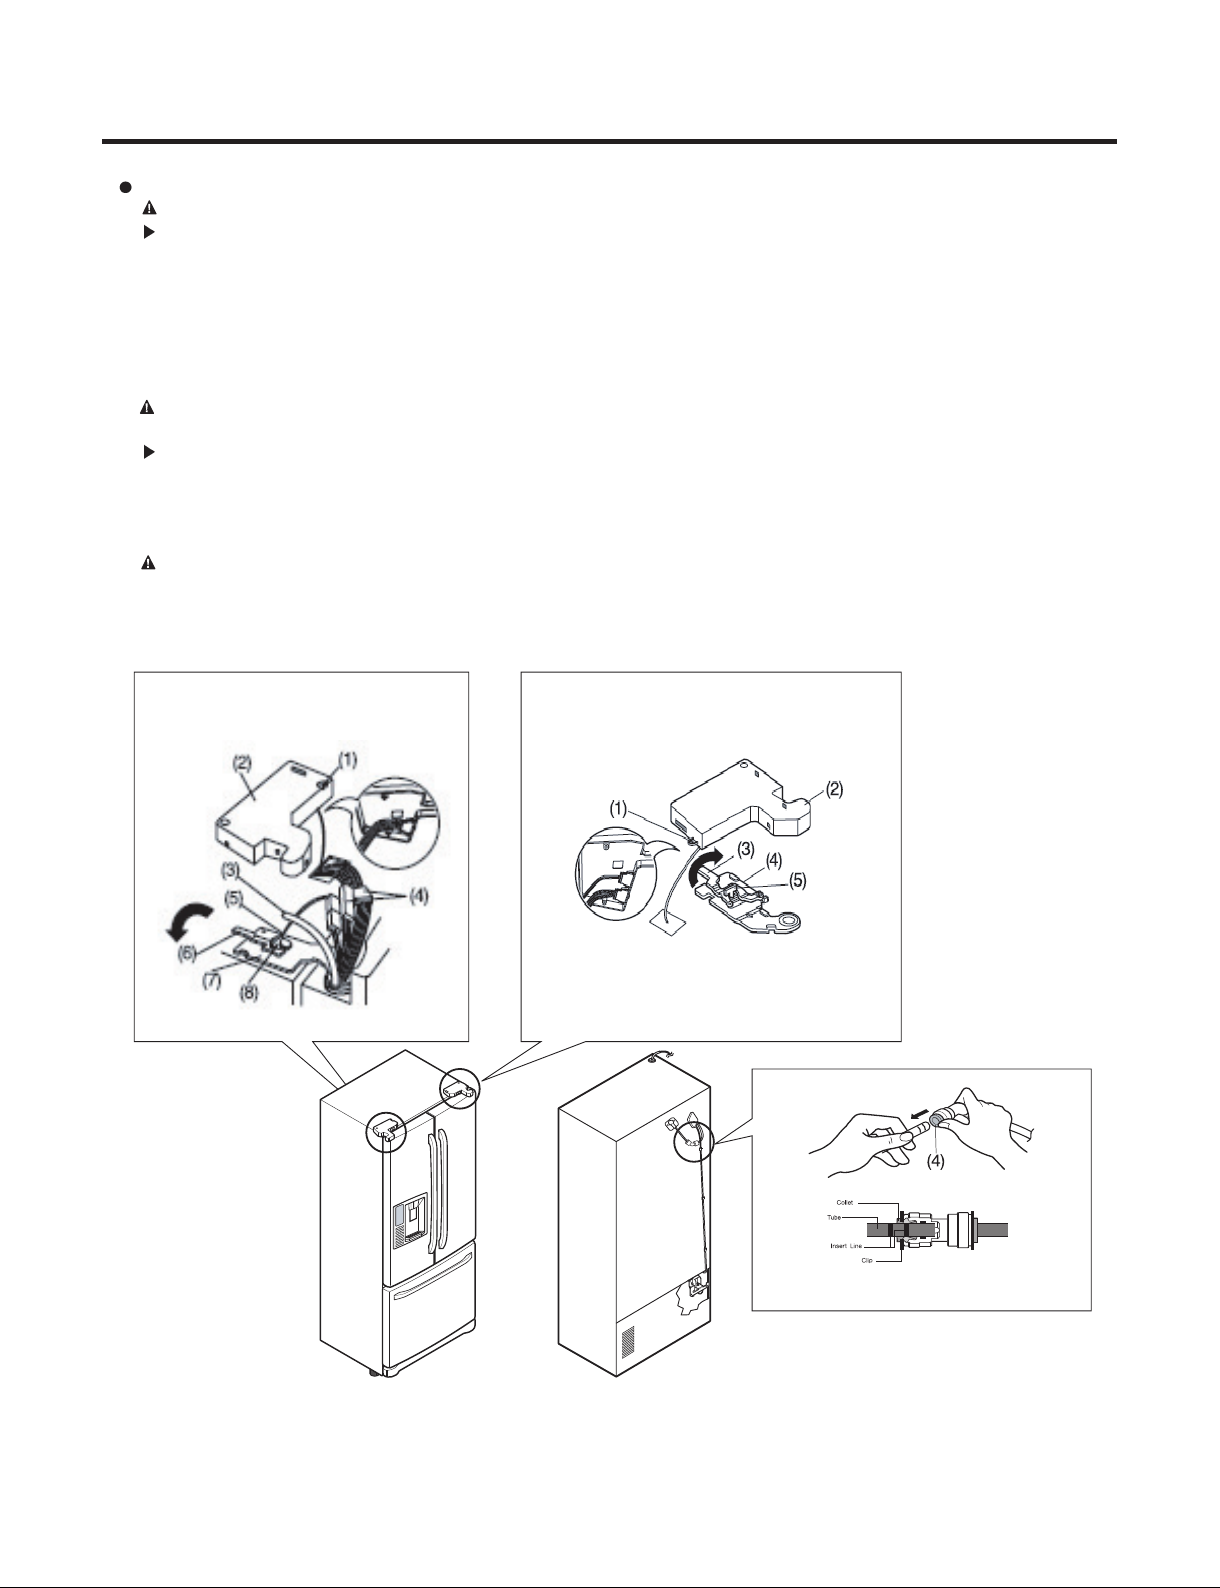
WATER VALVE DISASSEMBLY METHOD ........................................................................................................................ 15
FAN AND FAN MOTOR DISASSEMBLY METHOD ............................................................................................................ 15
DRAWER REMOVAL ......................................................................................................................................................... 16
4. ADJUSTMENT....................................................................................................................................................19
5. CIRCUIT DIAGRAM............................................................................................................................................20
6. TROUBLESHOOTING........................................................................................................................................21
7. PCB PICTURE ...............................................................................................................................................22-23
8. TROUBLESHOOTING WITH ERROR DISPLAY ..........................................................................................24-43
9. TROUBLESHOOTING WITHOUT ERROR DISPLAY...................................................................................44-68
10. REFERENCE ...............................................................................................................................................69-72
11. COMPONENT TESTING INFORMATION ...................................................................................................73-79
12. COMPRESSOR TROUBLESHOOTING......................................................................................................80-92
13. ICEMAKER OPEARTING AND TROUBLE SHOOTING METHOD............................................................93-95
14. DESCRIPTION OF FUNCTION & CIRCUIT OF MICOM...........................................................................96-100
SAFETY PRECAUTIONS
Please read the following instructions before servicing your refrigerator.
1. Unplug the power before handling any elctrical componets.
2. Check the rated current, voltage, and capacity.
3. Take caution not to get water near any electrical components.
4. Use exact replacement parts.
5. Remove any objects from the top prior to tilting the product.
Copyright © 2016 - 2017 LG Electronics Inc. All rights reserved. Only training and service purposes.