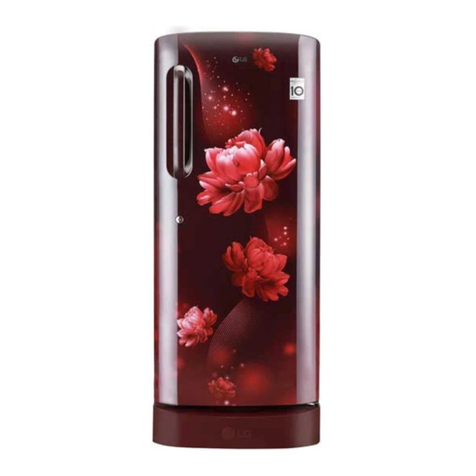
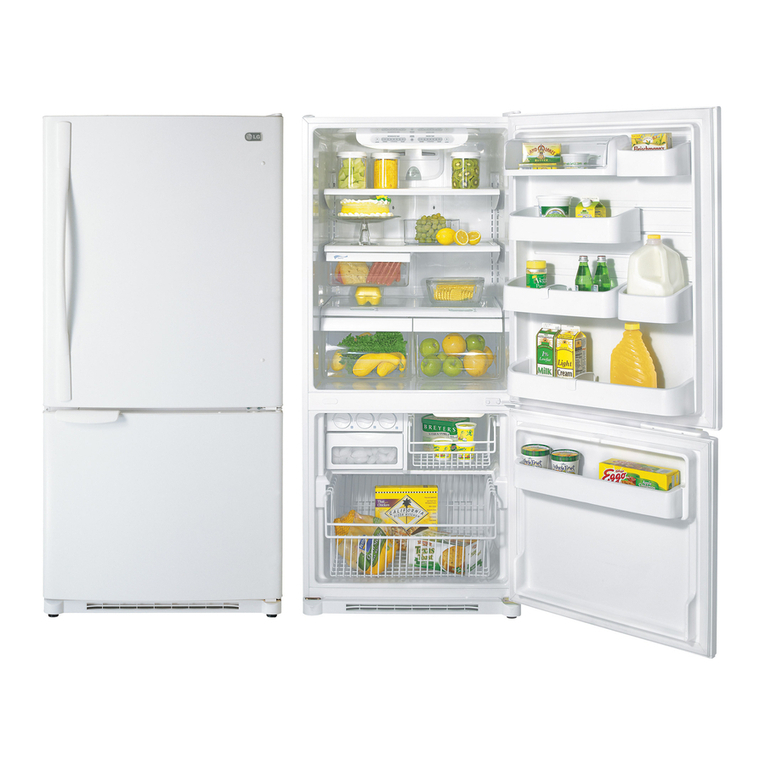
LG GC-181SA.CSWQRAN User manual

REFRIGERATOR
SERVICE MANUAL
MODEL: GC-181SA.CSWQRAN
CAUTION
BEFORE SERVICING THE UNIT, READ
THE "SAFETY PRECAUTIONS" IN THIS MANUAL.
COLOR:SUPER WHITE
http://biz.lgservice.com

CONTENTS
-2-
SAFETY PRECAUTIONS
(Page)
SAFETY PRECAUTIONS .............................................................................................................................................. 2
SERVICING PRECAUTIONS ......................................................................................................................................... 3
SPECIFICATIONS ...........................................................................................................................................................4
PARTS IDENTIFICATION ...............................................................................................................................................4
DISASSEMBLY ......................................................................................................................................................... 5 - 6
DOOR .......................................................................................................................................................................... 5
EVA DOOR ..................................................................................................................................................................5
TOP TABLE ................................................................................................................................................................ 6
COVER FEELER ..........................................................................................................................................................6
THERMOSTAT ............................................................................................................................................................6
COMPONENTS ...........................................................................................................................................................7-8
CIRCUIT DIAGRAM ...................................................................................................................................................... 8
TROUBLESHOOTING ............................................................................................................................................ 9 - 12
NO COOLING ............................................................................................................................................................ 10
COMPRESSOR AND ANOTHER ELECTRIC COMPONENTS ............................................................................... 11
PTC ............................................................................................................................................................................ 12
EXPLODED VIEW . ................................................................................................................................................13 - 14
REPLACEMENT PARTS LIST .....................................................................................................................................15
Please read the following before servicing your
refrigerator.
1. Check if electric leakage occurs in the set.
2. When servicing current applying parts, unplug prior to
servicing.
3. If testing with power on, wear rubber gloves to prevent
electric shock.
4. Be sure to check regular current, voltage, and capacity.
5. Don't touch metal products in a cold freezer compartment
with wet hands. It may cause frostbite or other injury.
6. Prevent water flowing to electric elements in mechanical
parts.
7. When tilting the set, remove any materials on the set,
especially thin plate type (ex,: glass plates or books.)
8. When servicing evaporator part, wear cotton gloves to
prevent injury by sharp fins of the evaporator.
9. Do not open the sealed refrigeration system. It could
cause injury or pollute the air. Leave this job to an
autherized servicer with the appropriate refrigerant
recovery equipment.
AIR RECHARGING IN COMPRESSOR
Test the refrigeration system by connecting it electrically before
beginning the refilling operation. This is necessary to ascertain
the function of the motor-compressor and identify defects
immediately. If defects have been found, empty the old system
of R134a residue by breaking off the end of the extension piece
at its narrow point.
(Figure 1) Use the appropriate refrigerant recovery equipment.
Replace the filter and any damaged components. Unsolder and
pull off the piece remaining inside the service tube and then
attach an extension with male Hansen, and last, solder it to the
same tube again. (Figure 2)
POINT TO BE
BROKEN
CHARGE TUBE
EXTENSION
FEMALE
HANSEN
MALE
HANSEN
SOLDERING
POINT
SERVICE TUBE
EXTENSION
Figu e 1 Figu e 2

SERVICING PRECAUTIONS
-3-
If case that a considerable leakage occurs, it will be necessary
to stop the vacuum pump and add a small quantity of Freon to
the system, if vacuum should not be obtained (pressure gauge
doesn't fall to 1 atmosphere.) Start the refrigeration unit and
find the leakage with a special leak-finder. When the defective
soldering point is visible, repair it after opening the extension
tube valve and reestablishing the normal outside pressure
inside the system.
Because the melted solder is sucked into the tubes and blocks
them, the pressure must be rebalanced when vacuum is in the
system for soldering. As soon as the vacuum operation is over,
add the quantity (in grams) of R134a to the refrigeration
system. Remember that every system has an exact quantity of
R134a with a tolerance of ±5 grams than can be added.
(Figure 5)
TO THE
R-134a CYLINDER
TO THE
REFRIGERATION
SYSTEM
FILLING OR
CHARGE TUBE
VALVE TO BE
OPENED WHEN
REFILLING
TO THE
REFRIGERATION
SYSTEM
TO THE
CHARGE
CYLINDER
VALVE TO BE
CLOSED
AFTER VACUUM
TO THE
VACUUM
PUMP
TO THE
VACUUM
PUMP
PRESSURE
GAUGE
Before performing this operation (if the vacuum pump and
refilling cylinder are connected), make sure that the valve
placed between the vacuum pump and refilling tube are closed
to keep the Freon from adding to the system.(Figure 6)
In addition, check the graduated scale on the cylinder for the
quantity of R134a to be added; for example, if we have 750
grams of Freon in the cylinder and must add 165 grams to the
group, this amount will be reached when R134a has dropped to
585 grams, remembering that the indicator shows a lower limit
of meniscus. Do this after choosing the scale corresponding to
the gas pressure different scales reported as the same gas
pressure indicated by the pressure gauge on the top of the
column.
To make R134a flow into the system, open the valve placed at
the base of the cylinder and connected to the filling tube. The
amount of Freon cannot be added to the system all at once
because it may cause a blocking of motor-compressor.
Therefore, proceed by adding original quantity of about 20-30
grams and close the valve
immediately thereafter.
The pressure rises and the motor-compressor must start,
sucking the gas and making the pressure go down again.
Regulate the valve again, maintaining the same manner until
reaching the quantity of R134a established for the system being
charged. When the system is running, the suction pressure
must be stabilized from 0.10 to 0.4 atmosphere.
It is necessary to execute the soldering operation with valve
open so that the fumes caused by oil residue can come out
freely without blowholes between two tubes during heating the
point to be soldered.
The extension fitted with the male Hansen is connected to the
female fitting of the vacuum pump tube. (Figure 3) Air
evacuating from the system begins as soon as the pump starts.
The refrigeration system must be kept under vacuum until the
reading on the low-pressure gauge indicates vacuum (0
absolute, -1 atm., -760 mm hg.) In any case, it is advisable to
keep the pump running for about 60 minutes. (Figure 4)
Figu e 3
Figu e 4
Figu e 5

1. SPECIFICATIONS
-4-
. PARTS IDENTIFICATION
ITEMS SPECIFICATIONS
FREEZER 14
STORAGE CAPACITY
REFRIGERATOR
126
TOTAL 140
DIMENSIONS (mm) 550 (W) X 600 (D) X 850 (H)
NET WHIGHT(kg) 36
TEMPERATURE CONTROL KNOB DIAL
DEFROSTING SYSTEM MANUAL
OUT CASE Coated Steel sheet
INNER CASE ABS
INSULATION CYCLOPENTANE
1-1 GR-181
ITEMS SPECIFICATIONS
VEGETABLE TRAY Drawer Type
EGG TRAY 1 Piece
ICE TRAY 1 Piece (Plastic)
COMPRESSOR P.T.C Starting Type
EVAPORATOR ROLL BOND TYPE
CONDENSER Wire Condenser
REFRIGERANT R-134a (105g)
LUBRICANT OIL FREOL @ 15G(210cc)
EVAPORATOR(Door Inside)
- The hea t of the ef ige ato .
- It evapo ates the ef ige ant
fluid and the eby abso bs
heat f om the su ounding
a ea.
ICE CUBE TRAY(Door Inside)
Ice cube is easy to emove
f om the t ay.
DRIP TRAY
Catches the wate that
d ips off the evapo ato
when def osting.
SHELVES MAGNETIC GASKET
- Tight fitting doo seal keeps
all the cooling powe locked
inside.
- No hooks o latches.
GLASS LID & VEGETABLE
CONTAINER
LEG ADJUST
COMMODITY RACKS
EGG TRAY
EVA DOOR
BOTTLE RACK
NOTE : This is a basic model. The shape of ef ige ato is subject to change.
THERMOSTAT
CONTROL DIAL
Regulates the ope ation of
the moto and cont olls the
tempe atu e inside the
ef ige ato .

3. DISASSEMBLY
-5-
A. DOOR
1. Unscrew the 2xBOLTS ▼, then remove the hinge (L) ※.
2. Remove the LEG 〒.
3. Gently pull the door downwards to remove it.
ýReversible
4. Before refitting the door, swap the Hinge Cap →by pulling it
out from its current location and repositioning it on the other
side of the door. Care should be taken not to damage the
adjacent surfaces when removing the Hinge Cap.
5. Unscrew the Upper Hinge pin (U) ←and screw it into the
opposite side hole.
6. After refitting the door, fix the Lower Hinge(L) in the
apposite side by using 2xBOLTS.
7. Fix the Leg.
8. Carefully place the appliance in an upright position.
Adjust the Leveling screw to make sure the appliance is
steady and check that the door opens and closes
properly.
Figure 7
B. EVA DOOR
1. Open the EVA DOOR, and Grasp the Bottom side of the
EVA DOOR Hinge.
2. Take it out forwards ※by lifting it slightly up ▼.
ýReversible
3. Rotate the EVA DOOR 180 degrees, and insert EVA
DOOR to opposite side top hole first, then in to the
Bottom side hole.
4. Check that EVA DOOR is installed properly.
Figure 8
1. First unplug the appliance.
2. Remove foods and accessories like shelves or trays
which are not fixed in the refrigerator.
3. Carefully lay the appliance on a cushion like packing
material to avoid the damage of refrigeration circuit.
4. Use ‘+’ driver or spanner to fix or remove the bolts.
PRECAUTION
Note: Reversing the doors is not covered by the
warranty.

-6-
D. COVER FEELER
1. Open the eva door.
2. Pull it downwards softely by pushing the hooks of the
cover feeler inside.
3. Separate the cover feeler from the evaporator.
E. THERMOSTAT
1. Remove the shelves and Drip tray in order to make access
easier.
2. Separate Cover feeler from Evaporator.
3. Separate Cover Lamp by twisting up and down (Figure 11).
4. Loosen 1 screw holding the case to remove the Thermostat
Enclosure. (Figure 12)
5. Pull Knob Dial.
6. Pull out thermostat in the thermostat cover, and
disconnect wires. (Figure 13)
NOTE : Replace a proper specification new thermostat.
Figu e 13
Figu e 10
1
2
Figu e 9
Figu e 11 Figu e 12
C. TOP TABLE
1. Unscrew 2 bolts at the rear of top table.
2. Hold the rear of top table and push forwoards with
lifting up top table slightly.

4. COMPONENTS
-7-
1. COMPRESSOR
1) Role
The compressor intakes low temperature and low
pressure gas evaporated from Evaporator of the
Refrigerator, and condenses this gas to high temperature
and high pressure gas, and then plays delivering role to
Condenser.
2) Composition
The Compressor is Composed of Compressor Apparatus
compressing gas, Compressor Motor moving Compressor
Apparatus and Case protecting Compressor Apparatus
and Motor. There are PTC-Starter, and Over Load
Protector (OLP) in the Compressor outside. On the other
hand, because the Compressor consists of 1/1000mm
processing precision components and is sealed after
production in absence of dust or humidity, deal and repair
with care.
3) Note for Usage
(1) Be careful not to allow over-voltage and over current.
(2) No Strike
If applying forcible power or strike (dropping or
careless dealing), poor operation and noise may occur
(3) Use proper electric components appropriate to the
Compressor.
(4) Note to Keep Compressor.
If Compressor gets wet in the rain and rust in the pin of
Hermetic Terminal, the result may be poor operation
and poor contact may cause.
(5) Be careful that dust, humidity, and flux welding don't
inflow in the Compressor inside in replacing the
Compressor. Dust, humidity, and flux due to welding
which inflows to Cylinder may cause lockage and
noise.
2. PTC-STARTER
1) Composition of PTC-Starter
(1) PTC (Positive Temperature Coefficient) is a no-contact
semiconductor starting device which uses ceramic
material and this material consists of BaTiO3.
(2) The higher the temperature is, the higher becomes the
resistance value. These features are used as starting
device for the Motor.
2) Role of PTC-Starter
(1) PTC is attached to Hermetic Compressor used for
Refrigerator, Show Case and starts Motor.
(2) Compressor for household refrigerator applies to
single-phase induction Motor.
For normal operation of the single-phase induction motor, in
the starting operation flows in both main coil and sub-coil.
After the starting is over, the current in subcoil is cut off. The
proper features of PTC play all the above roles. So, PTC is
used as a motor starting device.
3) PTC-Applied Circuit Diagram
According to Starting Method for the Motor
4) Motor Restarting and PTC Cooling
(1) For restarting after power off during normal
Compressor Motor operation, plug the power cord
after 5 min. for pressure balance of Refrigerating Cycle
and PTC cooling.
(2) During normal operation of the Compressor Motor,
PTC elements generate heat continuously. Therefore,
if PTC isn't cooled for a while after the power has been
shut off, Motor can't operate again.
5) Relation of PTC-Starter and OLP
(1)
If the power is off during operation of Compressor and the
power is on before the PTC is cooled, (instant shut- off within
2 min. or reconnect a power plug due to misconnecting), the
PTC isn't cooled and a resistance value grows. As a result,
current can't flow to the sub- coil and the Motor can't operate
and the OLP operates by flowing over current in only in the
main-coil.
(2)
While the OLP repeats on and off operation about 3-5 times,
PTC is cooled and Compressor Motor performs normal
operation.
If OLP doesn't operate when PTC is not cooled,
Compressor Motor is worn away and causes circuitshort and
fire. Therefore, use a properly fixed OLP without fail.
6) Note to Use PTC-Starter
(1) Be careful not to allow over-voltage and over-current.
(2) No Strike
Don't apply a forcible power or strike.
(3) Keep apart from any liquid.
If liquid such as oil or water away enter the PTC,
PTC materials it may break due to insulation
breakdown of the material itself.
(4) Don't change PTC at your convenience.
Don't disassemble PTC and mold. If the exterior to the
PTC-starter is damaged, resistance value is altered
and it may cause poor starting of the compressor
motor may cause.
(5) Use a properly fixed PTC.
PTC STARTER HERMETIC
TERMINAL
COMPRESSOR
MOTOR
C
M
SM
36
5
S
PTC
OVERLOAD PROTECTOR(O.L.P)
RSIR
Figu e 13

CIRCUIT DIAGRAM
POWER SUPPLY CORD
CAPACITOR-R
OVER LOAD
PROTECTOR
GN(GN/YL)
YL
PK
COMPRESSOR
P.T.C STARTER
BL
PR
YL
LAMP
DOOR
S/W
BL BL
BK
BK
THERMOSTAT
2
5
63
THE PLUG TYPE ON CIRCUIT DIAGRAM IS SUBJECT
TO CHANGE IN DIFFRENT LOCAL TIES. 3854JD1020K
YL : YELLOW
BK : BLACK
BL : BLUE
GN : GREEN
PR : PURRLE
PK : PINK
4. CIRCUIT DIAGRAM
-8-
3. OLP (OVER LOAD PROTECTOR)
1) Definition of OLP
(1) OLP (OVER LOAD PROTECTOR) is attached to the
Hermetic Compressor and protects the Motor by
cutting off current in Compressor Motor in case of
over-rising temperature by Bimetal in the OLP.
(2) When over-voltage flows to Compressor motor, the
Bimetal works by heating the heater inside the OLP,
and the OLP protects Motor by cutting off current
which flows to the Compressor Motor.
2) Role of the OLP
(1) The OLP is attached to the Hermetic Compressor
used for the Refrigerator and Show Case and prevents
the Motor Coil from being started in the Compressor.
(2) Do not turn the Adjust Screw of the OLP in any way for
normal operation of the OLP.(Composition and
connection Diagram of OLP)
CONTACTING
POINT COVER
BIMETAL
CONTACTING
POINT
HEATER
TERMINALS
ADJUST
SCREW
HEATER
BIMETAL
Figu e 14

5. TROUBLESHOOTING
-9-
DEFECT EFFECT CAUSE REMEDY
SYSTEM
PARTIALLY OR
COMPLETELY OUT
OF REFRIGERANT
CHARGE
EXCESSIVELY
FULL
HUMIDITY IN THE
SYSTEM
PRESENCE OF AIR
IN THE SYSTEM
BLOCKED
CAPILLARY
MOTOR-
COMPRESSOR
SHORT-CIRCUITED
OR BLOCKED
MOTOR-
COMPRESSOR
DOSE NOT
COMPRESS
NOISY MOTOR-
COMPRESSOR
Evaporator does not frost even
though motor-compressor runs
continually.
This defect is indicated by the
presence of water outside the
refrigerator near the motor caused
by formations of ice on the return
tube.
This defect is indicated by the
partial frosting of the evaporator
and by continual defrosting cycles
determined by the interruption of
the flow of gas on the evaporator.
The motor compressor keeps
running.
Poor performance of the
refrigerant system which is
indicated on the evaporator with a
slight frost which does not freeze
and an excessive overheating of
the condenser and motor-
compressor.
Because of the lack of circulation
Freon® in the system, there is no
frosting of the evaporator, while a
slight overheating of the first spiral
of the condenser is noted.
The system does not work and
the "OLP" intervenes interrupting
delivery to the motor-compressor.
No frost forms on the evaporator,
even if the motor-compressor is
apparently running regulary.
In case of mechanical failure in the
motor-compressor there in an
excessive noise when the system is
functioning. In case a suspension
spring is unhooked, banging will be
heard and there will be especially
strong vibrations when the system
starts up and stops.
An empty refrigerant system
indicates a leakage of R134a.
This loss is generally to be looked
for at the soldering points
connecting the various components
or in an eventual hole in the
evaporator made by the user.
If in the refrigerant system a
quantity of R134a is introduced
which is greater than that
indicated, the excess gas does
not terminate its expansion in
the evaporator but proceeds into
the return tube.
The refrigerant system is humid
when there is a small percentage
of water present, which, not
completely retained by the
dehydrator filter, enters into
circulation with the Freon® and
freezes at the capillary exit in the
evaporator.
There is air in the refrigerating
system when during the filling
phase vacuum is not effected or it
is not adequately done.
Impurities contained in the Freon®
or in the components of the
refrigeration system before
assembly and not retained by the
filter can obstruct the capillary.
In case of short circuit, the
breakdown is due to the electric
winding. If blocked, there is a
mechanical failure in the motor-
compressor.
In this case there is a mechanical
failure in the diaphram valves which
remaining continually open, do not
permit the compressor to operate.
Consequentely, Freon® does not
circulate in the system.
The cause of the excessive noise
is normally to be sought for in a
mechanical breakdown, and only
rarely in the unhooking of one of
the suspension springs.
Leakage must be eliminated by
resoldering the defective point or
substituting the damaged
evaporator.
The system must be emptied and
subsequently refilled introducing
the correct quantity of R134a.
The system must be emptied and
then refilled after eliminating the
humidity.
Group must be drained and
subsequently refilled after
carefully creating vacuum.
To restore the system it must be
emptied, substitute the capillary or
the evaporator entirely in case the
capillary is coaxial with respect to
the return tube, then refill it.
The motor-compressor must be
replaced and then proceed with
refilling.
The motor-comprossor must be
replaced and then proceed with
refilling.
The motor-compressor must be
replaced and then proceed with
the refilling.

-10-
NO COOLING
The Compressor
doesn't run.
Poor running of the
Compressor.
Compressor runs.
Measure the starting
voltage.
Check if the current flows
at the contacting point of
the starting system.
Check if the current flows
to the sub coil of the
Compressor.
Is the current amount of
the electric components
normal?
Frost doesn't form at the
Evaporator when
operating set for more
than 30 min.
Poor contacting point
Shorted or Broken
Coil shorted
Low voltage Increase the voltage.
Replace the device.
Replace the
Compressor.
Repair the Compressor.
Shorted Poor contacting
point and broken
Shorted
The coil of the
Compressor Motor is
worn out.
Refrigerant leaks. Poor
compressing.
Check the current flowing
of starting system.
Check the components
on the main circuit.
Check if the current flows
at the contacting point of
the Thermostat.
Check if the current flows
at the main coil of the
Comprossor.
Replace the
Thermostat.
Replace the device.
Replace the
components.
Replace the
Compressor.

-11-
COMPRESSOR AND ANOTHER ELECTRIC COMPONENTS
1
2
3
4
5
2
4
3
3
4
4
5
5
NO
NO
NO
NO
NO
YES
YES
YES
YES
YES
YES
Power Source
Check the
resistance of the
Compressor Motor.
Check the starting
state at the regular
voltage above.
Check the
resistance of
the PTC.
Check OLP.
Check the starting
state.
Separate the PTC-STARTER from the
Compressor and measure the voltage
between M and C of the Compressor.
Equal to the applied
voltage. (Rating
voltage ± 10%)
Advice the customer to
use in the specified
range.
Advice the customer to use
in the specified range.
Measure minimum starting voltage
after checking steps 1-3 above.
Measure the pressure balance of the
PTC at the interval of more than 5 min.
Starts at the voltage of more
than 90%.
Replace OLP.
Normal.
Normal.
Replace the PTC.
Replace the
PTC-STARTER.
The applied voltage is not in the range
of Rating Voltage ± 10%.
Test the resistance among
M-C, S-C, and M-S.
Check if applying a
regular OLP.
Test the resistance of the both
terminals in the PTC-STARTER.
Replace the Compressor.
Starts at the voltage
of 85% below.

-12-
PTC
YES
NO
Poor starting or no
operating of the
Compressor.
First, separate the PTC from the
Compressor and check the voltage
between NO 5 and 6 in the PTC
with a multitester or Wheatstone
Bridge.
Observation value is
220~240V/50Hz :
33Ω±30%
The value is 0.
The value is ∞.
Check another
electric
components.
Replace the PTC.
Normal
Abnormal
Abnormal Replace the PTC.
Separate the OLP from the
Compressor and check
resistance value between two
terminals of OLP with Tester.
Check other electric
components.
Replace OLP.

5. EXPLODED VIEW
-13-
411A
310A
309A
308A
307A
312A
315A
127A
104A
314A
283B
410A
410G
323B
106B
107A
281B
302A
302B
107B
282D
282D
318A
317A

-14-
120D
110C
408B
110A
302C
406B
409B
120A
110B
155A
151A
237A
235A
241C
233A
231A
281D
230A
241A
136B
136B
136A
140A
140A
126A
125A
136A
EXPLODED VIEW

This manual suits for next models
1
Table of contents
Other LG Refrigerator manuals