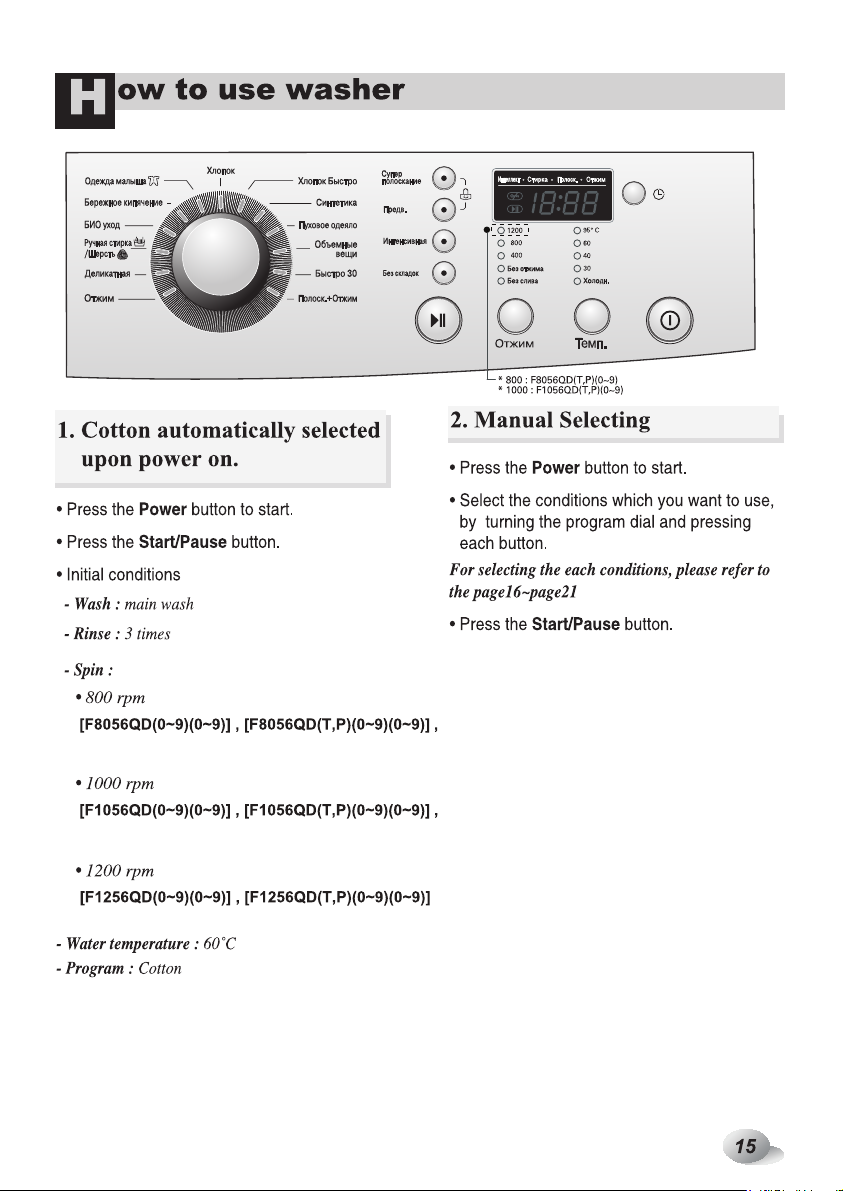
LG F8056QD User manual


Name : Front loading washing machine
Power supply : 220V~,50Hz / 230V~,50Hz / 240V~,50Hz
)W(mm006:
eziS 550mm(D) 850mm(H)
Weight/Max.Watt : 63kg / 2100W
Wash capacity : Refer to the Rating Label
Water consumption : 49 (7 /kg)
Permissible water pressure : 1.0-10kgf/cm2(100-1000kPa)
Spin speed :
No Spin/400/600/800
No Spin/400/800/1000
No Spin/400/800/1200
The appearance and specifications may be varied without notice to raise the units quality.
4
pecifications
S
Spanner
Option : Hot/Cold(2EA)Inlet hose(1EA)
Or
Accessories

11
are before washing
C
1. Care Labels
Look for a care label on your clothes. This will tell you about the fabric content of your garment and
how it should be washed.
2. Sorting
To get the best results, Sort clothes into loads that can be washed with the same wash cycle.
Water temperature and spin speed and different fabrics need to be washed in different ways.
Always sort dark colors from pale colors and whites. Wash separately as dye and lint transfer can
occur causing discoloration of white etc. If possible, do not wash heavily soiled items with lightly
soiled one.
Soil (Heavy, Normal, Light) Separate clothes according to amount of soil.
Color (White, Lights, Darks) Separate white fabrics from colored fabrics.
Lint (Lint producers, Collectors) Wash lint producers and lint collectors
separately.
3. Caring before loading
Caring before washing
Before the first washing
Combine large and small items in a load. Load large items first. Large items should not be more than half
the total wash load.
Do not wash single items. This may cause an out-of-balance load. Add one or two similar items.
• Check all pockets to make sure that they
are empty. Items such as nails, hair clip,
matches, pens, coins and keys can damage
both your washer and your clothes.
• Close zippers, hooks and strings to
make sure that these items don’t
snag on other clothes.
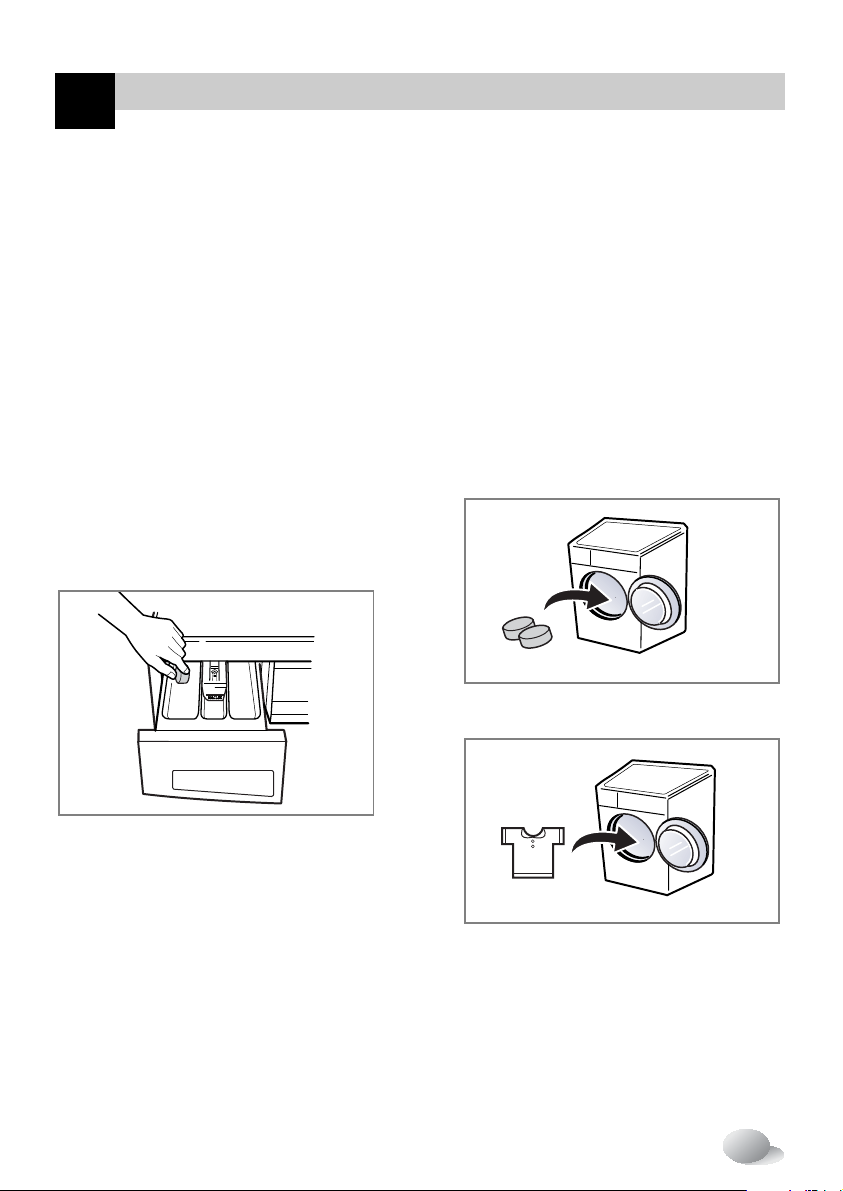
• Pre treat dirt and stains by brushing a little
detergent dissolved in water onto stains like
collars and cuffs to help shift dirt.
Select a cycle (COTTON 60°C, add a half load of detergent) allow the unit to wash
without clothing. This will remove residues and water from the drum that may have been left
during manufacturing.
• Check the folds of the flexible gasket (gray) and
remove any small articles,if any.
• Check inside of the drum and remove any left
items in it for next wash cycle.
• Remove any clothing or items on the flexible
gasket to prevent clothing and the gasket
damages.

12
dding detergent
A
• Main wash only
➔
• Pre Wash + Main Wash
➔
• Do not exceed the maximum fill line.
Close the dispenser drawer slowly.
Overfilling can cause early dispensing
of the fabric softener which could stain
clothes.
• Do not leave the fabric softener in the
detergent drawer for more than 2 days.
(Fabric softener could harden)
• Softener will automatically be added
during the last rinse cycle.
• Do not open the drawer when water is
supplied.
• Solvents(benzene, etc) are not
allowable.
1. The Dispenser Drawer
2. Adding Fabric Softener
Adding detergent and fabric softener
Do not pour fabric softener
directly on the cloths
NOTE
MAX
max

13
dding detergent
A
• The detergent should be used according to the
instruction of the detergent manufacture.
• If too much detergent is used, too many suds
can occur and this will decrease the washing
result or cause heavy load to the motor.
• Use powder detergent only for the front
loading washer.
❇
If suds occur too much, pleas reduce the
detergent amount.
• Detergent usage may need to be adjusted
for water temperature, water hardness,
size and soil level of the load. For best
results, avoid oversudsing.
4. Water softener
• A water softener, such as Anti limescale
(Clagon) can be used to cut down on the
use of detergent in extremely hard water
areas. Dispense according to the amount
specified on the packaging.
First add detergent and then the water
softener.
• Use the quantity of detergent as for soft
water.
❋
Tips
Full load : according to
manufacturer’s recommendation.
Part load : 3/4 of the normal
amount.
Minimum load : 1/2 of full load.
• Detergent is flushed from the dispenser
at the beginning of the cycle.
1) Open the door and Tablets into the
drum.
3. Detergent dosage
5. Using the Tablets
MAX
max
2) Load the laundry into the drum.
3) Close the door.

14
unction
F
The wool wash cycle of this machine has been approved by Woolmark for the washing of machine
washable Woolmark products provided that the products are washed according to the instructions
on the garment label and those issued by the manufacturer of this washing machine .
Notes : Neutral detergent is recommended. The wool cycle features gentle tumbling and low-speed spin for
garment care.
Recommended courses according to the laundry type
Cotton Quick
Synthetic
Quick 30
Hand Wash /
Wool
Delicate
Blanket
Bio Care
Baby Care
White
Bulky
Cotton which is lightly soiled
Polyamide, Acryic, Polyester
Colored Laundry which is lightly
soiled fast.
“Hand Wash” marked laundry or
machine washable woolens
Delicate laundry easily
damaged (silk, curtains...)
Cotton bedding with filling, duvet,
pillow, blanket, sofa cover with
light filling.
For elimination of protein
stains
Laundry for infant
For elimination of remnant
detergent after boliling wash.
Thick laundry absorbing
much water(Jumper)
30˚C
(Cold, 40°C )
30˚C
(Cold, 40°C )
30˚C
(Cold, 40°C )
40˚C
(Cold, 30˚C, 60°C)
60˚C
(Cold, 30˚C, 40°C)
60˚C
(95°C)
60˚C
(95°C)
95˚C
(60°C)
95˚C
30˚C
(Cold)
Medic Rinse
Intensive
Pre Wash
Crease Care
Intensive
-
Rating
Rating
Rating
Less than
6.0 kg
Rating
Less than
2.0 kg
Rating
Less than
2.0 kg
Less than
3.0 kg
Less than
2.0 kg
Medic Rinse
Intensive
Crease Care
Program Fabric Type Proper Temp. Option Maximum Load
Cotton
Color fast gaments (shirts, night
dresses, pajamas...) and lightly
soiled white cotton(underwear...)
60˚C
(Cold, 30˚C,
40°C,95°C)
Medic Rinse
Intensive
Pre Wash
Crease Care
Rating
Water Temperature : Select the water temperature to the wash cycles.
Always follow garment manufacture’s care label or instructions when laundering.
Medic Rinse : For high effectiveness or more purity in rinse operation you can choose Medic Rinse option.
Pre Wash : If the laundry is heavily soiled, “Pre Wash” Course is recommended.
Intensive : When washing heavily soiled laundry you can increase effectiveness by choosing “Intensive” option.
Program setting with “Cotton
60˚C+
Intensive” option for test in accordance or in conformity with IEC60456 and
EN60456 .
Crease Care : If you want to prevent crease, select Crease Care button.


16
ow to use washer
H
(1) Dial : Program
(2) Button : Start / Pause
(3) Button : Spin
(4) Button : Temperature
(5) Button : Power
(6) Button : Medic Rinse
(7) Button : Pre Wash
(8) Button : Intensive
(9) Button : Crease Care
(10) Child Lock
(11) Button : Time Delay
1. Power
2. Initial Program
Power
• Press the Power button to turn power on and off.
• To cancel the Time Delay function, the power
button should be pressed.
•When the Power button is pressed, the
washer is ready for Cotton program. And
the other initial conditions as follows.
•So, if you want to advance into the ashing
cycle without changing the program, just
press the Start/Pause button and then the
washer will proceed.
Initial program
•
- Cotton Program / Main wash /
Normal Rinse / 800 rpm / 60˚C
•
- Cotton Program / Main wash /
Normal Rinse / 1000 rpm / 60˚C
•
- Cotton Program / Main wash /
Normal Rinse / 1200 rpm / 60˚C
• 13 programs are available according to
the laundry type.
• Lamp will light up to indicate selected
program.
•When Start/Pause button is pressed, the
Cotton program is automatically selected.
- By turning the Program dial, the program
is selected in order of
“ Cotton – Cotton Quick – Synthetic –
Blanket – Bulky – Quick 30 –
Rinse+Spin – Spin – Delicate – Hand
Wash/Wool – Bio Care – White – Baby
Care”.
Regarding to the laundry type for each
program Please refer to the page14.
Program


26
roubleshooting guide
❋This washing machine is equipped with automatic safety functions which detect and diagnose faults at an
early stage and react appropriately
When the machine does not function properly or does not function at all, check the following points before
you contact your service provider.
Symptom Possible Cause Solution
Rattling and
clanking noise
Thumping sound
Vibrating noise
Water leaks.
Oversudsing
Water does not enter
washer or it enters
slowly
Water in the washer
does not drain or
drains slowly.
• Foreign objects such as coins or
safety pins maybe in drum or
pump.
• Heavy wash loads may produce
a thumping sound. This is usually
normal.
• Have all the transit bolts and
packing been removed?
• Are all the feet resting firmly on
the ground?
• Fill hoses or drain hose are loose
at tap or washer.
• House drain pipes are clogged.
• Water supply is not adequate in
area.
• Water supply tap is not
completely open.
• Water inlet hose(s) are kinked.
• The filter of the inlet hose(s)
clogged.
• Drain hose is kinked or clogged.
• The drain filter is clogged.
Stop washer and check drum
and drain filter.
If noise continues after washer
is restarted, call your authorised
service centre.
If sound continues, washer is
probably out of balance. Stop and
redistribute wash load.
If not removed during
installation. Refer to Installation guide
for removing transit bolts.
Wash load may be unevenly
distributed in drum. Stop washer and
rearrange wash load.
Check and tighten hose connections.
Unclog drain pipe. Contact plumber
if necessary.
Too much detergent or unsuitable
detergent may cause excessive
foaming which may result in water
leaks.
Check another tap in the house.
Fully open tap.
Straighten hose.
Check the filter of the inlet hose.
Clean and straighten the drain hose.
Clean the drain filter
T

27
Washer does not start
Washer will not spin
Door does not open
Wash cycle time
delayed
• Electrical power cord may not
be plugged in or connection
may be loose.
• House fuse blown, circuit
breaker tripped,or a power
outage has occurred.
• Water supply tap is not turned
on.
❋ Check that the door is firmly
shut.
Make sure plug fits tightly in wall
outlet.
Reset circuit breaker or replace fuse.
Do not increase fuse capacity.
If problem is a circuit overload, have
it corrected by a qualified electrician.
Turn on water supply tap.
Close the door and press the
Start/Pause button. After pressing
the Start/Pause button, it may take
a few moments before the clothes
washer begins to spin. The door
must lock before spin can be
achieved.
Once started, the door can not be
opened for safety reasons.
Wait one or two minutes before
opening the door to give the electric
locking mechanism time to release.
The washing time may vary by the
amount of laundry, water
pressure, water temperature and
other usage conditions.
If the imbalance is detected or if the
suds removing program works, the
wash time shall be increased.
Symptom Possible Cause Solution
roubleshooting guide
T

28
roubleshooting guide
Symptom Possible Cause Solution
T
• Water supply is not adequate in area.
• Water supply taps are not completely open.
• Water inlet hose(s) are kinked.
• The filter of the inlet hose(s) are clogged.
• Drain hose is kinked or clogged.
• The drain filter is clogged.
• Load is too small.
• Load is out of balance.
• The appliance has an imbalance detection
and correction system. If individual heavy
articles are loaded (ex. bath mat, bath robe,
etc.) this system may stop spinning or even
interrupt the spin cycle altogether.
• If the laundry is still too wet at the end of the
cycle, add smaller articles of laundry to
balance the load and repeat the spin cycle.
• Is the door opened?
• Water overfills due to the faulty water valve.
• Water level sensor has malfunctioned.
• Over load in motor.
• The washer experienced a power failure.
Check another tap in the house.
Fully open tap.
Straighten hose(s).
Check the filter of the inlet hose.
Clean and straighten the drain hose.
Clean the drain filter.
Add 1 or 2 similar items to help
balance the load.
Rearrange load to allow proper
spinning
Close the door.
❋ If “ ” is not released, call for
service.
Unplug the power plug and call for
service.
Close the water tap.
Unplug the power plug.
Call for service.
Restart the cycle.
This manual suits for next models
8
Table of contents
Other LG Washer manuals