LG WD-10310FDK User manual

P/No.: MFL38868723

WD-1031(0~9)FDK
WD-1231(0~9)FDK
WD-1431(0~9)FDK

roduct Feature
P
ontents
C
2
Warnings ............................................................................................................3
Specification........................................................................................................4
Installation ...........................................................................................................5
Care before was ing .........................................................................................11
Adding detergent...............................................................................................12
Function ..........................................................................................................14
How to use was er............................................................................................15
Maintenance......................................................................................................22
Troubles ooting guide.......................................................................................26
Terms of Warranty ............................................................................................29
Direct Drive System
T e advanced Brus less DC motor directly drives t e drum wit out
belt and pulley.
Water Circulation
Spray detergent solution and water onto t e load over and over.
Clot es are soaked more quickly and t oroug ly during was cycle.
T e detergent suds can be removed more easily by t e water
s ower during rinse cycle. T e water circulation system uses bot
water and detergent more efficiently.
Built-in Heater
Internal eater automatically eats t e water to t e best temperature
on selected cycles.
Child Lock
T e C ild lock prevents c ildren from pressing any button to c ange
t e settings during operation.
Jumbo drum
LG’s jumbo drum can was about 40% more load t an conventional
was ing mac ines. A bigger drum improves t e was performance.
More economical by Intelligent Wash System
Intelligent Was System detects t e amount of load and water
temperature, and t en determines t e optimum water level and
was ing time to minimize energy and water consumption.
Low noise speed control system
By sensing t e amount of load and balance, it evenly distributes load
to minimize t e spinning noise level.
추가선택, 예약,
40%

arnings
W
3
For your safety, the information in this manual must be followed to minimize
the risk of fire or explosion, electric shock, or to prevent property damage,
personal injury, or loss of life.
!
READ ALL INSTRUCTIONS AND EXPLANATION OF THE INSTALLATION BEFORE USE
WARNING!
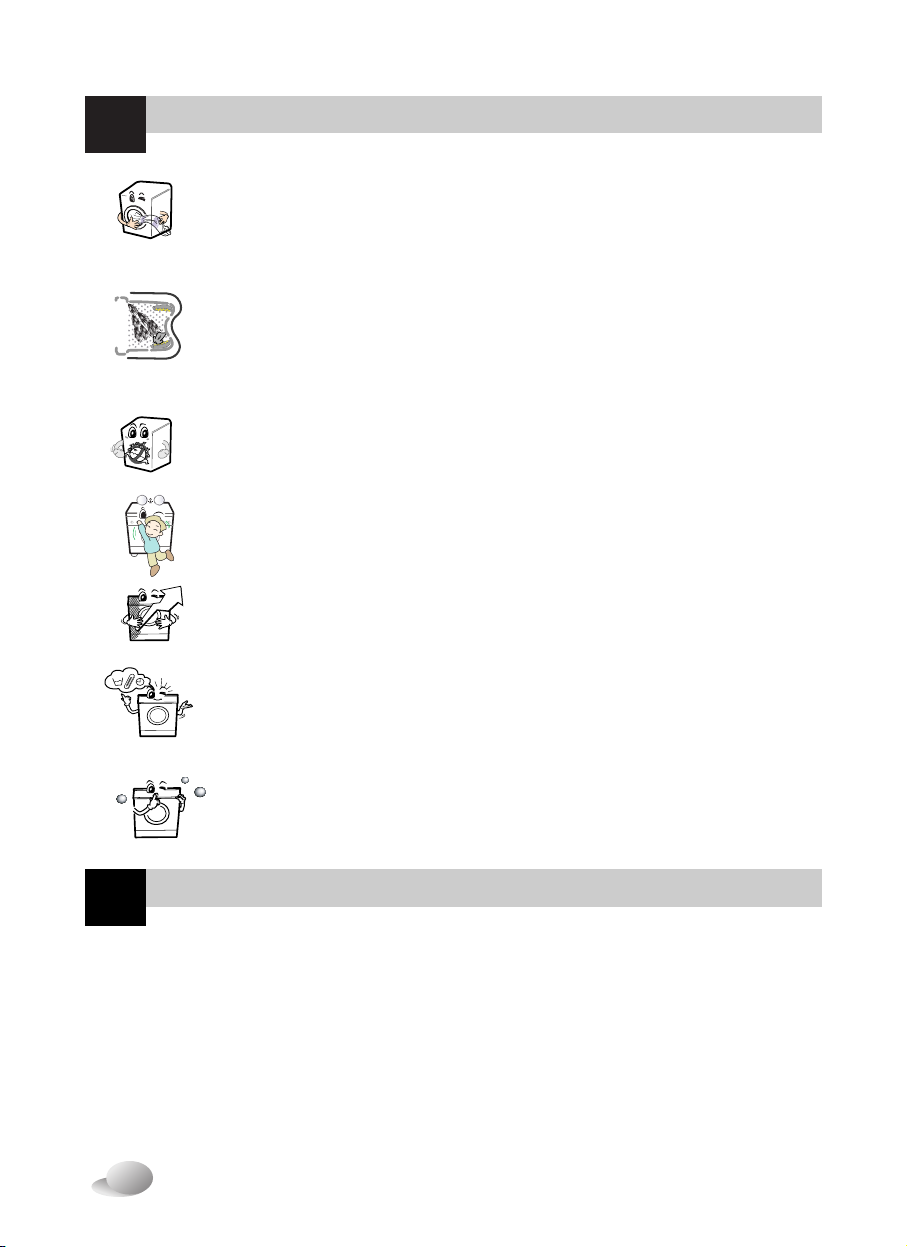
❊ Do not push down the door excessively, when washer door open.
This could topple over the washer.
• Before installation, c eck exterior damages. If it as,
do not install.
• Do not install or store t e was er w ere it will
be exposed to t e weat er.
• Do not tamper wit controls.
• Do not repair or replace any part of t e was er
or attempt any servicing unless specifically
recommended in t e user-maintenance instructions
or publis ed user-repair instructions t at you
understand and ave t e skills to carry out.
• Keep t e area underneat and around your
appliances free of combustible materials suc as
lint, paper, rags, c emicals, etc.
• Close supervision is necessary if t is appliance is
used by or near c ildren or infirm persons.
Do not allow t em to play on, wit , or inside t is
or any ot er appliance.
• Keep was er away from fire.
• Do not leave t e was er door open.
An open door could entice c ildren to ang on t e
door or crawl inside t e was er.
• Never reac into was er w ile it is moving. Wait
until t e drum as completely stopped.
• T e laundry process can reduce t e flame retardant
of fabrics.
• To avoid suc a result, carefully follow t e garment
manufacturer’s was and care instructions.
• Do not was or dry articles t at ave been cleaned
in, was ed in, soaked in, or spotted wit
combustible or explosive substances (suc as wax,
oil, paint, gasoline, degreasers, dry-cleaning
solvents, kerosene, etc.) w ic may ignite or
explode. Oil may remain in t e tub after a w ole
cycle resulting in fire during drying. So, do not load
oiled clot es.
• Do not slam t e was er door closed or try to force
t e door open w en locked. T is could result in
damage to t e was er.
• W en t e mac ine runs ig temperature, t e front
door may be very ot. Don’t touc it.
• To minimize t e possibility of electric s ock, unplug
t is appliance from t e power supply or disconnect
t e was er at t e ouse old distribution panel by
removing t e fuse or switc ing off t e circuit breaker
before attempting any maintenance or cleaning.
• W en unplugging power cord, do not pull out by
grasping t e cord. Ot erwise, t e power cord may
be damaged.
• Never attempt to operate t is appliance if it is
damaged, malfunctioning, partially disassembled, or
as missing or broken parts, including a damaged
cord or plug.
• Before discarding an old mac ine unplug it. Render
t e plug useless. Cut off t e cable directly be ind
t e appliance to prevent misuse.
• W en a product was under water, Please call
service center. T e risk of electric s ock and fire.
GROUNDING INSTRUCTIONS
T is appliance must be grounded. In t e event of malfunction or breakdown, grounding will reduce t e risk of electric s ock by providing a pat
of least resistance for electric current. T is appliance is equipped wit a cord aving an equipment-grounding conductor and grounding plug.
T e plug must be plugged into an appropriate outlet t at is properly installed and grounded in accordance wit all local codes and ordinance.
• Do not use an adapter or ot erwise defeat t e grounding plug.
• If you don’t ave t e proper outlet, consult an electrician.
IMPORTANT SAFETY INSTRUCTIONS
WARNING :To reduce t e risk of fire, electric s ock, or injury to persons w en using
t e was er, follow basic precautions, including t e following:
SAVE THESE INSTRUCTIONS
WARNING :
Improper connection of t e equipment-grounding conductor can result in risk of electric s ock. C eck wit
a qualified electrician or serviceman if you are in doubt as to w et er t e appliance is properly grounded. Do not modify
t e plug provided wit t e appliance - if it does not fit t e outlet, ave a proper outlet installed by a qualified electrician.

4
pecification
S
란제리
란제리
Name : Front loading was ing mac ine
Power supply : 230V~, 50Hz
Size : 600mm(W)×645mm(D)×850mm(H)
Weig t : 64kg
Was capacity : 8kg
Max. Watt : 2000W
Spin speed : No spin/400/600/800/1000 [WD-1031(0~9)FDK]
No spin/400/800/1000/1200 [WD-1231(0~9)FDK]
No spin/400/800/1000/1400 [WD-1431(0~9)FDK]
Water consumption : 56ℓ(7ℓ/Kg)
Permissible water pressure : 0.3-10kgf/㎠(30-1000kPa)
❋T e appearance and specifications may be varied wit out notice to raise t e units quality.
Spanner
Inlet ose(1EA)
Accessories

1. To prevent internal damage during
transport, t e special 4 bolts are
locked. Before operating t e was er,
remove t e bolts along wit t e rubber
bungs.
• If t ey are not removed, it may cause
eavy vibration, noise and malfunction.
3. Take out t e 4 bolts along wit t e
rubber bungs by slig tly twisting t e
bung. Keep t e 4 bolts and t e
spanner for future use.
• W enever t e appliance is transported,
t e transit bolts must be refitted.
2. Unscrew t e 4 bolts wit t e spanner
supplied.
4. Close t e oles wit t e caps supplied.
Removing transit bolts
5
nstallation
I
T e appliance is fitted wit transit bolts to prevent internal damage during transport.
• Packing and all transit bolts must
be removed before using the
washer.
When unpacking the base, be
sure to remove the additional
packing support in the middle
of the base packing.
Transit bolts
Install or store where it will not be exposed to temperatures below freezing or exposed to the
weather.
Properly ground washer to conform with all governing codes and ordinances.
The base opening must not be obstructed by carpeting when the washing machine is installed
on a carpeted floor.
In countries where there are areas which may be subject to infestation by cockroaches or other
vermin, pay particular attention to keeping the appliance and its surroundings in clean
condition at all times.
Any damage which may be cause by cockroaches or other vermin will not be covered by the
appliance guarantee.
(Packing support may not
be used depending on
models.)

6
nstallation
I
Level floor :
Allowable slope under entire was er is 1˚
Power outlet :
Must be wit in 1.5 meters of eit er side of location of was er.
Do not overload t e outlet wit more t an one appliance.
Additional Clearance :
For wall, door and floor modeling is required.
(10cm : rear / 2cm: rig t & left side)
Do not place or store laundry products on top of was er at any
times.
T ey can damage t e finis or controls.
Installation place requirement
Positioning
Install t e was er on a flat ard floor.
Make sure t at air circulation around t e was er is not impeded by carpets,rug etc.
• Never try to correct any unevenness in t e floor wit pieces of wood, cardboard or similar materials
under t e was er.
• If it is impossible to avoid positioning t e was er next to a gas cooker or coal burning stove,an
insulating(85x60cm) covered wit aluminum foil on t e side facing t e cooker or stove,must be
inserted between t e two appliance.
• T e was er must not be installed in rooms w ere t e temperature can drop below 0°C.
• Please ensure t at w en t e was er is installed, it is easily accessible for t e engineer in t e event of
a breakdown.
• Wit t e was er installed adjust all four feet using t e transit bolt spanner provided ensuring t e
appliance is stable, and a clearance of approximately 20mm is left between t e top of t e was er and
t e underside of t e work-top.
650
850
600

7
nstallation
I
▶Water supply pressure must be between 30kPa and 1000kPa (0.3~10kgf/cm2)
▶Don’t strip or crossthread when connecting Inlet hose to the valve.
▶If the water supply pressure is more than 1000kPa, a decompression device
should be installed.
• Two rubber seals are supplied wit t e water inlet oses t ese are in order
to prevent water leaks.
• C eck water tig tness of was ing mac ine connections by turning t e tap
completely on.
• Periodically c eck t e condition of t e ose and replace t e ose if
necessary.
• Make sure t at t ere is no kink on t e ose and t at it is not crus ed.
Washing Machine is to be connected to the water mains using new hose-sets and that old
hose-sets should not be used.
Connecting water supply hose
1. Do not use an extension cord or double adapter.
2. If t e supply cord is damaged, it must be replaced by t e manufacturer or its service agents or
similarly qualified person in order to avoid a azard.
3. Always unplug t e mac ine and turn off t e water supply after use.
4. Connect t e mac ine to an eart ed socket in accordance wit current wiring regulations.
5. T e appliance must be positioned so t at t e plug is easily accessible.
• Repairs to t e was ing mac ine must only be carried out qualified personnel. Repairs carried out by
inexperienced persons may cause injury or serious malfunctioning. Contact your local service center
• Do not install your was ing mac ine in rooms w ere temperatures below freezing may occur. Frozen oses
may burst under pressure. T e reliability of t e electronic control unit may be impaired at temperatures below
freezing point.
• If t e appliance is delivered in t e winter mont s and temperatures are below freezing : Store t e was ing
mac ine at room temperature for a few ours before putting it into operation.
Electrical connection
CAUTION concerning the Power Cord
Most appliances recommend t ey be placed upon a dedicated circuit; t at is, a single outlet circuit
w ic powers only t at appliance and as no additional outlets or branc circuits. C eck t e
specification page of t is owner's manual to be certain.
Do not overload wall outlets. Overloaded wall outlets, loose or damaged wall outlets, extension cords,
frayed power cords, or damaged or cracked wire insulation are dangerous. Any of t ese conditions
could result in electric s ock or fire. Periodically examine t e cord of your appliance, and if its
appearance indicates damage or deterioration, unplug it, discontinue use of t e appliance, and ave
t e cord replaced wit an exact replacement part by an aut orized servicer.
Protect t e power cord from p ysical or mec anical abuse, suc as being twisted, kinked, pinc ed,
closed in a door, or walked upon. Pay particular attention to plugs, wall outlets, and t e point w ere
t e cord exits t e appliance.
CAUTION
NOTE
After completing connection, if water leaks from the hose, repeat the same steps. Use the most conventional type
of faucet for water supply. In case the faucet is square or too big, remove the spacing ring before inserting the
faucet into the adaptor.
Rubber seal
Hose connector

8
nstallation
I
Normal Tap without thread & screw type inlet hose
Normal Tap without thread & one touch type inlet hose
1.Unscrew t e fixing screw to
attac t e tap.
2.Pus t e connector up till t e
rubber packing is in tig t contact
wit t e tap. T en tig ten t e 4
screws.
3.Pus t e water supply ose
vertically upwards so t at t e
rubber packing wit in in t e
ose can ad ere completely to
t e tap and t en tig ten it by
screwing it to t e rig t.
1.Untig ten t e upper connector
screw.
2.Pus t e upper connector up till
t e rubber packing is in tig t
contact wit t e tap. T en
tig ten t e 4 screws.
3. Connect t e water supply ose
to t e middle connector,
pus ing t e plate down.
• Your mac ine comes wit
only cold water connection.
• Make sure t at t ere are no
kinks in t e ose and t at it
is not crus ed.
• Make sure t at t e rubber seal
is inside t e ose connector.
Upper
Connector Rubber
packing
Middle
connector
Fixing screw
Guide plate
Connector
Rubber seal
Hose connector
Used the horizontal tap
Horizontal tap
Extension tap
Square tap
Rubber packing
Upper
Connector
Middle
connector
Plate
Upper
Connector
Water supply
ose
• In case t e diameter of t e tap is
large remove t e guide plate.
• Turn t e middle connector not
to ave water leaked.
• To separate t e water supply
ose from t e middle connector
s ut off t e tap. T en pull t e
inlet ose down, pus ing t e
plate down.

9
nstallation
I
Installation of drain hose
• T e drain ose s ould not be placed ig er
t an 100 cm above t e floor. Water in t e
was er does not drain or drains slowly.
• Proper securing of t e drain ose will
protect t e floor from damage due to water
leakage.
• W en t e drain ose is too long, do not
force back into t e was er. T is will cause
abnormal noise.
• W en installing t e drain ose sink,
secure it tig tly wit a string.
• Proper securing of t e drain ose will
protect t e floor from damage due to
water leakage.
T is equipment is not designed for maritime use or for use mobile installations suc as
caravans, aircraft etc.
Turn off t e stopcock if t e mac ine is to be left for any lengt of time (e.g. oliday),
especially if t ere is no floor drain(gully) in t e immediate vicinity.
W en disposing of t e appliance, cut off t e mains cable, and destroy t e plug Disable t e
door lock to prevent young c ildren being trapped inside.
Packaging material (e.g. Films, Styrofoam) can be dangerous for c ildren. T ere is a risk
of suffocation !
Keep all packaging well away from c ildren

10
nstallation
I
1. Adjusting t e was ing mac ine level properly prevents excessive noise
and vibration.
Install t e appliance on a solid and level floor surface, preferably in a
corner of t e room.
2. If t e floor is uneven, adjust t e adjustable feet as required. (do not insert
pieces of wood etc. under t e feet)
Make sure t at all four feet are stable and resting on t e floor and t en
c eck t at t e appliance is perfectly level. (use a spirit level)
※※
After the washer is level, tighten the lock nuts up towards of the base of the
washer. All lock nuts must be tightened.
❊ Diagonal Check
When pushing down the edges of the washing machine top plate diagonally, the
machine should not move up and down at all. (Please, check both of two
directions)
If machine rocks when pushing the machine top plate diagonally, adjust the
feet again.
NOTE
NOTE
Level adjustment
Concrete floors
Wooden floors (Suspended floors)
• T e installation surface must be clean, dry and level.
• Install was er on a flat ard floor.
Tile floors (Slippery floors)
• Position eac foot on t e Tread Mate and level t e mac ine to suit. (Cut Tread Mate into 70x70 mm
sections and stick t e pieces on to t e dry tile w ere mac ine is to be placed.)
※※
Tread Mate is a self adhesive material used on ladders & steps that prevents slipping.
• Wooden floors are particularly susceptible to vibration.
• To prevent vibration we recommend you place rubber cups under eac foot,
at least 15mm t ick under t e was er, secured to at least 2 floor beams wit screws.
• If possible install t e was er in one of t e corners of t e room, w ere t e floor is more stable.
※※
Insert the rubber cups to reduce vibration.
※※
You can obtain the rubber cups (p/no.4620ER4002B) from the LG spares dept.
Important!
• Proper placement and levelling of t e was er ensure long,regular and reliable operation.
• T e was er must be absolutely orizontal and stand firmly in position.
• It must not “Seesaw” across corners under load.
• T e installation surface must be clean, free from floor wax and ot er lubricant coatings.
• Do not let t e feet of t e was er get wet. If feet of t e was er get wet, slipping may occur.
Timber or suspended type flooring may contribute to excessive
vibration and unblance errors.
In the case that the washing machine is installed on a raised
platform, it must be securely fastened in order
to eliminate the risk that it might fall off.
Rubber Cup

11
are before washing
C
1. Care Labels
Look for a care label on your clot es. T is will tell you about t e fabric content of your garment and
ow it s ould be was ed.
2. Sorting
To get t e best results, Sort clot es into loads t at can be was ed wit t e same was cycle.
Water temperature and spin speed and different fabrics need to be was ed in different ways.
Always sort dark colors from pale colors and w ites. Was separately as dye and lint transfer can
occur causing discoloration of w ite etc. If possible, do not was eavily soiled items wit lig tly
soiled one.
Soil (Heavy, Normal, Lig t) Separate clot es according to amount of soil.
Color (W ite, Lig ts, Darks) Separate w ite fabrics from colored fabrics.
Lint (Lint producers, Collectors) Was lint producers and lint collectors
separately.
3. Caring before loading
Caring before washing
Before the first washing
Combine large and small items in a load. Load large items first. Large items should not be more than half
the total wash load.
Do not wash single items. This may cause an out-of-balance load. Add one or two similar items.
• C eck all pockets to make sure t at t ey
are empty. Items suc as nails, air clip,
matc es, pens, coins and keys can damage
bot your was er and your clot es.
• Close zippers, ooks and strings to
make sure t at t ese items don’t
snag on ot er clot es.
• Pre treat dirt and stains by brus ing a little
detergent dissolved in water onto stains like
collars and cuffs to elp s ift dirt.
Select a cycle (COTTON 60°C, add a alf load of detergent) allow t e unit to was
wit out clot ing. T is will remove residues and water from t e drum t at may ave been left
during manufacturing.
• C eck t e folds of t e flexible gasket (gray) and
remove any small articles,if any.
• C eck inside of t e drum and remove any left
items in it for next was cycle.
• Remove any clot ing or items on t e flexible
gasket to prevent clot ing and t e gasket
damages.

12
dding detergent
A
• Main was only
➔
• Pre Was + Main Was
➔
• Do not exceed t e maximum fill line.
Close t e dispenser drawer slowly.
Overfilling can cause early dispensing
of t e fabric softener w ic could stain
clot es.
• Do not leave t e fabric softener in t e
detergent drawer for more t an 2 days.
(Fabric softener could arden)
• Softener will automatically be added
during t e last rinse cycle.
• Do not open t e drawer w en water is
supplied.
• Solvents(benzene, etc) are not
allowable.
1. The Dispenser Drawer
2. Adding Fabric Softener
Adding detergent and fabric softener
Do not pour fabric softener
directly on the cloths
NOTE
MAXMAX
MAX
MAX
MAX
MAX

13
dding detergent
A
• The detergent should be used according to the
instruction of the detergent manufacture.
• If too much detergent is used, too many suds
can occur and this will decrease the washing
result or cause heavy load to the motor.
• Use powder detergent only for the front
loading washer.
❇
If suds occur too much, pleas reduce the
detergent amount.
• Detergent usage may need to be adjusted
for water temperature, water ardness,
size and soil level of t e load. For best
results, avoid oversudsing.
4. Water softener
• A water softener, suc as Anti limescale
(Clagon) can be used to cut down on t e
use of detergent in extremely ard water
areas. Dispense according to t e amount
specified on t e packaging.
First add detergent and t en t e water
softener.
• Use t e quantity of detergent as for soft
water.
❋
Tips
Full load : according to
manufacturer’s recommendation.
Part load : 3/4 of the normal
amount.
Minimum load : 1/2 of full load.
• Detergent is flus ed from t e dispenser
at t e beginning of t e cycle.
1) Open t e door and Tablets into t e
drum.
3. Detergent dosage
5. Using the Tablets
MAXMAX
MAX
2) Load t e laundry into t e drum.
3) Close t e door.
MAX

14
unction
F
Recommended courses according to the laundry type
Laundry type is t e same in
Cotton.
60˚C
(Cold, 30˚C,
40˚C, 95˚C)
60˚C
(40˚C)
40˚C
(Cold, 30˚C,
60˚C)
30˚C
(Cold, 40˚C)
30˚C
(Cold, 40˚C)
Cold
(30˚C, 40˚C)
Cold
(30˚C, 40˚C)
Color fast garments
(s irts, nig t dresses,
pajamas...)and lig tly soiled
w ite cotton (underwear...) - Bio
- Soak
- Pre Was
- Rinse+Spin
- Spin Only
- Intensive
- Rinse+Spin
- Spin Only
- Intensive
Polyamide, Acrylic, Polyester.
Delicate laundry easily
damaged.
Mac ine was able woolens wit
pure new wool only.
“Hand Was ” marked delicate
and wool laundry.
Colored Landry w ic is lig tely
soiled fast.
Cotton bedding wit filling, duvet,
pillow, blanket, sofa cover wit
lig t filling.
❋Water Temperature : Select t e water temperature to t e was cycles.
Always follow garment manufacture’s care label or instructions w en
laundering.
❋Intensive : If t e laundry is eavily soiled “Intensive” option is effective.
❋Program setting wit “Intensive” option for test in accordance or in conformity wit EN60456 and
IEC60456.
❋Pre Wash : If t e laundry is eavily soiled, “Pre Was ” Cotton is recommended. Pre Was is
available in Cotton, Cotton-Eco and Synt etic Program.
❋Bio : If you want to eliminate protein stains (milk, blood, c ocolate...), you may select Bio function by
pressing t e option button.
Program Fabric Type Maximum Load
Proper Temp. Option
Rating
Rating
4.0kg
3.0kg
2.0kg
2.0kg
5.0kg
1 king size
(9 Tog)
Cotton
Cotton-Eco
Synthetic
Delicate
Wool/Silk
Hand Wash
Quick 30
Duvet

15
ow to use washer
H
• Press t e Power button to start.
• Press t e Start/Pause button.
• Initial condition
- Wash : Main wash
- Rinse : 3 times
- Spin :
• 1000 rpm [WD-1031(0~9)FDK]
• 1200 rpm [WD-1231(0~9)FDK]
• 1400 rpm [WD-1431(0~9)FDK]
- Water temperature : 60˚C
- Program : Cotton
• Press t e Power button to start.
• Select t e conditions w ic you want to use,
by pressing eac button.
For selecting the each conditions, please refer to
the page 16~page 21.
• Press t e Start/Pause button.
1. Cotton automatically
selected upon power on.
2. Manual Selecting

16
ow to use washer
H
Program
• 9 programs are available according to t e
laundry type.
• Lamp will lig t up to indicate selected program.
1. Power
2. Initial Program
Power
• Press t e Power button to turn power on and
off.
• To cancel t e Time Delay function, t e
Power button s ould be pressed.
• W en t e Power button is pressed, t e was er
is ready for Cotton program. And t e ot er initial
conditions as follows.
• So, if you want to advance into t e was ing
cycle wit out c anging t e program, just press
Start/Pause button and t en t e was er will
proceed.
■
Initial program
• [WD-1031(0~9)FDK]
- Cotton Program / Main wash / Normal Rinse /
1000 rpm / 60˚C
• [WD-1231(0~9)FDK]
- Cotton Program / Main wash / Normal Rinse /
1200 rpm / 60˚C
• [WD-1431(0~9)FDK]
- Cotton Program / Main wash / Normal Rinse /
1400 rpm / 60˚C
• W en Start/Pause button is pressed, t e
Cotton program is automatically selected.
- By turning t e Program dial, t e program is
selected in order of “Cotton - Cotton-Eco -
Synt etic -Delicate -Wool/Silk -Hand Was -
Quick 30 -Duvet - Drain”.
Regarding to the laundry type for each program
Please refer to the page 14.
(1) (3) (4) (6) (7) (8) (9) (11)(10)(5)(2)
(1) Button : Power
(2) Dial : Program
(3) Button : Start/Pause
(4) Button : Option
(5) C ild lock
(6) Button : Rinse
(7) Button : Spin
(8) Button : Temperature
(9) Button : Beeper
(10) Button : Intensive
(11) Button : Time Delay
- Cotton
- Cotton-Eco
- Synthetic
- Delicate
- Wool/Silk
- Hand Wash
- Quick 30
- Duvet
- Drain

17
ow to use washer
H
Start/Pause Option
• T is Start/Pause button is used to start was
cycle or pause t e was cycle.
• If temporary stop of was cycle is needed,
press “Start/Pause” button.
• W en in Pause, t e power is turned off
automatically after 4 minutes.
• NB. T e door will not open before 1 to 2
minutes w en Pause is selected,
or at t e end of t e was cycle.
1. Start
2. Pause
• By pressing t e option
button, only one option
function be selected.
2. Soak
• Use t is mode to was normal clot es or t ick
and eavy clot es w ic are excessively dirty.
• Available in Cotton, Cotton-Eco and Synt etic.
3. Pre Wash
• Use t is option for load t at need
pretreatment. Add 16 minutes pre was and
drain.
- W en using Pre Was option, do not use
liquid detergent in t e main was
comportment. Use powder for t e main
was .
• Available in Cotton, Cotton-Eco and
Synt etic.
4. Rinse+Spin
• Use t is option to rinse and t en spin.
5. Spin Only
• W en you want spin only, select t e t is
option.
The required lamp will light up for identification.
1. Bio
• If you want to eliminate protein stains(milk,
blood, c ocolate...), you may select Bio
function by pressing t e option button.
[You can select Bio function w en
temperature is ig er t an 60˚C in Cotton,
Cotton-Eco and Synt etic.]
• W ile t e "Detect" is s own in t e display
t e mac ine rotates slowly and detects ow
many laundries are loaded in t e drum.
It will take a few seconds.
• Available in Cotton, Cotton-Eco and
Synt etic.
Detect
Door Lock
• Lig ts w enever t e door of t e was er is
locked.
• T e door can be unlocked by pressing t e
Start/Pause button to stop t e was er.
• T e door can be opened after a s ort delay.

18
ow to use washer
H
Child lock
If you c oose to lock t e buttons on t e control
assembly to prevent tampering, t is function
may be selected.
• C ild lock can be set by pressing and olding
t e Option and Rinse button simultaneously.
(About t ree seconds)
• When child lock is set, all buttons are inoperable
except for power button.
• To deactivate C ild lock system, press and
old t e Option and Rinse button
simultaneously again.
(About t ree seconds)
• To c ange to t e desired program, w ilst in
c ild lock mode.
1. Press and old bot Option and Rinse
button toget er once again.
2. Press t e Start/Pause button.
3. Select t e desired program and press t e
Start/Pause button again.
• T e c ild lock can be set at any time and it is
automatically canceled w en operational
errors occur. Also Child lock works w en
power is off.
1. Normal
2. Rinse+& Rinse++
3. Rinse Hold
Rinse
• By pressing t e Rinse
button, t e Rinse type can
be selected.
- Normal
- Rinse+
- Rinse++
- Normal+Hold
- Rinse++Hold
• Cotton, Cotton-Eco, Synthetic performs 3 Rinses
• Wool/Silk, Hand Wash, Quick 30, Delicate, Duvet
performs 2 Rinses
• Used to additional rinse, w ic may assist in
removing traces of detergent residue.
• By selecting Rinse+or Rinse++ function, t e
Rinse Time and t e Rinse water are
increased.
• Is selected by pressing t e Rinse button
repeatedly t is function leaves clot es in t e
was er; suspended in t e water after a rinse
wit out entering into spin.
• To proceed t roug to a drain or spin, once t e
rinse old function is completed using to
program dial scroll to t e required program.
The required lamp will light up for identification.

19
ow to use washer
H
1. Spin selection
2. No spin
• Spin speed is available according to t e
program as follows.
WD-1231(0~9)FDK
- Cotton & Cotton-Eco & Quick 30
No Spin - 400 - 800 - 1000 - 1200
- Synthetic & Wool/Silk & Hand Wash & Duvet
No Spin - 400 - 800 - 1000
- Delicate
No Spin - 400 - 800
• If “No Spin” is selected, t e was er stops after
draining water.
The required lamp will light up for identification.
• By pressing t e Spin button, t e spin speed
can be c osen.
[WD-1031(0~9)FDK] [WD-1231(0~9)FDK] [WD-1431(0~9)FDK]
WD-1431(0~9)FDK
- Cotton & Cotton-Eco & Quick 30
No Spin - 400 - 800 - 1000 - 1400
- Synthetic & Wool/Silk & Hand Wash & Duvet
No Spin - 400 - 800 - 1000
- Delicate
No Spin - 400 - 800
WD-1031(0~9)FDK
- Cotton & Cotton-Eco & Quick 30
No Spin - 400 - 600 - 800 - 1000
- Synthetic & Wool/Silk & Hand Wash & Duvet
No Spin - 400 - 600 - 800
- Delicate
No Spin - 400 - 600
Time Delay ( ) Spin
Preparing washing before starting “Time Delay”
- Turn on t e water tap.
- Load laundry and close t e door.
- Place t e detergent and fabric softener in t e
drawer.
• How to set “Time Delay”
- Press Power button.
- Turn t e Program dial to select
t e program you require.
- Press Time Delay button and set t e
desired time.
- Press t e Start/Pause button.
(“ ” lamp is on)
• If Time Delay button is pressed, “3:00” is
displayed. T e maximum delayed time is
19:00 ours and t e minimum time is 3:00
ours.
• Eac pressing of t e button advances time
delay by one our.
• To cancel t e time delay, press t e
Power button.
• Time Delay is ‘expected time’ from t e
present to t e completion of was ing cycle or
selected process (Was , Rinse, Spin).
• According to the condition of water supply and
temperature, the delayed time and the actual
washing time may vary.
This manual suits for next models
29
Table of contents
Other LG Washer manuals