LG WD-12590BD User manual

Washing Machine
OWNER'S MANUAL (2P~29P)
WD-1259(0~9)BD
Thank you for buying a
LG Fully Automatic Washing machine
Please read your owner's manual carefully, it provides
instructions on safe installation, use and maintenance
Retain it for future reference
Record the model and serial numbers of your washing
machine
Lavatrice
MANUALE D’USO (30P~59P)

roduct Feature
P
ontents
C
2
Warn ngs ......................................................................................................................3
Spec f cat on...................................................................................................................4
Installat on......................................................................................................................5
Care before wash ng....................................................................................................10
Add ng detergent..........................................................................................................11
Funct on ....................................................................................................................13
How to use washer ......................................................................................................14
Ma ntenance ................................................................................................................22
Troubleshoot ng gu de .................................................................................................25
Terms of Warranty .......................................................................................................29
Direct Drive System
The advanced Brushless DC motor d rectly dr ves the drum w thout
belt and pulley.
Water Circulation
Sprays detergent solut on and water onto the load over and over.
Clothes are soaked more qu ckly and thoroughly dur ng wash cycle.
The detergent suds can be removed more eas ly by the water shower dur ng r nse
cycle. The water c rculat on system uses both water and detergent more eff c ently.
Tilted Drum and Extra Large Door Opening
T lted drum and extra large open ng make t poss ble to load
and unload cloth ng more eas ly.
Automatic Wash Load Detection
Automat cally detects the load and opt m zes the wash ng t me.
Built-in Heater
Internal heater helps to ma nta n water temperature at ts opt mum level for
selected cycles.
Child Lock
The Ch ld lock prevents ch ldren from press ng any button to change the sett ngs
dur ng operat on.
추가선택 예약

arnings
W
3
For your safety, the information in this manual must be followed to minimize
the risk of fire or explosion, electric shock, or to prevent property damage,
personal injury, or loss of life.
!
READ ALL INSTRUCTIONS BEFORE USE
WARNING!
• Do not nstall or store the washer where t w ll
be exposed to the weather.
• Do not tamper w th controls.
• Do not repa r or replace any part of the washer
or attempt any serv c ng unless spec f cally
recommended n the user-ma ntenance
nstruct ons or publ shed user-repa r nstruct ons
that you understand and have the sk lls to carry
out.
• Keep the area underneath and around your
appl ances free of combust ble mater als such as
l nt, paper, rags, chem cals, etc.
• Close superv s on s necessary f th s appl ance s
used by or near ch ldren or nf rm persons.
Do not allow them to play on, w th, or ns de th s
or any other appl ance.
• Keep washer away from f re.
• Do not leave the washer door open.
An open door could ent ce ch ldren to hang on
the door or crawl ns de the washer.
• Never reach nto washer wh le t s mov ng. Wa t
unt l the drum has completely stopped.
• The laundry process can reduce the flame
retardant of fabr cs.
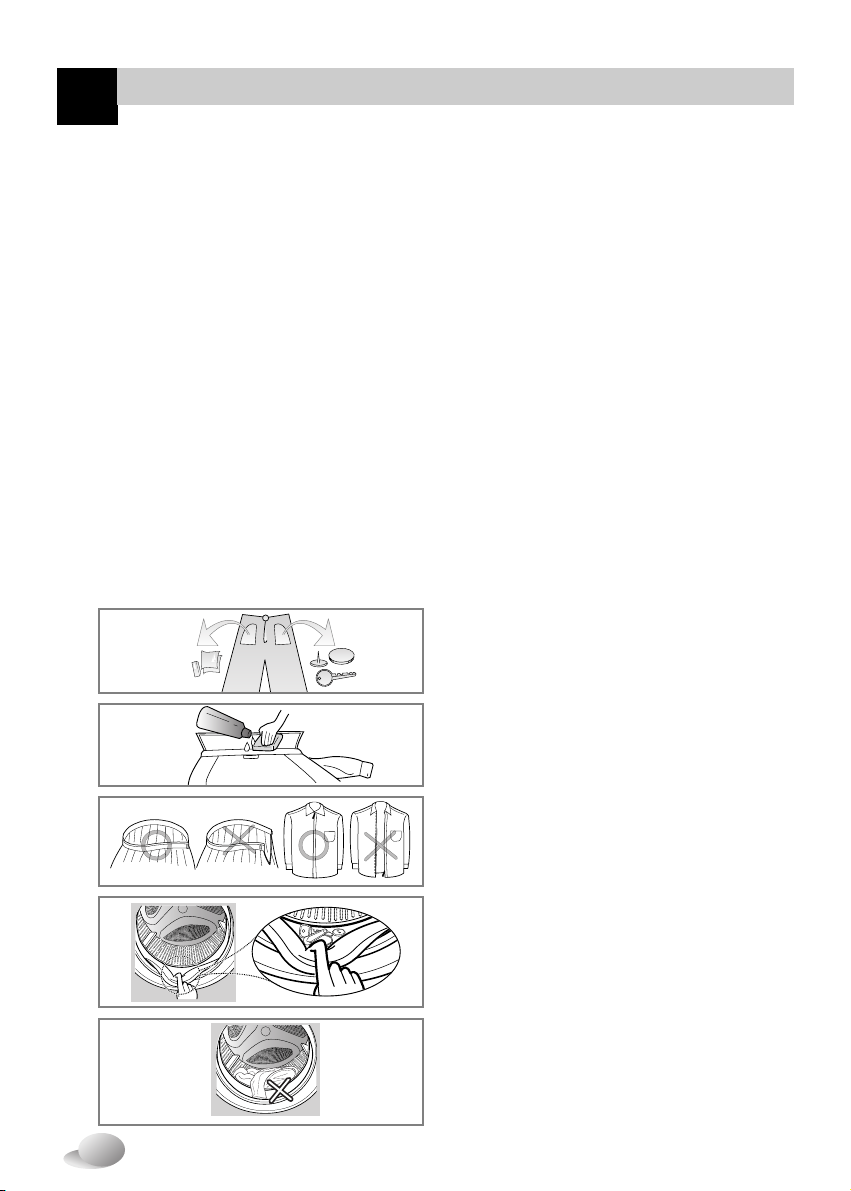
• Do not wash or dry art cles that have been
cleaned n, washed n, soaked n, or spotted w th
combust ble or explos ve substances (such as
wax, o l, pa nt, gasol ne, degreasers, dry clean ng
solvents, kerosene, etc.) wh ch may gn te or
explode.
O l may rema n n the tub after a whole
cycle result ng n f re dur ng dry ng. So, do not
load o led clothes.
• Always follow the fabr c care nstruct ons
suppl ed by the garment manufacturer.
• Do not slam the washer door closed or try to
force the door open when locked. Th s could
result n damage to the washer.
• To m n m ze the poss b l ty of electr c shock,
unplug th s appl ance from the power supply or
d sconnect the washer at the household
d str but on panel by remov ng the fuse or
sw tch ng off the c rcu t breaker before attempt ng
any ma ntenance or clean ng.
• Never attempt to operate th s appl ance f t s
damaged, malfunct on ng, part ally d sassembled,
or has m ss ng or broken parts, nclud ng a
damaged cord or plug.
• Dryer s ntended for only dry ng text le mater al.
• If the washer has been exposed to water, call an
author zed serv ce prov der to avo d any r sk of
f re or electr c shock.
GROUNDING INSTRUCTIONS
Th s appl ance must be grounded. In the event of malfunct on or breakdown, ground ng w ll reduce the r sk
of electr c shock by prov d ng a path of least res stance for electr c current. Th s appl ance s equ pped w th
a cord hav ng an equ pment-ground ng conductor and ground ng plug. The plug must be plugged nto an
appropr ate outlet that s properly nstalled and grounded n accordance w th all local codes and ord nance.
• Do not use an adapter or otherw se defeat the ground ng plug.
• If you don’t have the proper outlet, consult an electr c an.
IMPORTANT SAFETY INSTRUCTIONS
WARNING : To reduce the r sk of f re, electr c shock, or njury to persons when us ng
the washer, follow bas c precaut ons, nclud ng the follow ng:
SAVE THESE INSTRUCTIONS
WARNING :Improper connect on of the equ pment-ground ng conductor can result n r sk of electr c
shock. Check w th a qual f ed electr c an or serv ceman f you are n doubt as to whether the appl ance s
properly grounded. Do not mod fy the plug prov ded w th the appl ance - f t does not f t the outlet, have a
proper outlet nstalled by a qual f ed electr c an.

4
pecification
S
Name : Front load ng wash ng mach ne
Power supply : 220-240 V~, 50Hz
S ze : 635 mm(L) x 740 mm(P) x 925 mm(H)
We ght : 76kg
Wash capac ty : 10kg
Max. Watt : 2200W
Sp n speed : 0/400/800/1000/1200
Water consumpt on : 79ℓ(7.9ℓ/ kg )
Perm ss ble water pressure : 0.3~10 kgf/cm
2
(30~1000 kPa)
❋The appearance and spec f cat ons may be var ed w thout not ce to mprove the un ts qual ty.
❋Spec f cat ons subject to change by manufacturer.
Accessories
Drum
Drain Plug Drain Pump Filter
Lower cover cap
Door
Adjustable Feet
Drain Hose
Control Panel
Shipping Bolts
Power Plug
• If the supply cord s damaged,
t must be replaced by the
manufacturer or ts author zed
serv ce techn c an n order to
avo d a hazard.
Dispenser
Inlet hose (1EA) Spanner

5
nstallation
I
1. To prevent nternal damage dur ng
transport, the spec al 4 bolts are locked.
Before operat ng the washer, remove
the bolts along w th the rubber bungs.
• If they are not removed, t may cause
heavy v brat on, no se and malfunct on.
3. Take out the 4 bolts along w th the
rubber bungs by sl ghtly tw st ng the
bung. Keep the 4 bolts and the spanner
for future use.
• Whenever the appl ance s transported,
the trans t bolts must be ref tted.
The appl ance s f tted w th trans t bolts to prevent nternal damage dur ng transport.
• Packing and all transit bolts must be
removed before using the washer.
When unpacking the base, be sure to
remove the additional packing support
in the middle of the base packing.
2. Unscrew the 4 bolts w th
the spanner suppl ed.
4. Close the holes w th the caps suppl ed.
Transit bolts
Install or store where it will not be exposed to temperat res below freezing or exposed to the
weather.
Properly gro nd washer to conform with all governing codes and ordinances.
The base opening m st not be obstr cted by carpeting when the washing machine is installed on
a carpeted floor.
In co ntries where there are areas which may be s bject to infestation by cockroaches or other
vermin, pay partic lar attention to keeping the appliance and its s rro ndings in clean
condition at all times.
Any damage which may be ca se by cockroaches or other vermin will not be covered by the
appliance g arantee.
Removing transit bolts
Washer
Base Pack ng
Pack ng Support

6
nstallation
I
Level floor :
Allowable slope under ent re washer s 1°
Power outlet :
Must be w th n 1.5 meters of e ther s de of locat on of
washer. Do not overload the outlet w th more than one
appl ance.
Additional Clearance :
For wall, door and floor model ng s requ red.
(10cm : rear / 2cm : r ght & left s de)
Do not place or store laundry products on top of
washer at any t mes.
They can damage the f n sh or controls.
Installation place requirement
Positioning
Install the washer on a flat hard floor.
Make sure that a r c rculat on around the washer s not mpeded by carpets,rug etc.
• Before plac ng the washer on t les, apply a rubber mat under the feet.
• Never try to correct any unevenness n the floor w th p eces of wood, cardboard or s m lar
mater als under the washer.
• If t s mposs ble to avo d pos t on ng the washer next to a gas cooker or coal burn ng stove,an
nsulat ng(85x60cm) covered w th alum num fo l on the s de fac ng the cooker or stove,must be
nserted between the two appl ance.
• The washer must not be nstalled n rooms where the temperature can drop below 0°C.
• Please ensure that when the washer s nstalled, t s eas ly access ble for the eng neer n the
event of a breakdown.
• W th the washer nstalled adjust all four feet us ng the trans t bolt spanner prov ded ensur ng the
appl ance s stable, and a clearance of approx mately 20mm s left between the top of the washer
and the unders de of the work-top.
• The nstallat on nstruct ons shall state that the open ngs must not be obstructed by a carpet f t
has vent lat on open ngs n the base.
Washer
Dra n Hose
Laundry
Tub
approx.
2cm

7
nstallation
I
▶
Water supply pressure must be between 30kPa and 1000kPa (0.3~10kgf/cm2)
▶
D n’t strip r cr ssthread when c nnecting Inlet h se t the valve.
▶
If the water supply pressure is m re than 800kPa, a dec mpressi n device
sh uld be installed.
• Two rubber seals are suppl ed w th the water nlet hoses these are n
order to prevent water leaks.
• Check water t ghtness of wash ng mach ne connect ons by turn ng
the tap completely on.
• Per od cally check the cond t on of the hose and replace the hose f
necessary.
• Make sure that there s no k nk on the hose and that t s not crushed.
• The nstruct ons for appl ances connected to the water ma ns by
detachable hose-sets shall state that the new hose-sets suppl ed w th
the appl ance are to be used and that old hose-sets should not be
reused.
▶
When y ur washer has tw valves,
• If the washer has two valves, the energy s saved by us ng hot valve.
Washing Machine is to be connected to the water mains using new hose-sets and that old
hose-sets should not be used.
Connecting water supply hose
1. Do not use an extens on cord or double adapter.
2. If the supply cord s damaged, t must be replaced by the manufacturer or ts serv ce agents or s m larly
qual f ed person n order to avo d a hazard.
3. Always unplug the mach ne and turn off the water supply after use.
4. Connect the mach ne to an earthed socket n accordance w th current w r ng regulat ons.
5. The appl ance must be pos t oned so that the plug s eas ly access ble.
• Repa rs to the wash ng mach ne must only be carr ed out qual f ed personnel. Repa rs carr ed out by nexper enced
persons may cause njury or ser ous malfunct on ng. Contact your local serv ce center
• Do not nstall your wash ng mach ne n rooms where temperatures below freez ng may occur. Frozen hoses may burst
under pressure. The rel ab l ty of the electron c control un t may be mpa red at temperatures below freez ng po nt.
• If the appl ance s del vered n the w nter months and temperatures are below freez ng : Store the wash ng mach ne
at room temperature for a few hours before putt ng t nto operat on.
Electrical connection
CAUTION concerning the Power Cord
Most appl ances recommend they be placed upon a ded cated c rcu t; that s, a s ngle outlet c rcu t
wh ch powers only that appl ance and has no add t onal outlets or branch c rcu ts. Check the
spec f cat on page of th s owner's manual to be certa n.
Do not overload wall outlets. Overloaded wall outlets, loose or damaged wall outlets, extens on cords,
frayed power cords, or damaged or cracked w re nsulat on are dangerous. Any of these cond t ons
could result n electr c shock or f re. Per od cally exam ne the cord of your appl ance, and f ts
appearance nd cates damage or deter orat on, unplug t, d scont nue use of the appl ance, and have
the cord replaced w th an exact replacement part by an author zed serv cer.
Protect the power cord from phys cal or mechan cal abuse, such as be ng tw sted, k nked, p nched,
closed n a door, or walked upon. Pay part cular attent on to plugs, wall outlets, and the po nt where
the cord ex ts the appl ance.
If th s appl ance s suppl ed from a cord extens on set or electr cal portable outlet dev ce, the cord
extens on set or electr cal portable outlet dev ce must be pos t oned so that t s not subject to
splash ng or ngress of mo sture.
CAUTION
Hose connector
Seal ng
washer
Cold
Cold
water tap

8
nstallation
I
Installation of drain hose
• The dra n hose end should not be placed
h gher than 100 cm above the floor.
• Proper secur ng of the dra n hose w ll
protect the floor from damage due to water
leakage.
• When the dra n hose s too long, do not
force back nto the washer. Th s w ll cause
abnormal no se, malfunct on, and water
leakage.
• When nstall ng the dra n hose to a s nk,
secure t t ghtly w th a str ng.
• Proper secur ng of the dra n hose w ll
protect the floor from damage due to water
leakage should the dra n hose become
loose.
Th s equ pment s not des gned for mar t me use or for use mob le nstallat ons such as
caravans, a rcraft etc.
Turn off the stopcock f the mach ne s to be left for any length of t me (e.g. hol day),
espec ally f there s no floor dra n(gully) n the mmed ate v c n ty.
When d spos ng of the appl ance, cut off the ma ns cable, and destroy the Plug.
D sable the door lock to prevent young ch ldren be ng trapped ns de.
Packag ng mater al (e.g. F lms, Styrofoam) can be dangerous for ch ldren. There s a r sk of
suffocat on ! Keep all packag ng well away from ch ldren
about 100 cm
about 100 cm
Laundry tub
Hose
Reta ner
T e
strap max. 100cm
m n. 60cm
max. 100cm
m n. 60cm
about 105 cm
about 105 cm
max. 100 cm
max. 100 cm
m n. 60 cm
m n. 60 cm
about 145 cm
about 145 cm

9
nstallation
I
Concrete floors
Wooden floors (Suspended floors)
• The nstallat on surface must be clean, dry and level.
• Install washer on a flat hard floor.
Tile floors (Slippery floors)
• Pos t on each foot on the Tread Mate and level the mach ne to su t. (Cut Tread Mate nto
70x70 mm sect ons and st ck the p eces on to the dry t le where mach ne s to be placed.)
※※
Tread Mate is a self adhesive material used on ladders & steps that prevents slipping.
• Wooden floors are part cularly suscept ble to v brat on.
• To prevent v brat on we recommend you place rubber cups under each
foot, at least 15mm th ck under the washer, secured to at least 2 floor
beams w th screws.
• If poss ble nstall the washer n one of the corners of the room, where the floor s more stable.
※※
Insert the rubber cups to reduce vibration.
※※
Rubber cups ( p/no. 4620ER4002A) can be purchased from the L spare parts department.
Important!
• Proper placement and levell ng of the washer ensures long, regular and rel able operat on.
• The washer must be absolutely hor zontal and stand f rmly n pos t on.
• It must not “Seesaw” across corners under load.
• The nstallat on surface must be clean, free from floor wax and other lubr cant coat ngs.
• Do not let the feet of the washer get wet. If feet of the washer get wet, sl pp ng may occur.
※
It can be purchased from
hardware suppl ers.
Level adjustment
1. Adjust ng the wash ng mach ne level properly prevents excess ve
no se and v brat on.
Install the appl ance on a sol d and level floor surface, preferably n
a corner of the room.
2. If the floor s uneven, adjust the adjustable feet as requ red. (do
not nsert p eces of wood etc. under the feet)
Make sure that all four feet are stable and rest ng on the floor and
then check that the appl ance s perfectly level. (use a sp r t level)
※※
After the washer is level, tighten the lock nuts up towards of the base of
the washer. All lock nuts must be tightened.
❊ Diagonal Check
When pushing down the edges of the washing machine top plate diagonally, the
machine should not move up and down at all. (Please, check both of two directions)
If machine rocks when pushing the machine top plate diagonally, adjust the feet again.
NOTE
Timber or suspended type flooring may contribute to
excessive vibration and unblance errors.
NOTE
In the case that the washing machine is installed on a raised
platform, it must be securely fastened in order
to eliminate the risk that it might fall off.
Lock nut
Adjustable feet
Rubber Cup
Adjustable feet Adjustable feet
H gher Lower

10
are before washing
C
1. Care Labels
Look for a care label on your clothes. Th s w ll tell you about the fabr c content of your garment and
how t should be washed.
2. Sorting
To get the best results, Sort clothes nto loads that can be washed w th the same wash cycle.
Water temperature and sp n speed and d fferent fabr cs need to be washed n d fferent ways.
Always sort dark colors from pale colors and wh tes. Wash separately as dye and l nt transfer can
occur caus ng d scolorat on of wh te etc. If poss ble, do not wash heav ly so led tems w th l ghtly
so led one.
So l (Heavy, Normal, L ght) Separate clothes accord ng to amount of so l.
Color (Wh te, L ghts, Darks) Separate wh te fabr cs from colored fabr cs.
L nt (L nt producers, Collectors) Wash l nt producers and l nt collectors
separately.
3. Caring before loading
Caring before washing
Before the first washing
Combine large and small items in a load. Load large items first. Large items sho ld not be more
than half the total wash load.
Do not wash single items. This may ca se an o t-of-balance load. Add one or two similar items.
Select a cycle (COTTON 60°C, add a half load of detergent) allow the un t to wash w thout cloth ng.
Th s w ll remove res dues from the drum that may have been left dur ng manufactur ng.
• Check all pockets to make sure that they are
empty. Items such as na ls, ha r cl p,
matches, pens, co ns and keys can damage
both your washer and your clothes.
• Close z ppers, hooks and str ngs to make
sure that these tems don’t snag on other
clothes.
• Do not be stuck between the door and the
glass.
• Pre treat d rt and sta ns by brush ng a l ttle
detergent d ssolved n water onto sta ns l ke
collars and cuffs to help sh ft d rt.
• If you wash underwear, use the wash cloth
bag. If you don’t use the wash cloth bag wh le
wash ng the underwear, w res n the bra may
make a no se.

11
dding detergent
A
• Ma n wash only
➔
• Pre Wash + Ma n Wash
➔
• Do not exceed the max mum f ll l ne.
Close the d spenser drawer slowly.
Overf ll ng can cause early d spens ng
of the fabr c softener wh ch could sta n
clothes.
• Do not leave the fabr c softener n the
detergent drawer for more than 2 days.
(Fabr c softener could harden)
• Softener w ll automat cally be added
dur ng the last r nse cycle.
• Do not open the drawer when water s
suppl ed.
• Solvents(benzene, etc) are not
allowable.
1. The Dispenser Drawer
2. Adding Fabric Softener
Adding detergent and fabric softener
Do not pour fabric softener
directly on the cloths
NOTE
( )
( )
( )
( )
( )
Detergent for
ma n wash Fabr c
softener
Detergent for
pre wash

12
dding detergent
A
• The detergent sh uld be used acc rding t the
instructi n f the detergent manufacture.
• If t much detergent is used, t many suds can
ccur and this will decrease the washing result
r cause heavy l ad t the m t r.
• Use p wder detergent nly f r the fr nt l ading
washer.
❇
If suds ccur t much, pleas reduce the
detergent am unt.
• Detergent usage may need to be adjusted
for water temperature, water hardness, s ze
and so l level of the load. For best results,
avo d oversuds ng.
4. Water softener
• A water softener, such as Ant l mescale
(Clagon) can be used to cut down on the
use of detergent n extremely hard water
areas. D spense accord ng to the amount
spec f ed on the packag ng.
F rst add detergent and then the water
softener.
• Use the quant ty of detergent as for soft
water.
❋
Tips
Full load : according to manufacturer’s
recommendation.
Part load : 3/4 of the normal amount.
Minimum load : 1/2 of full load.
• Detergent s flushed from the d spenser at
the beg nn ng of the cycle.
3. Detergent dosage
1) Open the door and Tablets nto the
drum.
5. Using the Tablets
2) Load the laundry nto the drum.
3) Close the door.

13
unction
F
Recommended courses according to the laundry type
❋ Water Temperature: Select the water temperature to the wash cycles. Always follow garment
manufacture’s care label or nstruct ons when launder ng.
❋ Intens ve: When wash ng full load or heav ly so led laundry, you can ncrease effect veness by choos ng
ntens ve opt on.
❋ Pre Wash: If the laundry s heav ly so led, “Pre Wash” opt on s recommended.
Pre Wash s ava lable n Cotton, Contton-Eco, Baby Care, Cotton Qu ck and Synthet c.
Cotton
Color fast garments (sh rts, n ght
dresses, pajamas...) and l ghtly so led
wh te cotton (underwear...)
- Pre wash
- R nse+Sp n
- Sp n Only
- B o
- Soak
- Intens ve
- Water Plus
- Pre wash
- R nse+Sp n
- Sp n Only
- Soak
- Intens ve
- Water Plus
60°C
(Cold, 30°C,
40°C, 95°C)
Cotton-Eco Laundry type s the same n Cotton.
Synthetic Polyam de, Acryl c, Polyester.
40°C
(Cold, 30°C,
60°C)
Nom nal
Nom nal
Less than
5,0kg
- Pre wash
- R nse+Sp n
- Sp n Only
- B o
- Soak
- Intens ve
- Water Plus
Baby Care L ghtly so led baby wear 95°C
(40°C, 60°C) Less than
6,0kg
Nom nal
Less than
4,0kg
Less than
3,0kg
Less than
5,0kg
Max mum
load
9.0kg
- Pre wash
- R nse+Sp n
- Sp n Only
- Soak
- Intens ve
- Water Plus
- Pre wash
- Sp n Only
- Intens ve
- R nse+Sp n
- Sp n Only
- Intens ve
- Water Plus
40°C
(Cold, 30°C,
60°C, 95°C)
Cotton
Quick Cotton wh ch s l ghtly so led.
Delicate Del cate laundry eas ly damaged. 40°C
(Cold, 30°C)
Hand Wash
/Wool
“Hand Wash” marked laundry or mach ne
washable woolens. 30°C
(Cold, 40°C)
Quick 30 Colored Landry wh ch s l ghtly so led fast.
Duvet Cotton bedd ng w th f ll ng, duvet, p llow,
blanket, sofa cover w th l ght f ll ng.
40°C
(Cold, 30°C)
Maximum
Load
Additional
Option
Proper Temp.
(Option)
Fabric Type
Program

14
ow to use washer
H
• Press the Power( ) button to start.
• Press the Start/Pause( ) button.
• Initial condition
- Rinse : 3 times
- Water temperature : 60°C
- Spin : 1200 rpm
- Program : Cotton
• Press the Power( ) button to turn the
washer on.
• Select the desired cycle with the program
dial and if required, make any changes to
the washing conditions by pressing the
buttons accordingly.
For selecting the each conditions please refer
to the page15~page21
• Press the Start/Pause button to
commence the cycle.
1. Cotton automatically
selected upon power on.
2. Manual Selecting

15
ow to use washer
H
ProgramPower
• Press the Power( ) button to turn power
on and off.
• To cancel the Time Delay function, the
Power( ) button must be pressed.
• When the Power( ) button is pressed, the
washer is ready for Cotton program. And the
other initial conditions as follows.
• o, if you want to advance into the washing
cycle without changing the program, just
press Start/Pause( ) button and then the
washer will proceed.
■
Initial program
- Cotton Program / Rinse:Normal / 60°C/
1200rpm
(1)Button: Power
(2)Dial: Program
(3)Button: tart/Pause
(4)Button: Option
(5)Child lock
(6)Button: Rinse
(7)Button: Temp.
(8)Button: Intensive
(9)Button: Water Plus
(10)Button: Time Delay
(11)Button: Beeper
(12)Button: Tub Clean
(13)Dial: pin
• 9 programs are available according to the
laundry type.
• Dial lamp will light up to indicate selected
program.
• When Start/Pause( ) button is pressed,
the Cotton program is automatically
selected.
- By turning the Program dial, the program is
elected in order of “Cotton - Cotton Quick -
ynthetic - Delicate - Hand Wash/Wool -
Duvet - Quick 30 - Baby Care - Cotton-Eco”.
For information regarding laundry type for
ea h program, please refer to page 13.
1. Power
2. Initial Program
(1) (3) (4) (6) (7) (11) (12)(8,9,10) (13)(5)(2)

16
ow to use washer
H
Option
• By press ng the opt on
button, only one opt on
funct on may be selected.
NOTE:
Depend ng on the selected
program cycle, not all
Opt ons may be selectable.
Start/Pause
• Th s Start/Pause button s used to start
wash cycle or pause the wash cycle.
• If temporary stop of wash cycle s needed,
press “Start/Pause” button.
• When n Pause, the power s turned off
automat cally after 4 m nutes.
1. Start
• Use th s opt on for loads that need
pretreatment. Th s adds 16 m nutes of pre
wash ng before dra n ng.
- When us ng Pre Wash opt on, do not use a
l qu d detergent for the ma n wash.
Use powder for the ma n wash.
1. Pre Wash
• Use th s opt on to r nse and then sp n
2. Rinse + Spin
• When you want sp n only, select th s opt on.
3. Spin Only
• If you want to el m nate prote n sta ns(m lk,
blood, chocolate...), you may select B o
funct on by press ng the opt on button.
NB. You can select B o funct on when
temperature s h gher than 60。C n Cotton,
Cotton-Eco, Baby Care.
4. Bio
• Use th s mode to wash normal clothes or th ck
and heavy clothes wh ch are excess vely d rty.
5. Soak
2. Pause
Door Lock
• L ghts whenever the door of the washer s
locked.
• The door can be unlocked by press ng the
Start/Pause button to stop the washer.
• The door can be opened after a short delay.
Detecting
• Wh le the "Detect ng" s shown n the d splay
the mach ne rotates slowly and detects how
many laundr es are loaded n the drum. It
w ll take a few seconds.

17
ow to use washer
H
Rinse
• By press ng the R nse
button, the R nse type can
be selected.
- Normal
- Rinse+
- Medic Rinse
- Normal+Hold
- Rinse++Hold
• Cotton, Cotton-Eco, Synthetic, Baby Care
performs 3 Rinses
• Quick 30, Hand Wash/Wool, Duvet, Delicate
Cotton Quick performs 2 Rinses.
• Used to add t onal r nse, wh ch may ass st n
remov ng traces of detergent res due.
• By select ng R nse+or Med c R nse
funct on, the R nse T me and the R nse
water are ncreased.
• Med c R nse heats the water to 40 Deg n
the last r nse.
• Is selected by press ng the R nse button
repeatedly th s funct on leaves clothes n the
washer; suspended n the water after a r nse
w thout enter ng nto sp n.
• To proceed to a Dra n or Sp n funct on after
a R nse hold, select Dra n on the program
d al or press the Sp n button for the des red
speed, then press the Start/Pause button.
The matching indicator lamp will light up for
identification.
Child lock
If you choose to lock the buttons on the
control assembly to prevent tamper ng, th s
funct on may be selected.
• Ch ld lock can be set by press ng and
hold ng the Option and Rinse button
s multaneously. (About three seconds)
• When child l ck is set, all butt ns are
in perable.
• To deact vate Ch ld lock system, press and
hold the Option and Rinse button
s multaneously aga n.
(About three seconds)
• To change to the des red program, wh lst n
ch ld lock mode.
1. Press and hold both Option and Rinse
button to cancel the ch ld lock.
(About three seconds)
2. Press the Start/Pause button.
3. Select the des red program and press the
Start/Pause button aga n.
• The ch ld lock can be set at any t me and t
s automat cally canceled when operat onal
errors occur.
1. Normal
2. Rinse+& Medic Rinse
3. Rinse Hold
Change
the des red
program

18
Intensive
• When wash ng full load or heav ly so led
laundry, you can ncrease effect veness by
choos ng ntens ve opt on.
• By select ng the Intens ve opt on, the wash
t me may be extended, depend ng on the
program selected.
• To use th s opt on press the Intens ve button
once before the wash program s started.
ow to use washer
H
Water Temperature
• By press ng the Temp.
button, the water
temperature can be
selected.
- Cold
- 30˚C / 40˚C / 60˚C / 95˚C
• Water temperature can be selected as
below accord ng to the program.
- Cotton & Cotton Quick & Cotton-Eco
Cold- 30°C - 40°C - 60°C - 95°C
- Synthetic
Cold - 30°C - 40°C - 60°C
- Delicate & Quick 30 & Duvet & Hand
Wash/Wool
Cold - 30°C - 40°C
- Baby Care
40°C - 60°C - 95°C
The required temperature lamp will light up for
identification.
For the more detailed information, please refer
to the page13.
• Adds extra water to the wash and r nse
cycles for super or results.
Water Plus

19
ow to use washer
H
Tub Clean
Tub Clean course can be set by press ng
‘Tub Clean’ button.
TUB CLEAN s spec al cycle to clean the
ns de of the washer. Th s cycle uses h gher
water level w th h gher sp n speed. Perform
th s cycle regularly.
How to use the Tub Clean cycle:
1. Remove any cloth ng or tems from the
washer and close the door.
2. Open the d spenser drawer and add Ant
l mescale (Calgon) to the Ma n wash
compartment.
NOTE: Do not add any detergent to the
detergent compartments. Excess ve
suds may generate and leak from the
washer.
3. Close the d spenser drawer slowly.
4. Power On and then press ‘Tub Clean’
5. Press the Start/Pause button to start.
6. After the cycle s complete, leave the door
open to dry around the washer door
open ng, flex ble gasket and door glass.
CAUTION
If there s a small ch ld, be careful not to
leave the door open for too long.
!
Time Delay
Preparing washing before starting “Time Delay”
- Turn on the water tap.
- Load laundry and close the door.
- Place the detergent and fabr c softener n
the drawer.
• How to set “T me Delay”
- Press Power( ) button.
- Turn the Program d al to select
the program you requ re.
- Press Time Delay button and set the
des red t me.
- Press the Start/Pause( ) button.
(“ ” lamp s bl nk)
• If Time Delay button s pressed, “3:00” s
d splayed. The max mum delayed t me s
19:00 hours and the m n mum t me s 3:00
hours.
• Each press ng of the button advances t me
delay by one hour.
• To cancel the t me delay, press the
Power( ) button.
• Time Delay s ‘expected t me’ from the
present to the complet on of wash ng cycle
or selected process (Wash, R nse, Sp n).
• According to the condition of water supply and
temperature, the delayed time and the actual
washing time may vary.

ow to use washer
H
20
Beeper
The match ng nd cator lamp w ll l ght up for
dent f cat on.
Spin
• By press ng the Sp n button, the sp n speed
can be chosen.
• Press repeatedly to adjust
the volume of the Beeper.
- Cotton & Cotton-Eco & Quick 30 & Cotton
Quick
0 – 400 – 800 – 1000 – 1200
- Baby Care & Duvet & Synthetic & Hand
Wash/Wool
0 – 400 – 800 – 1000
- Delicate
0 – 400 – 800
• If “No Sp n” s selected, the washer stops
after dra n ng the water from the last sp n.
1. Press the Power buton.
2. Set the des red sp n speed by press ng the
Sp n button.
3. Press the Start/Pause button.
The matching indicator lamp will light up for
identification.
1. Spin selection
2. No spin
3. Spin Only
This manual suits for next models
9
Table of contents
Languages:
Other LG Washer manuals