LG WD-CD1212W User manual

DWG.
No.
TRIG.
DR COMPLETED
도면 DR 완료
완료일 :
LG 전자 (주)
LG Electronics Inc.
UNIT SCALE NS
mm
REVIEWEDDESIGNED
RELATED DWG.
CHECKED APPROVED
최 경 남
09.04.02
황 성 기
09.04.03
09.04.02
김 현 석
09.04.02
MODELING I
T
L
E
T
APPROVED
승인자
PREPARED
시방자
DATE
년/월/일
REF. NO.
시방 번호
REV. NO.
기호
REVISION DESCRIPTION
변경 사항
1
2
3
4
RELEASING THIS DRAWING
WITHOUT PERMISSION LG
Electronics SHOULD BE
ACCUSED ACCORDING TO THE
LAWS AND COMPANY RULES.
이 도면은 LG전자의 자산으로 불법
유출시 관계법과 회사규정에 의해 처벌됨.
PDF
ILLUSTRATOR
150 150
210
MFL51768127
MANUAL,OWNER’S
DRUM-EXPORT 1/1
MFL51768127
<< 주기 >>
1. 재질, 인쇄방법, 인쇄도수, 외곽치수등은 작업표에 준한다.
2. 인쇄내용, 문자크기 및 형상, 선의 굵기 등은 설계에서 제시된 FILM에 준함.
3. 외곽치수는 절단후 치수임.
4. 양산전에 설계 한도를 득할 것.
<< NOTES >>
1. Material, printing and exterier size are refer to work tables.
2. Printing, text size and line are based on LG design film.
3. Exterier size on the drawing is cutting line.
4. Before product controlled by criteria sample.
가
P/NO. 다
<FRONT> <BACK>
나
WORK
가
BRAND
LG
27
WD-CD1212W F126(0~9)RD
나
MODEL
MFL51768127
다
P/NO.
SNOW WHITE 100g OFFSET 인쇄
MATERIAL AND PRINTING DESCRIPTION
1 1
PRINTING DEGREE
EXTERIER INTERIER
LG MODEL 명
A**REML
SUFFIX
ENGLISH
LANGUAGE
36
PAGE
ELF-PJT
REMARK
SEC.
5. 본 부품에 금지물질이 포함되지 않도록 하고, 상세내용은 LG(63)-A-5501-34를 만족할 것
5. The part should not contain prohibited substances(Pb,Cd,Hg,Cr+6,PBB,PBDE)and details
should comply with LG standard of LG(63)-A-5501-34

Washing Machine
OWNER'S MANUAL
WD-CD1212W
Thank you for buying a
LG Fully Au oma ic Washing machine.
Please read your owner's manual carefully, i provides
ins ruc ions on safe ins alla ion, use and main enance.
Re ain i for fu ure reference.
Record he model and serial numbers of your washing
machine.

roduct Feature
P
ontents
C
2
Warnings ......................................................................................................................3
Specifica ion...................................................................................................................6
Ins alla ion......................................................................................................................7
Care before washing....................................................................................................13
Adding de ergen ..........................................................................................................14
Func ion ....................................................................................................................16
How o use washer ......................................................................................................17
Main enance ................................................................................................................27
Troubleshoo ing guide .................................................................................................30
Terms of Warran y .......................................................................................................34
Direct Drive System
The advanced Brushless DC mo or direc ly drives he drum wi hou
bel and pulley.
Water Circulation
Sprays de ergen solu ion and wa er on o he load over and over.
Clo hes are soaked more quickly and horoughly during wash cycle.
The de ergen suds can be removed more easily by he wa er shower during rinse
cycle. The wa er circula ion sys em uses bo h wa er and de ergen more efficien ly.
Tilted Drum and Extra Large Door Opening
Til ed drum and ex ra large opening make i possible o load
and unload clo hing more easily.
Embossing drum & waved lifter
Embossing drum enhances he washing performance and reduces clo hes
damage.The waved lif er spray and help clo hes o enhance washing performance
during he washing cycle.
Automatic Wash Load Detection
Au oma ically de ec s he load and op imizes he washing ime.
Built-in Heater
In ernal hea er helps o main ain wa er empera ure a i s op imum level for
selec ed cycles.
Child Lock
The Child lock preven s children from pressing any bu on o change he se ings
during opera ion.
추가선택 예약

arnings
W
3
For your safety, the information in this manual must be followed to minimize
the risk of fire or explosion, electric shock, or to prevent property damage,
personal injury, or loss of life.
!
READ ALL INSTRUCTIONS BEFORE USE
WARNING!
• Do no ins all or s ore he washer where i will
be exposed o he wea her.
• Do no amper wi h con rols.
• Do no repair or replace any par of he washer
or a emp any servicing unless specifically
recommended in he user-main enance
ins ruc ions or published user-repair ins ruc ions
ha you unders and and have he skills o carry
ou .
• Keep he area undernea h and around your
appliances free of combus ible ma erials such as
lin , paper, rags, chemicals, e c.
• Close supervision is necessary if his appliance is
used by or near children or infirm persons.
Do no allow hem o play on, wi h, or inside his
or any o her appliance.
• Keep washer away from fire.
• Do no leave he washer door open.
An open door could en ice children o hang on
he door or crawl inside he washer.
• Never reach in o washer while i is moving. Wai
un il he drum has comple ely s opped.
• The laundry process can reduce he flame
re ardan of fabrics.
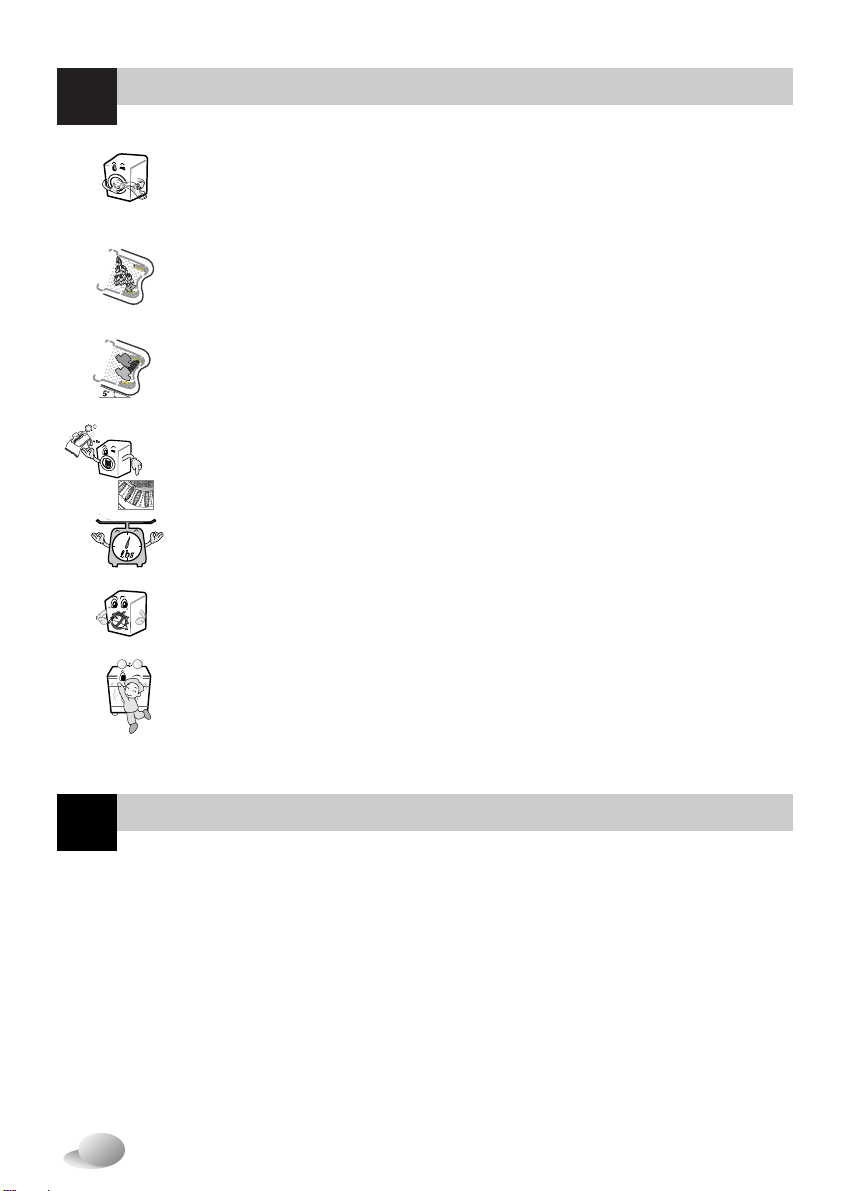
• Do no wash or dry ar icles ha have been
cleaned in, washed in, soaked in, or spo ed wi h
combus ible or explosive subs ances (such as
wax, oil, pain , gasoline, degreasers, dry cleaning
solven s, kerosene, e c.) which may igni e or
explode.
Oil may remain in he ub af er a whole
cycle resul ing in fire during drying. So, do no
load oiled clo hes.
• Always follow he fabric care ins ruc ions
supplied by he garmen manufac urer.
• Do no slam he washer door closed or ry o
force he door open when locked. This could
resul in damage o he washer.
• To minimize he possibili y of elec ric shock,
unplug his appliance from he power supply or
disconnec he washer a he household
dis ribu ion panel by removing he fuse or
swi ching off he circui breaker before a emp ing
any main enance or cleaning.
• Never a emp o opera e his appliance if i is
damaged, malfunc ioning, par ially disassembled,
or has missing or broken par s, including a
damaged cord or plug.
• Dryer is in ended for only drying ex ile ma erial.
• If he washer has been exposed o wa er, call an
au horized service provider o avoid any risk of
fire or elec ric shock.
GROUNDING INSTRUCTIONS
This appliance mus be grounded. In he even of malfunc ion or breakdown, grounding will reduce he risk
of elec ric shock by providing a pa h of leas resis ance for elec ric curren . This appliance is equipped wi h
a cord having an equipmen -grounding conduc or and grounding plug. The plug mus be plugged in o an
appropria e ou le ha is properly ins alled and grounded in accordance wi h all local codes and ordinance.
• Do no use an adap er or o herwise defea he grounding plug.
• If you don’ have he proper ou le , consul an elec rician.
IMPORTANT SAFETY INSTRUCTIONS
WARNING : To reduce he risk of fire, elec ric shock, or injury o persons when using
he washer, follow basic precau ions, including he following:
SAVE THESE INSTRUCTIONS
WARNING :Improper connec ion of he equipmen -grounding conduc or can resul in risk of elec ric
shock. Check wi h a qualified elec rician or serviceman if you are in doub as o whe her he appliance is
properly grounded. Do no modify he plug provided wi h he appliance - if i does no fi he ou le , have a
proper ou le ins alled by a qualified elec rician.

arnings
W
4
To minimize the risk of fire in a tumble dryer, the following should be observed:
• I ems ha have been spo ed or soaked wi h vege able or cooking oil cons i u e a fire
hazard and should no be placed in a umble dryer.
Oil-affec ed i ems can igni e spon aneously, especially when exposed o hea
sources Such as in a umble dryer. The i ems become warm, causing an oxida ion
reac ion in he oil. Oxida ion crea es hea . If he hea canno escape, he i ems can
become ho enough o ca ch fire. Piling, s acking or s oring oil-affec ed i ems can
preven hea from escaping and so crea e a fire hazard.
If i is unavoidable ha fabrics ha con ain vege able or cooking oil or have been
con amina ed by hair care produc s be placed in a umble dryer hey should firs be
washed in ho wa er wi h ex ra de ergen - his will reduce, bu no elimina e, he
hazard. Washed in ho wa er wi h ex ra de ergen - his will reduce, bu no
elimina e, he hazard. The ‘cool down’ cycle of umble dryers should be used o
reduce he empera ure of he i ems. They should no be removed from he umble
dryer or piled or s acked while ho .
• I ems ha have been previously cleaned in, washed in, soaked in or spo ed wi h
pe rol/gasoline, dry-cleaning solven s or o her flammable or explosive subs ances
should no be placed in a umble dryer.
Highly flammable subs ances commonly used in domes ic environmen s include
ace one, dena ured alcohol, pe rol/gasoline, kerosene, spo removers (some
brands), urpen ine, waxes and was removers.
• I ems con aining foam rubber (also known as la ex foam) or similarly es ured rubber.
like ma erials should no be dried in a umble dryer on a hea se ing.
Foam rubber ma erials can, when hea ed, produce fire by spon aneous combus ion.
• Fabric sof eners or similar produc s should no be used in a umble dryer o elimina e
he effec s of s a ic elec rici y unless his prac ice is specifically recommended by he
manufac urer of he fabric sof ener or produc .
• Undergarmen s ha con ain me al reinforcemen s should no be placed in a umble
dryer.
Damage o he umble dryer can resul if me al reinforcemen s come loose during
drying. When available a drying rack could be used for such i ems.
• Plas ic ar icles such as shower caps or babies wa erproof napkin covers should no
be placed in a umble dryer.
• Rubber-backed ar icles, clo hes fi ed wi h foam rubber pads, pillows, galoshes and
rubber-coa ed ennis shoes should no be placed in a umble dryer.

arnings
W
5
• Do no dry unwashed i ems in he umble dryer.
• I ems ha have been soiled wi h subs ances such as cooking oil,ace one,
alcohol,pe rol,kerosene,spo removers, urpen ine, waxes and wax removers should
be washed in ho wa er wi h an ex ra amoun of de ergen before being dried in he
umble dryer.
• I ems such as foam rubber(la ex foam), shower caps, wa erproof ex iles, rubber
backed ar icles and clo hes or pillows fi ed wi h foam rubber pads should no be
dried in he umble dryer.
• Fabric sof eners, or similar produc s, should be used as specified by he fabric
sof ener ins ruc ions.
• The final par of a umble dryer cycle occurs wi hou hea (cool down cycle) o ensure
ha he i ems are lef a a empera ure ha ensures ha he i ems will no be
damaged.
WARNING: Never s op a umble dryer before he end of he drying cycle unless all
i ems are quickly removed and spread ou so ha he hea is dissipa ed
• The lin rap has o be cleaned frequen ly, if applicable
• Lin mus no o be allowed o accumula e around he umble dryer
• adequa e ven ila ion has o be provided o avoid he back flow of gases in o he room
from appliacnes buring o her fuels, including open fires.
• The appliance is no in ended for use by young children or infirm persons wi hou
supervision.
• Young Children should be supervised o ensure ha hey do no play wi h appliance.
If The appliance is supplied from a cord ex ension se or an elec rical por able ou le
device, The cord ex ension se on elec rical por able ou le device mus be posi ioned
so ha i is no subjec o splashing or ingress of mois ure.

6
pecification
S
Name : Fron loading washing machine
Power supply : 220-240V~, 50Hz
Size : 635mm(W) x 720mm(D) x 925(H)
Weigh : 80kg
Wash capaci y (Max. Wa ) : 12kg (2200W)
Dry capaci y (Max. Wa ) : 7kg (2200W)
Spin speed : No Spin/400/800/1000/1200
Wa er consump ion : 96ℓ(8ℓ/kg)
Permissible wa er pressure : 0.3~10 kgf/cm
2
(30~1000 kPa)
❋The appearance and specifica ions may be varied wi hou no ice o improve he uni s quali y.
❋Specifica ions subjec o change by manufac urer.
Accessories
Drum
Drain Plug Drain Pump Filter
Lower cover cap
Door
Adjustable Feet
Drain Hose
Control Panel
Shipping Bolts
Power Plug
• If he supply cord is damaged,
i mus be replaced by he
manufac urer or i s au horized
service echnician in order o
avoid a hazard.
Dispenser
Air Ven for Safe y
Cold Wa er Inle
Back of Washer
Inle hose (1EA) Spanner

7
nstallation
I
1. To preven in ernal damage during
ranspor , he special 4 bol s are locked.
Before opera ing he washer, remove
he bol s along wi h he rubber bungs.
• If hey are no removed, i may cause
heavy vibra ion, noise and malfunc ion.
3. Take ou he 4 bol s along wi h he
rubber bungs by sligh ly wis ing he
bung. Keep he 4 bol s and he spanner
for fu ure use.
• Whenever he appliance is ranspor ed,
he ransi bol s mus be refi ed.
The appliance is fi ed wi h ransi bol s o preven in ernal damage during ranspor .
• Packing and all transit bolts must be
removed before using the washer.
When unpacking the base, be sure to
remove the additional packing support
in the middle of the base packing.
2. Unscrew he 4 bol s wi h
he spanner supplied.
4. Close he holes wi h he caps supplied.
Transit bolts
Install or store where it will not be exposed to temperat res below freezing or exposed to the
weather.
Properly gro nd washer to conform with all governing codes and ordinances.
The base opening m st not be obstr cted by carpeting when the washing machine is installed on
a carpeted floor.
In co ntries where there are areas which may be s bject to infestation by cockroaches or other
vermin, pay partic lar attention to keeping the appliance and its s rro ndings in clean
condition at all times.
Any damage which may be ca se by cockroaches or other vermin will not be covered by the
appliance g arantee.
Removing transit bolts
Washer
Base Packing
Packing Suppor

8
nstallation
I
Level floor :
Allowable slope under en ire washer is 1°
Power outlet :
Mus be wi hin 1.5 me ers of ei her side of loca ion of
washer. Do no overload he ou le wi h more han one
appliance.
Additional Clearance :
For wall, door and floor modeling is required.
(10cm : rear / 2cm : righ & lef side)
Do no place or s ore laundry produc s on op of
washer a any imes.
They can damage he finish or con rols.
Installation place requirement
Positioning
Ins all he washer on a fla hard floor.
Make sure ha air circula ion around he washer is no impeded by carpe s,rug e c.
• Before placing he washer on iles, apply a rubber ma under he fee .
• Never ry o correc any unevenness in he floor wi h pieces of wood, cardboard or similar
ma erials under he washer.
• If i is impossible o avoid posi ioning he washer nex o a gas cooker or coal burning s ove,an
insula ing(85x60cm) covered wi h aluminum foil on he side facing he cooker or s ove,mus be
inser ed be ween he wo appliance.
• The washer mus no be ins alled in rooms where he empera ure can drop below 0°C.
• Please ensure ha when he washer is ins alled, i is easily accessible for he engineer in he
even of a breakdown.
• Wi h he washer ins alled adjus all four fee using he ransi bol spanner provided ensuring he
appliance is s able, and a clearance of approxima ely 20mm is lef be ween he op of he washer
and he underside of he work- op.
• The ins alla ion ins ruc ions shall s a e ha he openings mus no be obs ruc ed by a carpe if i
has ven ila ion openings in he base.
Washer
Drain Hose
Laundry
Tub
approx.
2cm

9
nstallation
I
▶
Water supply pressure must be between 30kPa and 1000kPa (0.3~10kgf/cm2)
▶
D n’t strip r cr ssthread when c nnecting Inlet h se t the valve.
▶
If the water supply pressure is m re than 800kPa, a dec mpressi n device
sh uld be installed.
• Two rubber seals are supplied wi h he wa er inle hoses hese are in
order o preven wa er leaks.
• Check wa er igh ness of washing machine connec ions by urning
he ap comple ely on.
• Periodically check he condi ion of he hose and replace he hose if
necessary.
• Make sure ha here is no kink on he hose and ha i is no crushed.
• The ins ruc ions for appliances connec ed o he wa er mains by
de achable hose-se s shall s a e ha he new hose-se s supplied wi h
he appliance are o be used and ha old hose-se s should no be
reused.
▶
When y ur washer has tw valves,
• If he washer has wo valves, he energy is saved by using ho valve.
Washing Machine is to be connected to the water mains using new hose-sets and that old
hose-sets should not be used.
Connecting water supply hose
1. Do no use an ex ension cord or double adap er.
2. If he supply cord is damaged, i mus be replaced by he manufac urer or i s service agen s or similarly
qualified person in order o avoid a hazard.
3. Always unplug he machine and urn off he wa er supply af er use.
4. Connec he machine o an ear hed socke in accordance wi h curren wiring regula ions.
5. The appliance mus be posi ioned so ha he plug is easily accessible.
• Repairs o he washing machine mus only be carried ou qualified personnel. Repairs carried ou by inexperienced
persons may cause injury or serious malfunc ioning. Con ac your local service cen er
• Do no ins all your washing machine in rooms where empera ures below freezing may occur. Frozen hoses may burs
under pressure. The reliabili y of he elec ronic con rol uni may be impaired a empera ures below freezing poin .
• If he appliance is delivered in he win er mon hs and empera ures are below freezing : S ore he washing machine
a room empera ure for a few hours before pu ing i in o opera ion.
Electrical connection
CAUTION concerning the Power Cord
Mos appliances recommend hey be placed upon a dedica ed circui ; ha is, a single ou le circui
which powers only ha appliance and has no addi ional ou le s or branch circui s. Check he
specifica ion page of his owner's manual o be cer ain.
Do no overload wall ou le s. Overloaded wall ou le s, loose or damaged wall ou le s, ex ension cords,
frayed power cords, or damaged or cracked wire insula ion are dangerous. Any of hese condi ions
could resul in elec ric shock or fire. Periodically examine he cord of your appliance, and if i s
appearance indica es damage or de eriora ion, unplug i , discon inue use of he appliance, and have
he cord replaced wi h an exac replacemen par by an au horized servicer.
Pro ec he power cord from physical or mechanical abuse, such as being wis ed, kinked, pinched,
closed in a door, or walked upon. Pay par icular a en ion o plugs, wall ou le s, and he poin where
he cord exi s he appliance.
If his appliance is supplied from a cord ex ension se or elec rical por able ou le device, he cord
ex ension se or elec rical por able ou le device mus be posi ioned so ha i is no subjec o
splashing or ingress of mois ure.
CAUTION
Hose connec or
Sealing
washer
Cold
Cold
wa er ap

10
nstallation
I
Normal Tap without thread & screw type inlet hose
Normal Tap without thread & one touch type inlet hose
1.Unscrew he fixing screw o
a ach he ap.
2.Push he connec or up ill he
rubber packing is in igh con ac
wi h he ap. Then igh en he 4
screws.
3.Push he wa er supply hose
ver ically upwards so ha he
rubber packing wi hin in he hose
can adhere comple ely o he ap
and hen igh en i by screwing i
o he righ .
1.Un igh en he upper connec or
screw.
2.Push he upper connec or up ill
he rubber packing is in igh
con ac wi h he ap. Then igh en
he 4 screws.
3. Connec he wa er supply hose o
he middle connec or, pushing
he pla e down.
• Your machine comes wi h only
cold wa er connec ion.
• Make sure ha here are no
kinks in he hose and ha i is
no crushed.
• Make sure ha he rubber
seal is inside he hose
connec or.
• In case he diame er of he
ap is large remove he guide
pla e. • Turn he middle connec or no
o have wa er leaked.
• To separa e he wa er supply
hose from he middle connec or
shu off he ap. Then pull he
inle hose down, pushing he
pla e down.
Upper
Connec or
Upper
Connec or
Upper Connec or
Upper Connec or
Upper Connec or
Upper Connec or
Pla e
Pla e
Wa er supply hose
Wa er supply hose
Fixing screw
Fixing screw
Rubber
packing
Rubber
packing
Middle
connec or
Middle connec or
Hose
connec or
Guide pla e
Connec or
Used the horizontal tap
Horizon al ap
Ex ension ap
Square ap
Rubber
seal
Rubber packing
Rubber packing

11
nstallation
I
Installation of drain hose
• The drain hose end should no be placed
higher han 100 cm above he floor.
• Proper securing of he drain hose will
pro ec he floor from damage due o wa er
leakage.
• When he drain hose is oo long, do no
force back in o he washer. This will cause
abnormal noise, malfunc ion, and wa er
leakage.
• When ins alling he drain hose o a sink,
secure i igh ly wi h a s ring.
• Proper securing of he drain hose will
pro ec he floor from damage due o wa er
leakage should he drain hose become
loose.
This equipmen is no designed for mari ime use or for use mobile ins alla ions such as
caravans, aircraf e c.
Turn off he s opcock if he machine is o be lef for any leng h of ime (e.g. holiday),
especially if here is no floor drain(gully) in he immedia e vicini y.
When disposing of he appliance, cu off he mains cable, and des roy he Plug.
Disable he door lock o preven young children being rapped inside.
Packaging ma erial (e.g. Films, S yrofoam) can be dangerous for children. There is a risk of
suffoca ion ! Keep all packaging well away from children
abou 100 cm
abou 100 cm
Laundry ub
Hose
Re ainer
Tie
s rap
max. 100cm
min. 60cm
max. 100cm
min. 60cm
abou 105 cm
abou 105 cm
max. 100 cm
max. 100 cm
min. 60 cm
min. 60 cm
abou 145 cm
abou 145 cm

12
nstallation
I
Concrete floors
Wooden floors (Suspended floors)
• The ins alla ion surface mus be clean, dry and level.
• Ins all washer on a fla hard floor.
Tile floors (Slippery floors)
• Posi ion each foo on he Tread Ma e and level he machine o sui . (Cu Tread Ma e in o
70x70 mm sec ions and s ick he pieces on o he dry ile where machine is o be placed.)
※※
Tread Mate is a self adhesive material used on ladders & steps that prevents slipping.
• Wooden floors are par icularly suscep ible o vibra ion.
• To preven vibra ion we recommend you place rubber cups under each
foo , a leas 15mm hick under he washer, secured o a leas 2 floor
beams wi h screws.
• If possible ins all he washer in one of he corners of he room, where he floor is more s able.
※※
Insert the rubber cups to reduce vibration.
※※
Rubber cups ( p/no. 4620ER4002A) can be purchased from the L spare parts department.
Important!
• Proper placemen and levelling of he washer ensures long, regular and reliable opera ion.
• The washer mus be absolu ely horizon al and s and firmly in posi ion.
• I mus no “Seesaw” across corners under load.
• The ins alla ion surface mus be clean, free from floor wax and o her lubrican coa ings.
• Do no le he fee of he washer ge we . If fee of he washer ge we , slipping may occur.
※
I can be purchased from
hardware suppliers.
Level adjustment
1. Adjus ing he washing machine level properly preven s excessive
noise and vibra ion.
Ins all he appliance on a solid and level floor surface, preferably in
a corner of he room.
2. If he floor is uneven, adjus he adjus able fee as required. (do
no inser pieces of wood e c. under he fee )
Make sure ha all four fee are s able and res ing on he floor and
hen check ha he appliance is perfec ly level. (use a spiri level)
※※
After the washer is level, tighten the lock nuts up towards of the base of
the washer. All lock nuts must be tightened.
❊ Diagonal Check
When pushing down the edges of the washing machine top plate diagonally, the
machine should not move up and down at all. (Please, check both of two directions)
If machine rocks when pushing the machine top plate diagonally, adjust the feet again.
NOTE
Timber or suspended type flooring may contribute to
excessive vibration and unblance errors.
NOTE
In the case that the washing machine is installed on a raised
platform, it must be securely fastened in order
to eliminate the risk that it might fall off.
Lock nu
Adjus able fee
Rubber Cup
Adjus able fee Adjus able fee
Higher Lower

13
are before washing
C
1. Care Labels
Look for a care label on your clo hes. This will ell you abou he fabric con en of your garmen and
how i should be washed.
2. Sorting
To ge he bes resul s, Sor clo hes in o loads ha can be washed wi h he same wash cycle.
Wa er empera ure and spin speed and differen fabrics need o be washed in differen ways.
Always sor dark colors from pale colors and whi es. Wash separa ely as dye and lin ransfer can
occur causing discolora ion of whi e e c. If possible, do no wash heavily soiled i ems wi h ligh ly
soiled one.
Soil (Heavy, Normal, Ligh ) Separa e clo hes according o amoun of soil.
Color (Whi e, Ligh s, Darks) Separa e whi e fabrics from colored fabrics.
Lin (Lin producers, Collec ors) Wash lin producers and lin collec ors
separa ely.
3. Caring before loading
Caring before washing
Before the first washing
Combine large and small items in a load. Load large items first. Large items sho ld not be more
than half the total wash load.
Do not wash single items. This may ca se an o t-of-balance load. Add one or two similar items.
Selec a cycle (COTTON 60°C, add a half load of de ergen ) allow he uni o wash wi hou clo hing.
This will remove residues from he drum ha may have been lef during manufac uring.
• Check all pocke s o make sure ha hey are
emp y. I ems such as nails, hair clip,
ma ches, pens, coins and keys can damage
bo h your washer and your clo hes.
• Close zippers, hooks and s rings o make
sure ha hese i ems don’ snag on o her
clo hes.
• Do no be s uck be ween he door and he
glass.
• Pre rea dir and s ains by brushing a li le
de ergen dissolved in wa er on o s ains like
collars and cuffs o help shif dir .
• If you wash underwear, use he wash clo h
bag. If you don’ use he wash clo h bag while
washing he underwear, wires in he bra may
make a noise.

14
dding detergent
A
• Main wash only
➔
• Pre Wash + Main Wash
➔
• Do no exceed he maximum fill line.
Close he dispenser drawer slowly.
Overfilling can cause early dispensing
of he fabric sof ener which could s ain
clo hes.
• Do no leave he fabric sof ener in he
de ergen drawer for more han 2 days.
(Fabric sof ener could harden)
• Sof ener will au oma ically be added
during he las rinse cycle.
• Do no open he drawer when wa er is
supplied.
• Solven s(benzene, e c) are no
allowable.
1. The Dispenser Drawer
2. Adding Fabric Softener
Adding detergent and fabric softener
Do not pour fabric softener
directly on the cloths
NOTE
De ergen for
main wash
Fabric
sof ener
De ergen for
pre wash

15
dding detergent
A
• The detergent sh uld be used acc rding t the
instructi n f the detergent manufacture.
• If t much detergent is used, t many suds
can ccur and this will decrease the washing
result r cause heavy l ad t the m t r.
• Use p wder detergent nly f r the fr nt
l ading washer.
❇
If suds ccur t much, pleas reduce the
detergent am unt.
• De ergen usage may need o be adjus ed
for wa er empera ure, wa er hardness,
size and soil level of he load. For bes
resul s, avoid oversudsing.
4. Water softener
• A wa er sof ener, such as An i limescale
(Clagon) can be used o cu down on he
use of de ergen in ex remely hard wa er
areas. Dispense according o he amoun
specified on he packaging.
Firs add de ergen and hen he wa er
sof ener.
• Use he quan i y of de ergen as for sof
wa er.
❋
Tips
Full load : according to
manufacturer’s recommendation.
Part load : 3/4 of the normal
amount.
Minimum load : 1/2 of full load.
• De ergen is flushed from he dispenser
a he beginning of he cycle.
3. Detergent dosage

16
unction
F
Recommended courses according to the laundry type
❋ Wa er Tempera ure : Selec he wa er empera ure o he wash cycles. Always follow garmen manufac ure’s care label or
ins ruc ions when laundering.
❋ In ensive : When washing full load or heavily soiled laundry, you can increase effec iveness by choosing in ensive op ion.
❋ Pre Wash : If he laundry is heavily soiled, “Pre Wash” op ion is recommended.
Pre Wash is available in Co on, Co on Quick, Syn he ic and Baby Care, Wash + Dry Program.
Cotton
Color fas garmen s (shir s, nigh
dresses, pajamas...) and ligh ly soiled
whi e co on (underwear...)
- Pre Wash
- Rinse+Spin
- Dry Only
- Bio
- Soak
- In ensive
- Wa er Plus
- Time Delay
- Pre Wash
- Rinse+Spin
- Bio
- Soak
- In ensive
- Wa er Plus
- Time Delay
60˚C
(Cold, 30˚C,
40˚C, 95˚C)
Cotton
Quick Co on Which is ligh ly soiled.
40˚C
(Cold, 30˚C,
60˚C, 95˚C)
Synthetic Polyamide, Acrylic, Polyes er.
40˚C
(Cold, 30˚C,
60˚C)
Ra ing
6.0kg
- Rinse+Spin
- In ensive
- Time Delay
Delicate Delica e laundry easily damaged. 40˚C
(Cold, 30˚C)
Less han 3.0kg
3.0kg
Hand Wash
/Wool
“Hand Wash” marked laundry
or machine washable woolens.
Maximum
load
10.0kg
Less han
6.0kg
Less han
7.0kg
5.0kg
- Rinse+Spin
- In ensive
- Wa er Plus
- Time Delay
- Rinse+Spin
- Dry Only
- In ensive
- Wa er Plus
- Time Delay
- Pre Wash
- Rinse+Spin
- Bio
- Soak
- In ensive
- Wa er Plus
- Time Delay
- Pre Wash
- Rinse+Spin
- Dry Only
- Bio
- Soak
- In ensive
- Wa er Plus
- Time Delay
Quick 30 Colored Landry which is ligh ly soiled fas . 30˚C
(Cold, 40˚C)
30˚C
(Cold)
Duvet Co on bedding wi h filling, duve , pillow,
blanke , sofa cover wi h ligh filling.
Wash + Dry
(7kg/7kg)
A small amoun of laundry which can be
dried.
60˚C
(Cold, 30˚C,
40˚C, 95˚C)
Baby Care Ligh ly soiled baby wear 95˚C
(60˚C, 40˚C)
Maximum
Load
Additional
Option
Proper Temp.
(Option)
Fabric Type
Program

17
ow to use washer
H
• Press he Power( ) bu on o s ar .
• Press he Start/Pause( ) bu on.
• Ini ial condi ion
- Rinse : Normal
- Water temperature : 60°C
- Spin : 1200 rpm
- Program : Cotton
• Press he Power( ) bu on o urn he
washer on.
• Selec he desired cycle wi h he program
dial and if required, make any changes o
he washing condi ions by pressing he
bu ons accordingly.
For selecting the each conditions, please refer
to the page18~page26
• Press he Start/Pause bu on o
commence he cycle.
1. Cotton automatically
selected upon power on.
2. Manual Selecting

18
ow to use washer
H
ProgramPower
• Press he Power( ) bu on o urn power
on and off.
• To cancel he Time Delay func ion, he
Power( ) bu on mus be pressed.
• When he Power( ) bu on is pressed, he
washer is ready for Co on program. And he
o her ini ial condi ions as follows.
• So, if you wan o advance in o he washing
cycle wi hou changing he program, jus
press Start/Pause( ) bu on and hen he
washer will proceed.
■
Initial program
- Cotton Program / Rinse:Normal / 60°C/
1200rpm
(1)Bu on: Power
(2)Dial: Program
(3)Bu on: S ar /Pause
(4)Bu on: Op ion
(5)Child lock
(6)Bu on: Rinse
(7)Bu on: Spin
(8)Bu on: In ensive
(9)Bu on: Wa er Plus
(10)Bu on: Time Delay
(11)Bu on: Tempera ure
(12)Bu on: Tub Clean
(13)Dial: Dry
• 9 programs are available according o he
laundry ype.
• Dial lamp will ligh up o indica e selec ed
program.
• When Start/Pause( ) bu on is pressed,
he Co on program is au oma ically
selec ed.
- By urning he Program dial, he program is
Selec ed in order of “Co on – Co on Quick
– Syn he ic – Delica e – Hand Wash/Wool –
Duve – Quick 30 – Wash+Dry – Baby
Care”.
For information regarding laundry type for
each program, please refer to page 16.
1. Power
2. Initial Program
(1) (3) (4) (6) (7) (11) (12)(8,9,10) (13)(5)(2)

19
ow to use washer
H
Option
• By pressing he op ion
bu on, only one op ion
func ion may be selec ed.
NOTE:
Depending on he selec ed
program cycle, no all
Op ions may be selec able.
Start/Pause
• This Start/Pause bu on is used o s ar
wash cycle or pause he wash cycle.
• If emporary s op of wash cycle is needed,
press “Start/Pause” bu on.
• When in Pause, he power is urned off
au oma ically af er 4 minu es.
1. Start
• Use his op ion for loads ha need
pre rea men . This adds 16 minu es of pre
washing before draining.
- When using Pre Wash op ion, do no use a
liquid de ergen for he main wash.
Use powder for he main wash.
• Available in Co on, Syn he ic, Baby Care,
Wash+Dry and Co on Quick.
1. Pre Wash
• Use his op ion o rinse and hen spin
2. Rinse + Spin
• When you wan dry only, selec he his
op ion. Available in Baby Care, Co on,
Quick30 and Co on Quick.
3. Dry Only
• If you wan o elimina e pro ein s ains(milk,
blood, chocola e...), you may selec Bio
func ion by pressing he op ion bu on.
4. Bio
• Use his mode o wash normal clo hes or hick
and heavy clo hes which are excessively dir y.
• Available in Baby Care, Co on, Co on Quick,
Syn he ic and Wash+Dry.
5. Soak
2. Pause
Table of contents
Other LG Washer manuals
Popular Washer manuals by other brands

davoline
davoline DAV 6112 W user manual

Lloyd
Lloyd LWMS65 instruction manual

Franke
Franke LP21 Installation and operating instructions

Frigidaire
Frigidaire FCCW3000FS4 Installation instructions and use and care guide

Electrolux
Electrolux EIFLS20QSW installation instructions

Electrolux
Electrolux WA SL1 E100 user manual