8InfinityBox Plus User Manual Lifepro Strength Training Collection 9
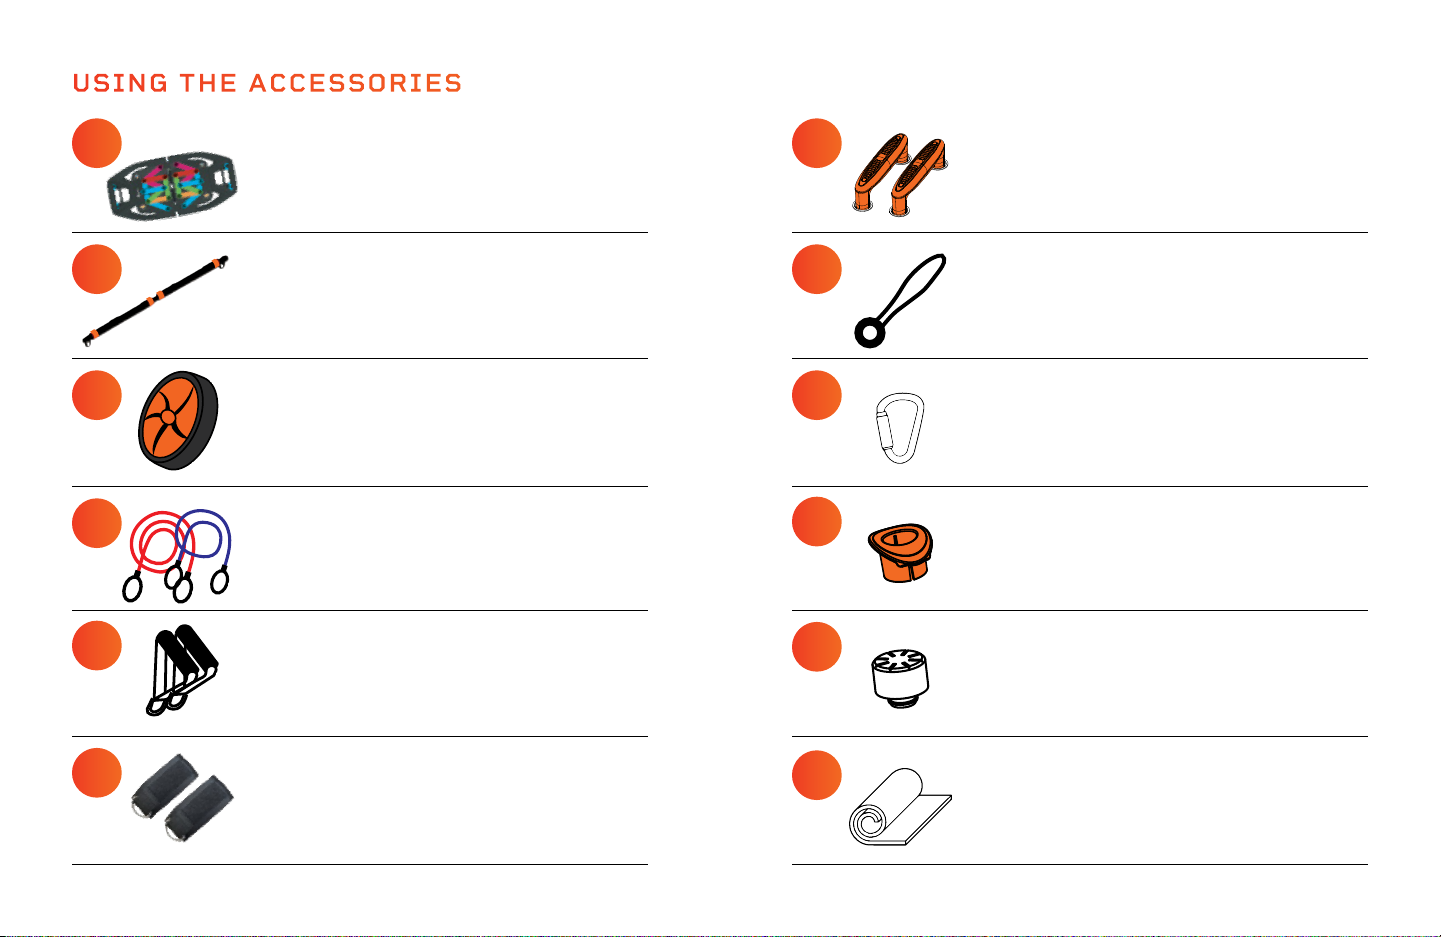
USING THE ACCESSORIES
The collapsible barbell (B) is durable but ultra-light with
ergonomic and comfortable handles on either side.
Use barbell with the ab wheel (C) and resistance bands (D).
To assemble: Screw the threaded end of one half of the
barbell into the threaded end on the other half.
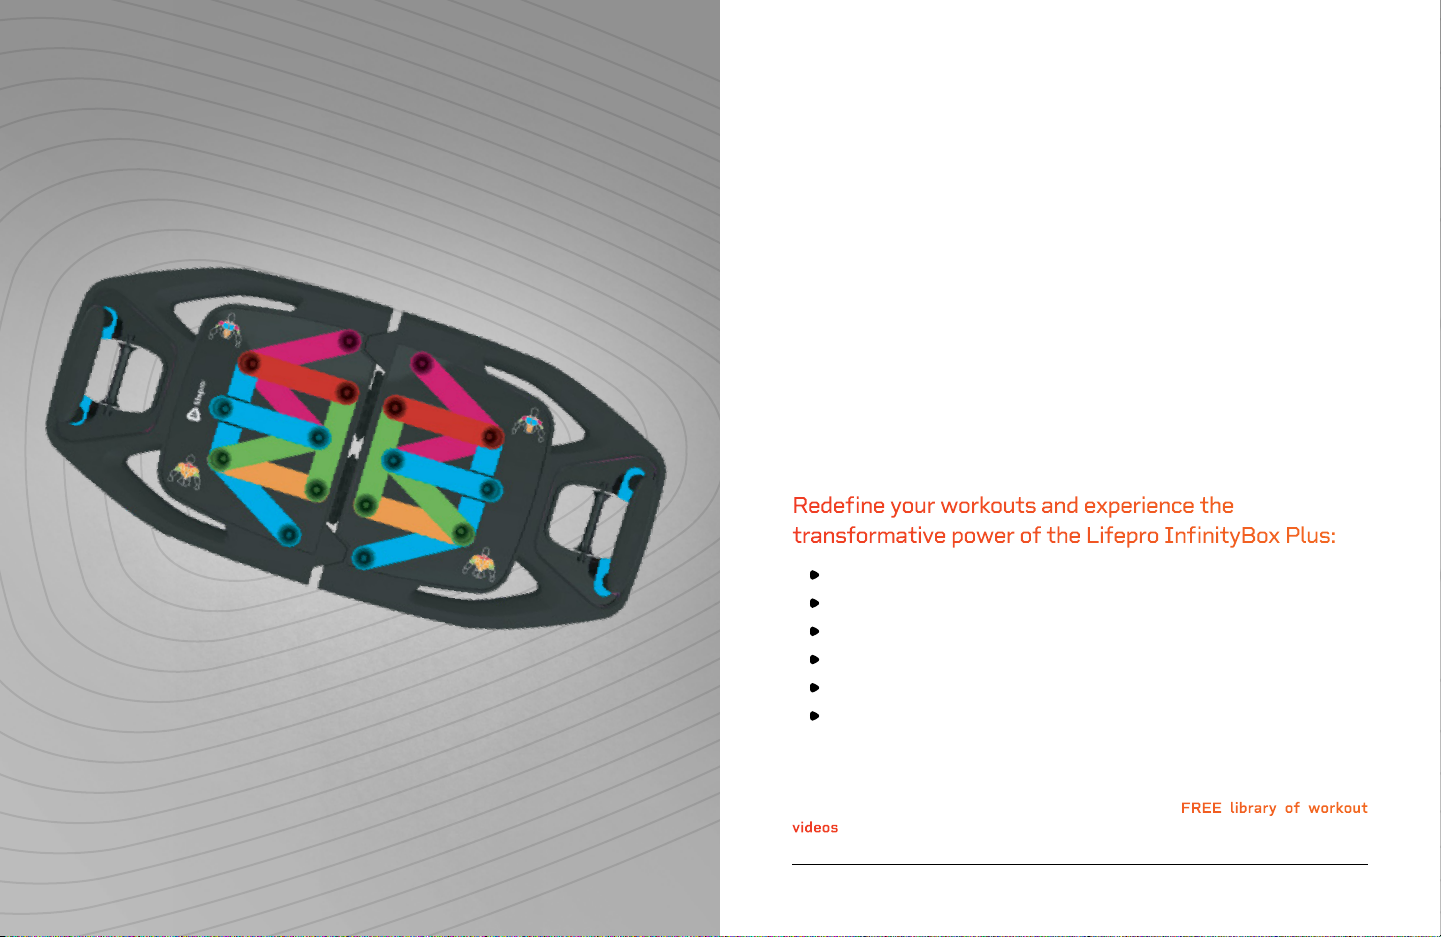
The training base (A) is a sturdy platform with a soft foam
surface. It is designed to offer a multitude of strength
training options when used with the included accessories.
The surface of the base has ten different push-up
configurations, each targeting different muscle groups.
The push-up handles (G) are durable and ergonomic. They
provide stability and symmetry during exercises.
Use the push-up handles to perform a variety of push-ups
with the training base (A).
The surface of the ab wheel (C) has a non-slip rubber
surface, ensuring stable, fluid movements.
Use the ab wheel with the barbell (B) for core exercises.
To assemble: Insert the threaded end of one half of the
barbell through the center of the ab wheel. Screw the
other half of the barbell into the first half.
Use the door anchor (H) to secure resistance bands (D) to
a door frame while doing standing exercises.
To use, lay the fabric loop over the top edge of the door
with the large rounded anchor hanging over the opposite
edge of the door. Close the door and thread a resistance
band through the anchor’s fabric loop or D-rings.
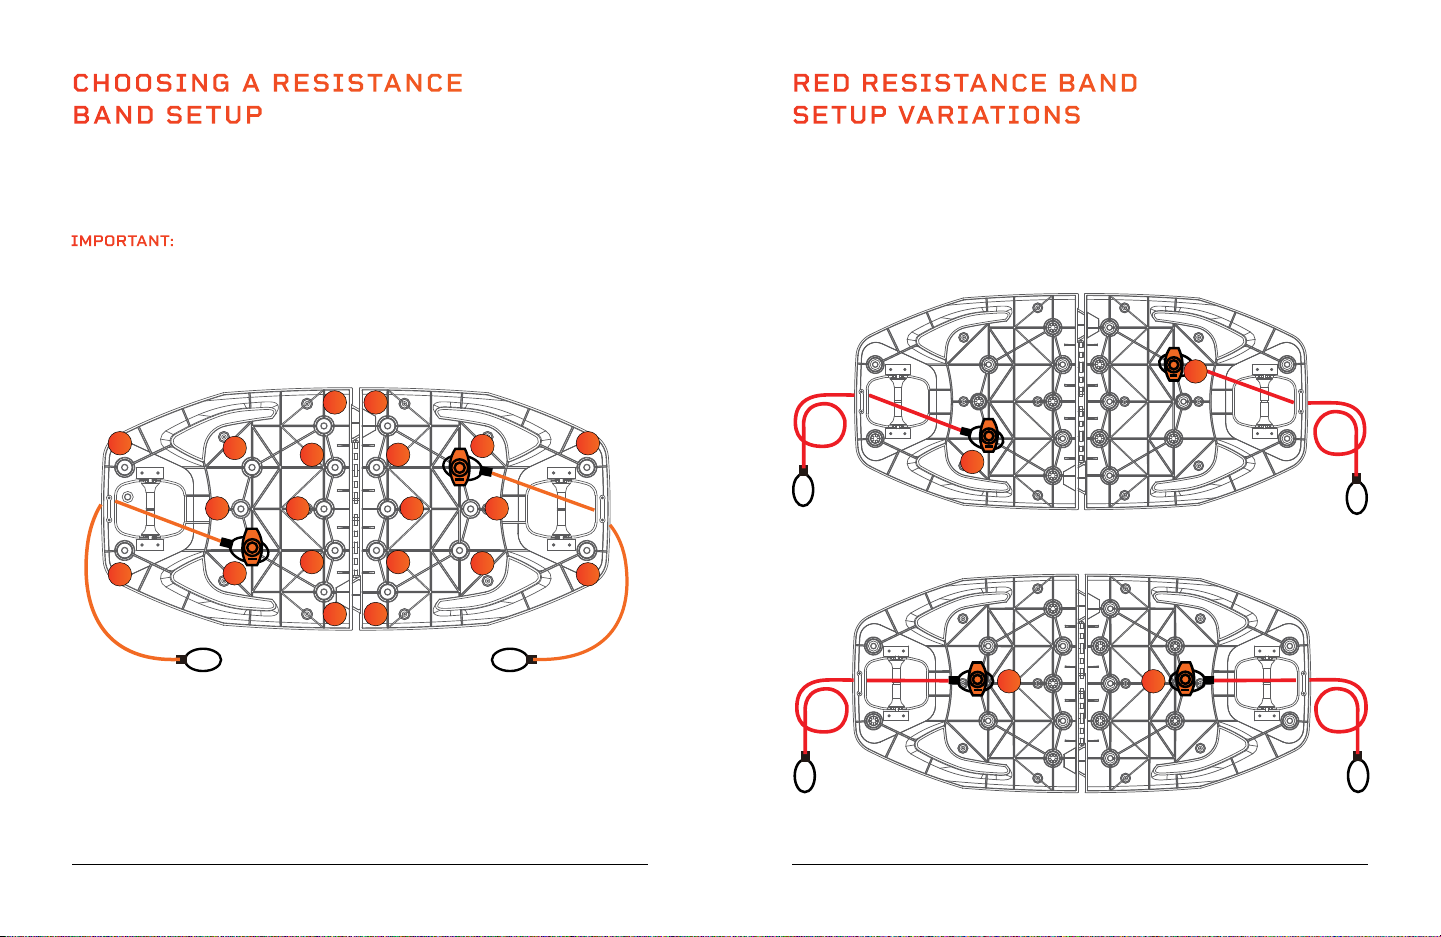
Customize the difficulty of each exercise depending on the
resistance bands (D) you choose. There are two 28” blue
resistance bands and two 46” red bands.
Clip the resistance bands to the barbell (B), workout handles
(E), ankle/wrist straps (F), or door anchor (H).
The carabiners (I) are made of ultra-durable steel. You will
need them for most exercises.
Use the carabiners to secure the resistance bands (D)
to the workout handles (E), ankle/wrist straps (F),
barbell (B), and door anchor (H).
Use the workout handles (E) with the resistance bands (D)
to perform upper body exercises.
Use the two plastic clamps (J) secure the resistance bands
(D) to the bottom of the training base (A).
Use the padded Velcro®straps (F) on your ankles or
wrists to perform lower or upper body exercises with the
resistance bands (C).
Use the twelve rubber feet (K) on the underside of the
training base (A) to help make it stable and secure.
Use the exercise mat (L) under the training base (A), an
alternative to the rubber feet, to help make it stable and
secure. The exercise mat can also be used as a cushion
when doing exercises requiring you to sit or lie on the floor.
x1
x1
x4
x4
x2
x2
x1
x2
x12
x1
x1 x2