Lilin DVR204B User manual

4CH/ 8CH/ 16CH
Digital Video Recorder
DVR204B/ 208B/ 216B
INSTRUCTION MANUAL

- 1 -
DIRECTORY
CHAPTER 1 Hard Disk Installing (Standard shipping products include neither HDD or R/W .............................2
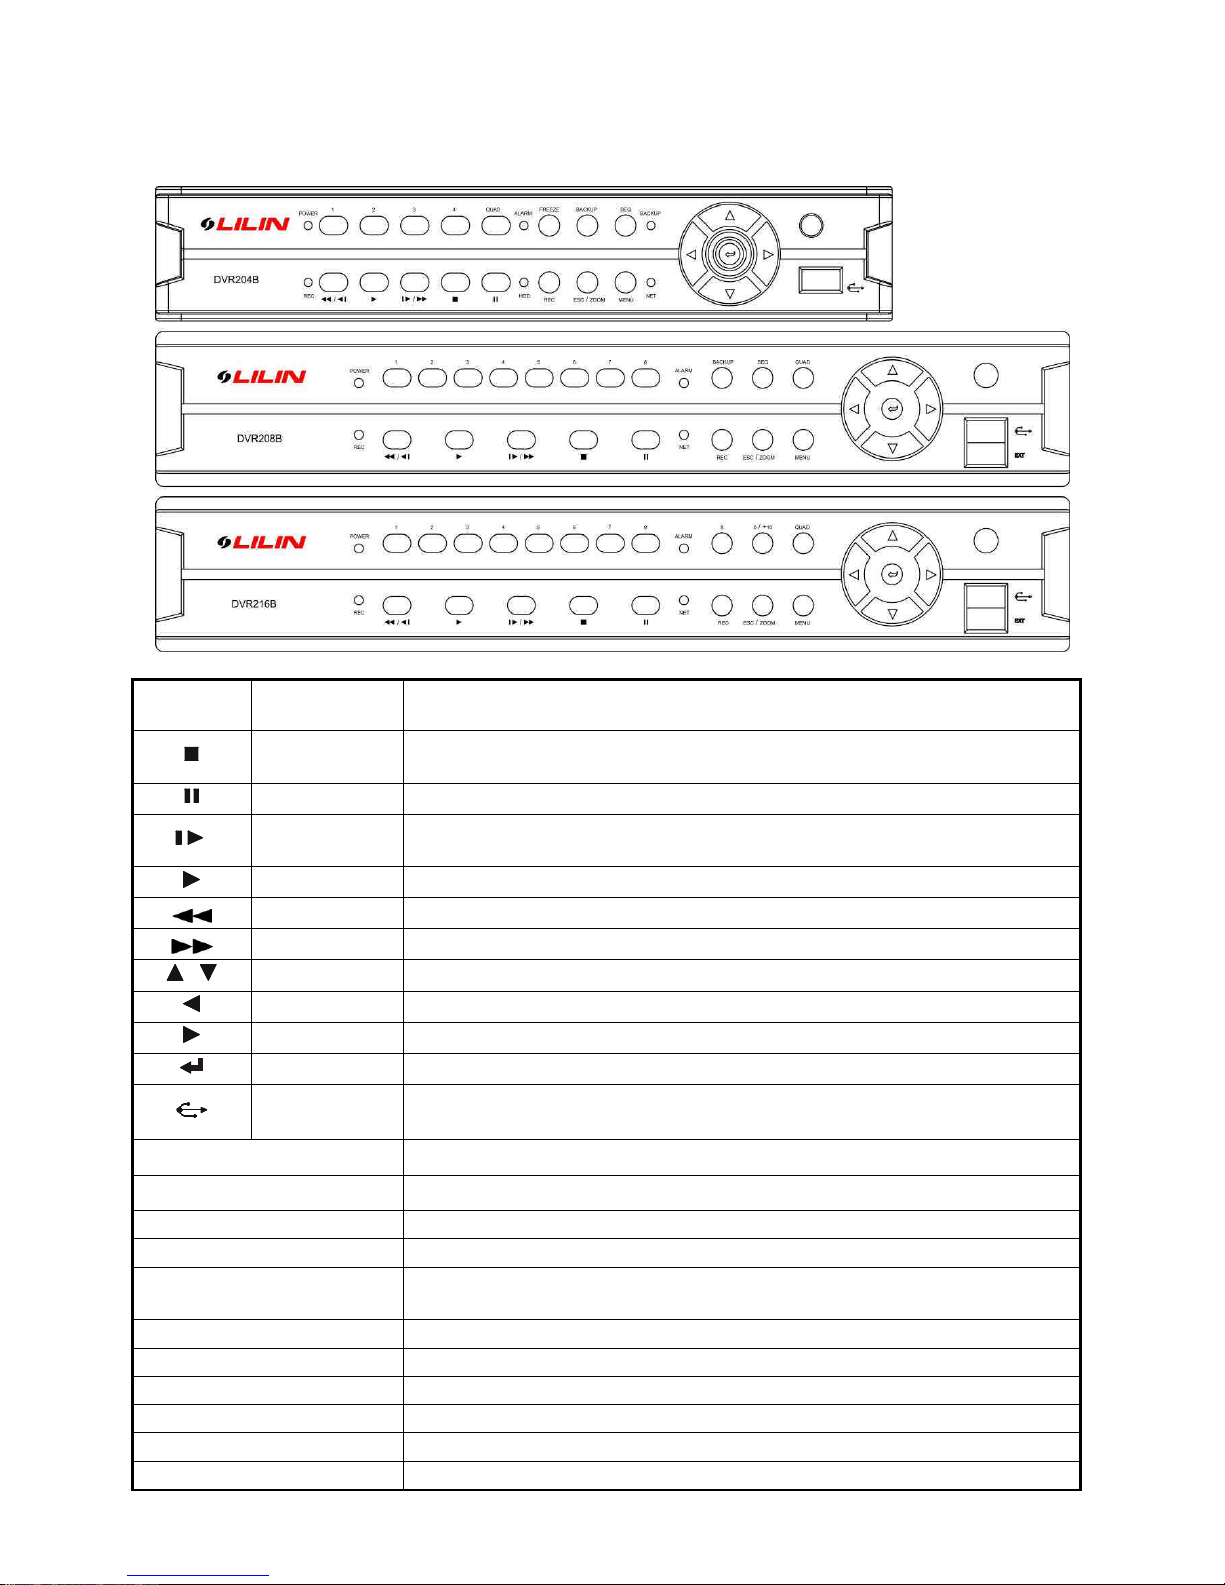
CHAPTER 2 Panel Appearance ......................................................................................................................4
2-1. Front panel controls............................................................................................................................4
2-2. Rear panel connectors........................................................................................................................5
CHAPTER 3 Live, Playback Operations...........................................................................................................6
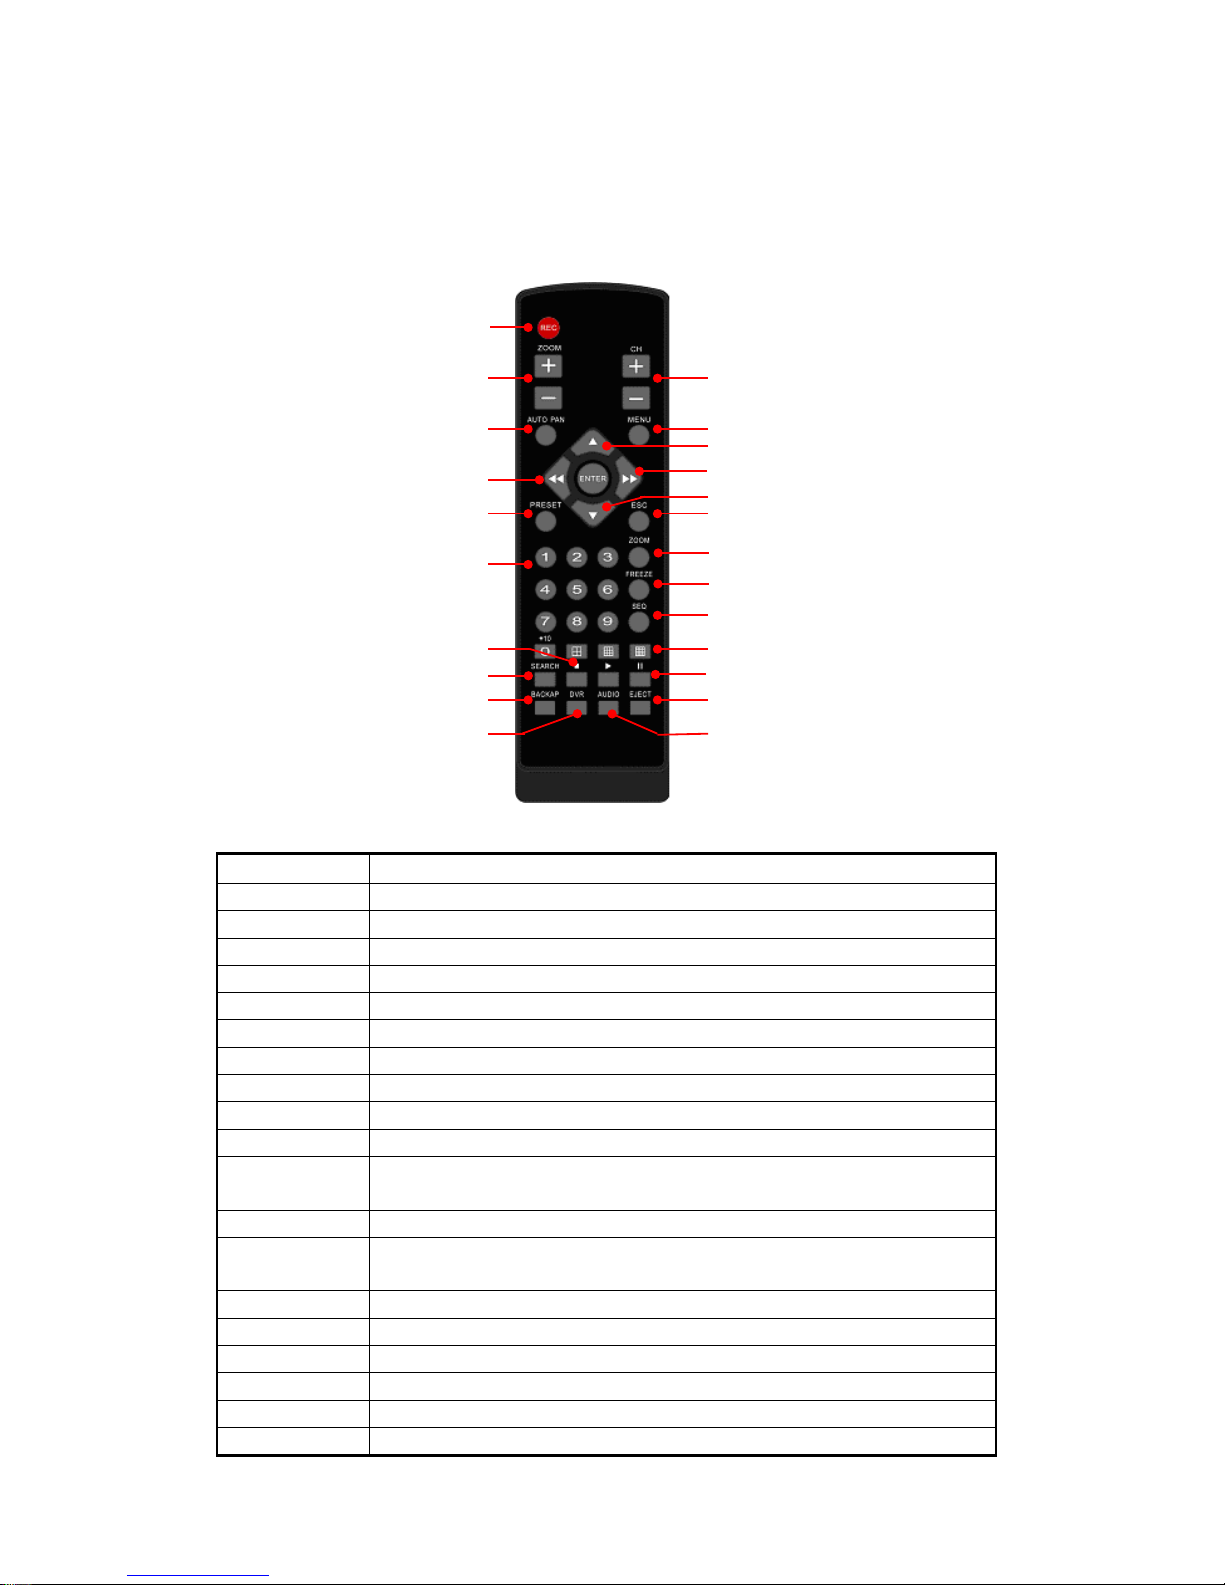
3-1. In LIVE mode, the remote control instructions .......................................................................................6
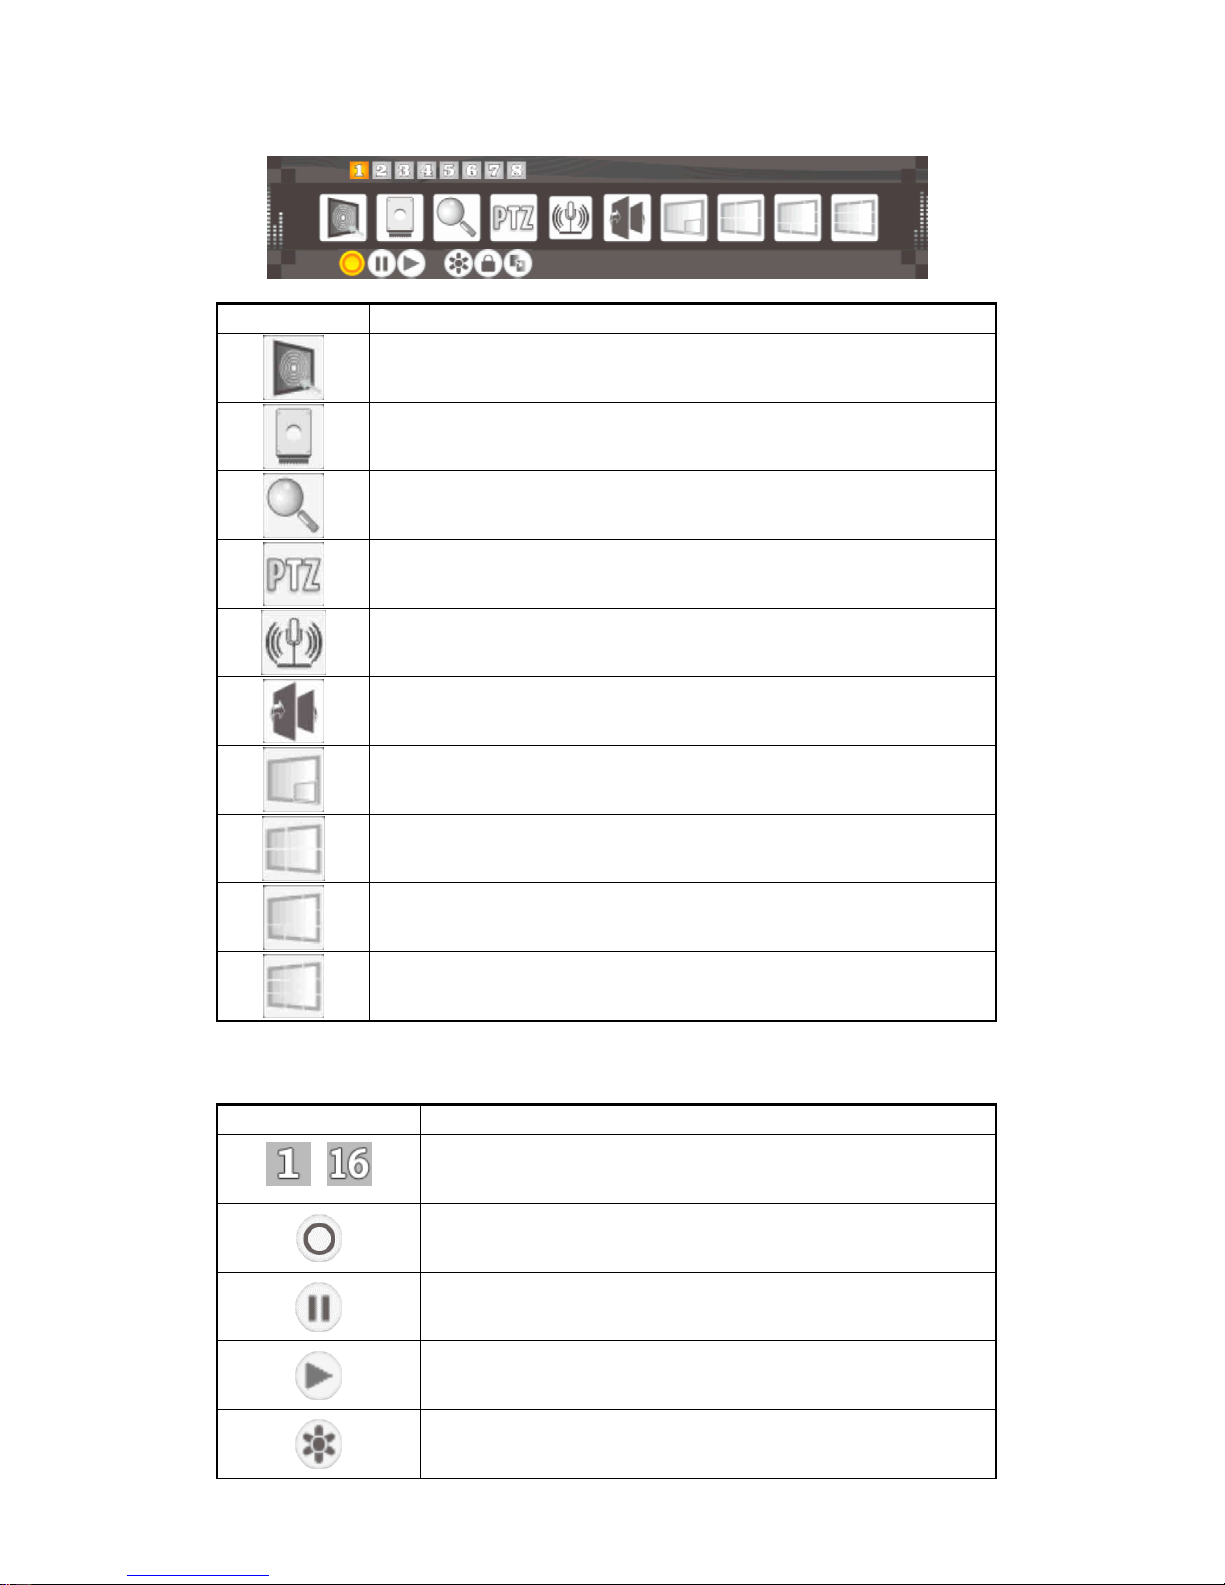
3-2. Main menu user guide ........................................................................................................................7
CHAPTER 4 The Main Menu Setup...............................................................................................................12
4-1. Camera Setup..................................................................................................................................12
4-2. Event Setup.....................................................................................................................................13
4-3. Recording Setup ..............................................................................................................................14
4-3-1. Sequence Setup.....................................................................................................................15
4-3-2. Video Quality and Frame Rate Setup .......................................................................................16
4-4. Hard Disk Management Setup...........................................................................................................16
4-4-1. System & Disk Information ......................................................................................................17
4-5. Networking Setup.............................................................................................................................17
4-5-1. Networking Connection...........................................................................................................18
4-5-2. HTTP ....................................................................................................................................20
4-5-3. DDNS....................................................................................................................................20
4-5-4. EMAIL Setup..........................................................................................................................21
4-6. Data Backup Setup ..........................................................................................................................22
4-7. System Setup ..................................................................................................................................23
4-7-1. Display Setup.........................................................................................................................24
4-7-2. Time / Date Setup ..................................................................................................................24
4-7-3. User Account Setup................................................................................................................26
CHAPTER 5 Backup and Playback Search ....................................................................................................28
5-1. Backup Setup ..................................................................................................................................28
5-1-1. DVF Player Usage..................................................................................................................29
5-2. Playback Search Setup.....................................................................................................................30
5-2-1. Time Search ..........................................................................................................................31
CHAPTER 6 Remote Software Installation and Setup .....................................................................................32
6-1. Application Software Installation and Setup ........................................................................................32
6-2. How to do remote monitoring through IE.............................................................................................34
6-3. How to do remote monitoring through JPG Viewer (Monitor Function only ............................................35
6-4. Application software and IE operation ................................................................................................37
CHAPTER 7 Digital Video Recorder DVR Specifications .................................................................................38
CHAPTER 8 Mobile Application Installation and Usage ...................................................................................39
8-1. iPhone iOS operating system – installation and management...............................................................39
8-2. Google Android Phone operating system – installation and management ..............................................41

- 2 -
CHAPTER 1. Hard Disk Installing (Standard package includes either HDD or R/ )
Step 1. Install hard disk after opened the DVR lid
Place the hard disk into the hard disk drive bay, and hook up SATA cable and power cable to their
corresponding ports accordingly.
Use hard disk mount to lock down the hard disk. Place the hard disk into the hard disk drive bay, and hook
up SATA cable and power cable to their corresponding ports accordingly.
Use hard disk mount to lock down the hard disk. Place the mount inserted with hard disk to the hard disk
drive bay, and hook up SATA cable and power cable to their corresponding ports accordingly.
【
4CH
】
【
8CH
】
【
16CH
】

- 3 -
Step 2. Screw the bottom 4 corner screw holes (for hard disk mount)
Step 3. Place the lid back on the top of the machine and locking screw holes. Hard disk
installation is complete.
NOTE:
::
:After installation, please reboot the hard disk before recording.
For more detailed information,
please check out User Manual System Tools for reference.

- 4 -
CHAPTER 2. Panel Appearance
2-1. Front panel controls
1~4/8/16
Channel 1~
4/8/16
Under the LIVE mode (livetime viewing mode or playback mode, 1~4/8 Channel
display.
Stop Under the playback mode, press the STOP button to stop the operation or go to the
upper menu.
Pause Under the playback mode, press the Pause button to pause the playback.
Step Forward Under the pause mode during the playback, press the button to playback
frame-by-frame at one time.
Play Under the LIVE mode, press the Play button to enter the playback mode.
Fast Rewind Rewind speed: x2 / x4 / x8 / x16 / x32
Fast Forward Forward speed: x2 / x4 / x8 / x16 / x32
Up/ Down Control the selection cursor moving up or down
Left Control the selection cursor moving to the left
Right Control the selection cursor moving to the left
Enter Press the Enter button to confirm the setup or go into sub-menu.
USB 2.0 Port USB backup or firmware update.
(There are a front and a back USB that can be used at one time.
Power Indicator LED The LED light will on when power is on.
REC Indicator LED The LED light will on when recording.
Alarm Indicator LED The LED will light on when Alarm Trigger or Motion Trigger.
Network Indicator LED The LED will light on when network is connected.
SEQ button Under the LIVE mode (livetime viewing mode , press the button to start / stop the auto
switching function.
BACKUP button Video backup.
FREEZE button
Turn on/off to pause the screen
MENU button Under the live viewing mode, press MENU to enter the main menu.
ESC/ZOOM button Under the menu mode, press ESC/ZOOM to go to the upper menu.
REC button Start/Stop recording under the live mode.
QUAD button Split screen display

- 5 -
2-2. Rear panel connectors
1 USB Mouse Port 2.0 USB Mouse
2 Video In 4/8/16CH Video Input (BNC
3 Video Out 1CH Video Output (BNC
4 Audio Out 1CH Audio Output (RCA
5 Audio In 4CH Audio Input
6 DC12V Power Input
7 VGA PC Monitor Output
8 LAN RJ-45 Network Connection
9 RS-485 For Speed Dome Use
【
4CH
】
【
8CH
】
【
16CH
】

- 6 -
CHAPTER 3. Live, Playback Operations
The IR (infrared remote control and mouse operate varied under different modes; this chapter introduces the
functions of them under three different modes: LIVE, PLAYBACK and PTZ.
3-1. In LIVE mode, the remote control instructions
ICON DESCRIPTION
REC Recording
AUDIO Live audio is on/off
PLAY Play the latest recording segment portion
0~9, +10 Switch off to full screen display
FREEZE Turn on/off to pause the screen
MENU Enable/ Disable Setup Menu
PRESET PTZ (Pan-Tilt-Zoom mode
ZOOM Zoom in/out
ESC Return to the previous menu
ENTER Proceed into action
FF Fast forward. Each press increases the speed to the next level. There are
six speeds: 2x, 4X, 8X, 16X, 32X and 64X.
STOP Stop playback
RF Rewind Fast. Each press increases the speed to the next level. There are
six speeds: 2x, 4X, 8X, 16X, 32X and 64X.
FREEZE Turn on/off to pause the screen
SPLIT Split into screens
SEQ Auto-Sequence
ZOOM IN Zoom in
ZOOM OUT Zoom out
DVR Switch DVR ID1~16
Not used
Record
Zoom in/out
Auto Pan
Left Selection/ Fast Rewind
PTZ Control(PTZ)
0~9 Numerical keys
Video Backup
DVR Control
Previous/Next single channel
Setup Menu
Escape/ exit/ stop buzzer
Zoom in
Screen frozen
Auto Switching
4/9/16 split screen display
Not used
Audio/ Mute
Stop
/
Playback
/
Pause
Up Selection
Right Selection/ Fast Forward
Down Selection
Stop Record

- 7 -
3-2. Function features instruction
Right-click the mouse, you may enter into LIVE mode to manage different features.
ICON DESCRIPTION
Main Menu,Resting the cursor on this icon will bring up the following
nine menu icons
System Disk Information – Version, IP, MAC, and HDD capacity
Zoom In/Out = ”Zoom,” AUX1~8 (Signal screen only
PTZ Control = “PTZ,” (signal screen only
Sound Control
=「SEQ」sequence
PIP (Picture in Picture
Quad Display
9-Screen Display
16-Screen Display
Graphical icons that will display after right-clicking your mouse under LIVE mode
ICON DESCRIPTION
~ CH1~CH16 Signal Screen
Record= “REC,” Start recording
Stop recording
Play= “PLAY,” playback
Freeze-screen is frozen

- 8 -
Lock= “LOCK”
Backup- information backup
Graphical icons that will display after right-clicking your mouse under Remote mode
ICON DESCRIPTION
Remote Snapshot. Pictures taken on camera and image storage.
(Pre-archived folder—My Documents Folder / DVRData / Snapshot
Select Archive Folder-Select the folder to store the photo and video
Switch off to full screen display
Image quality switch HQ (High Quality ; LQ (Low Quality
Remote Recording- record and store.
(Pre-archived folder—My Documents Folder / DVRData / Snapshot
Remote shortcut bar narrow
NOTE: Make sure that your Internet browser allows signed ActiveX plug-in running on your PC.
Set “Download Signed ActiveX plug-in controls” to “Prompt” and “Run ActiveX control and plug-in” to “Enable”
on your IE (Internet Explore .
ExploreToolsOptionsSecurity SettingsAdding to trusted Websites

- 9 -
Switch to the PLAYBACK Mode by pressing “PLAY” button under the LIVE mode. The control panel
will appear on far right down on the screen, the control panel can be controlled via mouse cursor.
ICON DESCRIPTION
Snapshot- turn the current screen into the “Image “and store in USB
device.;the Image will be stored in computer on Remote mode
Rewind Fast. Each press increases the speed to the next level.
There are six speeds: 2x, 4X, 8X, 16X, 32X and 64X.
Pause/Signal Screen playback
Normal speed playback
Stop
Normal speed play
Pause/Signal screen play
Fast forward. Each press increases the speed to the next level.
There are six speeds: 2x, 4X, 8X, 16X, 32X and 64X

- 10 -
Graphical icons that will display under Remote mode
ICON DESCRIPTION
USB device detected
HDD not being detected
Lock is on — need to enter code number in order to unlock
Network is connected
Recoding — in full screen the icon appears when the one of the
cameras is recording
Event occurred. Appear on alarm, lost channel, and motion
detected.
Recording. Icon color turned red represents cameras are now
recording.
Live audio is on
Live Audio is off
OSD (On-screen Display
Relay off
Relay on
Showing how much the hard disk space is currently being occupied
(in percentage .
Switch to PTZ (Pan-Tilt-Zoom mode by pressing “PTZ” button under the LIVE mode. The PTZ icon
will appear on upper left side of screen and the control panel will appear on the right down corner of the
screen.

- 11 -
ICON DESCRIPTION
Via Set function, cameras will point-by-point to patrol the
environment fully. Click on “SET” icon and hit Enter button to
proceed this action.
Pre-set number N(1~255
Move to Pre-set number N
Delete Pre-set number
Automatically patrol
Zoom in
Zoom out
Iris on
Iris off
Focus on
Focus off

- 12 -
CHAPTER 4. The Main Menu Setup
Enter the setup menu first time, please choose the login account, and then enter the password. Administrator default
password is "1111".
Verify password, if correct will enter the setup menu
4-1. Camera Setup

- 13 -
ICON DESCRIPTION
1-16 Each channel can be set dependently
Camera screen
Display On /Off
Polling mode On /Off
Polling mode time On/ 0~100 seconds (the time that screen stays.
Camera Title Setup
Customize the camera channel name
PTZ Enable On/Off
No. of PTZ PTZ Number( 0~255
Baud Rate Select the PTZ camera transmission speed(2400、4800、9600、
19200
PTZ Protocol Support :LILIN MLP2、PELCO-D、PELCO-P、HME
PDZ ,UNITED-D
Brightness Brightness Adjustment (From value1~255
Contrast Contrast Adjustment (From value1~255
Hue Color Adjustment (From value1~255
Saturation Chroma Adjustment (From value1~255
Volume Channel 1 can adjust the volume and record volume
4-2. Event Setup

- 14 -
ICON DESCRIPTION
1-16 Each channel can be set dependently
Enable Switch on or off the motion detection function
Buzzer Alarm On/Off
Sensitivity Set up Sensitivity from value 1 to 10 for each channel. The lower
value you set the higher sensitivity it will be
Motion Area Setup Enter to Motion Area Setup
Apply All On/Off
Motion Popup On/Off
4-3. Recording Setup

- 15 -
ICON DESCRIPTION
1-16 Each channel can be set independently
OSD Position X Setup OSD X axis
OSD Position Y Setup OSD Y axis
OSD Position setup Setup OSD axis
Record Sound On/Off
HDD Circulate Record On/Off
Alarm recording time 1~60 seconds
Recording Mode Manual/ Schedule Record 1~6
Schedule Record Setup Schedule Record On
Quality& Frame Rate Setup Turn On Quality& Frame Rate Setup
4-3-1. Sequence Setup
ICON DESCRIPTION
Stop REC Enter
Motion REC Enter
Full Time REC Enter
SEQ= Schedule Record Manual/Schedule Record 1~6
All Same Recording Mode All the Same

- 16 -
4-3-2. Video Quality and Frame Rate Setup
ICON DESCRIPTION
View Normal / View Event Select recording mode
No.1~8 Check/uncheck the box enable/disable selected channel
recording
Resolution
Select recording resolution:
NTSC:352x240, 704x240, 704x480
PAL:352X288,704X288,704X576
Quality Select quality: Below Basic/ Basic/ Normal/ High/ Highest
FPS Select recording frame rate.
Auto Assign each channel with its maximum accessible fps
4-4. Hard Disk Management Setup

- 17 -
ICON DESCRIPTION
HDD Cycle Recording On/Off
Hard Disk Information Hard Disk Information Instruction
H. D Formated Setup Hard Disk Format
4-4-1. System & Disk Information
ICON DESCRIPTION
Ver=Version DVR current software version
IP ADDR=IP Address DVR Network IP address, if DVR doesn’t connect ,it will show
"Network not connected"
MAC ADDR= MAC Address
Mac Address of DVR
NO.=NUMBER The number of the hard disk
NAME The name of the hard disk
CAPACITY The capacity of the hard disk
STATUS Shows the current hard disk space has been used
4-5. Networking Setup

- 18 -
ICON DESCRIPTION
Connectivity Connectivity Setup (LAN, DHCP, PPPoE, 3G
HTTP Setup Enter HTTP setup menu
DDNS Setup Enter DDNS setup menu
E-Mail Setup Enter E-Mail setup menu
FTP Setup Enter FTP setup menu
SMS Setup Enter SMS setup menu
Setup on Push
Notification Enter menu on Push Notification setup
4-5-1. Networking Connection
DVR has four different ways to connect Internet for users to choose from:
Local Area Network (LAN
Select LAN for network connection, the following information is required.

- 19 -
ICON DESCRIPTION
Local IP Address Enter IP address provided by ISP
Mask Enter IP address of Subnet Mask provided by ISP
Gateway Enter IP address of Gate way provided by ISP
DNS Server
Enter DNS address provided by ISP.
(Note: The correct DNS address must be entered for
DDNS function .
DHCP
When DHCP is selected, IP address will be assigned by DHCP server automatically
PPPoE
Select PPPOE for network connection, the following information is required.
This manual suits for next models
2
Table of contents