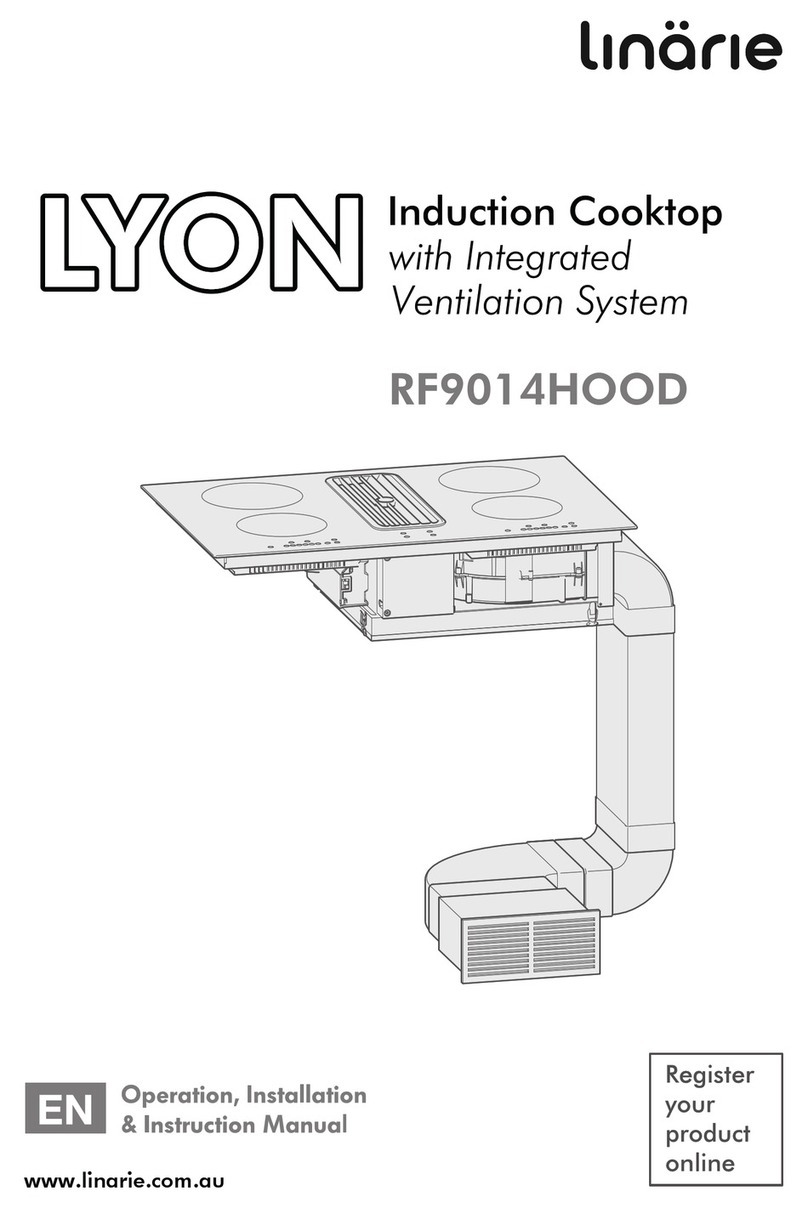
linarie LYON RF90I4FHOOD User manual

RF9014HOOD
www.linarie.com.au

CONGRATULATIONS
TABLE OF CONTENTS
Congratulations and thank you for choosing Linärie to
introduce a new comfort of cooking in your home. We are
sure you will find your new appliance a pleasure to use and
a great asset to your kitchen.
This appliance complies with all relevant safety
requirements in Australia. Inappropriate use can, however,
lead to personal injury and damage to property.
In order to operate the unit correctly and safely, please read
this instruction manual carefully before installation and
usage. This user manual which provides you with all
required instructions related to safety, installation, use and
maintenance of the appliance.
For future reference, please store this booklet in a safe place
and ensure that all users are familiar with the contents. Pass
them on to any future owner of the
appliance.
Record Model & Serial Number
Model .............................................................................................................................
Serial Number .........................................................................................................
Register your product www.linarie.com.au
Correct Conditions of Use
The appliance is intended for use in the home and similar
environments only. It is not intended for commercial use.
The appliance is not suitable for outdoor use, non-stationary
installation.
This product is used for cooking and extracting.
The electricity connection must be made by a qualified
specialist. Installation must comply with the valid
standards, regulations and laws. All safety and
warning information and the operating and installation
instructions must be complied with.
Additional information on products, accessories,
warranty, replacement parts and services can be
found at www.linarie.com.au
1. General Information .............................. 03
1.1 Appliance information
2. General Safety Instructions .................... 03
2.1 General safety information
2.2 Safety instruction - Installation
2.3 Exhaust air Operation ..............................04
2.4 Correction use & Operation
2.5 Disassembling and Disposal
of the Appliance ......................................05
2.6 Accessories and Spare parts
3. Description of the Functions ...................05
3.1 Air extraction mode
3.2 Recirculation mode
4. Technical data sheet
.......................................07
.........................11
5. Induction heating and how it works .......06
6. Installation (extraction mode)
Extraction mode
Recirculation mode
.....................................09Finishing installation
7.1 Electrical connection
7.2 Pots and pans and how to use them
8
7. Safety warning .......................................10
. Operation ..............................................10
8.1 Control panel and function keys
8.2 Using your Cooker hood
8.3 Using your Induction cooker
8.4 When you finished cooking
8.5 Using boost function ..................................12
8.6 Using child lock function
8.7 Using the timer
8.8a Auto shutdown protection ..........................13
8.8b Heat settings
8.9 Energy Saving tips
9. Troubleshooting .........................................13
10. Cleaning and maintenance .....................14
10.1 Stainless steel
10.2 Control panel
10.3 Daily maintenance
10.4 Cleaning agents
10.5 Cleaning techniques
11. Replacing the motor ................................15
12. Environmental tips ...................................16
12.1 Disposal considerations
12.2 Disposing of your old appliance
13. Warranty and After sales service
13.1 Warranty
13.2 After sales service
13.3 Replacement of spare parts
2
Adherence to the directions for use in this manual is extremely
important for health and safety. Failure to strictly adhere to the
requirements in this manual may result in personal injury and
property damage. Products must be used, installed and operated
in accordance with this manual. You may not be able to claim on
Linärie’s manufacturer’s warranty in the event that your product fault
is due to failure to adhere this manual.
www.linarie.com.au

Cleaning & Maintenance
1. GENERAL INFORMATION
2. GENERAL SAFETY
A damaged appliance can be dangerous. If you find the
appliance is damaged or marked, you must report it within
7 days if you wish to claim for damage/marks under the
manufacturer’s warranty. This does not affect your statutory
rights. Do not use a damaged appliance.
The manufacturer's warranty will be invalidated if the
appliance is not repaired by a Linärie approved service
technician.
Faulty components must only be replaced by genuine Linärie
spare parts. The manufacturer can only guarantee the safety
of the appliance when Linärie replacement parts are used.
If the power cord is damaged, it must only be replaced by a
Linärie authorized service technician or suitably qualified
electrician in order to avoid a hazard.
Linärie cannot be held liable for noncompliance with these
instructions, resulting from incorrect or improper use or
operation.
1.1 Appliance Information
Unauthorized Modifications
Unauthorised modifications can cause the appliance to
pose risks. Do not conduct any modifications to the
appliance.
The device must be cleaned regularly. Dirt can lead to
damage or the buildup of odors. (See “Cleaning and
maintenance” section).
Always clean the appliance exactly as indicated in
the operating instructions.
Always ensure the appliance is switched off before
cleaning or replacing parts.
Clean the appliance immediately after any food
spillage and the filter regularly to keep the appliance
working efficiently.
There is a risk of fire if cleaning is not carried out as
described in these operating instructions.
Make sure no water penetrates inside the device when
cleaning. Do not use a steam cleaning appliance to
clean this appliance. The steam could reach electrical
components and cause a short circuit.
In areas which may be subject to infestation by
cockroaches or other vermin, pay particular attention to
keeping the machine and its surroundings in a clean
condition at all times. Any damage which may be
caused by cockroaches or other vermin will not be
covered by the machine warranty.
2.1 General Safety Instructions
Children and People with Special Needs
2.2 Safety Instructions - Installation
This appliance is not intended for use by persons (including
children) with reduced physical, sensory or mental capabilities, or
lack of experience and knowledge, unless they have been given
supervision or instruction concerning use of the appliance by a
person responsible for their safety.
The appliance must only be installed and assembled by trained
specialists who are familiar with and comply with the standard
national regulations and supplementary regulations of ventilation
systems.
The appliance is NOT suitable for use by children
without supervision.
Young children should be supervised near the appliance
to ensure they do not play with this appliance.
Children may be able to wrap themselves in packing
material or pull it over their heads with the risk of
suffocation. Keep children away from any packing
material.
In order to avoid any potential hazard, the installation
instructions must be followed.
Observe all regional regulations for the installation of
ventilation systems.
During installation, maintenance and repair work, the
appliance must be disconnected from the mains
electricity supply. It is only completely isolated from the
electricity supply when:
– the mains circuit breaker is switched off, or
– it is switched off at the wall socket and the plug is
withdrawn from the socket.
Do not pull the mains connection cable but the mains
plug to disconnect your appliance from the mains
electricity supply.
Ensure that all specified vents, openings and airspaces
are not blocked.
All ducting, pipework and fittings must be of
non-flammable material.
The appliance must not be connected to a chimney or
vent flue which is in current use for exhausting fumes
from appliances burning gas or other fuels. Neither
should it be connected to ducting which ventilates rooms
with fireplaces. (See “Exhaust Air Operation” section).
Do not connect the appliance to the mains electricity
supply by a multi-socket unit or an extension lead.
3
The appliance complies with the stipulated safety
requirements in Australia. The user is responsible for
appliance cleaning and maintenance as well as its safe
use. Improper use can lead to personal injury and
damage to property.
www.linarie.com.au
Refer to the cooktop manufacturer's instructions as to
whether a rangehood may be operated above the
cooktop.
INSTRUCTIONS

Extension leads are a fire hazard and do not guarantee
the required safety of the appliance.
Tampering with electrical connections or components
and mechanical parts is highly dangerous to the user
and can cause operational faults. Only open the housing
as described in the instructions given in “Installation”
and in the “Cleaning & Maintenance” sections of this
booklet. Under no circumstances should any other parts
of the housing be opened.
THIS APPLIANCE MUST BE PROPERLY EARTHED. It is
most important that this basic safety requirement is
present and tested regularly and, where there is any
doubt, the household wiring system should be inspected
by a qualified electrician.
Linärie cannot be held liable for noncompliance with
these instructions, resulting from incorrect or improper
use or operation.
2.3 Exhaust Air Operation
2.3 Correction use and Operation
4
Danger of poisoning from recirculated exhaust gases! Do not
operate the appliance in extract air mode if it is operated together
with a room air-dependent fireplace and sufficient air circulation is
not guaranteed.
CAUTION
The appliance can get very hot during cooking due to heat rising
from the cooktop. Do not touch the housing or the grease filters
until the appliance has cooled down.
For safety reasons, this appliance may only be used after
it has been built in.
Reliable and safe operation of this appliance can only be
assured if it has been connected to the mains electricity
supply.
Before using the appliance, ensure that all packaging
materials are removed from the appliance and make
sure that the connection data on the data plate [voltage
(V) and frequency (Hz)] indicated on the appliance
corresponds to the voltage and frequency of the power
supply in your household. Consult a qualified electrician
if in doubt.
D
Cracks, fissures or fractures in the glass ceramic panels
can damage the underlying electronics. Switch off and
disconnect the appliance immediately.
O NOT store or spray flammable materials in the
appliance or near this appliance while it is in operation
(e.g. aerosols).
This appliance can become damaged when exposed to
excessive heat.
– When using this appliace, ensure that any burners in
use are always covered by a pan. Switch the cooking
zone off when a pan is removed, even for a short time.
– Select a pan which is suitable for the size of the
burner.
– Regulate the flame so that it does not burn up the
sides of the pan.
– Avoid overheating the pan (e.g. when cooking with a
wok).
Always switch the appliance on when a cooking zone is
in use, otherwise condensation may collect in the this
appliance, which could cause corrosion.
When cooking with oil or fat, chip pans and deep fat
fryers etc., do not leave the pans unattended. Never
leave an open grill unattended when grilling.
Overheated oil and fat can ignite and could set the
rangehood on fire.
Safe operation is only possible if the negative pressure at
the location of the fireplace does not exceed 4 Pa (0.04
mbar). This can be achieved if the air required for
combustion can flow in through non-closable openings
in doors and windows in conjunction with a supply air /
exhaust air wall box. In any case, have a master chimney
sweep advise you and assess the entire ventilation
system of the house. If necessary, they can tell you the
necessary measure for ventilation.
If the appliance is used exclusively in or has recirculation
mode, where the air is directed back into the room in
which it is located, operating a heating appliance
which depends on the room air at the same time is not
hazardous.
Room air-dependent fireplaces such as gas, oil, wood or
coal heaters, boilers or instantaneous water heaters draw
the air from the room and lead it outdoors through an
exhaust pipe or chimney. In extract air mode, air is
extracted from the kitchen and neighbouring rooms.
Without sufficient supply air, negative pressure is created.
The heating appliance will be starved of oxygen, impairing
combustion. Toxic gases from the chimney or exhaust pipe
can be sucked back into the living rooms.
Make sure that sufficient fresh air supply is guaranteed
and that the air can circulate.
A supply air/exhaust air wall box is not sufficient to
ensure compliance with the limit value.
Cracks, fissures or fractures in the glass ceramic panels
can damage the underlying electronics. Switch off and
disconnect the appliance immediately.
www.linarie.com.au

5
3. DESCRIPTION OF FUNCTIONS
4. TECHNICAL DATA SHEET
2.5 Disassembling and Disposal of the
Appliance
3.1 Air extraction mode
Non-return flap
2.6 Accessories and Spare parts
Depending on the model of the appliance, the following
options are available:
The air is drawn in and cleaned by the grease filter and
directed outside.
The air is drawn in and cleaned first by the grease filter
and then by a charcoal filter. The cleaned air is then
recirculated back into the kitchen.
(see the “Environmental Tips” section for best practices on
disposing of this appliance).
The device must only be disassembled by trained
specialists who are familiar with and comply with the
standard national regulations and supplementary
regulations of the local utility companies.
Work on electrical components must only be conducted by
trained electrical personnel.
The non-return flap is designed to prevent the exchange of
room and outside air taking place. The flap is closed
when the rangehood is switched off. When the rangehood
is switched on, the non-return flap opens for the cooking
vapors to be blown directly outside. If the on-site
ventilation system does not have a non-return flap, the
nonreturn flap supplied must be fitted.
Ensure a normal and comfortable room climate (humidity
of 45–60%), e.g. by opening natural ventilation openings
or using domestic ventilation systems.
Incorrect components can lead to personal injury or
damage to the appliance. Only use original Linärie spare
parts for repairs.
Modifications, additions or alterations to the appliance
can lead to safety risks. If spare parts or accessories from
other manufacturers are used, the warranty will be
invalidated, and Linärie cannot accept liability.
Please check www.linarie.com.au for more information.
3.2 Recirculation mode
www.linarie.com.au
Parameter Value
Power Supply Voltage
Dimensions
(width, depth x height)
Carton Size
(width, depth x height)
Weight (incl. accessories /
packaging)
Weight (NOT incl. accessories /
packaging)
Rangehood
Cooking output
4 Induction zones
P
Intuitive touch control/ touch panel
Motor power
Auto timer
Integrated grease drip tray
160mm -
Electromagnetic
Hole size of Cabinet: 765 x 495 mm Outlet size: 220 x 90mm
heating zone
Electromagnetic
heating zone
Hood
inlet
Hood
operation zone
Electromagnetic
heating zone
Motor
Electro-
magnetic
heating
zone
Induction
hob vents
180mm -
180mm -
160mm -
1500W
2100W
2100W
1500W
ower Levels 9
Max. Air Extraction Power 700m3/h
Filter
Aluminum/Stainless Steel Surface 4
135W
Layers
Activated carbon filter (CF152) Yes
Yes
Y
Lamp No lamp
es
Yes
220-240V ~
50Hz
Inlet
plenum
220
90
Oil plate
Outlet
plate
80.5 x52 x
20.5cm
87 x57.5 x
27.5cm
22 kg
18 kg
761
45
805 520
205
355
110
260
488
55 26
Glass
(not included)
Glass
(Included)

6
www.linarie.com.au
Make a square opening on the table surface with
the size of 765*490mm, refer to Pic above for the
specification.
6. INSTALLATION
Choose installation type (a. Extraction mode / b. Recirculation mode)
a. Extraction mode
Preparing the unit for a built-in appliance
490 >40
>100
1
After drilling a hole on the table surface, carefully
remove shavings or sawdust before inserting the
appliance, as they could be sucked up by the
appliance and compromising its function.
2
Make sure the table surface is level and square
and that no part interferes with the space required
for installation. The kitchen units that are in direct
contact with the appliance must be heat-proof
(min. 80°C).
3
Cut off
the bar
in front of
the work surface
20
200
100
>100
>100
100
≥110
30-40
>600
765
There is an electronic circuit inside the induction hob which
powers and commands a coil. This creates a magnetic field
that activates when it comes in contact with suitable pots and
pans (magnetic material).
Induction plate
Pan heating
Magnetic field
The pan on the hob warms up instantly, while the hob remains
cold. There is no loss of heat. The heat generated in the pan
lets you cook quickly, saving time and energy.
5. INDUCTION HEATING and HOW IT WORKS
The hob can be installed on a top with a flat surface and thickness of between 30mm and 40mm. The cupboard
underneath the top should leave enough sufficient area to accommodate inlet plenum, blower cavity, inlet pipe,
outlet pipe and so on, and this area should make sure good ventilation and heat dissipation is provided.
Refer to image shown.
Installation tips
Installing the appliance
Dismantle the package and take out the instruction manual.
1
Put a towel or cloth on the table surface.
Place the glass face down on the protected surface.
As shown on the image.
Towel or cloth
2

Apply the sealing strip to the edge of the bottom of the hob,
leaving about 3mm from the edge of the glass.
Apply the seal all around the circumference. Cut off the
excess part and link the two ends of the sealing strip.
Make a hole with a size of 160mm in diameter
in the wall in the direction of the air outlet.
160
1
Clean the surface of the motor air outlet with acloth,
stick the sealing strip around the air outlet, cut off
the excess part and link the two ends of the sealing
strip.
2
3
Sealing strip
Hob bottom
Put the right-angle elbow on the air outlet, and then
put the square pipe into the right-angle elbow.
4
Tilt the hob into the cupboard at a certain angle.
5
Put the square to round adapter on the square pipe,
and put the outer exhaust pipe on the square to
round adapter. Installation is finished.
6
1
2
Cupboard
Square pipe
Right angle elbow
Hob
Sealing stripMotor housing
7
www.linarie.com.au
cont. (extraction mode)
Outer exhaust
pipe
Right angle
elbow
Skip to [ finishing installation ]

8
www.linarie.com.au
Cut off
the bar
in front of
the work surface
20
200
100
>100
>100
Make a square opening on the table surface with
the size of 765 x 490mm, refer to Pic above for the
specification.
Preparing the unit for a built-in appliance
100
≥110
30-40
490 >40
>100
>240
>100
1
After drilling a hole on the table surface, carefully
remove shavings or sawdust before inserting the
appliance, as they could be sucked up by the
appliance and compromising its function.
2
Make sure the table surface is level and square
and that no part interferes with the space required
for installation. The kitchen units that are in direct
contact with the appliance must be heat-proof
(min. 80°C).
3
>600
765
b. Recirculation mode
Apply the sealing strip to the edge of the bottom of the hob
leaving about 3mm from the edge of the glass.
Apply the seal all around the circumference. Cut off the
excess part and link the two ends of the sealing strip.
Make a hole with a size of 160mm in diameter
in the wall in the direction of the air outlet.
1Clean the surface of the motor air outlet with acloth,
stick the sealing strip around the air outlet, cut off
the excess part and link the two ends of the sealing
strip.
2
3
Sealing strip
Hob bottom
>100
>240
Sealing stripMotor housing
Put the right-angle elbow on the air outlet, and then
put the square pipe into the right-angle elbow.
4
1
Right angle elbow
2
Square pipe
495

Put the square elbow sleeve, square pipe,
squarepipe 90°elbow, and inner exhaust pipe
on the corresponding pipes.
6
9
www.linarie.com.au
cont. recirculation mode
[ Finishing the installation ]
Inner exhaust pipe
Inner exhaust pipe
Square elbow
sleeve
Square pipe
90° elbow
Tilt the hob into the cupboard at a certain angle.
5
>100
>240
Cupboard
Stick carbon filter cotton to the back of the aluminum filter, and then insert one end of the steel wire into the side seam
of the aluminum filter, see pic a. Bending the steel wire by hand, insert the other end of the steel wire into the side seam
of the aluminum filter, see pic b. Adjusting the surface of carbon filter cotton by hand. see pic c.
7
Install the aluminum filter
8Install the air inlet net. All pipes must pass under the base of the pieceof
furniture, inside the lift of the kitchen plinth.
9
a b
fixing steel
wire
carbon
filter
aluminum
filter c
Aluminum filter

1. Disconnect the appliance before any intervention. Disregard
of this could cause electric shock and danger of death.
2. The appliance must be installed by qualified personnel with
all electrical installation requisites in compliance with the local
norms in force.
3. Make sure that the voltage of your electric network is the
same voltage as indicated on the appliance rating label.
4. The power supply cable must be long enough to allow the
hob to be removed from the work surface and it must be
positioned in such a way as to prevent damage or overheating
caused by contact with parts or appliances underneath.
5. Grounding of the appliance is compulsory, for this reason
all electrical wires and grounding must have a suitable section.
Ensure thatgrounding is efficient.
6. A multiple switch with 3mm contact separation ormore must
be foreseen when installing the hob.
7. No responsibility is accepted for damage to things or injury
to persons if these result from non-observance of these
requisites.
The pots and pans that can be used on this hob must be made of
ferromagnetic material.
They can be made of enameied steel, cast iron or special pans of
stainless steel for
induction. The diameter of the pan should be at least 11cm.
To make sure a pan is suitable, try using a magnetto see if it sticks
to the bottom of the
pan. Never use normal thin steel nor anything containing even just an amount of glass,
terracotta, copper or aluminium.
The display of the cooking area will show if the pan is suitable, if the power indicator
flashes the pan is not suitable or the diameter of the bottom is too small for the diameter
of the cooking area.
The pots and pans must be placed precisely in the middle of the cooking area.
In some cooking areas an internal diameter is indicated, with a lighter outline, which
advises the user to go to a smaller cooking area, if available, with smaller diameter pan.
This is to obtain optimim performance and efficiency. You can however use pans with
smaller diameters than this limit.
Prevent the pot from dry burning during the heating process.
1. If the appliance has a provided power supply cable, it can
be used directly. Otherwise, the proper power supply cable it
can choose included:H05VV-F,H05RN-F,H05RR-F or 5 core
cable with grounding. The diameter of the cable must be at
least 1.5mm².
2. Make sure that the switch is off before wiring.
3. Install the power cord to the switch with a screwdriver
according to the wiring diagram, as shown in the pic below.
Brown
Brown
Brown
Black
Black
Blue
Blue
Blue
Grey
Grey
Green-yellow
Green-yellow
Green-yellow
10
www.linarie.com.au
L1 L2 N1 N2 E L1 L2 N1 N2 E
220-240V
~
380-415V
~
L N E
220-240V
~
220-240V
~
220-240V
~
7. SAFETY WARNING (Extraction mode and Recirculation mode)
7.1 Electrical connection
7.2 Pots and pans and how to use them
WARNING
8.1 Control Panel and Function Keys
TOP VIEW
A: front left burner: Φ160mm,power 1500W
B: rear left burner: Φ180mm,power 2100W
C: rear right burner:Φ180mm,power 2100W
D: front right burner:Φ160mm,power 1500W
E: left induction hob control panel
F: cooker hood control panel
G: right induction hob control panel
H: inlet area
Induction cooker:
1.ON/OFF 2.Child lock 3.Select power level 4.Boost control
5.Setting the timer 6.Select heating zone 7. Timer display
Cooker hood:
8. ON/OFF 9. On/off indicator light 10.Timer indicator light
11. Timer 12. Digital display 13. Plus button 14. Minus button
Clean the cooking zone before using the cooktop for the
first time (see the “Cleaning” section).
Observe all safety and warning information during
operation (see the “General Safety Instructions” section).
8. OPERATION
C
D
B
A
EF G
143 14 8 3 4 1
611
9
10122576 7 5 2

8.2 Using your Cooker hood
8.3 Using your Induction cooker
8.4 When you finished cooking
After connecting to power, the cooker hood buzzer will ring
shortly for a sound, all indicator lights and digital tube will light
for 1s,then be off and the cooker hood is in stand-by mode.
1.On/off button: When the cooker hood is standby, press On/off button, theOn/off indicator light will be on,
the
cooker hood will work at the first speed by default, and digital tube will display“1”; Or, the cooker hood
will work at the speed it works last time, and digital tube will display corresponding speed level. When the
cooker hood is at work,
press On/off button, cooker hood will be turn off, indicator lights and digital tube will
be off as well, the cooker hood
2. “+” /”-” button: The cooker hood has three operating speeds, low, medium and high. Press“+” button in
standby
mode, cooker hood will work at low speed, every touching of “+” button will make 1 speed increase,
speed. Keep pressing “-” button when cooker hood is in use, thespeed will decrease one level till
no speed will turn off.
3. Timer: When cooker hood is in use, press timer button, Timer indicator light will be lit, timing function will
start-up. The timer setting is 5mins by default and could be repeat setting. When the time is up, the cooker
hood will be turn off automatically. When the timer is set, if adjusting the speeds, the cooker hood will
go out of the timer function.
1. Touch the ON/OFF switch, all the indicators show ‘—’.
2. Place a suitable pan on the cooking zone that you wish to use. Make sure the bottom of the pan and the
surface of the cooking zone is clean and dry.
1. Touch the heating zone selection that you wish to switch off. (the right down zone)
2. Turn the cooking zone off by scrolling down to ‘0’ or touching the ‘slider’ control. Make sure the display
shows ‘0’.
3. Turn the whole cooktop off by touching the ON/OFF control.
4. Beware of hot surface ‘H’ will show which means cooking zone is too hot to touch. It will disappear when the
surface has cooled down to a safe temperature. It can also be used as an energy saving function if you want to
heat further pans, use the hotplate that is still hot.
3. Touching the heating zone selection control, and an indicator next to the key will flash. (the right down zone)
4. Select a heat setting by touching the ‘+’, ‘-’ or touching
the ‘slider’ control. If you don’t choose a heat
within 1 minute, the induction hob will automatically switch off. You will need tostart again at step 1.
mYou can odify the heat setting at any time during cooking.
or
power
down
power
up
power
down
11
www.linarie.com.au
cont. operation
setting
till the highest
enters to standby mode. off and the cooker hood is in stand-by mode.

8.5 Using boost function
8.7 Using the timer
Using the timer as a minute minder
Using the timer to switch off one or more cooking zones
If the timer is set on more than one zone Cancelling the timer
You can use the timer in two different ways:
You can use it as a minute minder. In this case, the timer
will not turn any cooking zone off when the set time is up.
You can use I as cut-off timer to turn one or morecooking
zones off after time is up.
You can set the timer up to 99 minutes.
1. Make sure the cooktop is turned on. And zone
selection key is not activated (zone indication ‘ ’
is not blinking).
2. Touch timer key, ‘00’ will show in the timer
display and ‘00’ will blink.
3. Set the time by touching the ‘-’ , ‘+’ or touching
the ‘slider’ control of timer.
4. Touch timer control again, then ‘0’ will flash.
5. Set the time by touching the ‘-’ , ‘+’ or touching
the ‘slider’ control.
6. When the timer is set, it will begin to count
down immediately. The display will show the
remaining time.
7. Buzzer will beeps for 30 seconds and the timer
indicator shows ‘- -’ when the setting time finished.
8.6 Using child lock function
To lock the controls
Touch the key lock control.
The timer indicator will show ‘Lo’.
To unlock the controls
1. Make sure the hob is turned on.
2. Touch and hold the key lock control
for 3 seconds.
3. You can now start using your hob.
> You can lock the controls to prevent unintended use(for
example children accidentally turning the cooking zones on).
> When the controls are locked, all the controls except the
ON/OFF control are disabled.
When the hob is in lock mode, all the controls are
disabled except the ON/OFF, you can always turn the
hob off with the ON/OFF controlin an emergency, but you
shall unlock the hob first in the next operation.
1. Touching the heating zone selection control that
you want to set the timer for.
(the right down zone)
2. Touch timer control, the ‘00’will show in the
timer display, and the ‘0’ flashes.
3. Set the time by touching the ‘-’ , ‘+’ or touching
the ‘slider’ control.
1. When you set timer for several cooking zones,
red dots of the relevant cooking zones are
indicated. The timer display shows the min.
timer. The dot of the corresponding zone blinks.
2. Once the countdown timer expires, the
corresponding zone will switch off. Then it will
show the new min. tier andthe dot of
corresponding zone will flash.
NOTE: touch the heating zone selection
control,
the corresponding timer will be shown
in the timer indicator.
4. Touch timer control again, the ‘0’ will flash.
5. Set the time by touching the ‘-’ , ‘+’ or touching
the ‘slider’ control.
6. When the time is set, it will begin to count down
immediately. The display will show the
remaining time. NOTE: there will be a red dot
in the right
bottom corner of power level
indication which
indicating that zone is selected.
7. When cooking timer expires, the corresponding
cooking zone will be switch off automatically.
NOTE: other cooking zones will keep operating if
they are turned on previously.
(set to 15 minutes)
(set to 30 minutes)
1. Touching the heating zone selection control
that you want to cancel the timer.
2. Touching the timer control, the indicator
will flash.
3. Touch the ‘-’ or ‘slider’ control to set the
timer to ‘00’, the timer is cancelled.
12
www.linarie.com.au
cont. operation
- Activate the boost function
1. Select the zone with boost function.
2. Touching the ‘boost’ key, then the display
shows‘b’.
-Cancel boost function
1. Select the zone with boost function.
2. Touching the ‘minus’ key or touching the ‘slider’
control to cancel the Boost function, and select the
level you want to set.
3. Boost function can only last for 5 minutes, after
that the zone will go to level 9 automatically.
power
down

8.9 Energy Saving tips
8.8a Auto shutdown protection 8.8b Heat settings
This rangehood operates very efficiently and economically.
The following will help you to save even more energy when
using it:
Ensure that there is sufficient ventilation in the kitchen
when cooking. In extraction mode, if there is insufficient
air flow the rangehood cannot operate efficiently and this
causes increased operating noise levels.
Always cook with the lowest possible setting. This
produces fewer cooking vapors, so you can use a lower
rangehood power level and therefore benefit from
reduced energy consumption.
Check the power level selected on the rangehood. A
lower power level is generally sufficient for the
majority of cooking. Only use the Booster setting when
necessary.
When a large volume of cooking vapors is being
produced, switch to a high-power level in good time.
Clean or change the filters at regular intervals. Heavily
soiled filters reduce performance, increase the risk of
fire and are unhygienic.
13
www.linarie.com.au
9. TROUBLESHOOTING
WARNING
Any electrical repairs to this appliance must conform to your local, state and federal laws. Please contact the service center if in any
doubt before undertaking any of the above. Always disconnect the unit from the power source when opening the unit.
Auto shutdown is a safety protection function for your
induction hob. This occurs whenever you forget to
switch off a cooking zone. The default shutdown times
are shown in the table below:
When the hob has been operating for some time,
there will be some residual heat. The letter ‘H’ appears
to warm you to keep away from it.
Fault
code Possible cause Description Fault
code Possible cause Description
E1 Possible cause No pan or pot, or their size, material,
etc. is not suitable, or not placed pre-
cisely in the middle of the cooking area.
E8
Hob surface sensor
short-circuit
IGBT stops working when the tempe-
rature detection circuit of pot has
detected an short-circuit.
E9
High temperature
protection of pot
sensor
IGBT stops working when the tempe-
rature detection circuit of the pot is
detected to exceed a certain value.
EA
Pot sensor removal
or failure
protection
When the pot sensor is moved out,
and the whole machine is heated for
a period of time, the corresponding
area will detect the moving out state
of the cooker sensor, and the heating
area will stop heating.
EB Communication
fault
The power board does not receive a
valid communication signal from the
display board for 90 seconds.
EC Communication
fault
The display board does not receive a
valid communication signal from the
power board for 90 seconds.
HHob surface is of
high temperature.
After the hob is off, if the hob surface
temperature is too high, it will display
"H", and the fan will delay working for
2 minutes.
E2 Voltage is too high Higher than AC 265V.
E3 Voltage is too high Lower than AC 180V.
E4
IGBT sensor
open-circuit
When the IGBT sensor detects an open-
circuit, the IGBT sensor stops working.
E5
IGBT sensor
short-circuit
When the IGBT sensor detects a short-
circuit, the IGBT sensor stops working.
E6 IGBT sensor
over temperature
IGBT reaches 110±5°C for 3s (It can
recover automatically when
temperature decrease 50°C-70°C).
E7 Hob surface sensor
open-circuit
After 60 seconds of operation, IGBT
stops working when the temperature
detection circuit of pot has detected
an open-circuit.
Power level 1
8
2
8
3
8
4
4
5
4
6
4
7
2
8
2
9
2
Default working time
(hour)
Heat setting Suitability
1-2 - delicate warming for small amounts of food
- melting chocolate, butter, and foods that burn
quickly.
- gentle simmering / slow warming
-reheating / rapid simmering / cooking rice3-4
-pancakes5-6
-sauteing / cooking pasta7-8
-stir-frying / searing
-bringing soup to the boil / -boiling water
9

WARNING
The stainless steel must be cleaned regularly (weekly)
to ensure a long service life. Stainless steel surfaces
can be cleaned with a proprietary nonabrasive
cleaning agent designed specifically for use on
stainless steel.
Observe all safety and warning information during operation
(see the “General Safety Instructions” section).
Before maintenance or cleaning, the appliance should always
be disconnected from the power supply. Make sure that the
appliabce is switched off and the plug has been removed.
Exterior surfaces are prone to scratches and dents. Therefore,
please follow the cleaning instructions to achieve the best
possible result without damage.
WARNING
Do not use stainless steel cleaning agents on the controls.
Use neutral cleaning agents and avoid using harsh cleaning
chemicals, strong household cleaners or products containing
abrasive cleaners as this will affect the appearance of the
appliance and may remove the printed symbols on the control
panel.
10. CLEANING & MAINTENANCE
10.1 Stainless steel
The control panel can be cleaned with warm soapy
water. Make sure the cloth is clean and thoroughly
wrung out before cleaning the control panel.
Use a dry, soft cloth to remove excess moisture after
cleaning.
1. Periodically check that dust does not deposit under the fan
or in the discharge openings, this could obstruct ventilation
for cooling the electronic system, reducing the efficiency of
your hob.
2. The hob could be damaged if hard and sharp edged
objects fall on it, it is recommended that such objects be kept
away from the hob where they cannot fall on it.
3. Do not put hot pans on the control area or on the edge of
the hob, do not use pans with a raised design or pattern on
the base, they could scratch the hob.
4. Never use pan support or boiler cradle to avoid
damaging the glass hob.
5. Never make the cleaning when the hob surface is in high
temperature.
6. Steam cleaner or high pressure cleaner is not tobe used.
7. When cooker hood is in use, never block the inlet,
moreover, food residue, soup, etc. can not be inflow into the
inlet plenum.
Please shut off the power and pull out the plug before
cleaning of the appliance.
10.2 Control panel
10.3 Daily maintenance
10.5 Cleaning techniques
10.4 Cleaning agents
GENERAL INFORMATION
Allow the appliance to cool down completely before cleaning and
maintenance.
The surfaces and controls are susceptible to scratches and
abrasion. Please observe the following cleaning instructions.
When handling a grease filter, be careful not to drop it.
This can result in damage to the filter and the cooktop
below. Make sure you hold the filter securely at all
times when handling it.
1
3
2
Cleaning the hob glass: Dry any splashes with a damp
sponge or a paper towel, rinse and dry. If any stains
remain, use some vinegar, rinse and dry. Or apply a
small amount of cream detergent for hobs, when dry,
shine the surface with a soft cloth or paper.
4When chemical products heat up they can corrode
and damage the glass, moreover the fumes can be
dangerous for your health.
5Do not use these products to clean the glass hob:
Abrasive powders or detergents, spray products for
ovens, whitening products, sponges with abrasive
surfaces, steel wool balls or synthetic ones.
These products could seriously damage your hob.
6Clean the surface when it is completely cold except
for the following: dried sugar, syrups, sugar, tomato
sauce, milk - these must be removed immediately
with the scraper.
7The mesh filters of the cooker hood must be cleaned
and changed regularly, and the cleaning method is
as shown on the right.
Put the filters into 40-50℃water and soak them for
about 2-3 minutes with a grease-loosening detergent
then brush it gently with a soft brush. Please do not
apply too much pressure, avoid to damaging it.
Moreover, food residue, soup, etc. can not be
inflow into the inlet plenum.
Open and take down the filters referring to
steps ①&②below.
A.
B.
Clean the appliance until it cools down completely.
www.linarie.com.au 14
15
cont. cleaning and maintenance
8The oil plate of the cooker hood must be cleaned
regularly, and the cleaning method is as following:
As shown in the pic below, open the four buckleson
the hob by hand and remove the oil plate.
Put the oil plate into 40-50°C water and soak them
for about 2-3 minutes with a grease-loosening
detergent then brush it gently with a soft brush.
Please do not apply too much pressure, avoid to
damaging it.
9The filter is metal products, it is advisable not to use rinse aid that will corrupt metals.
Use a screwdriver to remove the oil plate, air inlet net cover, air duct air inlet plate, motor, junction box cover, and terminal
box cover in sequence as shown in the pic below, and unplug the motor wire to replace the motor.
Oil plate
Air duct air inlet plate
Motor
Motor wire
Terminal box cover
Junction
box cover
Air inlet net cover
B.
A.
11. REPLACING THE MOTOR
Buckle
Hob
Oil plate
Hob
www.linarie.com.au

16
12.2 Disposing of your old appliance
12. ENVIRONMENTAL TIPS
13. WARRANTY & AFTER SALES SERVICE
The transport and protective packaging has been selected
from materials which are environmentally friendly for
disposal, and can normally be recycled.
Recycling the packaging reduces the use of raw materials
in the manufacturing process and also reduces the
amount of waste in landfill sites. Ensure that any plastic
wrappings, bags etc. are disposed of safely and kept out
of the reach of babies and young children. Danger of
suffocation.
Observe all safety and warning information during
operation (see the “General Safety Instructions” section).
Observe all safety and warning information during
operation (see the “General Safety Instructions” section).
Incorrect components can lead to personal injury or
damage to the appliance. Use only genuine original
Linärie spare parts.
Modifications, additions or alterations to the appliance
can lead to safety risks. If spare parts or accessories from
other manufacturers are used, the warranty will be
invalidated, and Linärie cannot accept liability.
Please check www.linarie.com.au for more information.
Model:…………………………………………………………
Serial Number:.………………………………………………
Register your product www.linarie.com.au
In the event of a fault which you cannot remedy yourself,
please contact Linärie.
The manufacturer’s warranty for this appliance is 2 years.
The contact details for Linärie are given at the beginning
and of these instructions.
When contacting Linärie, please quote the model and
serial number of your appliance. These can be found on
the data plate, after removing the grease filter.
Electrical devices marked with this label may not be
disposed of in domestic waste at the end of their service
life.
Electrical and electronic appliances often contain valuable
materials. They also contain specific materials, compounds
and components, which were essential for their correct
function and safety. These could be hazardous to human
health and to the environment if disposed of with your
domestic waste or if handled incorrectly. Please do not,
therefore, dispose of your old appliance with your
household waste.
Please dispose of those materials by contacting your local
authorities and ask for the correct method of disposal.
Please ensure that your old appliance poses no risk to
children while being stored prior to disposal.
By disposing of this product in accordance with the
regulations, you protect the environment and the health of
those around you from negative consequences.
12.1 Disposal considerations
13.1 Warranty 13.3 Replacement of spare parts
13.2 After sales service
Record model & serial number
www.linarie.com.au

LIKE TO
KNOW MORE?
© Linärie
For further information on all Linärie appliances,
or to obtain detailed dimension and installation
information, phone or email our Customer Care
team or visit our website:
Australia
www.linarie.com.au
Follow Us
@Linarie.Appliances
www.linarie.com.au

Operating and installation instructions: Original √ Translation
Linärie Contact
www.linarie.com.au
The distribution and duplication of this document, as well as the use and disclosure of its contents
are prohibited unless expressly authorised.
These operating and installation instructions have been drawn up with the greatest of care. But it
cannot be ruled out that subsequent technical modifications have not yet been incorporated or
the relevant content has not yet been adapted. Please accept our apologies in this eventuality. An
updated version can be requested from our team. Subject to printing errors and mistakes.
© Linärie
All rights reserved.
www. linarie .c om.a u
Mart Online Services Pty Ltd.
ACN 657 824 050
Table of contents
Other linarie Cooktop manuals
Popular Cooktop manuals by other brands

Winco
Winco EIC-400C Operating instructions manual

Miele
Miele Gas cooktop Operating and installation instructions

Amana
Amana ACC4370AB owner's manual

GE
GE JGP329SETSS Dimensions and installation information

Roper
Roper 30” ElectricBuilt-in Glass Cooktop installation instructions

Bertazzoni
Bertazzoni B3H0 Q7X2 D Series Installation, service and user instructions

GE
GE PHP900DMBB - 30" Induction Cooktop Dimensions and installation information

Electrolux
Electrolux CHI643BA User and installation manual

bora
bora CI11 Operating and installation instructions

Wolf
Wolf CT30I/S Specification sheet

KitchenAid
KitchenAid KECC056RBL installation instructions

Miele
Miele CS 1234-1 Operating and installation instructions