.1 Temp er atur e Co ntr ols
Press the driver s ide
controls to incre ase/
decrease the temp erature
in the vehicle cabin (single
zone). Press the pas senger
side controls to activate
dual zone and allow the driver
and passenger to co ntrol
their individual set tings.
.2 Fan Speed – Press
to manually increase o r
decrease the fan speed.
To return to automatic fan
operation, pre ss AUTO.
.3 AUTO – Press to
activate automatic
temperature control. T he
system will autom atically
determine fan speed,
airflow loca tion, A/C on
or off and out side or
recirculated air, to heat or
cool the vehicle to reach
the desired temperat ure.
Press again to deac tivate.
.4 Driver/Passenger
Cooled Seats (if equipped)
Press to activ ate. Press
once for full cool (three
lights), twice for me dium
cool (two light s) and a third
time (one light) for low cool.
Press again to deac tivate
(no lig hts) .
.5 OFF – Outside air is
shut out and the fan will
not operate.
.6 Driver/Passenger
Heated Seats – Press to
activate. Pres s once for full
heat (three lights), tw ice for
medium heat (two light s)
and a third time (one light)
for low heat. Pres s again to
deactivate (no lights).
.7 EXT – Press to display
the outside air tempe rature.
Press again to displ ay cabin
temperature set tings.
.8 Airflow Direct ion Control
Press repeate dly to cycle
through the available air
distribution modes. The
selected mode will appear
in the display. To return to
full automatic con trol,
press AUTO.
.9 Recirculation
Control Used to
manually enable or
disable recirculate d air
operation. When activated,
recirculates air in the
cabin thereby reducing the
amount of time to cool
down the interior of the
vehicle. May also help
reduce undesired odo rs
from reaching the interior
of the vehicle. Will work in
all modes except de frost.
.10 Rear Window
Defroster Press t o clear
the rear window and the
outside rear view mirrors
of thin ice and fog.
Press again to deac tivate.
The defroster will tur n
off automat ically after
10 minutes.
.11 Defrost – Press
to distribute out side air
through the windshiel d
defroster and demister
vents. Can be u sed to
clear thin ice or fog from
the windshield.
.12 DUAL Zone Selector
Press to acti vate dual zone
mode where the driver
and passenger indiv idually
control their temper ature
settings. Pre ss again to
return to single zone
mode where the driver’s
settings det ermine the
cabin temperature.
For Maximum Cooling
Performance
Press , , and set
the temperature to 60 º
F (16º C) and the highest
blower setting.
Memory Feature
The memory feature enables the vehicle
to “remember” the position of your driver
seat and exterior mirrors. To set,
position the driver’s seat and
exterior mirrors where you want
them. Press SET on the driver’s
door panel. Within five seconds,
press the lock or unlock control on the
Integrated Keyhead/Keyfob Transmitter (IKT)
and then press 1 or 2 on the driver’s door
panel to save the settings under Driver 1 or
Driver 2. When you press
on the IKT to
get into the vehicle, the seat and mirrors will
automatically adjust to your desired positions.
Integrated Keyhead Transmitter and
Remote Entry System Features
IKTs are both a programmed
ignition key and a remote
keyless entry transmitter.
Handle the IKT carefully
when starting the car to avoid
accidentally pressing any of the remote entry
buttons. Press once to unlock the driver’s
door. The interior lamps will illuminate. Press
twice to unlock all the doors. Press once
to lock all the doors and activate the perimeter
alarm system. The turn lamps will flash. Press
twice to confirm all the doors and trunk are
closed. The horn will chirp and the turn signal
lamps will flash once if all the doors and the
trunk are closed. Press to activate the panic
alarm. (Press again or turn the ignition on to
deactivate.) Press twice within 3 seconds to
open the trunk. Press twice within 3 seconds
to activate the car finder; the horn will chirp and
the turn lamps will flash. It is recommended that
this method be used to locate your vehicle,
rather than using the panic alarm. Ensure that
you keep the IKT adhesive security label in a
safe place for future reference.
SecuriLock™
The SecuriLock™ passive anti-theft system
is an engine immobilization system. This
system is designed to help prevent the engine
from being started unless a coded Integrated
Keyhead Transmitter (IKT) programmed to
your vehicle is used. Using the wrong type of
coded key may lead to a “no start” condition.
The anti-theft indicator
(if equipped)
in the
instrument cluster will flash to indicate the
SecuriLock system is functioning as a theft
deterrent when the ignition is turned off.
Reverse Sensing (if equipped)
Your vehicle may be equipped with a reverse
sensing system which can warn you if there
is an object behind the vehicle. The system
will sound a warning tone that increases in
frequency as the object gets closer and will
sound continuously when the object is less
than 10 inches away.Refer to your Owner’s
Guide for safety information and more details.
All Wheel Drive (AWD) (if equipped)
Your vehicle may be equipped with All Wheel
Drive (AWD). AWD uses all four wheels to
power the vehicle, thereby increasing traction
and enabling you to drive over terrain and
road conditions that a conventional two-
wheel drive vehicle cannot. Note: If your
vehicle is equipped with AWD, a spare tire of
a different size (other than the tire provided)
should never be used. Using a different
size could cause the AWD system to stop
functioning and default to front wheel drive.
Your vehicle is not intended for off-road use.
Rear Seat Release
Both rear seats can be folded down for
additional cargo space. Pull the release handle
located inside the trunk to fold down the seat.
Moon Roof (if equipped)
The moon roof is equipped with a
one-touch express opening/closing and
venting feature. To open the moon roof,
press and release the rear
portion of the control. To close
the moon roof, press and
release the front portion of
the control. To vent, press and
release the front portion of the control when
the glass panel is closed. To stop motion at
any time during the one-touch operation,
press the control a second time.
Global Open Front Windows (if equipped)
You can open your front windows and moon
roof (if equipped) simultaneously using your
Integrated Keyhead Transmitter (IKT). Press
and hold until the two front windows and
moon roof begin to open. If any other remote
entry transmitter control is pressed during
the opening operation, both windows and
the moon roof will stop opening.
SYNC (if equipped)
Your vehicle may
be equipped with
SYNC – a hands-free communications and
entertainment system with special phone
and media features. For more information,
please refer to the SYNC Supplement or
to the SYNC section in the Navigation
Supplement. Please also feel free to visit
www.SyncMyRide.com.
THX
®
II (if equipped) – Your
vehicle may be equipped
with the THX II cer tified
premium audio system. T his
system create s optimal
acoustic qualit y for all seating
positions and ro ad conditions.
The system offers an advanced
speaker system, amp lifiers,
subwoofer and equalization.
.1 Load – Press LOAD and
a memory pres et to load to a
specific slot . Press and hold
to auto load up to six CD s.
.2 ON/OFF/Volume
Press to turn ON/OFF. Turn to
increase/decrease volume.
If the volume is set above a
certain level an d the ignition
is turned off, the volume will
come back on at a “nominal”
listening level when the
ignition switch is turned
back on.
SATELLITE RADIO CONTROLS
(if equipped)
.3 AUX – Press repeatedly
to cycle through SAT1, SAT2,
SAT3 (satellite radio mode if
equipped), LINE IN (auxiliary
audio mode) or SYNC (if
equipped). Satellite radio is
available only with a SIRIUS
radio subscription. Check
with your authorized dealer
for availability. If your
vehicle is equipped with
SYNC, please refer to the
SYNC supplement for
further information. Once
Satellite Radio mode is
activated you may use the
following functions:
Press MENU when satellite
radio mode is active to
access. Press OK to enter
into the SATELLITE RADIO
MENU. Press to cycle
through the following
options: CATEGORY, SAVE
SONG, DELETE SONG,
DELETE ALL SONGS, ENABLE
ALERTS/DISABLE ALERTS.
.4 SHUFFLE – Press to play
all tracks on the current C D/
MP3 disc in random ord er.
.5 SEEK – Press to acce ss
the previous/next strong
station or CD tr ack.
.6 TEXT/SCAN – In radio
mode, when listening to a
RBDS-equippedstation,
press and releas e to view the
text information o f the radio
station, if available. P ress
and hold for a brief sampling
of radio statio ns. In CD/MP3
mode, press and rele ase
to view the track title, artist
name, disc title or file n ame,
if available. Press and h old
for a brief sampling of all
tracks on the current di sc.
.7 (PLAY/PAUSE) & OK
PLAY/PAUSE – In CD/MP3
mode, press to p ause the
playing media. PAUSE will
appear in the display. Pres s
again to return to the
playing media.
OK – Use in various menu
selections . Your vehicle may
be equipped with SYNC. For
more information, refer to the
SYNC
supplement.
.8 MENU – Press repeatedl y
to cycle through:
Autoset – Allows you to set
the strongest lo cal radio
stations wit hout losing your
original stored st ations in
AM/FM1/FM2. Use to
turn on/off. When the six
strongest st ations are filled,
the station s tored in preset 1
will begin playing. If t here are
less than six s trong stations,
the system will st ore the last
one in the remaining preset s.
Occupancy mode, if equipped –
Use to select and
optimize sound for ALL
SEATS, DRIVERS SEAT or
REAR SEATS.
Speed sensitive volume
Radio volume automatically
changes slightly wit h vehicle
speed to compensate
for road and wind noise.
Recommended level i s 1-3.
Level 0 turns the feature
off and level 7 is the
maximum sett ing.
RBDS (Radio Broadcas t Data
System) –In FM mode, this
feature allows you to search
for certain c ategories of
music or announcement s.
For more information, refer to
your Owner’s Guide.
.9 Tun e –Turn to go up/
down the frequency ban d in
individual increment s, or to
advance to the next /previous
MP3 folder.
–If your vehic le is
equipped with SYNC, press
to access SYNC PHONE
features. For fur ther
information please re fer to
your SYNC supplement for
further informat ion. If your
vehicle is not equippe d with
SYNC, the display will read
NO PHONE.
Auxiliary Input J ack – Your
vehicle is equipped withan
auxiliary input ja ck which
allows you to play audio from
a portabl e music player
through the vehicle sp eakers.
To use, plug your portable
player into the input jac k
located inside t he center
console. Turn the radio on
and adjust the volume to a
comfortab le level. Turn on
your portab le music player
and adjust to approximate ly
1
/2volume. Press AUX on your
audio system repeatedlyuntil
LINE IN appears in the
display. Adjust the volume
as needed. Refer to yo ur
Owner’s Guide for more
information. If your vehicl e is
equipped with a navigation
system, refer to your navig ation
supplement for informatio n
on accessing thi s mode.
About Your Leather Se ats – Your leather seats have
a clear, protective co ating over them which requires
special care. Us e only Motorcraft Delu xe Leather and
Vinyl Cleaner (ZC -11-A). Dry with a sof t cloth.
Do not use any house hold cleaning products or
oil/petroleum- based conditioners as t hey may cause
premature wearing of the pro tective coating.
Location of Sp are Tire and Tools – If you get a flat
tire while driving, do no t apply the brake heavily.
Instead, graduallydecrease your speed. Hold the
steering wheelfirmly an d slowly move to a safe place
on the side of the road. Your vehicl e is equipped
with a temporar y spare tire. The spare tire, jack and
tool bag are loca ted under the carpeted floor panel
in the trunk. The tempo rary spare is designed for
emergency use o nly and should be replaced as soo n
as possible. Fo r complete details on how to change
your tire, refer to the Road side Emergencies chapter
in your Owner’s Guide.
Fuses – If t he vehicle’s electrical componen ts are not
operating, a fus e may have blown. The fuse panel is
located belo w the instrument panel on the driver ’s
side; remove the cover to vi ew the fuses. Additional
fuses are loca ted in the power distribution box in
the engine compar tment. For more information
regarding changing fuse s, refer to the Roadside
Emergencies chapter in your Owner’s Guide.
Fuel Type and Tank Capacity – Front Whe el Drive
(FWD) vehicles have a fu el tank capacity of 17.5
gallons (66.2L) while A ll Wheel Drive (AWD) vehicles
have a fuel tank capaci ty of 16.5 gallons (62.4L).
Your vehicle is designed to u se “Regular” unleaded
gasoline with an oc tane rating of 87. Do not use
gasoline labeled a s “Regular” in high altitude areas
that are sold with o ctane ratings less th an 87.Do n ot
use E85 fuels a s your vehicle was not designed to
run on E85 fuels th at are blended with a maximum
of 85% ethanol.
Tire Pressure – Your vehicle’s tire pres sure
specifications are found on the vehic le’sS afety
Compliance Certification Label or Ti re Label located
on the driver’s door jamb. Ch eck your tires for proper
air pressure mont hly,and b efore long trips. Use an
accurate tire gaug e to check the tire inflation
pressure, including the spare (if e quipped)
. Check
the tire press ure when tires are cold, after t he
vehicle has been par ked for at least three hours
or has been driven le ss than three miles (5 km).
(As you drive, the temper ature in the tire warms
up, increasing the tire pr essure.) As an added
safety feature, your ve hicle has been equipped
with a tire pres sure monitoring system (TP MS)
that illuminates a low tire p ressure warning light
when one or more of your ti res is significantly
under-inflated. War ning: Improperly infl ated tires
can affect ve hicle handling and can fail suddenly,
resulting in a pos sible loss of vehicle contro l. Refer
to the Tires, Whe els and Loading chapter in your
Owner’s Guide for further information.
Fuel Pump Shut-Off Switch – The fuel pump s hut-off
switch stops t he electric fuel pump from sending
fuel to your engine when yo ur vehicle has sustained
a substantial j olt. The switch is locate d in the
passenger’s foo twell, in the right upper corner. For
more information, refe r to the Roadside Emergencies
chapter in your Owner ’sGuid e.
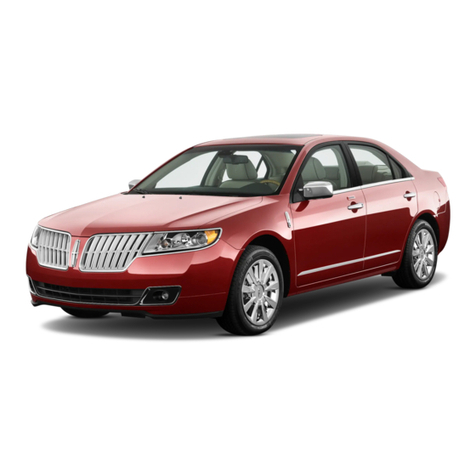
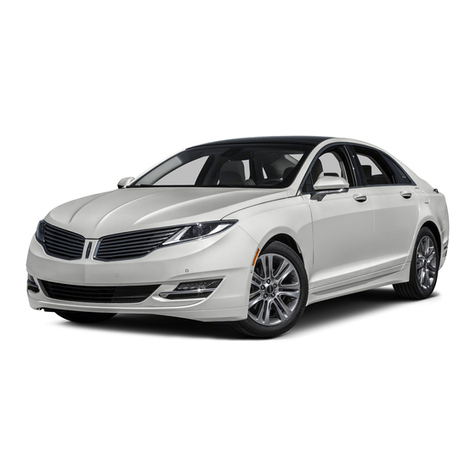
Roadside Assistance – Your new Linc oln MKZ
comes with th e assurance and support o f 24-hour
emergency roadside assistance. Roadside
assistan ce includes such servic es as: lockout
assistanc e, limited fuel delivery, batter y jump starts,
changing a flat tire, towing and win ch out.
To receive roadside assistance in the
United States, call1 (8 00) 241-367 3.
In Canada, call 1 (800) 6 65-2006. For
more information on c overage period
and details of ser vice, refer to your
Roadside Assistance Information card.
This Quick Reference Guide is not intended
to replace your vehicle Owner’s Guide which
contains more detailed information concerning
the features of your vehicle, as well as important
safety warnings designed to help reduce the
risk of injury to you and your passengers. Please
read your entire Owner’s Guide carefully as you
begin learning about your new vehicle and refer
to the appropriate sections when questions
arise. All information contained in this Quick
Reference Guide was accurate at the time of
duplication. We reserve the right to change
features, operation and/or functionality of any
vehicle specification at any time. YourLincoln
dealer is the best source for the most current
information. For detailed operating and safety
information, please refer to your Owner’s Guide.
Ford Motor Company,Customer Relationship
Center, P.O.Box 6248, Dearborn, MI 48121
1-800-392-3673 (FORD), (TDD for the hearing
impaired: 1-800-232-5952)
Climate System
Dual Automatic Temperature Control (DATC) System with Heated and Cooled Seats (if equipped)
Additional Features
MKZ Quick Reference Guide
Audio System
In-Dash Six CD/MP3 THX II Satellite Compatible Sound System
(if equipped)
Essential Information
MKZ Quick Reference Guide
MKZ 2009
Quick Reference Guide
April 2008
First Printing
Quick Reference
Guide
Lincoln MKZ
Litho in USA
45 6 5 7 9
135
46
7
84 6 12
1
2
8
9
1 3
10 11
2
9H6J 19G217 AA
