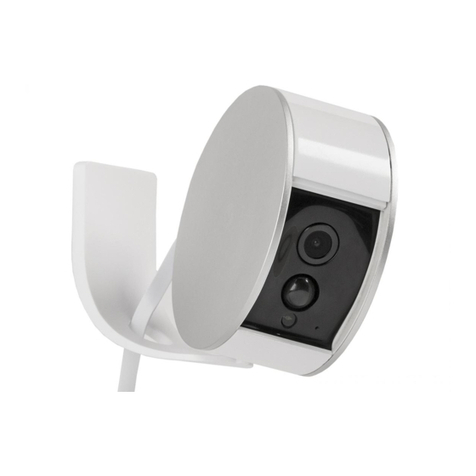
LinkU 201 User manual

1
Reviewer’s Guide_ March 2017
User Guide _ March 2017

User Guide_ March 2017
Index
This Reviewer’s Guide is designed to help you evaluate the link-U Hybrid SmartCam
3 Setting up your link-U 11
19
4 Onboard Sensors, BLT Sensors and Devices
235 Everyday Operation
24Appendix 1: Firmware Update
26Appendix 2: Worldwide 4G-LTE carriers list
21 Quick Start
82 Preparation, Turn On and Off, Reset
27Appendix 3: First Set-Up via direct-WiFi

User Guide_ March 2017
2
1 Quick Start
1
Quick Start Slide link-U cam front white door.

User Guide_ March 2017
3
2
Quick Start Insert NanoSim and SD memory card (cat. 6 or above).
1 Quick Start

User Guide_ March 2017
4
3
Quick Start Close the door and insert the power plug.
1 Quick Start

User Guide_ March 2017
5
4
Quick Start Dowload the APP and follow instruction.
Camera Default Passwrd: admin.
1 Quick Start

User Guide_ March 2017
6
1 Quick Start
5
Quick Start To Turn Off the camera, press the front button when on battery.
To Reset the camera, press the front button when plugged in.

User Guide_ March 2017
7
1 Quick Start
6
Quick Start For more installation options, removable the stand and use the
standard Photo screw.

User Guide_ March 2017
8
After unpacking the box and identifying its parts, please review the
following steps to operate your link-U:
Open the white front panel by pressing and sliding it off as
shown in the “Step 1” image of the quick start guide on page 3.
Insert the SD Memory Card (up to 32 GB, cat. 6 or above),
Note: link-U will work without an SD Memory Card, but it will not be able to record
videos.
Insert the Nano SIM card (as shown in “Step 2” on page 3), but
make sure the card is not PIN blocked.
You can verify by inserting the NanoSIM card in a Smartphone, and
checking if the device can access the Internet without further action.
The link-U modem is designed to work with several worldwide carriers
(see list in Appendix 2 on page 26). If you’re unsure if your carrier is
Note: Link-U works even without a SIM card installed, but then you can use it only
on Ethernet cabled or Wi-Fi wireless networks.
2 Preparation, Turn On and Off, Reset
Preparation,
Turn On and
Off, Reset 2.1
2.2

User Guide_ March 2017
9
Turn on the camera simply by inserting the Ethernet cable
into the camera and into the “Power Out” port of the PoE Injector,
both provided in the box. This technology allows you to bring both
power and Ethernet network data to the link-U with only one cable.
Note: any standard Ethernet cable can be used to connect the camera
to the PoE injector as well. If you are planning to connect your link-U
to Internet via Ethernet cable, please insert it in the other port of the
Power Injector (as shown in “Step 3”).
Download the “LINK-U” app from the Apple Store or Google
Play Store and install it on your smartphone (see “Step 4”).
For smooth operating, make sure your app and rmware are kept up
to date with the latest versions. Note: from your smartphone, visit our
webapge www.linkucam.com for a quick link to the APP Stores.
If you need to reset the camera to Factory Presets,
open the link-U’s front panel, and press the button located below
the SIM card slot (see “Step 5”).
Do not remove the PoE injector and cable from the plug.
2 Preparation, Turn On and Off, Reset
2.3
2.5
2.4
Preparation,
Turn On and
Off, Reset

User Guide_ March 2017
10
2 Preparation, Turn On and Off, Reset
To turn off the camera
remove the PoE cable (this causes the link-U to switch to battery
operation), open the front panel, and press the button located below
the SIM card slot (refer to “Step 5”). The camera will shut down in 5
seconds.
link-U comes with a stand that allows you to place the camera
on desks, tables and shelves.
If you would like to have more installation options, you can remove the
link-U stand. To do so, simply unscrew the base. The connection screw
is just a standard photo-stand type, so you can install it using any kind
of standard stands (see “Step 6”).
2.7
Preparation,
Turn On and
Off, Reset

User Guide_ March 2017
11
Setting up link-U is very simple. In just a few steps, you can get it
running and connect to your home from anywhere in the world.
Connecting your Smartphone to link-U
Open the app installed on your smartphone, insert your email, and
a password of your choice. Then, press “Login”.
If you are accessing for the rst time, a conrmation window will
appear.
If you forget your password and want to retrieve it, just press the
“Help” button. Your password will be sent to your email address.
3 Setting up your link-U
Setting up
your link-U
3.1

User Guide_ March 2017
12
3 Setting up your link-U
Adding your link-U to the App
Make sure your smartphone is connected to Internet. On the “Your
Cameras” page press the “+” button.
You will then be directed to the “Camera Search” page.
Select “Add by QR Code” button, and with your smartphone camera
focused on the backside of your link-U, scan the QR code sticker. The
unique UDID number of your link-U will be loaded automatically.
3.2
Setting up
your link-U
If you like to add a link-U that is located
remotely, you can add it by inserting the UDID
code manually. Push the button “Add by
UID” and ll it out. The link-U UDID code is
shown on the QR code label. Repeat the same
process if you have more than one link-U.
Your link-U will be by then listed on the “Your
Cameras” page.

User Guide_ March 2017
13
3 Setting up your link-U
If you inserted a workable SIM card (section 2.2), and/or you
connected to your Home network via an Ethernet cable (section
2.3), your link-U will be online and ready for standard operation.
If you planned to use your link-U via WiFi, go to “Settings” page
(push the “gear” icon on the right), select the WiFi Setup button
and select your home Wi name and password to connect. After
that, you can remove the Ethernet cable.
Note: if your camera is still ofine (or you have no Ethernet cable and no LTE
connection), to end the setup please refer to Appendix 3 (access your link-U via
direct-WiFi).
To force the link-U app to search for a camera again, press the
button “Reload” on the top right of the page.
To remove a link-U from the list, just slide it to the left and the
“Delete” button will appear.
Setting up
your link-U

User Guide_ March 2017
14
3 Setting up your link-U
Using link-U’s Live View
Now you can see the list of available link-U cameras. In order to watch
them live, simply press on the camera name. This will take you to the
LIVE VIEW page.
On the top right, you are able to manually select the denition quality
(up to full HD).
Below the image, you can operate installed Bluetooth accessories, if
any.
At the bottom left, you can press the Record button in order to save
the live video on your smartphone.
At the bottom right, you can open the Smartphone microphone, so
you can talk into the link-U speaker.
If you turn your Smartphone sideways, you can see live video in
landscape mode.
Setting up
your link-U
3.3

User Guide_ March 2017
15
3 Setting up your link-U
Events that Trigger Recordings
If you have installed an SD card, the camera will automatically start to
record a short video anytime sensors are triggered.
For privacy, you can choose to turn OFF Notications and Video
recording by switch the little “Bell” available in the “Camera List”
page, next to the camera name.
If you would like to watch the recorded video les saved in the internal
memory, press the “Event” button (between the “Bell” and the
“Gear”).
The next page, “Event Search,” allows you to provide search criteria to
lter results. This way, you can view a specic video or group of videos
(for example, videos from today, or only videos triggered by “Noise,”
by “Motion” or by additional BLT sensors, if any).
Setting up
your link-U
3.4

User Guide_ March 2017
16
3 Setting up your link-U
Press the “Search” button and you will get the ltered list of video
les that have been recorded to the SD memory card. An icon on the
left side of each le tells you the trigger that began the recording,
and the date and time stamp specify when it was recorded. Just
click on the video you would like to review and the video will begin
streaming.
If you turn your Smartphone sideways, you can see live video in
landscape mode.
Setting up
your link-U

User Guide_ March 2017
17
3 Setting up your link-U
Camera Settings
From the “Your Cameras” page, you can access the link-U “Settings”
page by pressing the “Gear” icon on thge right of the link-U name.
In the camera “Settings” page you can edit all conguration details.
• Name: you can change the link-U name.
• Wi-Fi: you can connect to a local Wi-Fi network.
• Password: you can change each single camera password, which
by default is “admin” (this is not the Account Password).
• System: you can review link-U system details (see 3.6 for more).
• Sensors: you can change how sensitive the onboard sensors
are, and set up additional BLT sensors and devices (see chapt.4).
• SD Card: you can select this to reformat your SD card. Please
note:allrecordedleswillbedeleted.
• Night IR: by defualt is ON and link-U will switch automatically
from day to night mode, or you can turn OFF the Night IR lighter.
• Front LEDs: you can toggle the LED indicators on the top of
the link-U camera ON and OFF.
Setting up
your link-U
3.5

User Guide_ March 2017
18
3 Setting up your link-U
System page
The “System” page informs you about your link-U’s main parameters.
Here, you can see the Wi-Fi name, the LTE operator name related to
your SIM card, and the connection strength in a percentage. You can
manually switch OFF the WiFi or the 4G/LTE modem.
You can insert a manual APN address, if required by your operator.
Just ll out the required address and shift ON the APN Mode switch.
You can retrieve information about the status of the battery, the IMEI
code related to your modem, the link-U rmware version, and the
App version on this page as well.
To ensure the best performance possible for your link-U, please make
sure download the most updated versions of the App and Firmware
(see Appendix 1 for details).
Note: you can reboot the link-U, or reset the congurations to factory defaults by
pressing the “Reboot” or “Reset” buttons.
Setting up
your link-U
3.6

User Guide_ March 2017
19
In the “Sensors” conguration page you can select the sensitivity
of the on-board link-U sensors (Motion, Sound and PIR).
_ The Motion sensor is triggered if any movement happens in front
of the link-U.
_ The Sound sensor is triggered if there is any noise in the room.
_ The PIR sensor is triggered if anything with human body
temperature passes in front of the link-U, even in total darkness.
When the sensor is triggered, link-U will send a notication message
to your smartphone and start recording a short video on the internal
SD memory card.
The pre-alarm and post-alarm timers allow you to set the duration
of the video recordings before and after any event happens, as
triggered by the sensors.
At the bottom of this page, you can see any additional BLT Sensors
that may be installed.
If you would like to search for additional BLT Sensors or BLT Devices,
press the button “+” on the top right.
4 Onboard Sensors, additional BLT Sensors and Devices
Onboard
Sensors
This manual suits for next models
2
Table of contents
Popular Security Camera manuals by other brands

Burg Wächter
Burg Wächter BWNC-242RSIA Quick installation guide

Axis
Axis M11-E Mk II Series user manual
TRENDnet
TRENDnet TV-IP252P - SecurView PoE Dome Internet Camera... Quick installation guide
Moog Videolarm
Moog Videolarm Toshiba JK-SM5C-0 Product instructions

Lorex
Lorex SG7610B Quick setup guide
Eneo
Eneo VKC-1415 Installation and operating instructions
