Lionidas Montia 989705271-SS-LED User manual

Spiegelschrank Montageanleitung
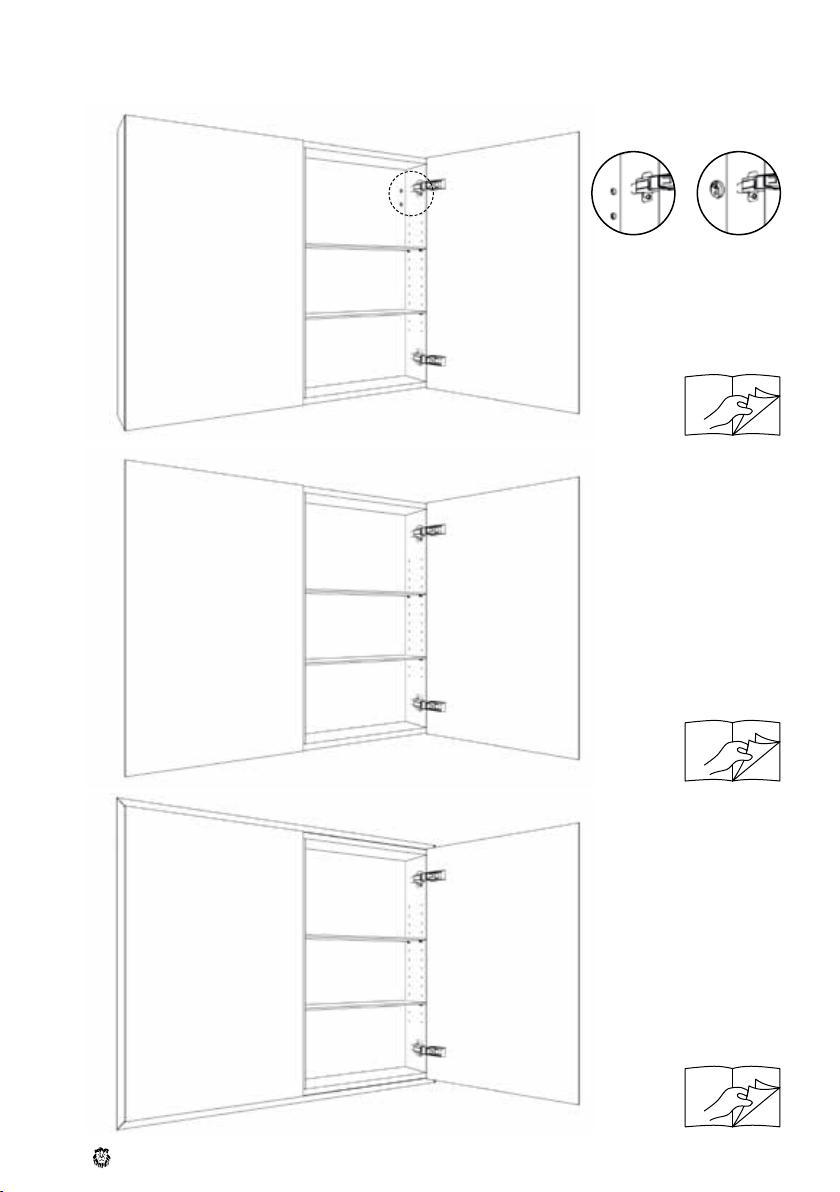
Mirror Cabinet Assembly Instructions

Hinweise zur Elektroinstallation:
WICHTIG IMPORTANT
Information to electrical installation
Hinweise zum Einbaurahmen: Information to the mounting frame
Hinweise zur Reinigung: Information to cleaning
Vor der Arbeit an elektrischen Lei-
tungen den Strom abschalten. Wir
empfehlen Elektroinstallationen nur
von ausgebildetem Fachpersonal
durchführen zu lassen.
Disconnect electricity before starting
work on electric mains. We recom-
mend to employ trained professio-
nals for electrical installation.
Jede Einbausituation ist anders. Ver-
wenden Sie zur Montage des Einbau-
rahmens nur Befestigungsmaterial,
das für Ihre Wandbeschaenheit
geeignet ist. Sollten Sie sich unsicher
sein, rufen Sie uns an oder informie-
ren Sie sich im örtlichen Fachhandel.
Every assembly situation is dierent.
For the assembly of the mounting
frame only use fastening material
which is suitable for your type of
wall. Please call our service if you
are uncertain or contact your local
specialized dealer.
Reinigen Sie den Schrankkorpus mit
warmen Wasser und einem saube-
ren Mikrofasertuch. Verwenden Sie
handelsübliche Haushaltsreinigungs-
mittel ohne scheuernde Bestand-
teile. Mit Wasser nachwischen um
Reinigungsmittel zu entfernen und
mit saugfähigen Wisch- oder Papier-
tüchern die Oberäche trocken
wischen
Clean the cabinet carcass with warm
water and a cleaning rag or a mic-
rober cloth. Only use customary
non-abrasive detergents. Remove
the detergent with water and wipe
dry with an absorbent wiper or
paper towel.
Verwenden Sie keine:
• schleifende oder scheuernde
Mittel (Scheuerpulver, Putz-
schwämme mit rauer Seite,...)
• Poliermittel, Waschmittel, Möbel-
putzmittel, Bleichmittel
• Reinigungsmittel mit starken
Säuren und stark sauren Salzen
• Dampfreinigungsgeräte
Do not use:
• abrasive detergents (abrasive
cleaning powder, cleaning spon-
ge with abrasive surface, ...)
• polish, washing powder, bleach
• detergents with strong acids or
acrid salts
• steam cleaner
2
!

3
?
8 mm
Benötigtes Werkzeug
Nur für Einbaurahmen
Tools needed
Only for mounting frame

Unterputz
Montage in einer Nische
Unterputz mit
Einbaurahmen
Montage mit Ausgleichsrahmen
Aufputz
Montage hängend an der Wand
6
11
14
Concealed Installation
Assembly in an alcove
Concealed Installation with
mounting frame
Assembly with an equalizing frame
Exposed Fitting
Assembly hanging on a wall
A
B
C
4
Einbauvarianten
Installation Options
Version 1 Version 2

Überprüfen Sie die Lieferung vor der Montage auf Vollständigkeit und eventuelle
Beschädigungen.
Please check your order on completeness and any damage before assembling.
5
Lieferumfang (Ihr bestellter Schrank kann von den Abbildungen abweichen)
Delivery Contents (your order may dier from the one shown below)
Schrankkorpus
Einbaurahmen (nur wenn bestellt)
Montageschienen
Spiegeltüren
Glasablagen
nur bei Holz Korpus nur bei Aluminium Korpus
SchraubenBodenträger Dübel Abdeckkappen
Carbinet Carcass
Mounting Frame (only if ordered)
Mounting Bars
Mirrored Doors
Glass Shelfs
only for wooden carcass only for aluminium carcass
ScrewsBottom Beams Dowels Covering Caps
Version 1 Version 2

6
A
1
Aufputz: Montage hängend an der Wand
Exposed Fitting: Assembly hanging on a wall
Legen Sie die Position des Schrankes fest.
Der Abstand zur Oberkante beträgt ca. 50 mm.
Der Abstand zur Oberkante beträgt ca. 85 mm.
Set the position of the cabinet.
The distance to the top edge amounts to about 50 mm.
The distance to the top edge amounts to about 85 mm.
50mm
85mm
Version 1
Version 2

7
A
2
3
Aufputz
Exposed Fitting
Richten Sie die Montageschienen mit der Wasserwaage aus und zeichnen Sie die
Bohrlöcher an.
Align the mounting bars with a level and mark the drill holes.
Bohren Sie Löcher an den markierten Stellen.
Beschädigen Sie keine Leitungen (Gas, Wasser, Strom)!
Drill the holes at the marked positions.
Do not damage any pipes or wiring (gas, water, electricity)!

8
A
5
4
Aufputz
Exposed Fitting
Versenken Sie die Dübel in den gebohrten Löchern.
Put the dowls into the drilled holes.
Befestigen Sie die Montageschienen mit Schrauben an der Wand.
Stellen Sie sicher, dass die Schrauben fest angezogen sind!
Attach the mounting bars with screws to the wall.
Be sure that the screws are tightened!
kg
kg

9
A
6
7
Aufputz
Exposed Fitting
Schließen Sie den Schrank an die Hauselektronik an.
Beachten Sie unsere Hinweise zur Elektroinstallation!
Connect the cabinet to your electrics.
Note our information to electrical installations!
Hängen Sie daraufhin den Schrank an den Montageschienen auf.
Hang up the cabinet on the mounting bars.
1
1
2
2
Version 1
Version 1
Version 2
Version 2

10
A
9
8
Aufputz
Exposed Fitting
Richten Sie den Schrank , mit den Stellschrauben links und rechts aus.
If nessecary align the cabinet with the setscrews on the left and right.
Setzen Sie die Abdeckkappen für die Ausschnitte auf.
Fit the caps on the cutouts.
19
Vertikal
Vertikal
Tiefe
Tiefe
vertically
vertically
depth
depth
Version 1
Version 2
Version 1
Version 2

B
1
Unterputz: Montage in einer Nische
Concealed Installation: Assembly in an alcove
11
Schließen Sie den Schrank an die Hauselektronik an.
Beachten Sie unsere Hinweise zur Elektroinstallation!
Connect the cabinet to your electrics.
Note our information to electrical installations!

12
B
3
2
Unterputz
Concealed Installation
Setzen Sie den Schrank in die Nische ein.
Put the cabinet into the alcove.
Richten Sie den Schrank mit der Wasserwaage aus und legen Sie Keile oder Holz-
klötze unter, um ihn zu xieren.
Align the cabinet with a level and secure it with blocks of wood or wedges.

13
B
4
5
Unterputz
Concealed Installation
Bohren Sie Löcher an mehreren Stellen durch den Korpus in die Wand. Wir emp-
fehlen den Schrank vorzubohren.
Beschädigen Sie keine Leitungen (Gas, Wasser, Strom)!
Drill a few holes through the cabinet carcass into the wall. We recommend to pre-drill the cabinet.
Do not damage any pipes or wiring (gas, water, electricity)!
Verwenden Sie einen Senker um die Bohrlöcher zu fasen, damit die
Schrauben nicht überstehen. Verschrauben Sie den Schrank mit
Schrauben und Dübeln an den gebohrten Stellen mit der Wand.
Entfernen Sie anschließend die Keile.
Use a countersink to chamfer the drill holes so the screws do not project. Use screws and dowels to screw toge-
ther the cabinet and the wall. Remove the wedges afterwards.
1
2
19

14
C
1
Unterputz mit Einbaurahmen: Montage in einem speziellen Rahmen
Concealed Installation: Assembly in a mounting frame
Setzen Sie den Einbaurahmen in die Nische ein.
Put the mounting frame into the alcove.

15
C
2
3
Unterputz mit Einbaurahmen
Concealed Installation
Richten Sie den Schrank mit der Wasserwaage aus und legen Sie Keile oder Holz-
klötze unter, um ihn zu xieren.
Align the cabinet with a level and secure it with blocks of wood or wedges.
Bohren Sie Löcher an mehreren Stellen durch den Korpus in die Wand. Wir emp-
fehlen den Schrank vorzubohren.
Beschädigen Sie keine Leitungen (Gas, Wasser, Strom)!
Drill a few holes through the cabinet carcass into the wall. We recommend to pre-drill the cabinet.
Do not damage any pipes or wiring (gas, water, electricity)!

16
C
4b
4
Unterputz mit Einbaurahmen
Concealed Installation
Verwenden Sie einen Senker um die Bohrlöcher zu fasen, damit die Schrauben
nicht überstehen. Verschrauben Sie den Schrank mit Schrauben und Dübeln an
den gebohrten Stellen mit der Wand. Entfernen Sie anschließend die Keile.
Use a countersink to chamfer the drill holes so the screws do not project. Use screws and dowels to screw together the cabinet and the
wall. Remove the wedges afterwards.
Alternativ können Sie die Hohlräume auch mit Montageschaum füllen.
Alternatively use expanding foam to ll in the gaps.
1
2
Montageschaum
Expanding Foam

17
C
5
6
Unterputz mit Einbaurahmen
Concealed Installation
Setzen Sie den Schrank in den Einbaurahmen ein und entfernen Sie die Keile.
Put the cabinet into the mounting frame and remove the wedges.
Schließen Sie den Schrank an die Hauselektronik an.
Beachten Sie unsere Hinweise zur Elektroinstallation!
Connect the cabinet to your electrics.
Note our information to electrical installations!

18
C
7
Unterputz mit Einbaurahmen
Concealed Installation
Verschrauben Sie den Schrank mit dem Einbaurahmen. Sie können die oberen
und unteren Bohrlöcher der Bodenträger verwenden, sollten Sie diese nicht be-
nötigen.
Screw together the cabinet with the frame. Use the top and bottom drill holes of the bottom beams if you do not need them.

A/B/C
10
Die folgenden Schritte sind für alle Varianten identisch
The following steps are identical for each variant
19
Hängen Sie die Türen ein. Haken Sie das Scharnier vorne an der Montageplatte
ein und drücken es dann auf die Platte bis es einrastet.
Mount the doors by hooking the hinge into the installation plate at the front and push it onto the plate until it snaps in.
1
2

20
11
12
A/B/C
Die Türen sind voreingestellt und müssen nur nachgestellt werden. Entnehmen
sie dazu die Sichtkappe und verwenden sie die Schrauben wie gezeigt.
Beachten Sie die gleichzeitige Adjustierung der Bänder, da es sonst zu
Beschädigungen Ihres Schrankes führen kann.
The doors are pre-set and do not need to be adjusted. Readjust only if nessecary. To adjust take o the covering cap and use the
screws as shown above.
Please be sure to adjust the bands at once to avoid damaging your cabinet.
Stecken Sie die Bodenträger an gewünschter Stelle in die Bohrlöcher und setzen
Sie dann die Glasböden ein.
Put the bottom beams in the holes at your desired position and insert the glass shelfs.
Vertikal
Tiefe
Horizontal
nur Aluminium Korpus
nur Holz Korpus
vertically
depth
horizontally
only aluminium carcass
only wooden carcass
1
2
This manual suits for next models
9
Table of contents