manuals.online logo
Brands
  1. Home
  2. •
  3. Brands
  4. •
  5. Little Cottage
  6. •
  7. Garden House
  8. •
  9. Little Cottage Star Barn User manual

Little Cottage Star Barn User manual

Little Cottage Co.
PO Box 455
Berlin, OH 44610
330-893-4212
www.cottagekits.com
© 2010 Little Cottage Co.
Star Barn Manual
®
Tools Needed:
-Cordless Drill (12V or higher)
-#2 Square Drive Bit
-Hammer
-6’ Step Ladder
-Tape Measure
-Square utility knife
w/ blade & hook blade
-Speed Square
Star Barn Manual
Construction Manual © 2007-2008 Little Cottage Co. Page 1
12
3 4
56
Once your site is ready you may begin construction of your
oor by laying out your 4x4 runners as shown. 8’ wide build-
ing includes (2) runners set in 12” from corner. 10’ and 12’
wide buildings include (5) runners.
Now place 2x4’s, 16” on center, on top of 4x4’s place
2 1/2” screws in each of the 4 corners. Measure from
corner to corner to make sure it is square. Now you
can fasten each 2x4 to the 4x4’s with 2 1/2” screws.
Next set sheeting in place and make sure the
sheeting is ush on both sides. Secure in place,
fasten with 1 1/4” screws every 8”. Locate the rst wall panel, then set in place.
Make sure wall is ush with the outside edge of
oor structure. Apply pressure from the outside
pushing in and fasten with 2 1/2” screws.
Position next wall in place as shown. Secure with 2 1/2” screws.
Star Barn Manual
Construction Manual © 2007-2008 Little Cottage Co. Page 2
78
9 10
11 12
Continue with walls.... Insert 2 1/2” screws as shown to tie walls
together.
Continue with walls as shown... Secure with 2 1/2” screws.
Follow wall sheet layout. Next install small end wall as shown and fasten
with 2 1/2” screws.
Star Barn Manual
Construction Manual © 2007-2008 Little Cottage Co. Page 3
13 14
15 16
17 18
Secure top with 1 1/4” screws. Continue with 1 1/4” screws every 8” on center.
Make sure all walls are ush on the inside
before fastening.
Next install small wall in double door wall
section.
Door panel will attach just as shown. Fasten wall with 2 1/2” screws.
Star Barn Manual
Construction Manual © 2007-2008 Little Cottage Co. Page 4
19 20
21 22
23 24
Make sure walls are ush as shown and fasten
with 2 1/2” screws.
Next Install small wall as shown.
On inside of the doors, you will nd a 2x4
brace. Remove the brace and set aside, you
will use this again to help brace.
On bottom inside of door, apply pressure on
the door, tap on top of barrel bolt. Drill 5/16”
hole for the barrel bolt.
Locate 3” LP Smartside siding. Next install as shown and secure with 1 1/4”
screws.
Star Barn Manual
Construction Manual © 2007-2008 Little Cottage Co. Page 5
25 26
27 28
29 30
Next fasten the latch with 1 1/4” black headed
screws.
Install D part of latch on the inside.
You are ready for your trusses. Using your
angle make sure the trusses are square.
Now take your Truss Gusset, set in place and
fasten with 8 of the 1 1/4” black headed screws.
Repeat on the reverse side.
Next install 2x12 Top Plates. Measure 4” from
the outside of the wall to the end of the Top
Plate.
Make sure the Top Plate is ush with inside of
wall. Fasten with 2 1/2” screws.
Star Barn Manual
Construction Manual © 2007-2008 Little Cottage Co. Page 6
31 32
33 34
35 36
Continue with Top Plates Next install Gable Dormer.
Secure with 2 1/2” screws. After Gable Dormer is installed. Finish install-
ing 2x12 Top Plates.
Now install 2x12 Top Plate on top of Gable.
Secure with 2 1/2” screws.
Install Top Plates on backside as shown.
Star Barn Manual
Construction Manual © 2007-2008 Little Cottage Co. Page 7
37 38
39 40
41 42
Fasten with 2 1/2” screws. Continue with Top Plates
Locate Gable Truss panels
Placing the 2 gable sections together (as shown
above) Make sure it is square.
Use 2 1/2” screws to secure gables together. Make sure the bottom is ush and secure with 2
1/2” screws.
Star Barn Manual
Construction Manual © 2007-2008 Little Cottage Co. Page 8
43 44
45 46
47 48
Now locate your vent frame.
Next install 2x8 Top Plates
Secure with 2 1/2” screws on all corners.
Lay vent in place, make sure the star is covered.
Make sure the Top Plate is ush on top of
Gable as shown. Secure with 2 1/2” screws
coming from inside out. Repeat from last picture on the other end.
Star Barn Manual
Construction Manual © 2007-2008 Little Cottage Co. Page 9
49 50
51 52
53 54
Next install Gable
Make sure plates are ush on the outside, secure
with 2 1/2” screws.
Now install rafter with Gusset on one side.
Install beside the front dormer as shown.
Fasten from underneath 2x12 into 2x4 Install 2x6 Ridge Pole as shown after the 2
rafters are set.
Use angle square to make sure peaks meet as
shown. Secure with 2 1/2” screws.
Star Barn Manual
Construction Manual © 2007-2008 Little Cottage Co. Page 10
55 56
57 58
59 60
Use angle square, keep 2x6 ush with rafter on
bottom edge.
Next install T-bar
Make sure T-bar is ush on top of Ridge Pole,
fasten with 2 1/2” screws.
Fasten T-bar to Gable with 2 1/2” screws as
shown.
Continue with trusses. You will have 3 rafters that are 3/4” shorter
than the rest. Install them in Ridge Pole area.
Star Barn Manual
Construction Manual © 2007-2008 Little Cottage Co. Page 11
61 62
63 64
65 66
Locate sheeting layout. Install rst piece of sheeting as shown and
secure with 1 14” screws.
Make sure sheeting reveals are the same on the
bottom.
Continue with sheeting.
Install next piece and secure with 1 1/4”
screws.
Next fasten bottom corner with 1 1/4” screw as
shown.
Star Barn Manual
Construction Manual © 2007-2008 Little Cottage Co. Page 12
67 68
69 70
71 72
Make sure rafters are in place before fastening.
Secure 1 1/4” screws every 8” on center. Continue with sheeting.
Back side sheeting is complete.
Install front side as shown. Lay the sheeting
per diagram.
Continue from last picture. Follow sheeting diagram.
Star Barn Manual
Construction Manual © 2007-2008 Little Cottage Co. Page 13
73 74
75 76
77 78
Install last row as shown. Fasten with 1 1/4” scew 8” on center.
continue with roof sheeting. Next install dormer sheeting
Now you will start on the other end and work
your way to the middle.
continue with roof sheeting
Star Barn Manual
Construction Manual © 2007-2008 Little Cottage Co. Page 14
79 80
81 82
83 84
Repeat from left side of dormer Gable. Continue with sheeting.
Fasten with 1 1/4” screws 8” on center.
Sheeting is now nal on roof.
Locate V-channel Push V-channel up where Valley comes togeth-
er. One guy pushes up, while another guy goes
on the roof and fasten it with 2 1/2” screws
coming from the outside in.
Star Barn Manual
Construction Manual © 2007-2008 Little Cottage Co. Page 15
85 86
87 88
89 90
Secure V-channel with 2 1/2” screws going into
sheeting thru V-channel.
Continue with 2 1/2” screws into V-channel.
Next locate the corner boxes. Install corner boxes as shown.
Secure with 1 1/4” screw into 2x8. Secure with 2 1/2” screws on an angle as
shown.
Star Barn Manual
Construction Manual © 2007-2008 Little Cottage Co. Page 16
91 92
93 94
95 96
Next locate rake trim. Fasten with 1 1/4” screws.
Continue to fasten rake trim as shown.
Next install trim on the backside and secure
with 1 1/4” screws.
Continue with trim. Install trim on front side.
Star Barn Manual
Construction Manual © 2007-2008 Little Cottage Co. Page 17
97 98
99 100
101
Install front gable trim. Continue with trim on the left side of the dormer.
Install trim on right side of Gable. Next install dripedge. Secure with 1 1/4” screw
every 12” to 14”.
Continue with drip edge up the side.
Use tin snips to cut drip edge at peak.
102
Star Barn Manual
Construction Manual © 2007-2008 Little Cottage Co. Page 18
103 104
105 106
107 108
After drip edge is cut break drip edge at the
peak to run down the other side.
Cut drip edge to length.
Measure 11 3/4” from the outside of the drip
edge. Snap Chalk line.
This is a guide line so you know where to place
the shingle starter.
Next install shingle and secure with 3/4” roof-
ing nails which is included in the kit.
Star Barn Manual
Construction Manual © 2007-2008 Little Cottage Co. Page 19
109 110
111 112
113 114
Continue shingling as shown. Once you get to the other end cut shingles with
a square for a nice edge.
Continue with cutting. Install shingles on front left of dormer as
shown.
Install shingles in a staggered fashion as shown. Continue with shingling

Other Little Cottage Garden House manuals

Little Cottage Hunting Blind User manual

Little Cottage

Little Cottage Hunting Blind User manual

Little Cottage Value Gable Shed Installation guide

Little Cottage

Little Cottage Value Gable Shed Installation guide

Little Cottage Atlanta Chicken Coop User manual

Little Cottage

Little Cottage Atlanta Chicken Coop User manual

Little Cottage Classic Saltbox User manual

Little Cottage

Little Cottage Classic Saltbox User manual

Popular Garden House manuals by other brands
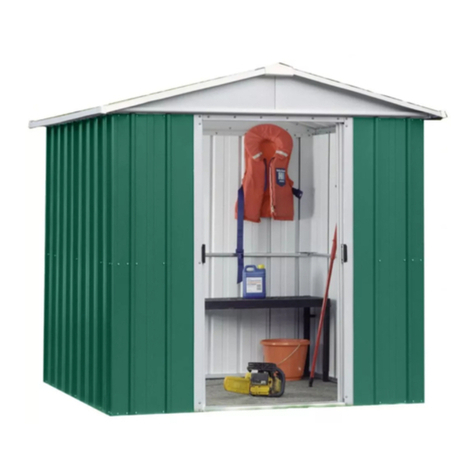
Metalcraft 220-1-1 manual

Metalcraft

Metalcraft 220-1-1 manual

Simply Log Cabins PA44-3030 installation manual

Simply Log Cabins

Simply Log Cabins PA44-3030 installation manual

Palmako FR28-3222 installation manual

Palmako

Palmako FR28-3222 installation manual

Palmako F44-3838 installation manual

Palmako

Palmako F44-3838 installation manual

Duratuf Ardmore Assembly instructions

Duratuf

Duratuf Ardmore Assembly instructions

T&J Heidi manual

T&J

T&J Heidi manual

NetSuite L-GZ793PST-A1 Assembly instruction

NetSuite

NetSuite L-GZ793PST-A1 Assembly instruction

Palmako Olaf EL18-3422-1 installation manual

Palmako

Palmako Olaf EL18-3422-1 installation manual

Palram Silver line Assembly instructions

Palram

Palram Silver line Assembly instructions

Lifetime 60190 Assembly instructions

Lifetime

Lifetime 60190 Assembly instructions

Bear County Functional CF2010 Assembly instructions

Bear County

Bear County Functional CF2010 Assembly instructions

Rowlinson Garden Products Ryton 8’x6’ Assembly instructions

Rowlinson Garden Products

Rowlinson Garden Products Ryton 8’x6’ Assembly instructions

Backyard Products MODERN 12 x 6 Assembly manual

Backyard Products

Backyard Products MODERN 12 x 6 Assembly manual

Oakville OF-95OS05 8x12 manual

Oakville

Oakville OF-95OS05 8x12 manual

Forest garden Overlap Apex Shed ODA68NW quick start guide

Forest garden

Forest garden Overlap Apex Shed ODA68NW quick start guide

Weka 221.2420.30.00 Assembly instructions

Weka

Weka 221.2420.30.00 Assembly instructions

Lemeks Palmako FR34-3548 Assembly, installation and maintenance manual

Lemeks

Lemeks Palmako FR34-3548 Assembly, installation and maintenance manual

Mr. GARDENER England 2 installation manual

Mr. GARDENER

Mr. GARDENER England 2 installation manual

manuals.online logo
manuals.online logoBrands
  • About & Mission
  • Contact us
  • Privacy Policy
  • Terms and Conditions

Copyright 2025 Manuals.Online. All Rights Reserved.